
Watermelon yield boosting DIY projects are easier than you think, and I’m here to show you how to get the most out of your watermelon patch! Imagine biting into a juicy, sweet watermelon that you grew yourself – and imagine having *more* of them than you ever thought possible. Sounds good, right?
For centuries, watermelons have been a symbol of summer, abundance, and refreshment. From ancient Egypt, where they were depicted in hieroglyphics, to the American South, where they’re a staple of picnics and gatherings, watermelons hold a special place in our hearts (and stomachs!). But sometimes, getting a good harvest can feel like a challenge. That’s where these DIY tricks come in.
Let’s face it, nobody wants a puny, tasteless watermelon after all the hard work of planting and tending to the vines. You need these watermelon yield boosting DIY hacks because they’re simple, effective, and will help you maximize your harvest. I’ll share some of my favorite tips and tricks that I’ve learned over the years, from simple soil amendments to clever pollination techniques. Get ready to impress your friends and family with the biggest, juiciest watermelons they’ve ever seen!
Wassermelonen-Ernte steigern: Dein DIY-Leitfaden für eine üppige Ernte
Hallo liebe Gartenfreunde! Wer träumt nicht von saftigen, süßen Wassermelonen aus dem eigenen Garten? Ich weiß, ich tue es! Und deshalb habe ich mich intensiv mit Methoden beschäftigt, um die Ernte zu maximieren. Hier teile ich meine bewährten DIY-Tricks mit dir, die dir helfen werden, deine Wassermelonen-Ernte deutlich zu steigern. Keine komplizierten Chemikalien, nur clevere, natürliche Lösungen!
Grundlagen für eine erfolgreiche Wassermelonen-Ernte
Bevor wir uns den eigentlichen DIY-Hacks widmen, ist es wichtig, die Grundlagen für eine erfolgreiche Wassermelonen-Ernte zu verstehen. Wassermelonen sind nämlich kleine Diven und haben bestimmte Ansprüche.
* Sonnenschein: Wassermelonen lieben die Sonne! Sie brauchen mindestens 6-8 Stunden direkte Sonneneinstrahlung pro Tag. Wähle also einen sonnigen Standort in deinem Garten.
* Boden: Der Boden sollte gut durchlässig und reich an Nährstoffen sein. Ein leicht saurer pH-Wert (zwischen 6,0 und 6,8) ist ideal.
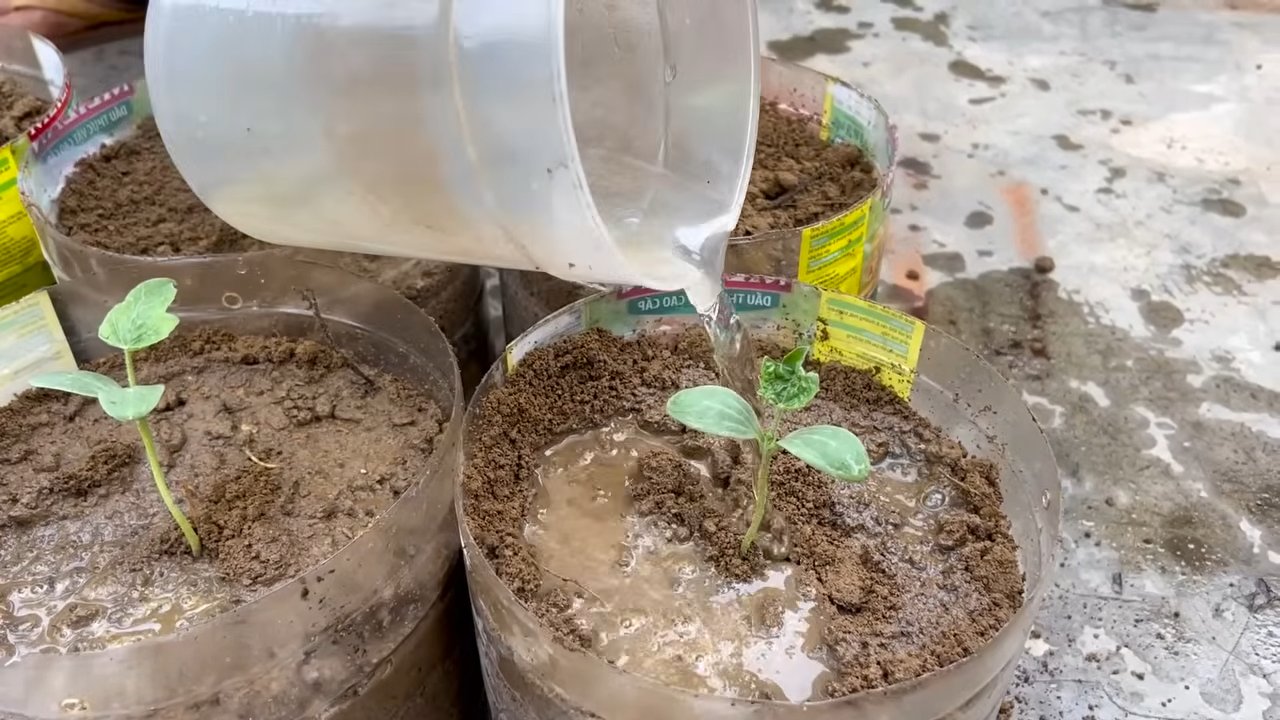
* Bewässerung: Wassermelonen brauchen viel Wasser, besonders während der Fruchtbildung. Achte darauf, den Boden gleichmäßig feucht zu halten, aber vermeide Staunässe.
* Bestäubung: Wassermelonen sind auf die Bestäubung durch Bienen und andere Insekten angewiesen. Fördere die Bestäuberpopulation in deinem Garten, indem du blühende Pflanzen anbaust.
* Dünger: Regelmäßiges Düngen ist wichtig, um die Pflanzen mit ausreichend Nährstoffen zu versorgen. Verwende einen Dünger, der reich an Kalium und Phosphor ist.
DIY-Hacks für eine größere Wassermelonen-Ernte
Jetzt kommen wir zu den spannenden DIY-Tricks, die dir helfen werden, deine Wassermelonen-Ernte zu maximieren. Ich habe diese Methoden selbst ausprobiert und war begeistert von den Ergebnissen!
1. Der “Eierschalen-Boost” für kräftige Pflanzen
Eierschalen sind ein wahres Wundermittel für den Garten! Sie sind reich an Kalzium, das für das Wachstum und die Entwicklung von Pflanzen unerlässlich ist. Außerdem helfen sie, den Boden zu belüften und Schnecken fernzuhalten.
Schritt-für-Schritt-Anleitung:
1. Eierschalen sammeln: Sammle über mehrere Wochen Eierschalen. Spüle sie gründlich aus und lasse sie trocknen.
2. Eierschalen zerkleinern: Zerkleinere die Eierschalen mit einem Mörser und Stößel oder in einem Mixer zu einem feinen Pulver. Je feiner das Pulver, desto besser können die Pflanzen das Kalzium aufnehmen.
3. Eierschalenpulver einarbeiten: Arbeite das Eierschalenpulver vor dem Pflanzen in den Boden ein. Du kannst auch während der Wachstumsphase regelmäßig eine Handvoll Eierschalenpulver um die Pflanzen streuen und leicht einarbeiten.
4. Eierschalen-Tee: Du kannst auch einen Eierschalen-Tee herstellen, indem du die zerkleinerten Eierschalen in Wasser kochst und das abgekühlte Wasser zum Gießen verwendest.
2. Der “Kaffeesatz-Kick” für gesunde Blätter und Früchte
Kaffeesatz ist ein weiterer wertvoller Abfallprodukt, das du im Garten wiederverwenden kannst. Er ist reich an Stickstoff, der für das Wachstum von Blättern und Stängeln wichtig ist. Außerdem enthält er Phosphor und Kalium, die für die Fruchtbildung unerlässlich sind.
Schritt-für-Schritt-Anleitung:
1. Kaffeesatz sammeln: Sammle deinen Kaffeesatz nach dem Brühen. Lasse ihn gut trocknen, um Schimmelbildung zu vermeiden.
2. Kaffeesatz einarbeiten: Arbeite den getrockneten Kaffeesatz um die Wassermelonenpflanzen herum in den Boden ein. Achte darauf, ihn nicht direkt an den Stängel zu geben, da er sonst verbrennen könnte.
3. Kaffeesatz als Mulch: Du kannst den Kaffeesatz auch als Mulch um die Pflanzen herum verwenden. Er hilft, die Feuchtigkeit im Boden zu halten und Unkraut zu unterdrücken.
4. Kaffeesatz-Dünger: Mische den Kaffeesatz mit Wasser und verwende ihn als Flüssigdünger.
3. Der “Bananenschalen-Booster” für süße Früchte
Bananenschalen sind reich an Kalium, das für die Fruchtbildung und die Entwicklung von süßen Früchten unerlässlich ist.
Schritt-für-Schritt-Anleitung:
1. Bananenschalen sammeln: Sammle deine Bananenschalen.
2. Bananenschalen vergraben: Grabe die Bananenschalen in der Nähe der Wassermelonenpflanzen ein. Sie zersetzen sich langsam und geben dabei Kalium an den Boden ab.
3. Bananenschalen-Tee: Du kannst auch einen Bananenschalen-Tee herstellen, indem du die Bananenschalen in Wasser kochst und das abgekühlte Wasser zum Gießen verwendest.
4. Bananenschalen-Dünger: Schneide die Bananenschalen in kleine Stücke und mische sie unter die Erde, bevor du die Wassermelonenpflanzen einpflanzt.
4. Die “Kompost-Kur” für einen vitalen Boden
Kompost ist das A und O für einen gesunden und vitalen Boden. Er verbessert die Bodenstruktur, speichert Feuchtigkeit und versorgt die Pflanzen mit wichtigen Nährstoffen.
Schritt-für-Schritt-Anleitung:
1. Kompost herstellen: Stelle deinen eigenen Kompost her, indem du organische Abfälle wie Gemüsereste, Laub und Rasenschnitt kompostierst.
2. Kompost einarbeiten: Arbeite den Kompost vor dem Pflanzen in den Boden ein.
3. Kompost als Mulch: Verwende den Kompost als Mulch um die Pflanzen herum.
5. Die “Mulch-Magie” für weniger Unkraut und mehr Feuchtigkeit
Mulch ist eine Schicht aus organischem Material, die um die Pflanzen herum aufgetragen wird. Er hilft, Unkraut zu unterdrücken, die Feuchtigkeit im Boden zu halten und die Bodentemperatur zu regulieren.
Schritt-für-Schritt-Anleitung:
1. Mulchmaterial auswählen: Wähle ein geeignetes Mulchmaterial wie Stroh, Holzhackschnitzel oder Rasenschnitt.
2. Mulch auftragen: Trage eine dicke Schicht Mulch um die Pflanzen herum auf. Achte darauf, den Mulch nicht direkt an den Stängel zu geben.
6. Die “Bestäubungs-Beihilfe” für mehr Früchte
Wassermelonen sind auf die Bestäubung durch Bienen und andere Insekten angewiesen. Wenn du nicht genügend Bestäuber in deinem Garten hast, kannst du die Bestäubung manuell unterstützen.
Schritt-für-Schritt-Anleitung:
1. Männliche und weibliche Blüten identifizieren: Männliche Blüten haben einen dünnen Stiel, während weibliche Blüten einen kleinen Fruchtansatz unterhalb der Blüte haben.
2. Pollen übertragen: Verwende einen kleinen Pinsel, um Pollen von einer männlichen Blüte auf eine weibliche Blüte zu übertragen. Tue dies am besten am frühen Morgen, wenn die Pollen am aktivsten sind.
7. Die “Ranken-Regulierung” für mehr Energie in den Früchten
Wassermelonenpflanzen können sehr ausladend werden. Wenn du die Ranken regelmäßig beschneidest, kannst du sicherstellen, dass die Pflanze ihre Energie in die Entwicklung der Früchte steckt.
Schritt-für-Schritt-Anleitung:
1. Überflüssige Ranken entfernen: Entferne alle Ranken, die keine Früchte tragen.
2. Ranken kürzen: Kürze die Ranken, die Früchte tragen, auf etwa 5-6 Blätter hinter der Frucht.
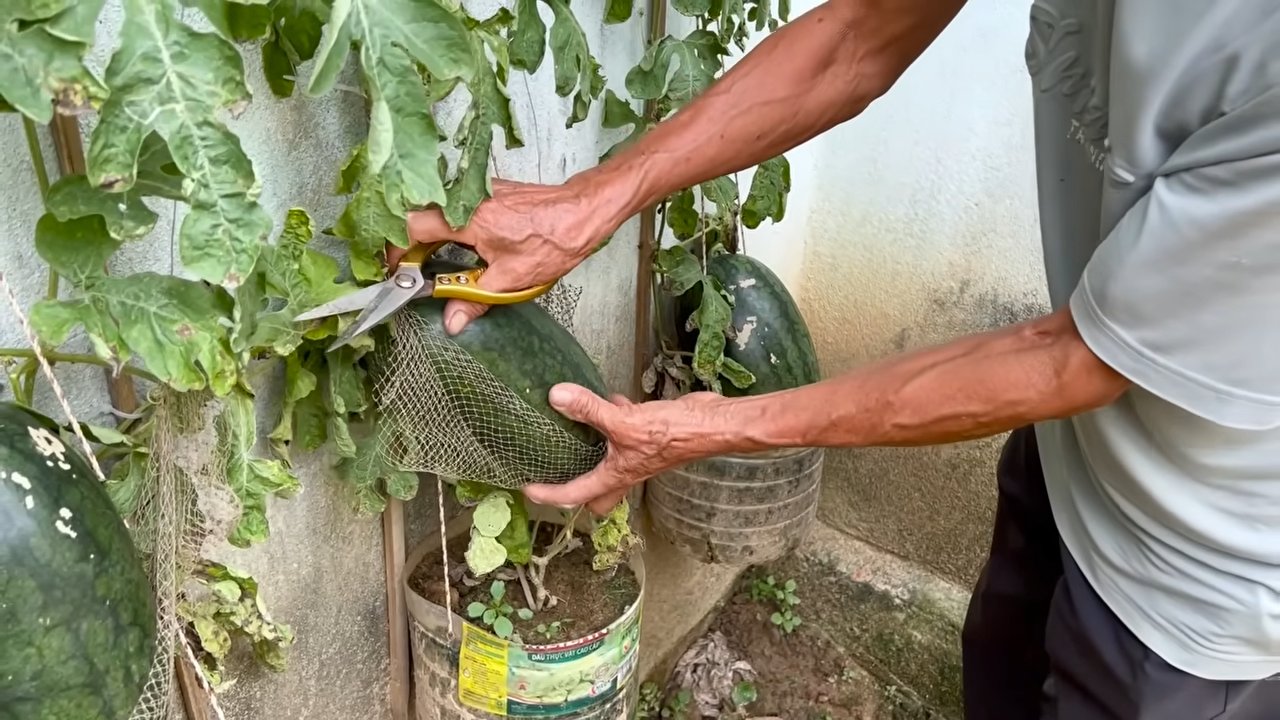
8. Die “Sonnenbad-Strategie” für reife Früchte
Wenn die Wassermelonen reif werden, kannst du sie vorsichtig drehen, damit alle Seiten der Frucht der Sonne ausgesetzt sind. Dies hilft, die Reifung zu beschleunigen und
Conclusion
So, there you have it! This simple, yet incredibly effective, DIY trick for boosting your watermelon yield is more than just a gardening hack; it’s a pathway to enjoying the sweetest, juiciest watermelons you’ve ever tasted, right from your own backyard. We’ve walked you through the process, highlighting the benefits and providing clear, easy-to-follow instructions. But why is this a must-try?
Firstly, it’s about maximizing your resources. Instead of relying solely on natural pollination, which can be unpredictable, this hand-pollination method puts you in control. You’re essentially playing matchmaker for your watermelon plants, ensuring a higher success rate of fruit set and, consequently, a more abundant harvest. Imagine the satisfaction of seeing more watermelons developing on your vines, knowing that you played a direct role in their growth.
Secondly, it’s about quality. By carefully selecting the male and female flowers for pollination, you can influence the characteristics of your watermelons. Perhaps you want to prioritize sweetness, size, or even disease resistance. This DIY approach allows you to experiment and tailor your watermelon crop to your specific preferences.
But the benefits don’t stop there. This method is also incredibly cost-effective. You don’t need to invest in expensive equipment or specialized fertilizers. All you need is a soft brush or cotton swab and a little bit of patience. It’s a sustainable and environmentally friendly way to improve your watermelon yield without relying on harsh chemicals or unsustainable practices.
Ready to take your watermelon game to the next level?
Don’t be afraid to experiment with variations of this technique. For example, you could try using different types of brushes or swabs to see which works best for you. You could also try hand-pollinating at different times of the day to see if it affects the success rate. Some gardeners even swear by using a small magnifying glass to help them identify the male and female flowers more easily.
Consider these variations:
* Companion Planting: Enhance your watermelon patch by planting companion plants like marigolds or basil to attract pollinators and deter pests. This can further boost your overall yield.
* Soil Amendments: Before planting, amend your soil with compost or well-rotted manure to provide your watermelon plants with the nutrients they need to thrive.
* Watering Techniques: Water deeply and consistently, especially during fruit development. Avoid overhead watering, which can lead to fungal diseases.
* Grafting: For advanced gardeners, consider grafting your watermelon plants onto more vigorous rootstocks for increased disease resistance and yield.
Ultimately, the best way to learn is by doing. So, grab your tools, head out to your garden, and give this DIY trick a try. We’re confident that you’ll be amazed by the results.
We encourage you to share your experiences with us! Did this method work for you? Did you try any variations? What challenges did you encounter? Your feedback is invaluable and will help other gardeners learn and improve their own watermelon-growing techniques. Post your photos and stories on social media using #WatermelonYieldBoost and let’s create a community of thriving watermelon growers! Let us know if this DIY trick for boosting watermelon yield worked for you!
Frequently Asked Questions (FAQ)
Q: What exactly is hand-pollination, and why is it necessary for watermelons?
A: Hand-pollination is the process of manually transferring pollen from the male flower of a plant to the female flower, enabling fertilization and fruit development. While watermelons can be pollinated naturally by insects like bees, relying solely on natural pollination can be unreliable, especially in areas with low pollinator populations or unfavorable weather conditions. Hand-pollination ensures a higher success rate of fruit set, leading to a greater watermelon yield. It gives you more control over the process and can result in more consistent and abundant harvests.
Q: How can I tell the difference between male and female watermelon flowers?
A: Identifying male and female watermelon flowers is crucial for successful hand-pollination. The easiest way to distinguish them is by looking at the base of the flower. Female flowers have a small, immature watermelon (a tiny, round swelling) located between the flower and the stem. Male flowers, on the other hand, have a simple stem connecting the flower to the vine, without any swelling. Male flowers also tend to appear earlier and in greater numbers than female flowers.
Q: When is the best time of day to hand-pollinate watermelons?
A: The best time to hand-pollinate watermelons is in the early morning, ideally between 6:00 AM and 10:00 AM. This is when the flowers are most receptive to pollination, and the pollen is at its most viable. The cooler temperatures and higher humidity in the morning also help to prevent the pollen from drying out too quickly. Avoid hand-pollinating during the hottest part of the day, as the heat can damage the pollen and reduce the chances of successful fertilization.
Q: How do I actually transfer the pollen from the male flower to the female flower?
A: The process is quite simple. First, gently pluck a male flower from the vine. Remove the petals to expose the stamen, which is the pollen-bearing part of the flower. Then, using a soft brush, cotton swab, or even your fingertip, gently collect the pollen from the stamen. Next, locate a receptive female flower and gently brush or dab the pollen onto the stigma, which is the sticky center part of the female flower. Ensure that the stigma is thoroughly covered with pollen. You can also directly transfer the pollen by gently touching the stamen of the male flower to the stigma of the female flower.
Q: How many female flowers should I hand-pollinate per plant?
A: It’s generally recommended to hand-pollinate as many female flowers as you can reasonably manage. However, keep in mind that each watermelon plant can only support a limited number of fruits. Over-pollinating can lead to smaller, less developed watermelons. A good rule of thumb is to aim for 2-3 watermelons per plant, depending on the variety and the overall health of the plant.
Q: What if it rains after I hand-pollinate? Will the pollen wash away?
A: Rain can indeed wash away the pollen and reduce the chances of successful fertilization. If rain is expected shortly after you hand-pollinate, you can try covering the pollinated female flowers with a small plastic bag or container to protect them from the rain. Remove the covering once the rain has stopped. Alternatively, you can simply re-pollinate the flowers after the rain has passed.
Q: How long does it take for a hand-pollinated watermelon to start growing?
A: After successful hand-pollination, you should start to see the small watermelon at the base of the female flower begin to swell and grow within a few days. The exact timeframe will depend on factors such as temperature, sunlight, and the specific watermelon variety. Keep an eye on the pollinated flowers and monitor their development. If the small watermelon starts to shrivel or turn yellow, it means that pollination was unsuccessful, and the fruit is not developing.
Q: Can I use this hand-pollination technique for other types of melons or vegetables?
A: Yes, the hand-pollination technique can be applied to other types of melons, such as cantaloupes and honeydews, as well as other vegetables like squash and cucumbers. The basic principles are the same: identify the male and female flowers, collect pollen from the male flower, and transfer it to the female flower. However, the specific characteristics of the flowers and the timing of pollination may vary depending on the plant species.
Q: What are some signs that my watermelon plant is not getting enough pollination, even with hand-pollination?
A: Even with hand-pollination, several factors can hinder successful fruit development. Signs of inadequate pollination include:
* Misshapen or deformed watermelons: If the watermelons are not developing into a round or oval shape, it could indicate incomplete pollination.
* Small or underdeveloped watermelons: If the watermelons are significantly smaller than expected for the variety, it could be due to insufficient pollination.
* Watermelons that rot or drop off the vine prematurely: This can happen if the fruit is not properly fertilized.
* Lack of female flowers: If your plant is producing mostly male flowers and very few female flowers, it could indicate a nutrient deficiency or other environmental stress.
If you observe these signs, consider adjusting your hand-pollination technique, ensuring adequate watering and fertilization, and addressing any potential environmental stressors.
Q: Is there anything else I can do to improve my watermelon yield besides hand-pollination?
A: Absolutely! Hand-pollination is a great start, but it’s just one piece of the puzzle. Here are some other tips to boost your watermelon yield:
* Choose the right variety: Select watermelon varieties that are well-suited to your climate and growing conditions.
* Provide adequate sunlight: Watermelons need at least 6-8 hours of direct sunlight per day.
* Ensure proper soil drainage: Watermelons prefer well-drained soil that is rich in organic matter.
* Fertilize regularly:
Leave a Comment