
Vinegar life hacks DIY – who knew this humble kitchen staple could be your secret weapon for a sparkling home and a thriving garden? I’m constantly amazed by the versatility of vinegar, and I’m excited to share some incredible DIY tricks that will save you money, time, and effort. Forget those expensive, chemical-laden cleaners and garden products; vinegar is the eco-friendly, budget-friendly solution you’ve been searching for!
Vinegar’s been around for centuries, with evidence suggesting its use dates back to ancient Babylonians. It wasn’t just for cooking; people recognized its cleaning and preserving properties long ago. Now, we’re rediscovering its power in a whole new light, using it for everything from banishing weeds to boosting plant growth.
Why do you need these vinegar life hacks DIY? Because let’s face it, maintaining a beautiful home and garden can be a challenge. We’re all looking for ways to simplify our lives and reduce our reliance on harsh chemicals. These DIY tricks are not only effective but also incredibly easy to implement. I’ll show you how to harness the natural power of vinegar to tackle common household and gardening problems, leaving you with more time to enjoy the fruits (and vegetables!) of your labor. Get ready to be amazed by the magic of vinegar!
Growing Chayote Squash in a Bucket: A Comprehensive DIY Guide
Hey there, fellow gardening enthusiasts! Have you ever considered growing chayote squash? It’s a fantastic, versatile vegetable, and guess what? You don’t need a huge garden to cultivate it. I’m going to walk you through how to grow chayote squash right in a bucket! It’s easier than you might think, and the reward of fresh, homegrown chayote is totally worth it.
Why Grow Chayote in a Bucket?
Growing chayote in a bucket offers several advantages:
* Space-Saving: Perfect for balconies, patios, or small gardens.
* Portability: You can move the bucket to optimize sunlight exposure.
* Controlled Environment: Easier to manage soil quality, watering, and pest control.
* Early Start: You can start the chayote indoors and transplant it later.
Materials You’ll Need
Before we dive in, let’s gather everything we need. This will make the whole process smoother and more enjoyable.
* Chayote Fruit: Choose a mature chayote fruit from a grocery store or farmer’s market. Look for one that’s starting to sprout or has a small root emerging. This is crucial!
* Large Bucket (10-20 Gallons): A large bucket is essential to accommodate the chayote’s extensive root system. Make sure it has drainage holes.
* Potting Mix: Use a high-quality potting mix that drains well. Avoid garden soil, as it can become compacted in a container.
* Compost: Compost adds nutrients and improves soil structure.
* Trellis or Support Structure: Chayote is a vine, so it needs something to climb on. A trellis, bamboo stakes, or even a sturdy tomato cage will work.
* Watering Can or Hose: For regular watering.
* Gloves: To protect your hands.
* Optional: Slow-Release Fertilizer: To provide a steady supply of nutrients.
Phase 1: Sprouting the Chayote Fruit
This is arguably the most crucial step. You need to get that chayote fruit to sprout before planting it.
1. Prepare the Sprouting Container: Find a small container, like a yogurt cup or a small pot. Fill it with slightly moist potting mix.
2. Partially Bury the Fruit: Place the chayote fruit horizontally in the container, with the sprout (if visible) pointing upwards. Bury about two-thirds of the fruit in the potting mix, leaving the top third exposed.
3. Maintain Moisture: Keep the potting mix consistently moist, but not soggy. Water gently when the top inch of soil feels dry.
4. Provide Warmth and Light: Place the container in a warm, bright location, but avoid direct sunlight, which can scorch the fruit. A windowsill or a spot under a grow light works well.
5. Be Patient: This process can take several weeks, even a month or more. Don’t get discouraged if you don’t see immediate results. Just keep the soil moist and the environment warm. You’ll know it’s working when a vine starts to emerge from the fruit.
Phase 2: Preparing the Bucket and Soil
While you’re waiting for the chayote to sprout, let’s get the bucket ready.
1. Drill Drainage Holes: If your bucket doesn’t already have them, drill several drainage holes in the bottom. This is essential to prevent waterlogging, which can rot the roots.
2. Add a Layer of Gravel (Optional): Some gardeners like to add a layer of gravel or pebbles to the bottom of the bucket to improve drainage. This is optional, but it can be helpful in heavy clay soils.
3. Mix the Soil: In a large container or on a tarp, mix the potting mix and compost in a ratio of about 2:1 (two parts potting mix to one part compost). This will create a rich, well-draining soil that’s perfect for chayote. If you’re using slow-release fertilizer, mix it in according to the package directions.
4. Fill the Bucket: Fill the bucket with the soil mixture, leaving a few inches of space at the top.
Phase 3: Planting the Sprouted Chayote
Once the chayote has a healthy vine and some roots, it’s time to plant it in the bucket.
1. Gently Remove the Chayote: Carefully remove the sprouted chayote from its sprouting container. Be gentle to avoid damaging the roots. If the roots are tightly bound, gently loosen them with your fingers.
2. Dig a Hole: Dig a hole in the center of the bucket, large enough to accommodate the chayote fruit and its roots.
3. Plant the Chayote: Place the chayote fruit in the hole, making sure the top of the fruit is just below the soil surface. Cover the roots with soil and gently firm the soil around the base of the plant.
4. Water Thoroughly: Water the newly planted chayote thoroughly, until water drains out of the drainage holes. This will help settle the soil and ensure the roots are well-hydrated.
Phase 4: Providing Support and Care
Chayote is a vigorous vine, so it needs plenty of support and care to thrive.
1. Install the Trellis: Immediately after planting, install the trellis or support structure. Make sure it’s sturdy enough to support the weight of the mature vine and its fruits. Position the trellis close to the plant so it can easily start climbing.
2. Water Regularly: Water the chayote regularly, especially during hot, dry weather. Check the soil moisture regularly and water when the top inch feels dry. Avoid overwatering, as this can lead to root rot.
3. Fertilize Periodically: Chayote is a heavy feeder, so it benefits from regular fertilization. Use a balanced fertilizer or a fertilizer specifically formulated for vegetables. Follow the package directions for application rates. You can also side-dress with compost every few weeks.
4. Prune as Needed: Prune the vine to encourage branching and fruit production. Remove any dead or damaged leaves or stems. You can also trim the vine to keep it from becoming too unruly.
5. Pest and Disease Control: Keep an eye out for pests and diseases. Common pests include aphids, spider mites, and squash bugs. Treat infestations promptly with insecticidal soap or neem oil. Prevent fungal diseases by providing good air circulation and avoiding overhead watering.
6. Sunlight: Chayote needs at least 6-8 hours of sunlight per day to produce well. Position your bucket in a sunny location. If you live in a very hot climate, some afternoon shade can be beneficial.
Harvesting Your Chayote
Harvest time is the most rewarding part!
1. When to Harvest: Chayote fruits are typically ready to harvest about 4-6 weeks after flowering. The fruits should be firm and smooth, with a light green color.
2. How to Harvest: Use a sharp knife or pruning shears to cut the fruit from the vine, leaving a short stem attached.
3. Storage: Chayote fruits can be stored in the refrigerator for several weeks.
Troubleshooting
Even with the best care, you might encounter some challenges. Here are a few common issues and how to address them:
* No Fruit Production: This could be due to a lack of pollination. Chayote plants have separate male and female flowers, and they need to be pollinated to produce fruit. You can hand-pollinate the flowers by transferring pollen from the male flowers to the female flowers with a small brush. Also, ensure the plant is getting enough sunlight and nutrients.
* Yellowing Leaves: This could be a sign of overwatering, nutrient deficiency, or pest infestation. Check the soil moisture and adjust your watering accordingly. Fertilize the plant with a balanced fertilizer. Inspect the leaves for pests and treat as needed.
* Slow Growth: This could be due to a lack of sunlight, poor soil, or cold temperatures. Move the bucket to a sunnier location. Amend the soil with compost. Protect the plant from frost.
Enjoy Your Homegrown Chayote!
Growing chayote in a bucket is a fun and rewarding experience. With a little patience and care, you can enjoy a bountiful harvest of fresh, delicious chayote squash. Experiment with different recipes and enjoy the fruits (literally!) of your labor. Happy gardening!
Conclusion
So, there you have it! Unlocking the power of vinegar goes far beyond just salad dressings and cleaning solutions. This simple, readily available ingredient can be a game-changer in so many unexpected ways. From revitalizing tired hair to creating stunning tie-dye effects, the possibilities are truly endless. We’ve explored some fantastic vinegar life hacks DIY projects that are not only cost-effective but also environmentally friendly, reducing your reliance on harsh chemicals and expensive store-bought alternatives.
The beauty of these vinegar life hacks DIY projects lies in their simplicity and adaptability. Feel free to experiment with different types of vinegar – white vinegar, apple cider vinegar, even cleaning vinegar – to see what works best for your specific needs and preferences. For instance, when using vinegar as a fabric softener, try adding a few drops of your favorite essential oil for a personalized scent boost. Lavender, lemon, or eucalyptus can create a wonderfully fresh and calming aroma. Similarly, when using vinegar to clean your microwave, add a few lemon slices to the water and vinegar mixture for an extra burst of citrusy freshness.
Don’t be afraid to get creative and tailor these vinegar life hacks DIY projects to your own unique circumstances. Perhaps you have a particularly stubborn stain that requires a stronger vinegar solution, or maybe you want to explore different tie-dye patterns using vinegar as a mordant. The key is to experiment, observe, and adjust as needed.
We are confident that once you start incorporating these vinegar life hacks DIY tricks into your daily routine, you’ll be amazed by the results. You’ll save money, reduce your environmental impact, and discover a whole new world of possibilities with this humble ingredient.
We wholeheartedly encourage you to try these vinegar life hacks DIY projects for yourself. Pick one or two that pique your interest and give them a whirl. We’re eager to hear about your experiences! Share your successes, your challenges, and any variations you discover in the comments section below. Let’s build a community of vinegar enthusiasts and learn from each other’s experiences. Your insights could be invaluable to other readers who are just starting their vinegar journey. So, go ahead, grab a bottle of vinegar, and get ready to be amazed! Let us know which of these vinegar life hacks DIY projects worked best for you!
Frequently Asked Questions (FAQs)
What type of vinegar is best for cleaning?
White distilled vinegar is generally considered the best type of vinegar for cleaning purposes. It has a high acidity level, which makes it effective at dissolving dirt, grime, and mineral deposits. It’s also inexpensive and readily available. While other types of vinegar, such as apple cider vinegar, can be used for cleaning, they may not be as effective due to their lower acidity. Cleaning vinegar is also an option, it has a higher acidity than white vinegar and is specifically formulated for cleaning.
Can I use vinegar on all surfaces?
No, vinegar should not be used on all surfaces. Avoid using vinegar on natural stone surfaces like marble, granite, and limestone, as the acidity can etch and damage them. It’s also best to avoid using vinegar on waxed furniture, as it can strip the wax finish. Additionally, vinegar can damage electronic screens, so avoid using it to clean your TV, computer, or phone. Always test vinegar on an inconspicuous area before applying it to a larger surface.
How do I get rid of the vinegar smell after cleaning?
The vinegar smell typically dissipates within a few hours. To speed up the process, you can open windows and doors to ventilate the area. You can also place bowls of baking soda around the room to absorb the odor. Another option is to add a few drops of essential oil, such as lemon or lavender, to your cleaning solution to mask the vinegar smell.
Is vinegar safe to use around pets and children?
Vinegar is generally considered safe to use around pets and children, but it’s important to take precautions. Keep vinegar out of reach of children and pets to prevent accidental ingestion. While vinegar is not highly toxic, it can cause irritation if ingested in large quantities. When cleaning with vinegar, ensure that the area is well-ventilated to prevent inhalation of fumes. If your pet or child comes into contact with vinegar, rinse the affected area with water.
Can I mix vinegar with bleach?
No, never mix vinegar with bleach. Mixing vinegar and bleach creates chlorine gas, which is highly toxic and can cause serious respiratory problems, burns, and even death. Always use vinegar and bleach separately and never combine them in the same cleaning solution.
How can I use vinegar to remove hard water stains?
Vinegar is excellent for removing hard water stains. For faucets and showerheads, soak them in a solution of equal parts vinegar and water for a few hours or overnight. For shower doors and tiles, spray them with vinegar and let it sit for 15-20 minutes before scrubbing and rinsing. For coffee makers, run a cycle with a solution of equal parts vinegar and water, followed by two cycles with plain water.
What are some other uses for vinegar in the kitchen?
Besides cleaning, vinegar has many other uses in the kitchen. It can be used to poach eggs, tenderize meat, make pickles, and clean fruits and vegetables. A splash of vinegar can also brighten up sauces and soups. Apple cider vinegar, in particular, is often used in salad dressings and marinades.
How does vinegar work as a natural weed killer?
The acetic acid in vinegar acts as a natural herbicide, drying out the leaves of weeds and disrupting their growth. To use vinegar as a weed killer, spray undiluted white vinegar directly onto the weeds, being careful to avoid spraying desirable plants. It’s most effective on young weeds and works best on sunny days. You can also add a tablespoon of dish soap to the vinegar to help it stick to the weeds better.
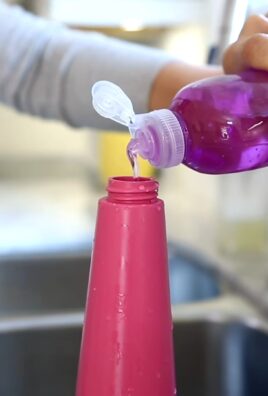
Can vinegar help with laundry?
Yes, vinegar can be a great addition to your laundry routine. It can be used as a natural fabric softener, helping to reduce static cling and soften clothes. Add 1/2 cup of white vinegar to the fabric softener dispenser of your washing machine. Vinegar can also help to remove odors from clothes, brighten colors, and prevent fading.
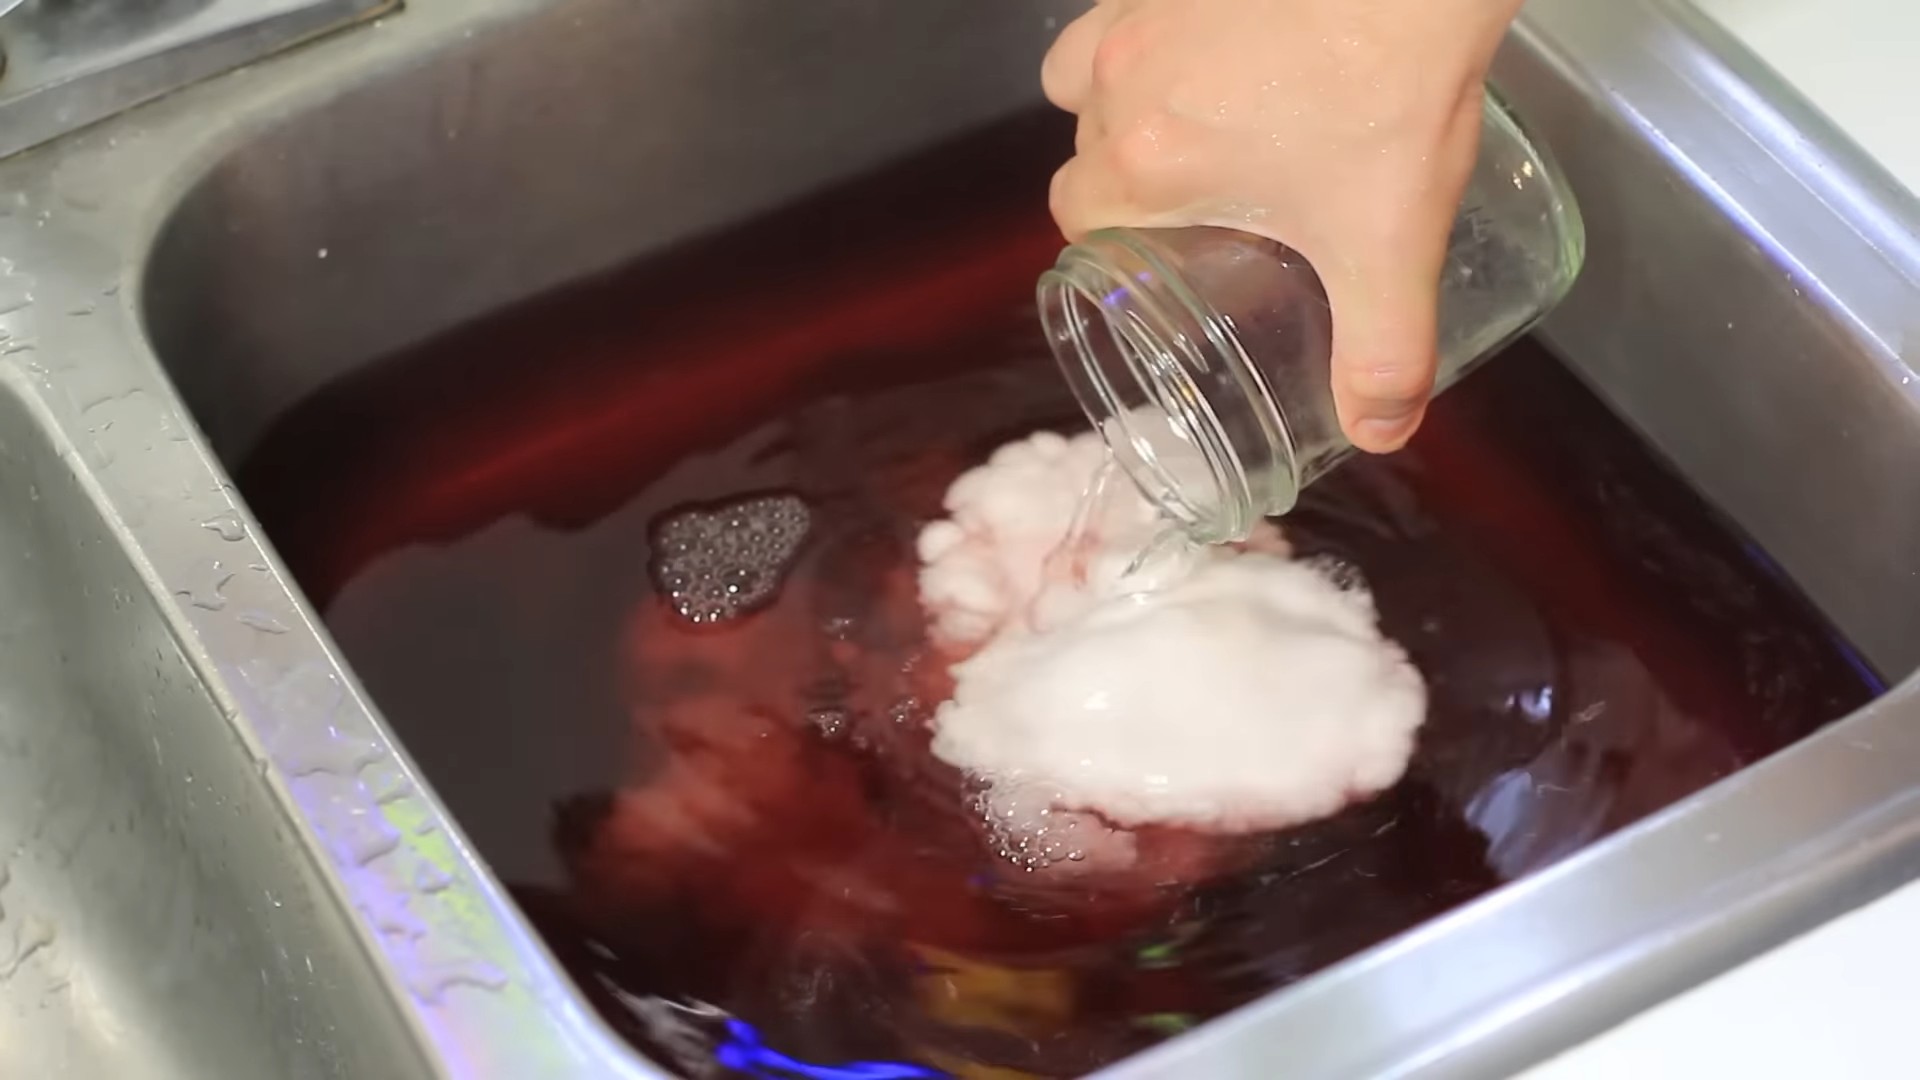
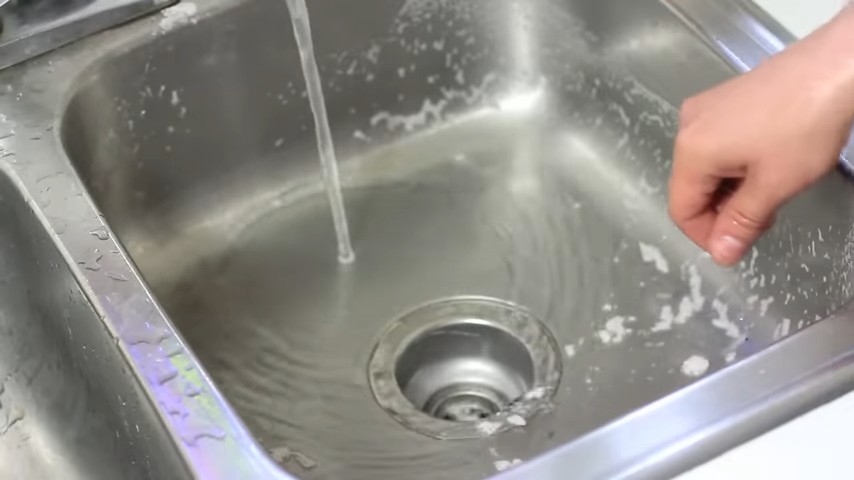
How can I use vinegar to unclog a drain?
Vinegar can be used to unclog a drain in combination with baking soda. Pour 1 cup of baking soda down the drain, followed by 1 cup of vinegar. Let it fizz for 30 minutes, then flush with hot water. This combination can help to break down grease and debris that are clogging the drain. For stubborn clogs, you may need to repeat the process.

Leave a Comment