
Tomato growing hack: the secret weapon every gardener needs! Imagine biting into a juicy, sun-ripened tomato, bursting with flavor, grown right in your own backyard. Sounds idyllic, right? But let’s be honest, sometimes growing tomatoes can feel more like a battle against pests, diseases, and unpredictable weather than a relaxing hobby. For centuries, tomatoes have been a staple in cuisines around the world, from the vibrant sauces of Italy to the refreshing salads of the Mediterranean. Their journey from the Andes Mountains to our plates is a testament to their adaptability and deliciousness.
But what if I told you there’s a simple, yet incredibly effective, tomato growing hack that can dramatically improve your harvest? A trick so easy, even beginner gardeners can master it? In this article, I’m going to share a game-changing DIY technique that will help you grow bigger, healthier, and more flavorful tomatoes than ever before. Forget complicated gardening methods and expensive equipment. This is about working smarter, not harder, and unlocking the full potential of your tomato plants. So, grab your gardening gloves, and let’s dive in! You’ll be amazed at the difference this one simple trick can make.
Tomato-Growing Hack: How to Harvest a Huge Crop with Minimal Effort!
Hello dear garden friends! I am so excited to show you one of my absolute favorite tomato-growing hacks today. This trick has multiplied my tomato harvest every year, and the best part is that it’s super easy and inexpensive. We are going to bury tomato plants horizontally to encourage more root growth, resulting in a much larger and healthier plant. Sounds crazy? Trust me, it works!
What you need:
- Tomato seedlings (strong, healthy plants are best)
- Gardening gloves
- A shovel or spade
- Garden lime (optional, but recommended, especially for acidic soil)
- Compost or well-rotted manure
- Mulch (straw, wood chips, grass clippings)
- Plant stakes or tomato cages
- Watering can or garden hose
Why plant horizontally? The advantages at a glance:
- More roots, more yield: By burying the stem, new roots form along the entire buried part. More roots mean better nutrient absorption and thus a larger and more productive plant.
- Stronger plants: A larger root system makes the plant more resistant to drought, diseases, and pests.
- Less watering: The deeper roots can draw water from deeper soil layers, which means you have to water less.
- Better nutrient uptake: The larger root surface area allows for more efficient absorption of nutrients from the soil.
- Earlier harvest: Due to the faster growth and stronger plant, you can look forward to an earlier harvest.
Step-by-Step Guide: Planting Tomatoes Horizontally
- Preparation is everything: Before we get started, let’s prepare the soil. Choose a sunny location with at least 6-8 hours of direct sunlight per day. Tomatoes love the sun! Loosen the soil with a shovel or spade and remove stones and weeds. If your soil is very clayey or sandy, work in compost or well-rotted manure to improve the soil structure. If your soil is acidic (which is the case in many regions), sprinkle some garden lime to neutralize the pH. Tomatoes prefer a pH between 6.0 and 6.8.
- Digging the hole: Now for the exciting part! Dig a trench that is long enough to bury most of the tomato stem horizontally. The length of the trench depends on the size of your tomato plant. In general, the trench should be about 2/3 the length of the stem. The depth of the trench should be about 15-20 cm. So, the hole should be more of a long trench than a deep hole.
- Preparing the plant: Remove the lower leaves of the tomato stem that would be under the ground. These leaves would otherwise rot and could cause diseases. Be careful when removing the leaves not to damage the stem.
- Placing the plant: Carefully lay the tomato plant in the trench so that the stem lies horizontally and the top of the plant points upwards. Gently bend the top of the plant upwards so that it sticks vertically out of the ground.
- Burying and fertilizing: Fill the trench with soil and press it down lightly. Make sure that the tip of the plant is not covered with soil. Water the plant thoroughly to settle the soil and encourage root formation. Give the plant a good start by adding some compost or organic fertilizer to the planting hole. This will give it an extra boost.
- Don’t forget to mulch: Apply a layer of mulch around the tomato plant. Mulch helps to retain moisture in the soil, suppress weeds, and regulate the soil temperature. Straw, wood chips, or grass clippings are excellent mulch materials.
- Providing support: Insert plant stakes or tomato cages to support the tomato plant as it grows. Tomato plants can become very heavy when they are full of fruit, so it’s important to support them from the beginning.
- Watering and care: Water the tomato plant regularly, especially during dry periods. Make sure the soil is moist but not waterlogged. Fertilize the plant every few weeks with a tomato fertilizer to ensure an optimal supply of nutrients. Regularly remove side shoots (also called suckers) to concentrate the plant’s energy on fruit production.
Additional Tips for a Bountiful Harvest:
- Variety selection: Choose tomato varieties that are suitable for your climate and growing conditions. There are countless varieties, from small cherry tomatoes to giant beefsteak tomatoes. Find out which varieties thrive well in your region.
- Regular watering: Tomatoes need regular water, especially during fruit formation. It is best to water early in the morning so that the leaves have time to dry before dusk. Avoid watering the leaves, as this can promote diseases.
- Suckering: Regularly remove the side shoots (suckers) that grow between the main stem and the side stems. These shoots take unnecessary energy from the plant and can impair fruit production.
- Protection from pests and diseases: Regularly check your tomato plants for pests and diseases. There are many biological and chemical agents to combat pests and diseases.
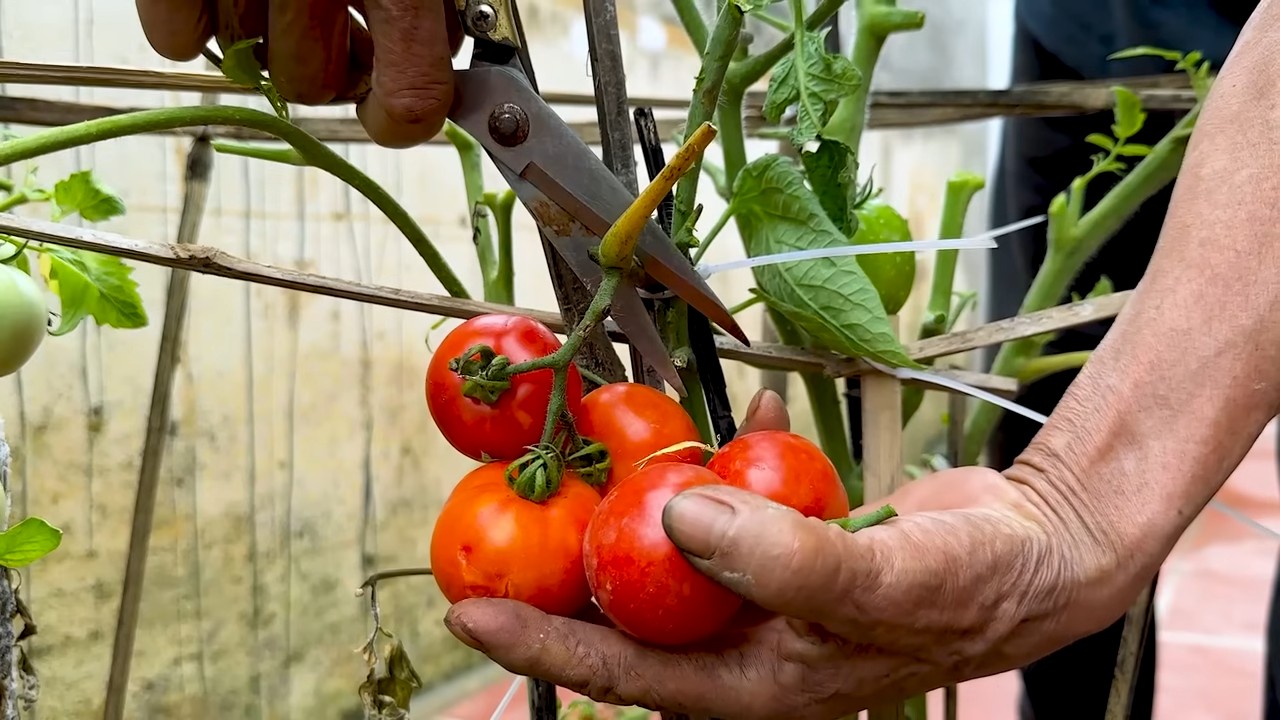
- Harvesting: Harvest the tomatoes as soon as they are ripe. Ripe tomatoes are bright red (or yellow, orange, depending on the variety) and give slightly when pressed. The more often you harvest, the more fruit the plant will produce.
Avoiding Common Mistakes:
- Planting too deep: Make sure that the tip of the plant is not covered with soil.
- Watering too little: Tomatoes need regular water, especially during fruit formation.
- Not suckering: Regularly remove the side shoots to concentrate the plant’s energy on fruit production.
- Not providing support: Tomato plants can become very heavy when they are full of fruit, so it is important to support them from the beginning.
- Ignoring pests and diseases: Regularly check your tomato plants for pests and diseases and combat them in a timely manner.
Another Little Trick: The “Upside-Down Tomato” Method
Another variation that I sometimes try is the “upside-down tomato” method. Here, you plant the tomato plant in an inverted bucket or pot, so that the roots point upwards and the leaves hang downwards. This sounds crazy, but it works! The advantage of this method is that the tomato plant is well-ventilated from the beginning and is less susceptible to diseases. It also saves space, as the tomato plant grows downwards.
Here’s how it works:
- Hang the bucket or pot in a sunny place.
- Cut a hole in the bottom of a bucket or pot that is large enough to stick the tomato plant through.
- Fill the bucket or pot with soil.
- Stick the tomato plant through the hole from the bottom, so that the roots point upwards and the leaves hang downwards.
Conclusion
So, there you have it! This simple, yet incredibly effective tomato growing hack is a game-changer for anyone looking to maximize their yield and enjoy the freshest, most flavorful tomatoes imaginable. We’ve walked you through the process, highlighting the benefits of this method, and hopefully, dispelled any doubts you might have had.
Why is this a must-try? Because it addresses some of the most common challenges faced by tomato growers: lack of space, nutrient deficiencies, and the constant battle against pests and diseases. By strategically burying a portion of the tomato plant’s stem, you’re essentially creating a more robust root system, allowing the plant to absorb more nutrients and water. This translates to stronger, healthier plants that are better equipped to withstand environmental stressors and produce an abundance of delicious tomatoes.
But the beauty of this tomato growing hack lies in its adaptability. Feel free to experiment with different variations to suit your specific needs and preferences. For instance, if you’re dealing with particularly poor soil, consider adding a layer of compost or well-rotted manure to the planting hole before burying the stem. This will provide an extra boost of nutrients and help to improve soil drainage. You can also try using different types of organic matter, such as shredded leaves or grass clippings, to enrich the soil around the buried stem.
Another variation to consider is the depth at which you bury the stem. While we recommend burying about two-thirds of the stem, you can adjust this based on the size of your plant and the type of soil you’re working with. If you’re planting a smaller tomato plant, you may only need to bury half of the stem. Conversely, if you’re planting a larger plant in well-drained soil, you may be able to bury even more of the stem.
Furthermore, don’t be afraid to experiment with different tomato varieties. This tomato growing hack works well with most types of tomatoes, but some varieties may respond better than others. Cherry tomatoes, for example, tend to be particularly prolific when grown using this method. Heirloom tomatoes, with their unique flavors and textures, can also benefit from the extra root support and nutrient uptake.
Ultimately, the best way to discover the full potential of this tomato growing hack is to try it for yourself. We encourage you to give it a shot and see the difference it can make in your tomato harvest. Whether you’re a seasoned gardener or a complete beginner, this technique is easy to implement and can yield impressive results.
We’re confident that you’ll be amazed by the difference this simple trick can make. So, grab your gardening gloves, head out to your garden, and get ready to experience the joy of growing your own delicious, homegrown tomatoes.
And most importantly, we want to hear about your experience! Share your results, tips, and variations in the comments section below. Let’s create a community of tomato enthusiasts who are passionate about maximizing their yields and enjoying the fruits (or vegetables!) of their labor. Happy gardening!
Frequently Asked Questions (FAQ)
What exactly is the benefit of burying the tomato stem?
The primary benefit of burying the tomato stem is that it allows the plant to develop a more extensive root system along the buried portion of the stem. Tomato stems have the ability to sprout roots when they come into contact with soil. By burying a significant portion of the stem, you’re essentially creating multiple points for root development. This expanded root system allows the plant to absorb more water and nutrients from the soil, leading to stronger, healthier growth and a higher yield of tomatoes. It also makes the plant more resilient to drought and other environmental stresses.
Will this work for all types of tomatoes?
Yes, this tomato growing hack generally works well for all types of tomatoes, including determinate (bush) and indeterminate (vining) varieties. However, indeterminate varieties, which tend to grow taller and produce more fruit, may benefit even more from the extra root support provided by this method. Cherry tomatoes, Roma tomatoes, beefsteak tomatoes, and heirloom varieties can all be successfully grown using this technique. The key is to ensure that the buried portion of the stem is in contact with well-draining, nutrient-rich soil.
How deep should I bury the tomato stem?
We recommend burying approximately two-thirds of the tomato stem. This provides ample opportunity for root development while still leaving enough of the plant above ground to receive sunlight and air. However, you can adjust the depth based on the size of your plant and the type of soil you’re working with. For smaller plants, you may only need to bury half of the stem. For larger plants in well-drained soil, you may be able to bury even more. The goal is to maximize root development without burying the leaves or causing the stem to rot.
What kind of soil should I use when burying the stem?
It’s crucial to use well-draining, nutrient-rich soil when burying the tomato stem. This will provide the plant with the necessary nutrients and moisture to support root development and healthy growth. Amend your existing garden soil with compost, well-rotted manure, or other organic matter to improve its fertility and drainage. Avoid using heavy clay soil, as it can become waterlogged and lead to root rot. A slightly acidic soil pH (around 6.0 to 6.8) is ideal for tomato growth.
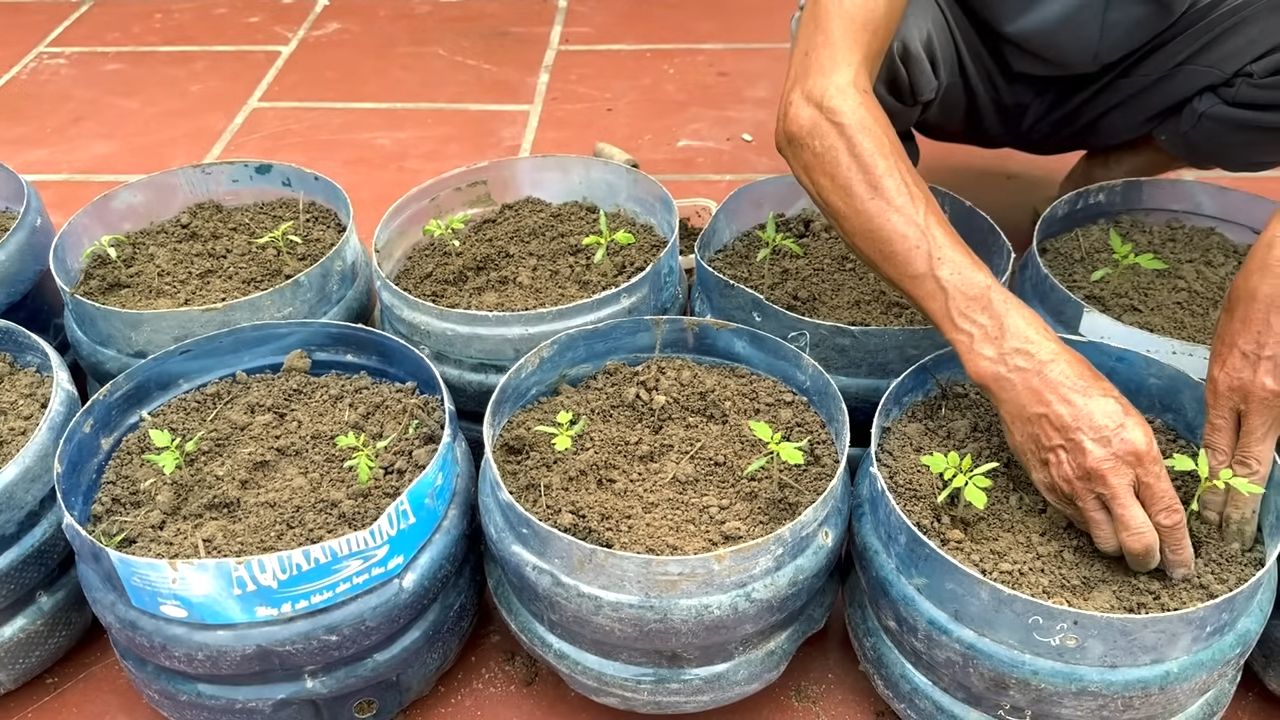
Can I use this method in containers?
Yes, this tomato growing hack can be successfully used in containers. Choose a container that is large enough to accommodate the mature size of your tomato plant. Fill the container with a high-quality potting mix that is well-draining and nutrient-rich. When planting, bury the tomato stem as described above, ensuring that the buried portion is in contact with the potting mix. Water regularly and fertilize as needed to provide the plant with the necessary nutrients.
Will burying the stem attract pests or diseases?
While burying the stem can create a favorable environment for root development, it can also potentially attract pests or diseases if not done properly. To minimize this risk, ensure that the soil around the buried stem is well-draining and free of debris. Avoid burying the leaves, as they can rot and attract pests. You can also apply a layer of mulch around the base of the plant to help suppress weeds and retain moisture. Regularly inspect your plants for signs of pests or diseases and take appropriate action if necessary.
How long will it take to see results from this method?
You should start to see results from this tomato growing hack within a few weeks of planting. The buried portion of the stem will begin to sprout roots, and the plant will start to grow more vigorously. You may also notice an increase in the number of flowers and fruits. However, the exact timing will depend on factors such as the type of tomato variety, the growing conditions, and the overall health of the plant. Be patient and continue to provide your plants with the necessary care, and you’ll be rewarded with a bountiful harvest.
What if the buried stem starts to rot?
If you notice that the buried stem is starting to rot, it’s important to take action immediately. This could be a sign of overwatering, poor drainage, or a fungal infection. Gently dig up the plant and inspect the buried stem. If the rot is localized, you may be able to remove the affected portion and replant the plant in fresh soil. However, if the rot is extensive, it may be necessary to discard the plant. To prevent stem rot, ensure that the soil is well-draining and avoid overwatering. You can also apply a fungicide to the soil to help protect against fungal infections.

Leave a Comment