
Toilet Grout Cleaning Upgrade: Are you tired of battling stubborn stains and unsightly mildew in your bathroom? I know I was! That dingy grout around your toilet can make even the cleanest bathroom feel grimy. But don’t despair, because I’m about to share some amazing DIY tricks that will transform your toilet area from drab to dazzling!
For generations, keeping our homes clean has been a symbol of pride and well-being. Think about the ancient Roman bathhouses, where meticulous cleaning was a ritual. While we might not have slaves to scrub our grout anymore, we can certainly embrace the DIY spirit and tackle this chore ourselves. A sparkling clean bathroom is not just aesthetically pleasing; it’s also crucial for maintaining a healthy living environment.
Let’s face it, nobody enjoys cleaning toilet grout. It’s a tedious task that often feels impossible to conquer. But with the right techniques and a few simple ingredients, you can achieve professional-level results without breaking the bank. This toilet grout cleaning upgrade will not only save you money on expensive cleaning products but also empower you to take control of your home’s cleanliness. I’m going to show you how to banish those stubborn stains and restore your grout to its former glory, making your bathroom a space you can truly be proud of. Get ready to roll up your sleeves and say goodbye to dirty grout forever!
DIY Toilet Grout Cleaning Upgrade: Sparkling Clean in a Weekend!
Okay, let’s face it, cleaning toilet grout is nobody’s favorite chore. But that dingy, stained grout around your toilet can really bring down the whole bathroom vibe. I’m here to tell you that with a little elbow grease and the right approach, you can transform that grout from grimy to gleaming! This guide will walk you through a comprehensive cleaning and sealing process that will not only make your toilet area look fantastic but also protect your grout from future stains.
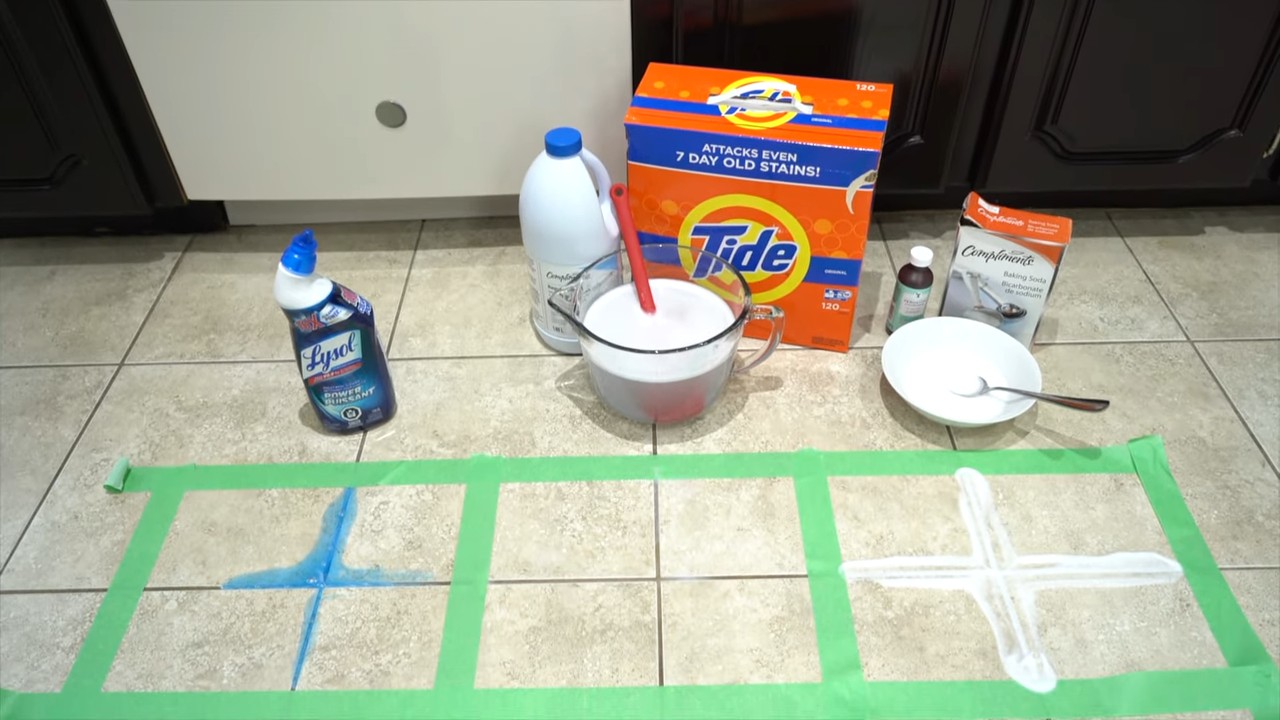
What You’ll Need: The Arsenal of Clean
Before we dive in, let’s gather our supplies. Having everything on hand will make the process smoother and more efficient.
* Cleaning Supplies:
* Baking Soda: Our gentle abrasive and deodorizer.
* White Vinegar: The acid that fizzes away grime (use with caution!).
* Hydrogen Peroxide: A powerful disinfectant and stain remover.
* Dish Soap: For cutting through grease and general cleaning.
* Grout Brush: A stiff-bristled brush designed for grout lines. An old toothbrush works in a pinch, but a grout brush is much more effective.
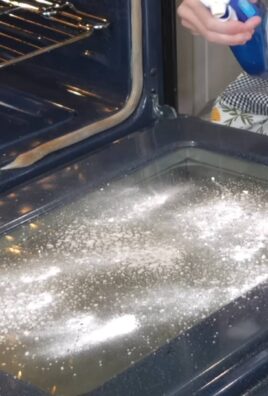
* Spray Bottle: For easy application of cleaning solutions.
* Microfiber Cloths: For wiping and drying.
* Old Rags: For messy cleanup.
* Optional: Steam Cleaner: If you have one, it can be a game-changer for loosening stubborn dirt.
* Safety Gear:
* Rubber Gloves: Protect your hands from harsh chemicals and bacteria.
* Eye Protection: Safety glasses or goggles to prevent splashes.
* Mask: Especially important when working with vinegar or bleach.
* Sealing Supplies:
* Grout Sealer: Choose a quality sealer designed for bathroom grout. Epoxy-based sealers are very durable but can be trickier to apply. Penetrating sealers are easier to use.
* Small Brush or Applicator: For applying the sealer precisely. A small artist’s brush or a grout sealer applicator works well.
* Clean Cloth: For wiping away excess sealer.
* Tools:
* Vacuum Cleaner: To remove loose debris before cleaning.
* Scraper or Putty Knife: For removing stubborn buildup (use carefully to avoid damaging the tile).
* Small Bowl or Container: For mixing cleaning solutions.
Phase 1: Deep Cleaning the Grout
This is where the real work begins! We’re going to tackle that grime head-on.
1. Prepare the Area: Start by vacuuming the area around the toilet to remove any loose dirt, dust, or hair. This will prevent it from getting mixed into your cleaning solutions and making things even messier.
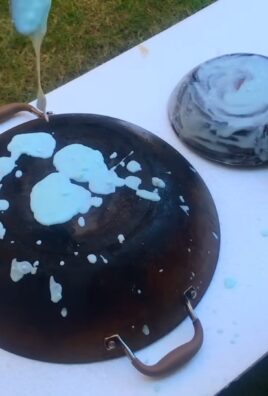
2. The Baking Soda Paste: In a small bowl, mix baking soda with a little water to form a thick paste. The consistency should be similar to toothpaste.
3. Apply the Paste: Using your fingers (with gloves on, of course!) or a small spatula, apply the baking soda paste generously to the grout lines. Make sure to cover all the stained or dirty areas.
4. Let it Sit: Allow the baking soda paste to sit on the grout for at least 15-20 minutes. This gives it time to penetrate the grime and loosen it up. For heavily stained areas, you can leave it on for up to an hour.
5. Scrub-a-Dub-Dub: Now comes the elbow grease! Using your grout brush, scrub the grout lines vigorously. Work in small sections and apply firm pressure. You should see the dirt and grime starting to lift.
6. The Vinegar Fizz (Use with Caution!): Fill a spray bottle with white vinegar. Lightly spray the vinegar onto the baking soda paste. You’ll see a fizzing reaction, which helps to further break down the grime. Be careful not to over-saturate the area, as vinegar can damage some types of tile.
7. More Scrubbing: Continue scrubbing the grout lines while the vinegar is fizzing. The combination of baking soda and vinegar is a powerful cleaning duo.
8. Rinse Thoroughly: Once you’ve scrubbed all the grout lines, rinse the area thoroughly with clean water. Use a sponge or cloth to wipe away any remaining baking soda or vinegar residue.
9. Inspect and Repeat: Take a close look at the grout lines. If there are still some stubborn stains, repeat steps 2-8. You can also try using a stronger cleaning solution, such as hydrogen peroxide, on particularly difficult areas.
10. Hydrogen Peroxide Power: For stubborn stains that persist after the baking soda and vinegar treatment, try applying hydrogen peroxide directly to the grout lines. Let it sit for 10-15 minutes, then scrub and rinse.
11. Dish Soap Boost: If you’re dealing with greasy or oily stains, add a few drops of dish soap to your cleaning solution. The dish soap will help to cut through the grease and make it easier to remove.
12. Steam Cleaning (Optional): If you have a steam cleaner, now is a great time to use it. The steam will help to loosen any remaining dirt and grime, making it easier to wipe away. Direct the steam nozzle along the grout lines and then wipe with a clean cloth.
13. Dry Completely: After rinsing, dry the area thoroughly with a clean cloth. You can also use a fan to speed up the drying process. It’s important to make sure the grout is completely dry before moving on to the sealing phase.
Phase 2: Sealing the Grout for Long-Lasting Protection
Now that your grout is sparkling clean, we want to protect it from future stains and make it easier to clean in the future. Sealing the grout is the key!
1. Choose Your Sealer: Select a grout sealer that is appropriate for your type of tile and grout. Read the product label carefully and follow the manufacturer’s instructions. There are two main types of sealers: penetrating sealers and epoxy-based sealers. Penetrating sealers are easier to apply and are a good choice for most homeowners. Epoxy-based sealers are more durable but can be more difficult to work with.
2. Read the Instructions: I can’t stress this enough! Every sealer is different, so read the manufacturer’s instructions carefully before you begin. Pay attention to drying times, application methods, and safety precautions.
3. Test in an Inconspicuous Area: Before sealing the entire area, test the sealer in a small, inconspicuous area to make sure it doesn’t discolor the tile or grout. Apply a small amount of sealer, let it dry, and then check for any changes in appearance.
4. Apply the Sealer: Using a small brush or applicator, carefully apply the sealer to the grout lines. Work in small sections and avoid getting sealer on the tile. If you do get sealer on the tile, wipe it off immediately with a clean cloth.
5. Be Precise: Take your time and be precise when applying the sealer. You want to make sure that all the grout lines are completely covered.
6. Wipe Away Excess: After applying the sealer, wipe away any excess with a clean cloth. This will prevent the sealer from drying on the tile and creating a hazy film.
7. Allow to Dry: Allow the sealer to dry completely according to the manufacturer’s instructions. This may take several hours or even overnight. Avoid using the toilet area during the drying time.
8. Apply a Second Coat (Optional): For extra protection, you can apply a second coat of sealer after the first coat has dried completely. Follow the same application and drying instructions as before.
9. Curing Time: Even after the sealer is dry to the touch, it may still need to cure completely. Check the manufacturer’s instructions for the recommended curing time. Avoid exposing the sealed grout to water or harsh chemicals during the curing period.
10. Proper Ventilation: Ensure proper ventilation while applying and drying the sealer. Open windows and doors to allow fresh air to circulate.
11. Clean Up: Dispose of any used brushes, applicators, and cloths according to the manufacturer’s instructions. Clean up any spills or drips immediately.
Maintaining Your Sparkling Grout
Now that you’ve put in all this effort, you’ll want to keep your grout looking its best! Here are a few tips for maintaining your sparkling clean grout:
* Regular Cleaning: Clean your toilet area regularly with a mild soap and water solution. This will prevent dirt and grime from building up and making it harder to clean in the future.
* Avoid Harsh Chemicals: Avoid using harsh chemicals or abrasive cleaners on your grout, as they can damage the sealer and cause the grout to discolor.
* Wipe Up Spills Immediately: Wipe up any spills immediately to prevent them from staining the grout.
* Re-seal Periodically: Re-seal your grout every 1-
Conclusion
So, there you have it! This simple yet incredibly effective DIY toilet grout cleaning upgrade is more than just a cleaning hack; it’s a game-changer for your bathroom. We’ve shown you how to banish stubborn stains and discoloration, breathing new life into your toilet area and transforming it from a potential eyesore into a sparkling clean space.
Why is this a must-try? Because it’s affordable, uses readily available ingredients you likely already have in your home, and delivers professional-level results without the hefty price tag of commercial cleaners or professional services. Think about the time and money you’ll save, not to mention the satisfaction of knowing you achieved such a dramatic improvement with your own two hands.
But the benefits extend beyond just aesthetics. A clean toilet grout area is also a more hygienic one. By eliminating the buildup of mold, mildew, and bacteria, you’re creating a healthier environment for yourself and your family. This is particularly important in a space that’s prone to moisture and humidity.
Don’t be afraid to experiment and personalize this DIY toilet grout cleaning upgrade to suit your specific needs and preferences. For instance, if you’re dealing with particularly stubborn stains, you might consider increasing the concentration of baking soda or letting the paste sit for a longer period. You could also add a few drops of your favorite essential oil, like tea tree or eucalyptus, for an extra boost of antibacterial power and a refreshing scent.
Another variation to consider is using a different type of brush. While an old toothbrush is ideal for detailed work, a small scrub brush with stiffer bristles can be more effective for larger areas or heavily soiled grout. Just be sure to test the brush on an inconspicuous area first to ensure it doesn’t scratch the tile.
We’re confident that once you try this DIY toilet grout cleaning upgrade, you’ll be amazed by the results. It’s a simple, effective, and budget-friendly way to achieve a cleaner, brighter, and healthier bathroom.
Now, it’s your turn! We encourage you to give this DIY trick a try and see the difference it can make in your own home. Don’t forget to take before-and-after photos – we’d love to see your transformations! Share your experiences, tips, and variations in the comments below. Let’s create a community of clean bathroom enthusiasts and help each other achieve sparkling results. We are eager to hear how this method worked for you and any modifications you made to further enhance its effectiveness. Your feedback is invaluable and will help others achieve the best possible results. So, grab your supplies, roll up your sleeves, and get ready to say goodbye to dirty toilet grout forever!
Frequently Asked Questions (FAQ)
1. What ingredients do I need for this DIY toilet grout cleaning upgrade?
The basic recipe requires just a few simple ingredients: baking soda, white vinegar, and water. You may also want to have an old toothbrush or small scrub brush, a spray bottle, and some paper towels or a clean cloth on hand. For added cleaning power, some people like to add a few drops of dish soap or hydrogen peroxide.
2. Is this DIY grout cleaner safe for all types of tile?
While baking soda and vinegar are generally safe for most types of tile, it’s always a good idea to test the cleaner on an inconspicuous area first, especially if you have delicate or porous tiles like natural stone. Avoid using abrasive scrub brushes on easily scratched surfaces. If you are unsure, consult the tile manufacturer’s recommendations.
3. How often should I clean my toilet grout?
The frequency of cleaning depends on how quickly your grout gets dirty. In general, a deep cleaning every one to two months is sufficient for most bathrooms. However, if you notice stains or discoloration appearing more frequently, you may need to clean more often. Regular wiping down of the area after showers can also help prevent buildup.
4. Can I use bleach instead of vinegar?
While bleach is a powerful disinfectant, it’s not recommended for grout cleaning. Bleach can damage grout over time, causing it to become brittle and crack. It can also react with other cleaning products, creating harmful fumes. Vinegar is a safer and more environmentally friendly alternative.
5. How long should I let the baking soda paste sit on the grout?
For best results, let the baking soda paste sit on the grout for at least 15-20 minutes. For heavily soiled grout, you can let it sit for up to an hour. The longer the paste sits, the more time it has to break down the dirt and grime.
6. What if the stains are still there after cleaning?
If the stains persist after the initial cleaning, you can try repeating the process. You can also try using a stronger concentration of baking soda or letting the paste sit for a longer period. For particularly stubborn stains, you can try using a grout stain remover specifically designed for this purpose. Always follow the manufacturer’s instructions when using commercial cleaning products.
7. How can I prevent grout from getting dirty in the first place?
Prevention is key to keeping your toilet grout clean. Here are a few tips:
* Wipe down the area after each shower to remove excess moisture.
* Ensure proper ventilation in your bathroom to prevent mold and mildew growth.
* Consider sealing your grout to protect it from stains and water damage.
* Regularly sweep or vacuum the bathroom floor to remove dirt and debris.
8. Can I use this method on colored grout?
Yes, you can use this method on colored grout, but it’s essential to test it on an inconspicuous area first to ensure it doesn’t fade or discolor the grout. Vinegar, in particular, can sometimes lighten colored grout, so use it sparingly and rinse thoroughly.
9. What type of vinegar should I use?
White vinegar is the best choice for cleaning grout. It’s inexpensive, readily available, and effective at removing dirt and grime. Avoid using other types of vinegar, such as apple cider vinegar or balsamic vinegar, as they may contain sugars or other additives that can leave a sticky residue.
10. Is this DIY toilet grout cleaning upgrade safe for septic systems?
Yes, baking soda and vinegar are generally safe for septic systems. They are natural and biodegradable, and they won’t harm the beneficial bacteria that are essential for septic system function. However, it’s always a good idea to use these cleaners in moderation and avoid flushing large amounts of baking soda down the toilet at once.
Leave a Comment