
Terrace Guava Tree Harvest season is upon us, and I’m practically bursting with excitement to share some incredible DIY tricks that will maximize your yield! Imagine biting into a juicy, homegrown guava, bursting with flavor, all thanks to your own terrace garden. But what if your guava tree isn’t producing as much as you hoped? Or perhaps the fruits are small and lack that intense sweetness? Don’t worry, I’ve got you covered!
Guava cultivation has a rich history, dating back thousands of years in tropical America. It’s been cherished not only for its delicious fruit but also for its medicinal properties. For generations, gardeners have passed down secrets to encourage bountiful harvests, and I’m thrilled to share some of those time-tested techniques, along with some modern hacks, to help you achieve a truly impressive Terrace Guava Tree Harvest.
Let’s face it, gardening can be challenging, especially in limited spaces like terraces. Pests, diseases, and nutrient deficiencies can all impact your guava tree’s productivity. That’s why these DIY tricks are so essential. They’ll empower you to take control of your guava tree’s health, optimize its growing conditions, and ultimately, enjoy a significantly larger and more flavorful harvest. So, grab your gardening gloves, and let’s dive into the secrets of a successful guava harvest!
Terrace Guava Tree Harvest: How to Do It Right!
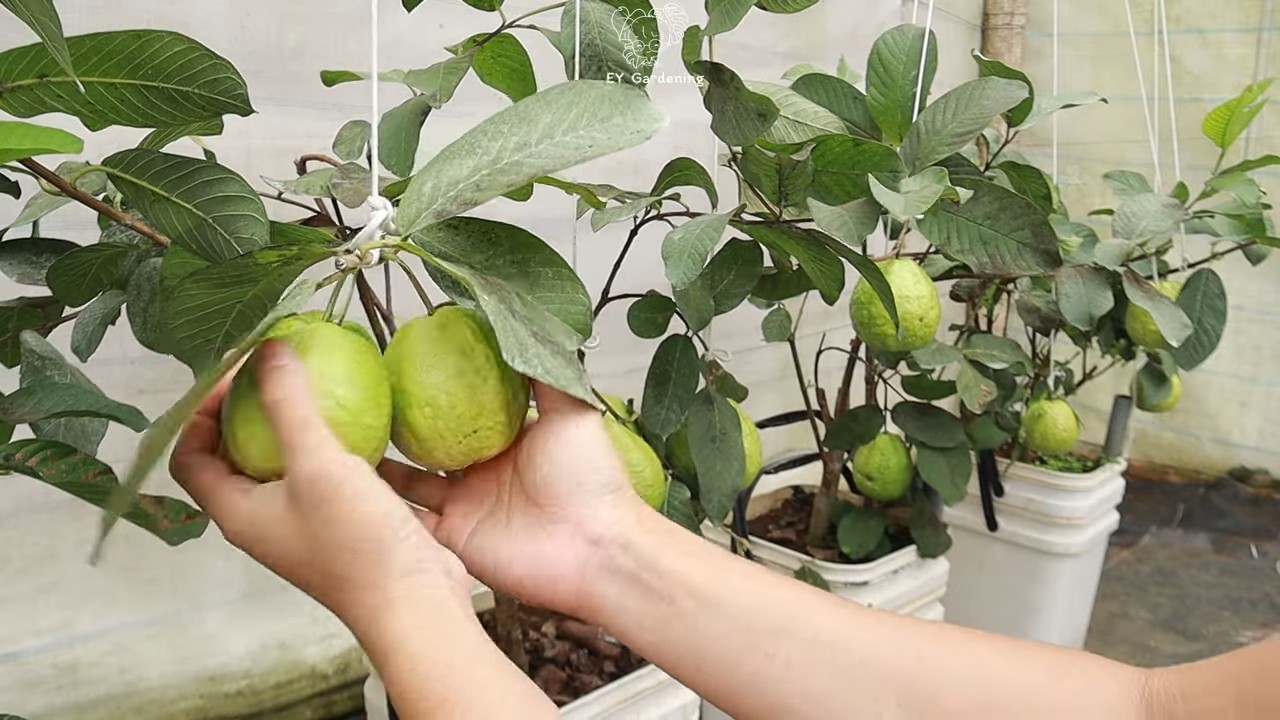
Hello dear garden friends! Today I’m going to show you how to properly harvest the guavas from your terrace tree and what you should pay attention to. I have a small guava tree on my terrace myself and look forward to the harvest every year. It’s truly a great feeling to enjoy the fruits of your own labor!
When is the right time for the guava harvest?
The timing of the harvest is crucial for the taste and quality of your guavas. Here are a few signs you should look out for:
- Color: The color of the guava changes from green to yellow or pink, depending on the variety. This is a clear sign of ripeness.
- Scent: Ripe guavas emit a sweet, aromatic scent. If you pick up a guava and it smells intense, that’s a good sign.
- Consistency: The fruit should give slightly when you press it gently. It shouldn’t be rock hard, but not too soft either.
- Easy Drop: Ripe guavas sometimes fall off the tree on their own. This is a sure sign that they are ready for harvest.
Attention: Don’t wait too long to harvest, as overripe guavas can spoil quickly.
Required Materials and Tools
Before we get started, make sure you have everything on hand:
- Pruning shears or fruit picker: Sharp pruning shears are ideal for cleanly separating the guavas from the tree. A fruit picker with a small bag is helpful for reaching higher-hanging fruits without damaging them.
- Gloves: Wear garden gloves to protect your hands from thorns and dirt.
- Basket or bucket: A basket or bucket serves as a container for the harvested guavas.
- Soft cloth or paper: To protect the guavas from bruising during transport, you can line the container with a soft cloth or paper.
- Ladder (optional): If your guava tree is very tall, you may need a ladder to reach all the fruits. Make sure it is on a secure footing.
Step-by-Step Guide to Harvesting Guavas
Now let’s get down to it! Follow these steps to harvest your guavas correctly:
- Preparation: Put on your garden gloves and have all the necessary materials ready. Check your guava tree for ripe fruits.
- Selection of ripe fruits: Choose the guavas that show the signs of ripeness mentioned above (color, scent, consistency).
- Harvesting with pruning shears:
- Carefully take the ripe guava in your hand.
- Cut the stem of the guava with the pruning shears. Be careful not to damage the tree.
- Cut the stem as close to the fruit as possible, but leave a small piece of the stem on the guava to make it last longer.
- Harvesting with the fruit picker:
- Position the fruit picker so that the guava goes into the bag.
- Gently turn the fruit picker until the guava detaches from the tree.
- Carefully empty the bag into your basket or bucket.
- Careful placement of the fruits: Place the harvested guavas carefully in the basket or bucket. Make sure they are not on top of each other to avoid bruising. If you have several layers of guavas, place a soft cloth or paper between the layers.
- Checking the tree: Go through the entire tree again and harvest all ripe guavas. Do not leave any overripe fruits on the tree, as they can attract pests.
- Cleaning the tools: Clean your pruning shears or fruit picker thoroughly after harvesting to prevent the spread of diseases.
- Storing the guavas: Store the harvested guavas in a cool, dry place. They can be kept in the refrigerator for about a week.
After the Harvest: What to do with the Guavas?
After the harvest, the question naturally arises: What do I do now with all these guavas? Here are a few ideas:
- Enjoy fresh: The easiest and most delicious way to enjoy guavas is to eat them fresh. Just cut them open and scoop out the pulp.
- Guava juice: Guava juice is refreshing and healthy. You can make it yourself by juicing the guavas or pureeing them and diluting with water.
- Guava jam: Guava jam is a delicious spread for bread. There are many recipes online you can try.
- Guava jelly: Similar to jam, but with a finer consistency.
- Guava compote: Guava compote is a delicious side to desserts or yogurt.
- Freezing: If you have too many guavas, you can also freeze them. Cut them into pieces and freeze them in freezer bags. This way you’ll have some of your harvest in the winter too.
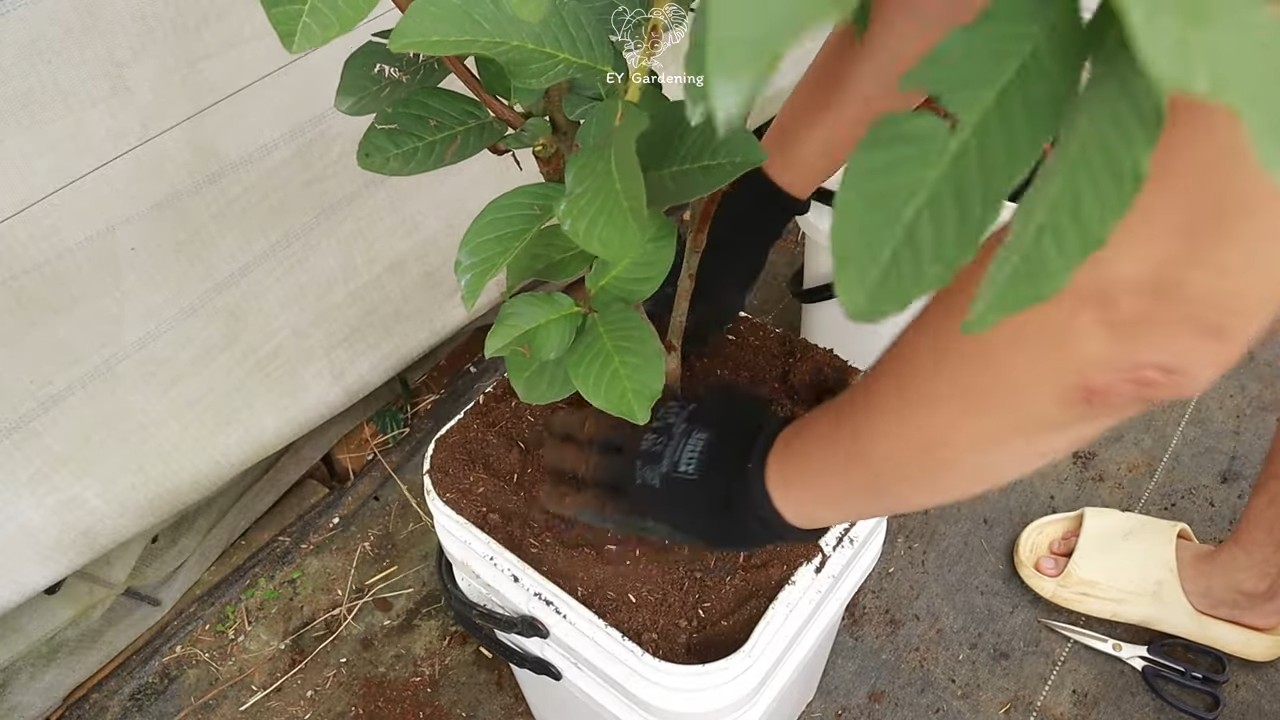
Care of the Guava Tree After Harvest
After the harvest, it is important to take good care of your guava tree so that it will bear plenty of fruit again next year.
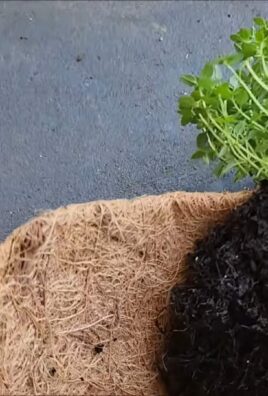
- Fertilizing: Fertilize your guava tree with a special fruit tree fertilizer. Follow the instructions on the package.
- Watering: Water your guava tree regularly, especially during dry periods.
- Pruning: Prune your guava tree back after the harvest to maintain its shape and promote fruit production for the next year. Remove dead or diseased branches.
- Frost protection: If you live in a region with cold winters, you should protect your guava tree from frost. Wrap it with fleece or move it to a protected location.
Common Problems and Solutions in Guava Harvesting
Sometimes there are problems with the guava harvest. Here are a few common problems and how you can solve them:
- Fruits fall off prematurely: This can have various causes, such as lack of water, nutrient deficiency, or pest infestation. Make sure your tree receives enough water and nutrients and check it regularly for pests.
- Fruits are wormy: This can be caused by fruit flies. You can set up fruit fly traps to combat the pests.
- Fruits rot on the tree: This can be caused by fungal diseases. Remove the affected fruits and treat the tree with a fungicide.
Additional Tips for a Successful Guava Harvest
Here are a few more tips that can help you achieve a successful guava harvest:
- Observe your tree regularly: The better you know your tree, the better you can recognize its needs and act in a timely manner.
- Be patient: It can take several years for a guava tree to bear fruit for the first time. Be patient and don’t give up!
- Share your harvest: If you have too many guavas, share them with friends, family, or neighbors. This way, everyone can benefit from your harvest.
I hope this guide has helped you to harvest your guavas correctly. Have fun and enjoy!
Conclusion
So, there you have it! Transforming your terrace guava tree harvest into a delectable guava paste is not just a rewarding experience; it’s a testament to the magic of homemade goodness. Forget the store-bought versions laden with preservatives and artificial flavors. This DIY guava paste recipe allows you to control every ingredient, ensuring a pure, authentic taste that bursts with the natural sweetness of your own homegrown guavas.
Why is this a must-try? Because it’s more than just a recipe; it’s a connection to your garden, a celebration of seasonal bounty, and a chance to create something truly special. Imagine the satisfaction of serving a homemade guava paste, knowing that every bite is a product of your own labor and love. The vibrant color, the rich aroma, and the unforgettable flavor will undoubtedly impress your family and friends.
But the beauty of this recipe lies not only in its simplicity but also in its versatility. Feel free to experiment with different variations to personalize your guava paste. For a touch of warmth, add a pinch of ground cinnamon or nutmeg during the cooking process. If you prefer a slightly tangy flavor, incorporate a squeeze of fresh lime juice towards the end. For a spicy kick, consider adding a finely chopped chili pepper. You can also adjust the amount of sugar to suit your taste preferences, creating a guava paste that is perfectly tailored to your palate.
Consider adding other fruits to the mix. A combination of guava and pineapple can create a tropical explosion of flavor. Or, try adding a few slices of ginger for a zesty and aromatic twist. The possibilities are endless!
Beyond enjoying it on its own, this homemade guava paste can be used in a myriad of ways. Spread it on toast or crackers for a quick and satisfying snack. Use it as a filling for pastries, empanadas, or cakes. Pair it with cheese for a sophisticated appetizer. Or, simply enjoy it as a sweet treat straight from the jar.
We wholeheartedly encourage you to embark on this culinary adventure and experience the joy of making your own guava paste. It’s a simple yet profound way to appreciate the fruits of your labor and create something truly extraordinary. Don’t be intimidated by the process; it’s far easier than you might think. With a little patience and a few simple ingredients, you’ll be rewarded with a delicious and unforgettable treat.
So, gather your guavas, put on your apron, and get ready to transform your terrace guava tree harvest into a culinary masterpiece. We’re confident that you’ll love the results. And most importantly, we want to hear about your experience! Share your photos, tips, and variations with us in the comments below. Let’s create a community of guava paste enthusiasts and inspire others to embrace the magic of homemade goodness. Happy cooking!
Frequently Asked Questions (FAQ)
1. What kind of guavas are best for making guava paste?
The best guavas for making guava paste are those that are ripe and fragrant. Pink guavas are generally preferred because they yield a paste with a beautiful color and a slightly sweeter flavor. However, white guavas can also be used, although the resulting paste may be less vibrant in color. Make sure to use guavas that are free from blemishes and bruises for the best results. The riper the guava, the sweeter and more flavorful your paste will be.
2. How do I know when the guava paste is done cooking?
Determining the doneness of guava paste is crucial for achieving the right consistency. The paste is ready when it has thickened considerably and pulls away from the sides of the pot as you stir it. A good test is to place a small spoonful of the paste on a cold plate. If it sets quickly and forms a soft, pliable gel, it’s ready. Be careful not to overcook the paste, as it can become too hard and brittle. Remember that the paste will continue to thicken as it cools.
3. Can I use a food processor or blender to puree the guavas?
Yes, you can definitely use a food processor or blender to puree the guavas. This will significantly reduce the cooking time and ensure a smoother final product. However, be sure to strain the puree through a fine-mesh sieve to remove any seeds or fibrous bits. This step is essential for achieving a smooth and creamy guava paste. If you don’t have a sieve, you can use a cheesecloth-lined colander.
4. How long does homemade guava paste last?
Homemade guava paste, when stored properly, can last for several weeks or even months. To ensure its longevity, store the paste in an airtight container in the refrigerator. You can also sterilize jars and process the guava paste in a water bath canner for longer shelf life. This method will allow you to store the paste at room temperature for up to a year. Always check for any signs of spoilage, such as mold or an off odor, before consuming.
5. Can I reduce the amount of sugar in the recipe?
Yes, you can adjust the amount of sugar in the recipe to suit your taste preferences. However, keep in mind that sugar acts as a preservative and helps to thicken the paste. Reducing the sugar too much may result in a less firm paste and a shorter shelf life. If you want to reduce the sugar, consider adding a natural sweetener like honey or maple syrup. You can also use a sugar substitute, but be aware that this may affect the texture and flavor of the paste.
6. What can I do if my guava paste is too runny?
If your guava paste is too runny, it simply means that it hasn’t cooked long enough. Return the paste to the pot and continue cooking over low heat, stirring constantly, until it thickens to the desired consistency. Be patient, as it may take some time for the paste to thicken. You can also add a small amount of pectin to help it set.
7. Can I add other fruits or spices to the guava paste?
Absolutely! One of the best things about making your own guava paste is the ability to customize it to your liking. Feel free to experiment with different fruits and spices to create unique flavor combinations. Some popular additions include cinnamon, nutmeg, cloves, ginger, lime juice, pineapple, and chili peppers. Just be sure to adjust the cooking time and sugar levels accordingly.
8. What are some creative ways to use guava paste?
Guava paste is incredibly versatile and can be used in a variety of ways. Here are a few ideas:
* Spread it on toast, crackers, or sandwiches.
* Use it as a filling for pastries, empanadas, or cakes.
* Pair it with cheese for a sophisticated appetizer.
* Serve it with grilled meats or poultry.
* Use it as a glaze for ham or pork.
* Add it to smoothies or milkshakes.
* Enjoy it as a sweet treat straight from the jar.
9. My guava tree produces a lot of fruit. Can I freeze the guava puree for later use?
Yes, freezing guava puree is an excellent way to preserve your harvest and enjoy guava paste year-round. Simply puree the guavas as directed in the recipe, strain the puree to remove the seeds, and then pour it into freezer-safe containers or bags. Be sure to leave some headspace in the containers to allow for expansion during freezing. The guava puree can be stored in the freezer for up to 6 months. When you’re ready to make guava paste, simply thaw the puree in the refrigerator overnight and proceed with the recipe.
10. Is making guava paste a good way to utilize my terrace guava tree harvest?
Absolutely! Making guava paste is a fantastic way to utilize your terrace guava tree harvest. It’s a delicious and versatile way to preserve the flavor of your guavas and enjoy them long after the harvest season is over. Plus, it’s a rewarding experience that allows you to connect with your garden and create something truly special. By making your own guava paste, you’re not only reducing food waste but also creating a healthy and delicious treat for yourself and your loved ones.
Leave a Comment