
Sweet Honeydew Melon Growing – ever dreamt of biting into a perfectly ripe, juicy honeydew melon that you grew yourself? I know I have! There’s something incredibly satisfying about nurturing a plant from seed to fruit, especially when that fruit is as delicious and refreshing as a honeydew. For centuries, melons have been cultivated across the globe, from the sun-drenched fields of ancient Egypt to the vibrant gardens of Asia, symbolizing abundance and sweetness.
But let’s be honest, the thought of growing your own honeydew can seem a little daunting. Maybe you’ve tried before and ended up with small, bland melons, or perhaps you’re just not sure where to start. That’s where this DIY guide comes in! I’m going to share some simple yet effective tricks and hacks that will help you achieve sweet honeydew melon growing success, even if you’re a complete beginner.
Why do you need these tricks? Because store-bought melons often lack the intense flavor and sweetness of homegrown varieties. Plus, you’ll know exactly what went into growing your melon, ensuring it’s free from harmful pesticides and chemicals. Imagine the pride you’ll feel serving up slices of your own homegrown honeydew to family and friends! So, let’s dive in and unlock the secrets to cultivating the sweetest, most flavorful honeydew melons right in your own backyard. Get ready to impress your neighbors (and your taste buds!).
Growing Sweet Honeydew Melons Yourself: Your DIY Guide for a Rich Harvest
I love honeydew melons! Their sweet, juicy taste is simply unbeatable, especially on hot summer days. And what could be better than harvesting a honeydew melon from your own garden? Sounds tempting, right? Don’t worry, it’s not as difficult as you might think. With this DIY guide, I’ll show you how to grow your own sweet honeydew melons – step by step.
What You Need: Preparation is Everything
Before we get started, let’s make sure you have everything you need. Here is a list of the most important things:
- Honeydew melon seeds: Choose a variety that is suitable for your climate. There are many different types, from small, round melons to large, oblong ones. It’s best to get advice from a specialist retailer.
- Seedling pots or trays: For starting the seeds indoors.
- Seed starting mix: Special soil for growing seedlings, which contains fewer nutrients than regular potting soil.
- Potting soil: For transplanting the seedlings into larger pots or directly into the garden bed.
- Compost or well-rotted manure: To enrich the soil in the bed.
- Garden fleece or mulch: To keep the soil warm and suppress weeds.
- Watering can or garden hose: For watering the plants.
- Plant stakes or trellis: To support the plants, especially if you have limited space.
- Garden shears: For pruning the plants.
- Patience and love: The most important things of all!
Phase 1: Starting Indoors – The Foundation for a Successful Harvest
Honeydew melons need a lot of warmth to grow well. That’s why in our latitudes, it’s advisable to start them indoors. This gives them a head start and increases the chances of a rich harvest.
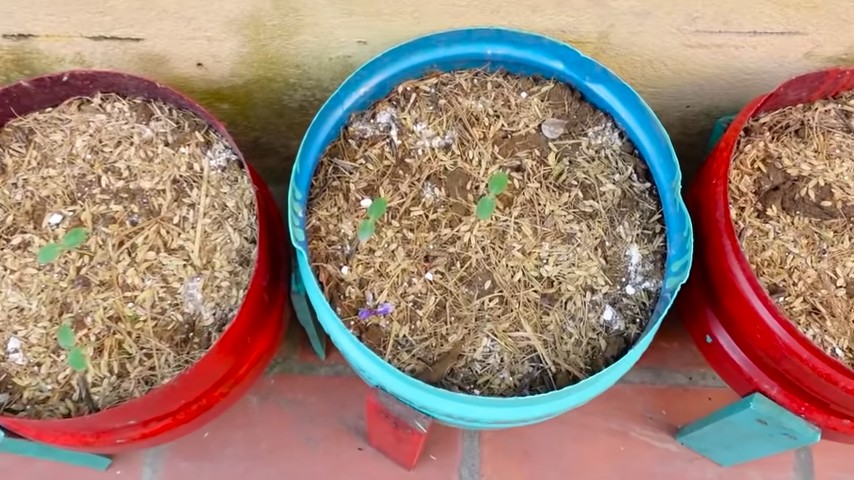
- Sow seeds: Fill the seedling pots with seed starting mix. Place 2-3 seeds in each pot, about 1-2 cm deep. Cover the seeds with soil and water them gently.
- Keep warm and moist: Place the seedling pots in a warm, bright spot. The ideal germination temperature is 20-25°C. You can cover the pots with a transparent film or a lid to increase humidity. Make sure the soil is always slightly moist, but not wet.
- Wait for germination: The seeds should germinate after about 7-14 days. As soon as the first seedlings appear, remove the film or lid.
- Thin out: When the seedlings are about 5 cm tall, you can thin them out. This means you keep only the strongest seedling in each pot. You can gently prick out or cut off the others.
- Continue care: Water the seedlings regularly and fertilize them once a week with a mild liquid fertilizer. Make sure they get enough light.
Phase 2: Planting Out – Into the Bed!
As soon as the temperatures rise and there is no more risk of frost (usually from mid-May), the seedlings can be planted out into the bed.
- Prepare the bed: Choose a sunny, warm location for your honeydew melons. The soil should be loose, well-drained, and rich in nutrients. Dig over the bed and work in compost or well-rotted manure.
- Dig planting holes: Dig planting holes that are slightly larger than the seedling pots. The distance between the plants should be about 80-100 cm.
- Insert seedlings: Carefully remove the seedlings from their pots and place them in the planting holes. Be careful not to damage the root ball. Fill the planting holes with soil and press it down lightly.
- Water in: Water the plants thoroughly.
- Protective measures: Cover the soil around the plants with garden fleece or mulch. This keeps the soil warm, suppresses weeds, and protects the fruits from direct contact with the ground.
Phase 3: Care – Patience is Rewarded
Caring for honeydew melons is relatively simple, but important for a good harvest.
- Watering: Honeydew melons need a lot of water, especially during fruit formation. Water the plants regularly, but avoid waterlogging. It’s best to water in the morning so the leaves can dry during the day.
- Fertilizing: Fertilize the plants every 2-3 weeks with a potassium-rich fertilizer. Potassium promotes fruit formation and the taste of the melons.
- Pruning: Honeydew melons can grow vigorously. To encourage fruit formation, you can prune the plants. Remove side shoots that do not have flowers or fruits. Do not let more than 3-4 fruits ripen per plant.
- Support: If you have limited space or the fruits become very heavy, you can support the plants with stakes or a trellis.
- Protection from pests and diseases: Honeydew melons can be affected by various pests and diseases, such as aphids, powdery mildew, or cucumber mosaic virus. Check the plants regularly and combat pests and diseases early.
Phase 4: The Harvest – The Reward for Your Efforts
The harvest time for honeydew melons depends on the variety and weather conditions. As a rule, the melons are ripe about 3-4 months after sowing.
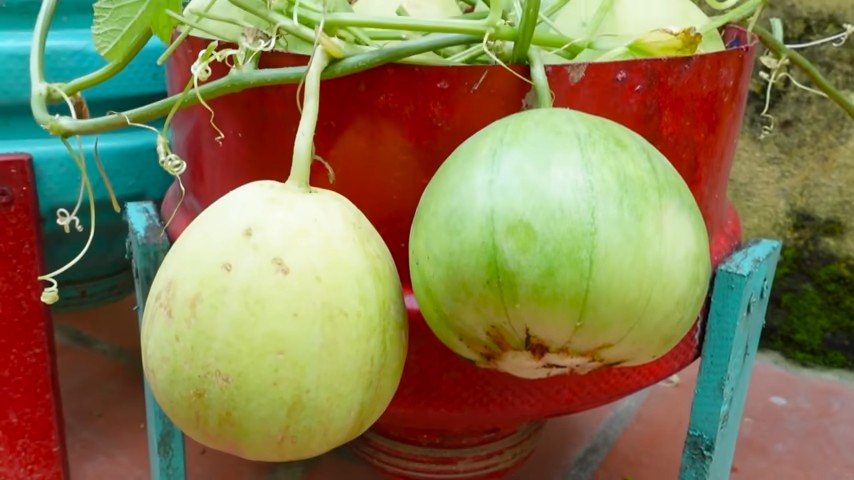
- Recognizing ripeness: There are several signs that indicate whether a honeydew melon is ripe:
- The rind changes color from green to yellowish.
- The rind gives slightly under gentle pressure.
- The stem end dries out and detaches easily from the fruit.
- The melon has an aromatic fragrance.
- Harvesting: Cut the ripe melon from the stem with a sharp knife.
- Enjoy: Enjoy your homegrown honeydew melon! It is a treat on its own, but also a highlight in salads, smoothies, or desserts.
Additional Tips for a Successful Honeydew Melon Harvest
Don’t give up: Sometimes it doesn’t work out on the first try. Let
Choose the right variety: Find out which varieties are suitable for your climate and location. There are early-ripening and late-ripening varieties, as well as varieties that are particularly resistant to diseases.
Ensure good drainage: Honeydew melons do not tolerate waterlogging. Ensure good drainage in the bed, for example, by mixing sand or gravel into the soil.
Protect the plants from wind: Honeydew melons are sensitive to wind. Choose a sheltered location or set up a windbreak.
Encourage pollination: Honeydew melons depend on pollination by insects. Encourage pollination by planting flowering plants nearby that attract insects.
Regular checks: Check the plants regularly for pests and diseases. The sooner you identify problems, the better you can combat them.
Conclusion
So, there you have it! Mastering the art of growing sweet honeydew melon at home is not just a possibility; it’s an achievable reality with a little patience, the right techniques, and a dash of dedication. We’ve explored the key elements, from selecting the perfect seeds and preparing the soil to nurturing the vines and protecting your precious melons from pests and diseases.
But why should you embark on this journey of cultivating your own honeydew? The answer is simple: the unparalleled taste of a homegrown melon, bursting with sweetness and freshness that you simply cannot replicate with store-bought varieties. Imagine biting into a juicy, perfectly ripe honeydew, knowing that you nurtured it from seed to fruit. The satisfaction is immense, and the flavor is simply divine.
This DIY trick, focusing on consistent watering, strategic pruning, and providing ample sunlight, is a game-changer. It’s the secret sauce that transforms ordinary honeydew plants into prolific producers of exceptionally sweet and flavorful melons. Don’t underestimate the power of these seemingly small adjustments; they can make all the difference between a mediocre harvest and a bountiful one.
Consider these variations to personalize your honeydew growing experience:
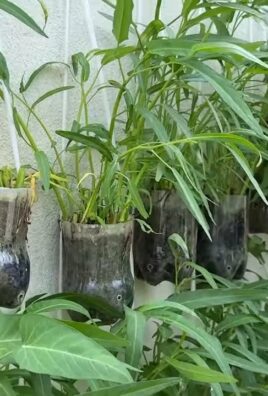
* Vertical Gardening: If you’re short on space, train your honeydew vines to grow vertically on a trellis or fence. This not only saves space but also improves air circulation, reducing the risk of fungal diseases.
* Companion Planting: Plant basil, marigolds, or nasturtiums near your honeydew to deter pests and attract beneficial insects. These companion plants can create a healthier and more vibrant garden ecosystem.
* Grafting: For advanced gardeners, grafting honeydew onto a more vigorous rootstock can improve disease resistance and increase yields. This technique requires some skill but can be well worth the effort.
* Different Varieties: Experiment with different honeydew varieties to find your favorite. Some varieties are sweeter, some are more disease-resistant, and some are better suited to specific climates.
We strongly encourage you to give this DIY trick a try. It’s a rewarding experience that will connect you with nature and provide you with delicious, homegrown honeydew melons. Don’t be afraid to experiment, adapt the techniques to your specific environment, and learn from your experiences.
And most importantly, we want to hear about your journey! Share your successes, challenges, and tips in the comments below. Let’s create a community of honeydew enthusiasts who can learn from each other and celebrate the joys of homegrown goodness. What specific techniques did you find most effective? Did you encounter any unexpected challenges? What are your favorite ways to enjoy your homegrown honeydew? Your insights will be invaluable to other gardeners who are just starting out.
Growing your own sweet honeydew melon is more than just a gardening project; it’s an investment in your health, your happiness, and your connection to the natural world. So, grab your seeds, prepare your soil, and get ready to experience the sweet taste of success! Happy gardening!
Frequently Asked Questions (FAQ)
What is the best time to plant honeydew melon seeds?
The ideal time to plant honeydew melon seeds is after the last frost when the soil temperature has warmed to at least 65°F (18°C). In most regions, this is typically in late spring or early summer. Starting seeds indoors 3-4 weeks before the last frost can give you a head start, but be sure to harden off the seedlings before transplanting them outdoors.
How much sunlight do honeydew melons need?
Honeydew melons require at least 6-8 hours of direct sunlight per day to thrive. Choose a planting location that receives full sun throughout the day. Insufficient sunlight can result in smaller, less sweet melons.
What type of soil is best for growing honeydew melons?
Honeydew melons prefer well-drained, fertile soil with a pH between 6.0 and 6.8. Amend the soil with compost or other organic matter to improve drainage and fertility. Avoid heavy clay soils, as they can retain too much moisture and lead to root rot.
How often should I water my honeydew melon plants?
Consistent watering is crucial for growing sweet honeydew melons. Water deeply and regularly, especially during hot, dry weather. Aim to keep the soil consistently moist but not waterlogged. Reduce watering as the melons ripen to concentrate the sugars and enhance their sweetness. Drip irrigation or soaker hoses are excellent options for delivering water directly to the roots.
How do I know when my honeydew melon is ripe?
Determining ripeness can be tricky, but here are a few indicators:
* Color Change: The rind of the melon will change from a pale green to a creamy yellow or ivory color.
* Aroma: A ripe honeydew will have a sweet, slightly musky aroma near the blossom end.
* Stem Slip: The stem should easily slip from the vine with gentle pressure.
* Sound: A ripe honeydew will have a dull, hollow sound when tapped.
What are some common pests and diseases that affect honeydew melons?
Common pests include aphids, squash bugs, cucumber beetles, and vine borers. Common diseases include powdery mildew, fusarium wilt, and anthracnose. Implement preventative measures such as crop rotation, companion planting, and proper sanitation to minimize pest and disease problems. Use organic pest control methods whenever possible.
How can I prevent powdery mildew on my honeydew melon plants?
Powdery mildew is a common fungal disease that can affect honeydew melons. To prevent it:
* Provide Good Air Circulation: Space plants adequately to allow for good air circulation.
* Water Properly: Avoid overhead watering, which can create a humid environment that favors powdery mildew.
* Use Resistant Varieties: Choose honeydew varieties that are resistant to powdery mildew.
* Apply Fungicides: If powdery mildew appears, apply an organic fungicide such as neem oil or copper fungicide.
Should I prune my honeydew melon vines?
Yes, pruning can help improve air circulation, promote fruit development, and increase the sweetness of your honeydew melons. Prune away any non-productive vines, suckers, and overcrowded foliage. You can also pinch off the growing tips of the vines to encourage the plant to focus its energy on fruit production.
How can I increase the sweetness of my honeydew melons?
Several factors contribute to the sweetness of honeydew melons:
* Sunlight: Ensure your plants receive at least 6-8 hours of direct sunlight per day.
* Watering: Reduce watering as the melons ripen to concentrate the sugars.
* Fertilizer: Use a fertilizer that is high in potassium, which promotes fruit development and sweetness.
* Pruning: Prune away non-productive vines to direct the plant’s energy to the developing melons.
Can I grow honeydew melons in containers?
Yes, you can grow honeydew melons in containers, but you’ll need a large container (at least 20 gallons) with good drainage. Choose a dwarf or bush variety of honeydew that is better suited to container growing. Provide a trellis or support for the vines to climb. Water and fertilize regularly, as container-grown plants tend to dry out and deplete nutrients more quickly.
What are some good companion plants for honeydew melons?
Good companion plants for honeydew melons include:
* Basil: Repels aphids and other pests.
* Marigolds: Repel nematodes and other soil pests.
* Nasturtiums: Attract beneficial insects and deter aphids.
* Radishes: Deter cucumber beetles.
* Beans: Fix nitrogen in the soil, which benefits honeydew melons.
How long does it take for honeydew melons to mature?
Honeydew melons typically take 75-100 days to mature from seed. The exact time will depend on the variety, climate, and growing conditions.
What is the best way to store honeydew melons?
Store unripe honeydew melons at room temperature until they ripen. Once ripe, store them in the refrigerator for up to a week. Cut honeydew melons should be stored in an airtight container in the refrigerator.
Can I save seeds from my honeydew melons?
Yes, you can save seeds from your honeydew melons, but be aware that the resulting plants may not be true to type, especially if the melons were cross-pollinated with other melon varieties. To save seeds, scoop out the seeds from a ripe melon, rinse them thoroughly, and dry them completely before storing them in an airtight container in a cool, dry place.


Leave a Comment