
Surprise bean plant harvest! Imagine this: you stroll into your garden, expecting the usual green foliage, and BAM! You’re greeted by a bounty of plump, vibrant beans, practically begging to be picked. That’s the magic of a successful bean harvest, and I’m here to tell you it doesn’t have to be left to chance.
For centuries, beans have been a staple crop across cultures, providing essential nutrients and playing a vital role in sustainable agriculture. From the ancient Incas who revered the common bean to the modern-day gardener seeking fresh, homegrown goodness, the allure of the bean remains strong. But let’s be honest, sometimes getting that surprise bean plant harvest feels more like luck than skill.
That’s where these DIY tricks and hacks come in. We all want a thriving garden, but not everyone has the time or resources for complicated gardening techniques. I’m going to share some simple, effective methods to maximize your bean yield, even if you’re a beginner. These aren’t just random tips; they’re tried-and-true strategies that will help you avoid common pitfalls and ensure a plentiful harvest. So, get ready to ditch the guesswork and embrace the joy of a truly rewarding bean-growing experience!
Growing a Surprise Bean Plant Harvest Indoors: A Fun DIY Project!
Hey there, fellow plant enthusiasts! Ever wanted to experience the magic of growing your own food, but maybe you’re short on space or the weather isn’t cooperating? Well, I’ve got just the project for you: growing a surprise bean plant harvest indoors! It’s a super rewarding and surprisingly easy DIY project that’ll bring a little bit of the garden right into your home. Plus, the “surprise” element makes it extra exciting!
Here’s what we’ll cover:
* **Choosing the Right Bean Variety:** Not all beans are created equal when it comes to indoor growing.
* **Gathering Your Supplies:** Let’s make sure you have everything you need before we get started.
* **Planting Your Bean Seeds:** The first step towards a bountiful harvest!
* **Providing the Right Environment:** Light, water, and temperature are key.
* **Supporting Your Growing Bean Plant:** Giving your plant the structure it needs to thrive.
* **Harvesting Your Beans:** The moment we’ve all been waiting for!
* **Troubleshooting Common Issues:** Addressing any problems that might pop up along the way.
Let’s dive in!
Choosing the Right Bean Variety
Okay, so the first thing we need to consider is what kind of bean we want to grow. Some beans are better suited for indoor growing than others. We’re looking for bush beans, not pole beans. Pole beans are climbers and need a lot of vertical space, which isn’t ideal for indoors. Bush beans, on the other hand, stay relatively compact and are perfect for containers.
Here are a few bush bean varieties that I’ve had success with:
* **Bush Blue Lake 274:** These are classic green beans, reliable and productive. They’re a great choice for beginners.
* **Contender:** As the name suggests, these beans are tough and resilient. They produce early and often.
* **Provider:** Another excellent choice for beginners, Provider beans are known for their disease resistance and high yields.
* **Royal Burgundy:** If you want something a little different, try Royal Burgundy beans. They have beautiful purple pods that turn green when cooked.
* **Golden Wax:** These beans have a lovely yellow color and a mild, buttery flavor.
You can find these seeds at most garden centers or online. Make sure to choose seeds that are specifically labeled as “bush beans.”
Gathering Your Supplies
Alright, now that we’ve chosen our bean variety, let’s gather our supplies. Here’s what you’ll need:
* **Bean Seeds:** Of course! Choose your favorite bush bean variety.
* **A Large Container:** You’ll need a container that’s at least 12 inches deep and 12 inches wide. A larger container is always better, as it will give your bean plants more room to grow. Make sure the container has drainage holes!
* **Potting Mix:** Use a high-quality potting mix that’s well-draining. Avoid using garden soil, as it can become compacted and doesn’t drain well in containers.
* **Watering Can or Hose:** For watering your plants.
* **Grow Lights (Optional but Recommended):** If you don’t have a sunny window, you’ll need grow lights to provide your bean plants with enough light.
* **Fertilizer (Optional):** A balanced liquid fertilizer can help boost growth and yields.
* **Small Stakes or Trellis (Optional):** While bush beans don’t climb like pole beans, they can sometimes get a little floppy, especially when they’re loaded with beans. Stakes or a small trellis can help support them.
Planting Your Bean Seeds
Okay, let’s get our hands dirty! Here’s how to plant your bean seeds:
1. **Fill Your Container with Potting Mix:** Fill your container with potting mix, leaving about an inch of space at the top.
2. **Water the Potting Mix:** Water the potting mix thoroughly until it’s evenly moist.
3. **Sow the Seeds:** Sow the bean seeds about 1 inch deep and 2-3 inches apart. You can plant several seeds in the same container, but don’t overcrowd them. I usually plant 4-5 seeds in a 12-inch container.
4. **Cover the Seeds:** Gently cover the seeds with potting mix.
5. **Water Again:** Water the potting mix gently to settle the soil.
6. **Label Your Container:** Label your container with the date and the type of bean you planted. This will help you keep track of your progress.
Providing the Right Environment
Now that our seeds are planted, it’s crucial to provide the right environment for them to germinate and grow. Here’s what your bean plants need:
* **Light:** Bean plants need at least 6-8 hours of sunlight per day. If you don’t have a sunny window, you’ll need to use grow lights. Place the grow lights about 6-12 inches above the plants.
* **Water:** Keep the potting mix consistently moist, but not soggy. Water when the top inch of soil feels dry to the touch. Avoid overwatering, as this can lead to root rot.
* **Temperature:** Bean plants prefer temperatures between 65°F and 80°F (18°C and 27°C). Avoid placing them near drafts or sources of extreme heat or cold.
* **Humidity:** Bean plants prefer moderate humidity. If your home is very dry, you can increase the humidity by placing a tray of water near the plants or using a humidifier.
Supporting Your Growing Bean Plant
As your bean plants grow, they may need some support, especially when they start producing beans. Here’s how to support your plants:
1. **Insert Stakes or Trellis:** When your plants are about 6 inches tall, insert small stakes or a small trellis into the container near the plants.
2. **Tie the Plants to the Stakes or Trellis:** Gently tie the plants to the stakes or trellis using soft twine or plant ties. Be careful not to tie them too tightly, as this can damage the stems.
3. **Adjust as Needed:** As the plants grow, continue to tie them to the stakes or trellis as needed.
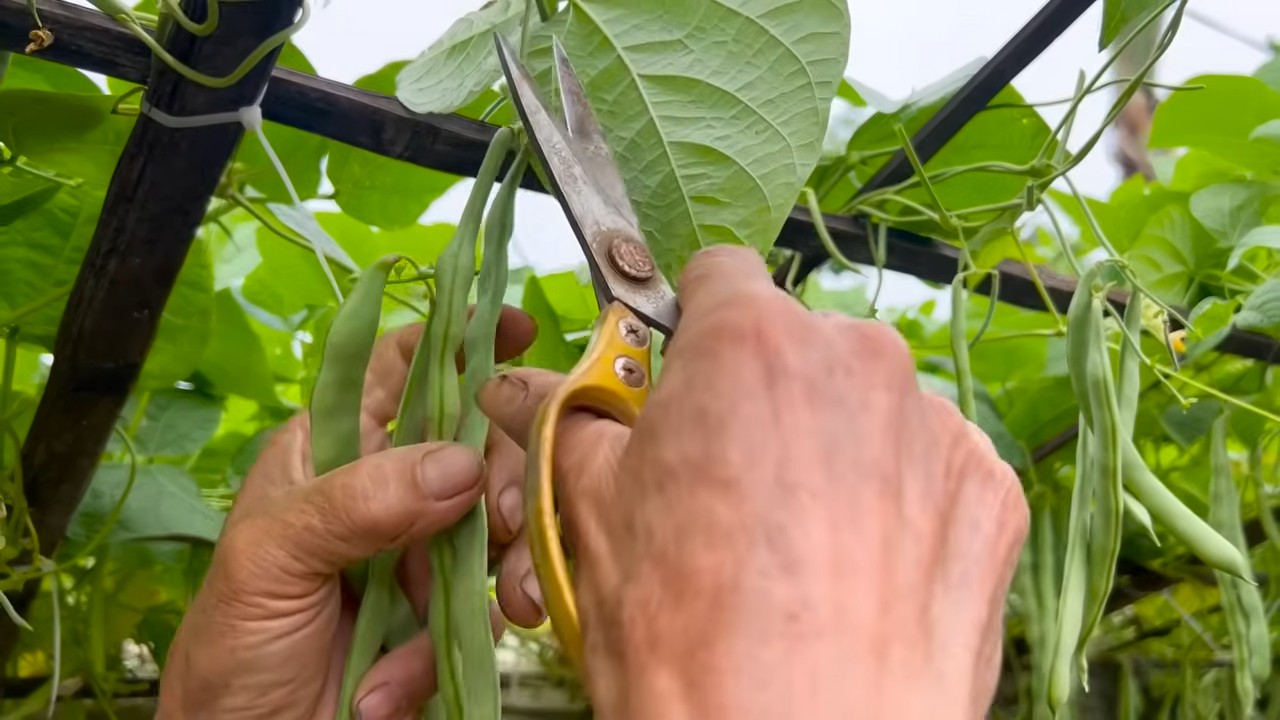
Harvesting Your Beans
This is the most exciting part! Here’s how to harvest your beans:
1. **Check for Readiness:** Bean pods are typically ready to harvest about 50-60 days after planting. The pods should be firm, plump, and snap easily when bent.
2. **Harvest Regularly:** Harvest your beans regularly to encourage continued production.
3. **Pick the Beans:** Gently pick the beans from the plant, being careful not to damage the stems or leaves.
4. **Enjoy Your Harvest:** Enjoy your fresh, homegrown beans! You can eat them raw, steamed, sautéed, or added to your favorite recipes.
Troubleshooting Common Issues
Even with the best care, you might encounter some problems along the way. Here are some common issues and how to address them:
* **Yellowing Leaves:** Yellowing leaves can be caused by overwatering, underwatering, nutrient deficiencies, or pests. Check the soil moisture and adjust your watering accordingly. If the soil is dry, water thoroughly. If the soil is soggy, allow it to dry out before watering again. You can also try fertilizing your plants with a balanced liquid fertilizer.
* **Leggy Growth:** Leggy growth (long, spindly stems) is usually caused by insufficient light. Make sure your plants are getting enough sunlight or grow light.
* **Pests:** Common pests that can affect bean plants include aphids, spider mites, and whiteflies. You can control these pests by spraying your plants with insecticidal soap or neem oil.
* **Disease:** Bean plants can be susceptible to diseases such as powdery mildew and bean rust. To prevent disease, make sure your plants have good air circulation and avoid overwatering. If you notice signs of disease, remove the affected leaves and spray your plants with a fungicide.
* **No Beans:** If your bean plants are growing well but not producing beans, it could be due to a lack of pollination. While bean plants are self-pollinating, sometimes they need a little help. You can try hand-pollinating your plants by gently shaking the flowers or using a small paintbrush to transfer pollen from one flower to another.
And that’s it! With a little bit of care and attention, you can enjoy a bountiful harvest of fresh, homegrown beans right in your own home. Happy gardening!

Conclusion
So, there you have it! Transforming a simple bean into a thriving plant, ready to surprise you with a bountiful harvest, is not only incredibly rewarding but also surprisingly easy. This DIY bean plant project is a must-try for several reasons. First, it’s an amazing educational experience, especially for children, allowing them to witness the miracle of life firsthand. Second, it’s a sustainable way to grow your own food, reducing your reliance on store-bought produce and minimizing your carbon footprint. Third, and perhaps most importantly, it’s just plain fun! The anticipation of watching your bean sprout, grow, and eventually produce a harvest is a unique and fulfilling experience.
But the fun doesn’t stop there! Feel free to experiment with different types of beans. While common varieties like kidney beans and pinto beans work well, you could also try growing runner beans for their beautiful flowers and long pods, or even explore heirloom varieties for a truly unique harvest. Consider using different types of growing mediums as well. While soil is the most common choice, you can also try hydroponics for a soilless growing experience. Just remember to adjust your watering and nutrient schedule accordingly.
Another variation to consider is the support system you provide for your bean plant. As your plant grows, it will need something to climb on. You can use a simple trellis made from bamboo stakes, a tomato cage, or even a repurposed ladder. Get creative and find a support system that fits your space and aesthetic.
Don’t be afraid to get your hands dirty and experiment! The beauty of this DIY project is that it’s adaptable to your specific needs and preferences. Whether you have a sprawling garden or a small balcony, you can successfully grow your own bean plant.
We wholeheartedly encourage you to try this DIY bean plant project. It’s a simple, affordable, and rewarding way to connect with nature and enjoy the fruits (or rather, beans!) of your labor. And once you’ve experienced the joy of harvesting your own homegrown beans, we’re confident you’ll be hooked.
We’d love to hear about your experiences! Share your photos, tips, and tricks in the comments below. Let’s create a community of bean-growing enthusiasts and inspire others to embark on this exciting journey. What kind of beans did you plant? What challenges did you face, and how did you overcome them? Your insights could be invaluable to other aspiring bean growers. So, go ahead, give it a try, and let us know how it goes! Happy growing!
Frequently Asked Questions (FAQ)
What kind of beans are best for starting a bean plant?
The best beans for starting a bean plant are dried beans that are still viable. Common varieties like kidney beans, pinto beans, black beans, and even lima beans often work well. Avoid using canned beans, as they have been processed and are unlikely to germinate. Look for beans that are plump and unbroken, as these are more likely to be healthy and sprout successfully. You can often find suitable beans in the bulk section of your local grocery store or at a garden center. Experimenting with different varieties can be fun, but starting with a common type is generally recommended for beginners.
How long does it take for a bean plant to sprout?
The time it takes for a bean plant to sprout can vary depending on several factors, including the type of bean, the temperature, and the moisture level. Generally, you can expect to see sprouts within 5 to 10 days. Soaking the beans in water for 12-24 hours before planting can help speed up the germination process. Make sure the soil is consistently moist but not waterlogged, and keep the plant in a warm location. If you don’t see any sprouts after two weeks, it’s possible that the beans are not viable or that the conditions are not optimal.
How much sunlight does a bean plant need?
Bean plants need at least 6-8 hours of direct sunlight per day to thrive. Insufficient sunlight can lead to weak, leggy growth and reduced bean production. If you’re growing your bean plant indoors, place it near a sunny window or supplement with artificial grow lights. Rotate the plant regularly to ensure that all sides receive adequate sunlight. If you’re growing your bean plant outdoors, choose a location that receives full sun throughout the day.
How often should I water my bean plant?
Water your bean plant regularly, keeping the soil consistently moist but not waterlogged. The frequency of watering will depend on the weather conditions, the type of soil, and the size of the pot. In general, you should water your bean plant when the top inch of soil feels dry to the touch. Avoid overwatering, as this can lead to root rot. During hot, dry weather, you may need to water your bean plant more frequently.
What kind of soil is best for bean plants?
Bean plants prefer well-draining soil that is rich in organic matter. A good potting mix for bean plants should contain a blend of peat moss, perlite, and vermiculite. You can also amend your soil with compost or other organic matter to improve its fertility and drainage. Avoid using heavy clay soil, as this can become waterlogged and suffocate the roots.
Do bean plants need fertilizer?
Bean plants can benefit from regular fertilization, especially during the growing season. Use a balanced fertilizer that is specifically formulated for vegetables. Follow the instructions on the fertilizer package carefully, and avoid over-fertilizing, as this can damage the plant. You can also use organic fertilizers, such as compost tea or fish emulsion.
How do I support my bean plant as it grows?
As bean plants grow, they will need a support system to climb on. You can use a trellis, a tomato cage, or even a simple stake. Install the support system when you plant the bean, so that the plant can start climbing as soon as it starts to grow. Tie the plant to the support system with soft twine or plant ties.
What are some common pests and diseases that affect bean plants?
Some common pests that affect bean plants include aphids, spider mites, and bean beetles. These pests can damage the leaves and stems of the plant, reducing its yield. You can control these pests with insecticidal soap, neem oil, or by hand-picking them off the plant. Common diseases that affect bean plants include powdery mildew, rust, and bean mosaic virus. These diseases can cause yellowing, spotting, and wilting of the leaves. You can prevent these diseases by providing good air circulation, avoiding overwatering, and using disease-resistant varieties.
When is the best time to harvest my beans?
The best time to harvest your beans will depend on the type of bean you are growing. Green beans are typically harvested when they are young and tender, before the beans inside the pods have fully developed. Dry beans are harvested when the pods are dry and brittle, and the beans inside are fully mature. Check the seed packet or plant tag for specific harvesting instructions.
Can I grow bean plants indoors?
Yes, you can grow bean plants indoors, but it requires providing them with adequate light and support. Choose a sunny location near a window or supplement with grow lights. Use a large pot with well-draining soil and provide a trellis or other support system for the plant to climb on. Water regularly and fertilize as needed. Keep an eye out for pests and diseases, and take action promptly if you notice any problems.

Leave a Comment