
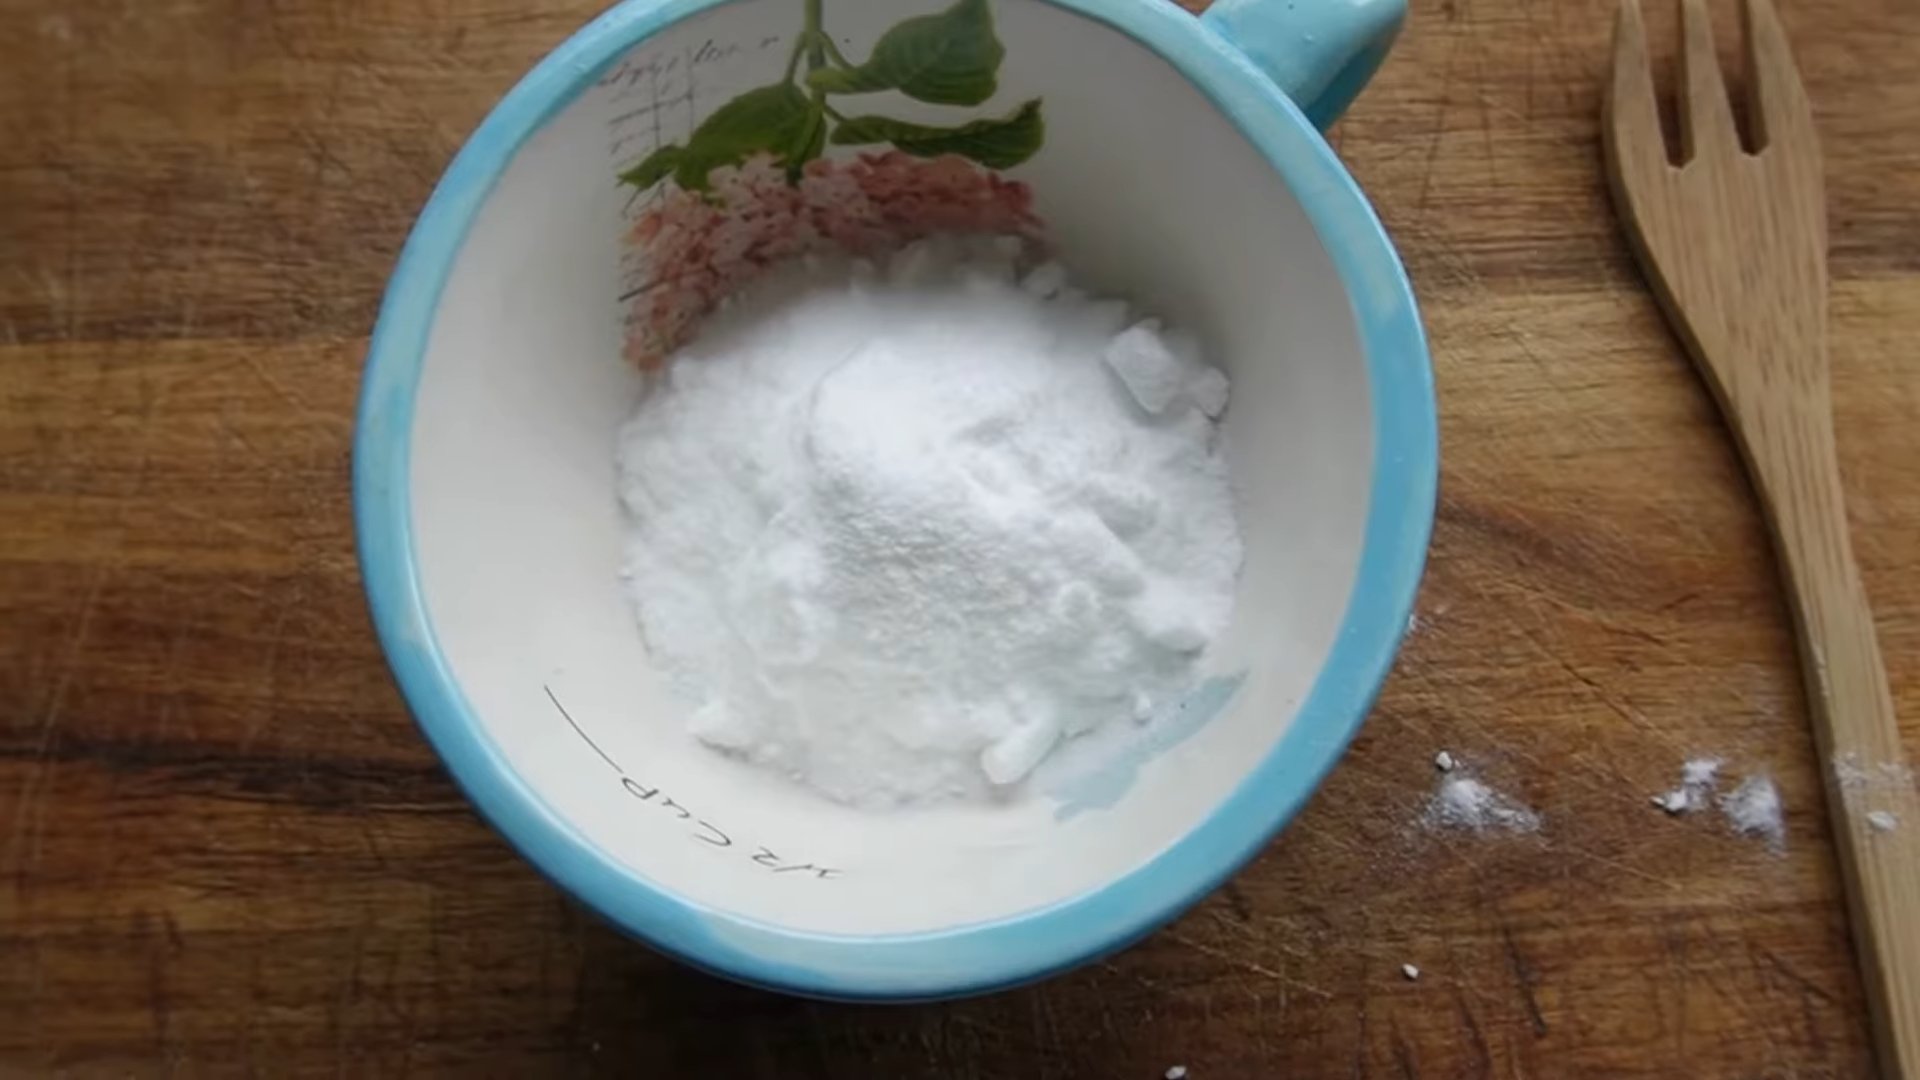
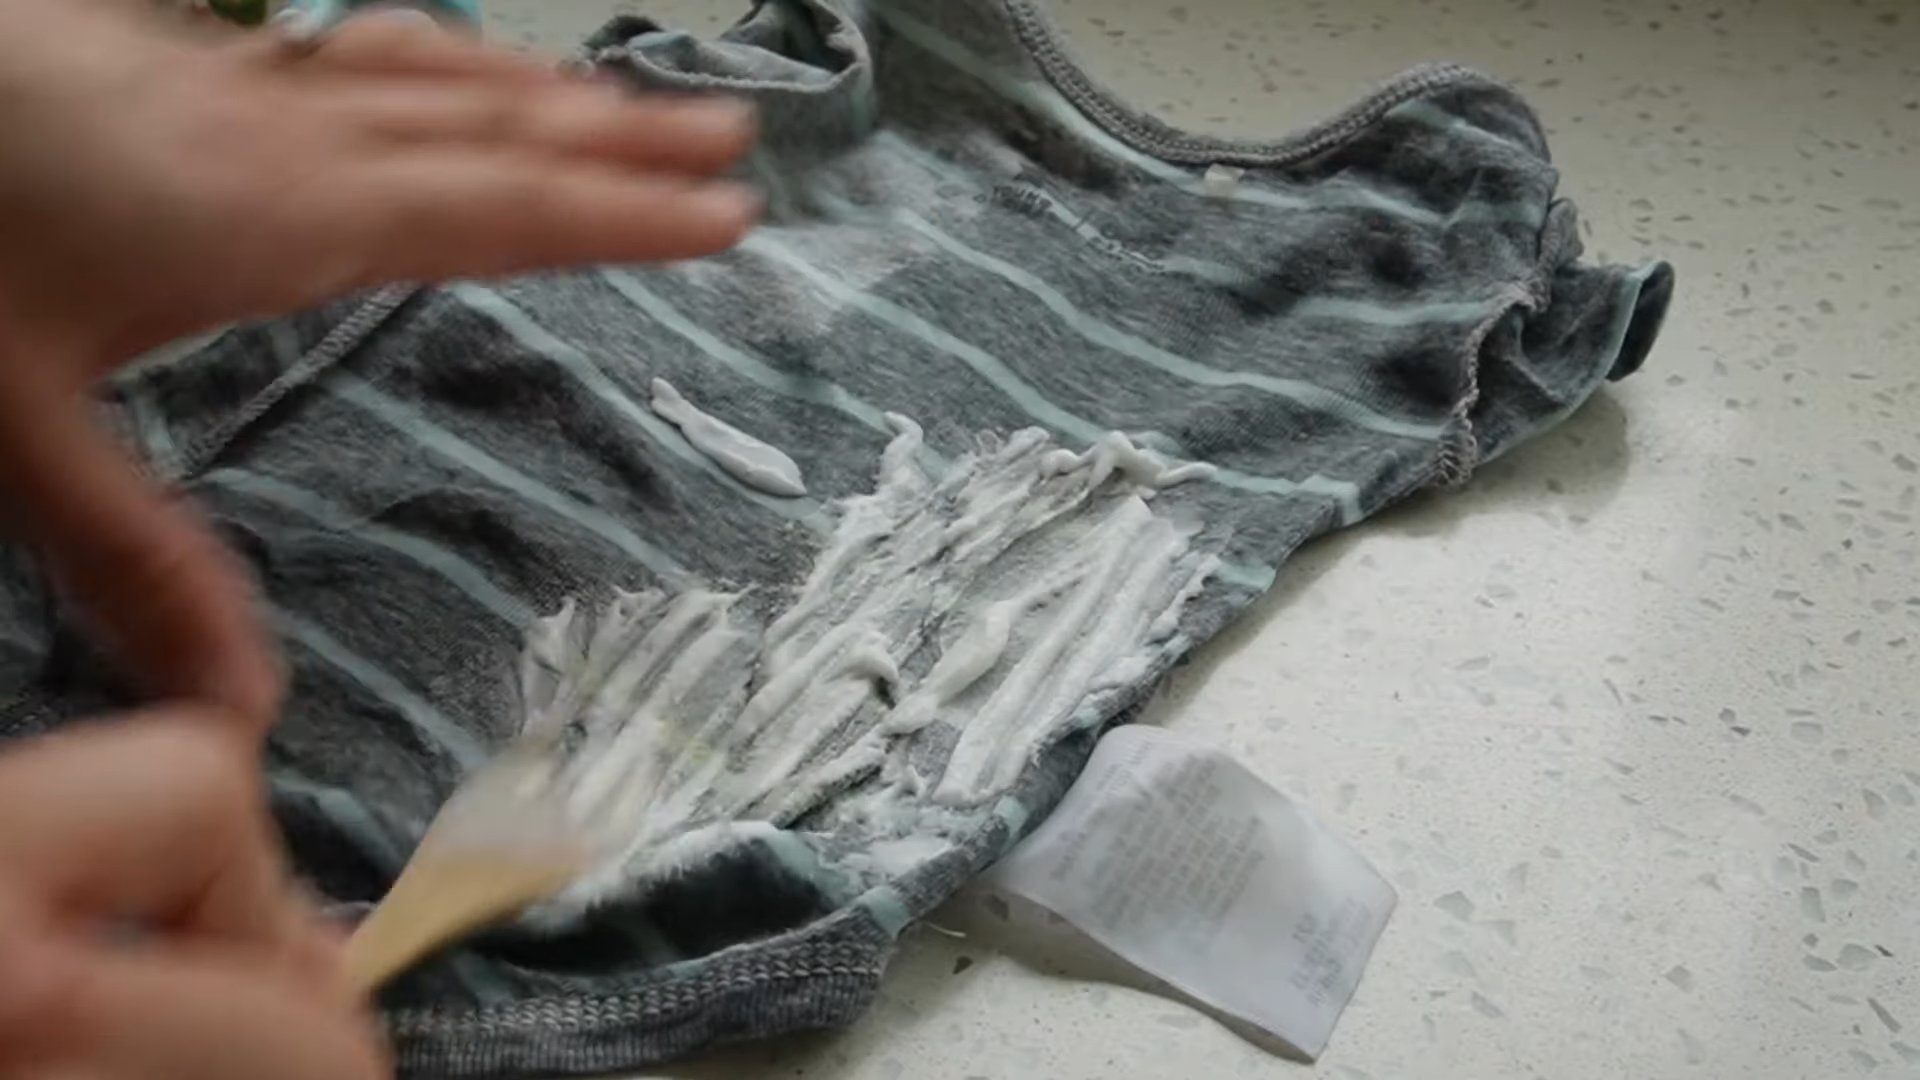
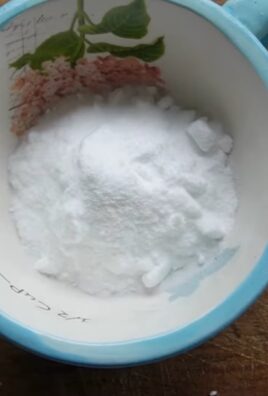
Stain removal easy technique – sounds like magic, right? Well, maybe not magic, but definitely a game-changer when you’re faced with that dreaded coffee spill on your favorite shirt or a muddy paw print on your pristine rug. Let’s be honest, we’ve all been there! I know I have. From accidental wine splashes during dinner parties to mysterious marks left by the kids, stains are an inevitable part of life. But fear not, because this isn’t about accepting defeat and tossing your beloved items in the trash.
Throughout history, people have been devising clever ways to combat stains. From ancient Romans using lye and ashes to modern-day innovations in detergents, the quest for spotless surfaces has been a constant. But what if I told you that you don’t need expensive chemicals or complicated procedures to tackle most common stains?
That’s where this DIY guide comes in! I’m going to share some incredibly effective, easy-to-follow techniques that will empower you to conquer those pesky blemishes using ingredients you probably already have in your pantry. Why spend a fortune on specialized stain removers when you can achieve amazing results with simple, natural solutions? This stain removal easy technique will save you time, money, and a whole lot of frustration. Get ready to say goodbye to stubborn stains and hello to a cleaner, brighter home!
DIY Waterless Tomato Growing: The Self-Watering Bucket System
Hey there, fellow gardening enthusiasts! Are you tired of constantly watering your tomato plants, especially during those scorching summer months? Or maybe you live in an area with water restrictions? Well, I’ve got a fantastic solution for you: waterless tomato growing using a self-watering bucket system! This method is not only incredibly efficient but also helps you grow delicious, juicy tomatoes with minimal effort. Let’s dive in!
What You’ll Need
Before we get started, let’s gather all the necessary materials. This is a crucial step to ensure a smooth and enjoyable DIY experience.
* Two 5-gallon buckets: Make sure they are food-grade plastic. You can often find these at hardware stores or even reuse old ones.
* One 1-gallon bucket or container: This will act as the water reservoir inside the larger bucket.
* Drill with various sized drill bits: We’ll need these for creating drainage and aeration holes.
* PVC pipe (approximately 12 inches long and 1-2 inches in diameter): This will be our watering tube.
* Landscape fabric or burlap: This will prevent soil from clogging the water reservoir.
* Potting mix: A high-quality potting mix is essential for healthy tomato growth.
* Tomato seedlings: Choose your favorite variety!
* Slow-release fertilizer: This will provide your tomato plants with essential nutrients.
* Gravel or small rocks: For drainage in the water reservoir.
* Measuring tape or ruler: For accurate measurements.
* Gloves: To protect your hands.
* Safety glasses: To protect your eyes while drilling.
Preparing the Buckets
This is where the magic begins! We’ll be transforming ordinary buckets into a self-watering oasis for our tomato plants.
1. Drilling Drainage Holes in the Outer Bucket:
* Take one of the 5-gallon buckets (this will be the outer bucket).
* Using a drill bit (around 1/4 inch), drill several drainage holes in the bottom of the bucket. I usually go for about 6-8 holes, evenly spaced. This is important to prevent the soil from becoming waterlogged if it rains excessively.
* Also, drill a few holes near the bottom sides of the bucket, about an inch or two from the bottom. These will act as overflow holes, preventing the water reservoir from overfilling.
2. Preparing the Inner Reservoir Bucket:
* Take the 1-gallon bucket or container. This will be our water reservoir.
* Drill numerous holes (around 1/4 inch) all around the sides and bottom of this bucket. The more holes, the better the water flow will be.
* This bucket will sit inside the larger bucket and hold the water that the tomato plant will draw up as needed.
3. Creating the Watering Tube Hole:
* In the outer 5-gallon bucket, drill a hole near the top edge, large enough to accommodate the PVC pipe. This hole should be positioned so that the PVC pipe will reach down into the inner reservoir bucket when inserted.
* The PVC pipe will allow you to easily add water to the reservoir without disturbing the plant.
Assembling the Self-Watering System
Now, let’s put all the pieces together to create our self-watering tomato planter.
1. Placing the Inner Reservoir:
* Place a layer of gravel or small rocks (about 2-3 inches deep) in the bottom of the outer 5-gallon bucket. This will improve drainage and prevent the inner reservoir from sitting directly on the bottom.
* Place the prepared 1-gallon bucket (the one with all the holes) on top of the gravel layer.
2. Adding the Landscape Fabric:
* Cut a piece of landscape fabric or burlap large enough to cover the top of the inner reservoir bucket and extend up the sides of the outer bucket.
* This fabric will act as a barrier, preventing the potting mix from falling into the water reservoir and clogging it.
* Carefully place the fabric over the inner reservoir, ensuring it covers the entire top and extends up the sides of the outer bucket.
3. Inserting the Watering Tube:
* Insert the PVC pipe through the hole you drilled in the outer bucket, making sure it reaches down into the inner reservoir bucket.
* This pipe will be used to fill the reservoir with water.
Planting Your Tomato Seedling
It’s time to get our hands dirty and plant our tomato seedling!
1. Filling with Potting Mix:
* Fill the outer bucket with high-quality potting mix, leaving a few inches of space at the top.
* Gently press down on the potting mix to remove any air pockets.
2. Adding Slow-Release Fertilizer:
* Mix in the recommended amount of slow-release fertilizer according to the package instructions. This will provide your tomato plant with a steady supply of nutrients.
3. Planting the Seedling:
* Dig a hole in the center of the potting mix large enough to accommodate the root ball of your tomato seedling.
* Carefully remove the seedling from its container and gently loosen the roots.
* Place the seedling in the hole and backfill with potting mix.
* Water the seedling thoroughly to help it settle in.
Maintaining Your Waterless Tomato Plant
Now that your tomato plant is happily settled in its self-watering bucket, here’s how to keep it thriving.
1. Watering the Reservoir:
* The beauty of this system is that you don’t need to water the plant directly. Instead, you’ll fill the water reservoir through the PVC pipe.
* Check the reservoir level every few days, especially during hot weather. You can use a dipstick or simply look down the pipe to see the water level.
* Fill the reservoir as needed, making sure not to overfill it. The overflow holes will help prevent this.
2. Sunlight:
* Tomato plants need at least 6-8 hours of sunlight per day. Place your self-watering bucket in a sunny location.
3. Support:
* As your tomato plant grows, it will need support. You can use a tomato cage or stakes to keep the plant upright and prevent the branches from breaking.
4. Pruning:
* Prune your tomato plant regularly to remove suckers (the small shoots that grow between the main stem and the branches). This will help the plant focus its energy on producing fruit.
5. Fertilizing:
* Even with slow-release fertilizer, you may need to supplement with liquid fertilizer every few weeks, especially when the plant starts producing fruit. Follow the instructions on the fertilizer package.
Troubleshooting
Even with the best planning, sometimes things don’t go exactly as expected. Here are a few common issues you might encounter and how to address them:
* Plant Wilting: If your plant is wilting, even though the reservoir is full, it could be a sign of root rot. This can happen if the drainage is poor. Make sure the drainage holes in the outer bucket are clear and that the gravel layer is providing adequate drainage. You might also need to let the soil dry out a bit before refilling the reservoir.
* Yellowing Leaves: Yellowing leaves can indicate a nutrient deficiency. Make sure you are using a high-quality potting mix and supplementing with fertilizer as needed.
* Pests: Keep an eye out for common tomato pests like aphids, whiteflies, and tomato hornworms. Treat infestations promptly with organic pest control methods.
* Blossom End Rot: This is a common problem with tomatoes, characterized by a dark, leathery spot on the bottom of the fruit. It’s usually caused by a calcium deficiency. You can prevent blossom end rot by adding calcium to the soil or using a calcium-rich fertilizer.
Benefits of Waterless Tomato Growing
This self-watering bucket system offers numerous advantages over traditional gardening methods:
* Water Conservation: It significantly reduces water usage by delivering water directly to the roots of the plant.
* Reduced Watering Frequency: You don’t need to water the plant every day, saving you time and effort.
* Healthier Plants: The consistent moisture level promotes healthy root growth and reduces the risk of overwatering or underwatering.
* Increased Yields: Healthy plants produce more fruit!
* Space-Saving: Perfect for small spaces like balconies, patios, or decks.
* Easy to Move: The buckets are relatively easy to move around, allowing you to follow the sun or protect your plants from harsh weather.
Final Thoughts
Growing tomatoes in a self-watering bucket is a rewarding and sustainable way to enjoy fresh, homegrown tomatoes. With a
Conclusion
So there you have it! This simple, yet incredibly effective DIY stain removal easy technique is a game-changer for anyone who’s ever battled stubborn stains. We’ve all been there, staring in dismay at a beloved garment or cherished piece of furniture marred by an unsightly mark. Instead of resigning yourself to expensive dry cleaning bills or, even worse, throwing the item away, this method offers a powerful and affordable solution right at your fingertips.
Why is this a must-try? Because it’s not just about removing stains; it’s about reclaiming your belongings and saving money. It’s about the satisfaction of knowing you have a reliable weapon in your arsenal against everyday mishaps. It’s about extending the life of your clothes and home furnishings, reducing waste, and contributing to a more sustainable lifestyle. This stain removal easy technique is a win-win on all fronts.
But the beauty of this method lies not only in its effectiveness but also in its versatility. Feel free to experiment with variations to suit your specific needs and the type of stain you’re dealing with. For instance, for particularly stubborn grease stains, consider adding a small amount of dish soap to the mixture. For delicate fabrics, test the solution on an inconspicuous area first to ensure colorfastness. You can also adjust the ratio of ingredients depending on the severity of the stain. Remember, a little experimentation can go a long way in perfecting your stain-fighting technique.
Don’t be afraid to get creative! Perhaps you’ll discover a unique combination of ingredients that works wonders on a particular type of stain. The possibilities are endless.
We are confident that once you try this DIY stain removal easy technique, you’ll be amazed by the results. It’s a simple, cost-effective, and environmentally friendly way to keep your clothes and home looking their best.
So, what are you waiting for? Gather your ingredients, identify your stain, and put this technique to the test. We encourage you to share your experiences with us! Let us know what worked for you, what variations you tried, and any tips or tricks you discovered along the way. Your feedback will not only help us improve this guide but also inspire others to embrace the power of DIY stain removal.
Join the stain-fighting revolution and say goodbye to those pesky blemishes for good! Share your success stories and before-and-after photos on social media using #DIYStainRemoval and let’s create a community of stain-busting experts. We can’t wait to hear from you!
Frequently Asked Questions (FAQ)
Q: What types of stains does this DIY stain removal easy technique work best on?
A: This technique is effective on a wide range of common stains, including food spills (like coffee, tea, and sauces), dirt, grass, ink (depending on the type), and some types of grease. However, its effectiveness can vary depending on the age and severity of the stain, as well as the type of fabric. For older, more stubborn stains, you may need to repeat the process or try a slightly stronger solution. It’s always a good idea to test the solution on an inconspicuous area first, especially on delicate fabrics.
Q: Can I use this stain removal easy technique on all types of fabrics?
A: While this technique is generally safe for most fabrics, it’s crucial to exercise caution, especially with delicate materials like silk, wool, or linen. Always test the solution on a hidden area first to ensure it doesn’t cause any discoloration or damage. For very delicate fabrics, you might want to dilute the solution further or consider using a specialized stain remover designed for those materials. If you’re unsure, it’s always best to consult a professional dry cleaner.
Q: How long should I leave the solution on the stain before washing?
A: The amount of time you leave the solution on the stain depends on the severity of the stain and the type of fabric. For light stains, 15-30 minutes may be sufficient. For more stubborn stains, you can leave it on for up to an hour or even overnight, but be sure to keep the area moist by covering it with a damp cloth or plastic wrap to prevent the solution from drying out. Always check the fabric periodically to ensure the solution isn’t causing any damage.
Q: What if the stain doesn’t come out completely after the first try?
A: Don’t give up! Sometimes, stubborn stains require multiple treatments. Repeat the process, applying the solution again and allowing it to sit for a longer period. You can also try gently scrubbing the stain with a soft brush or cloth. If the stain persists after several attempts, consider using a stronger stain remover or consulting a professional dry cleaner.
Q: Can I use this stain removal easy technique on carpets or upholstery?
A: Yes, this technique can be used on carpets and upholstery, but it’s essential to be extra careful. Always test the solution on a hidden area first to ensure it doesn’t cause any discoloration or damage. When applying the solution, use a clean cloth or sponge and blot the stain gently, working from the outside in to prevent it from spreading. Avoid saturating the carpet or upholstery, as this can lead to mold or mildew growth. After treating the stain, blot the area with a clean, damp cloth to remove any residue and allow it to air dry completely. You can also use a fan to speed up the drying process.
Q: What are some alternative ingredients I can use if I don’t have the ones listed in the recipe?
A: While the specific ingredients listed in the recipe are generally the most effective, you can try some alternatives if you don’t have them on hand. For example, you can substitute baking soda with cornstarch, which also has absorbent properties. White vinegar can be replaced with lemon juice, which is a natural bleaching agent. However, keep in mind that these substitutions may not be as effective as the original ingredients, so you may need to adjust the ratios or application time accordingly.
Q: Is this stain removal easy technique safe for colored fabrics?
A: While this technique is generally safe for colored fabrics, there is always a risk of color fading or discoloration, especially with vibrant or delicate colors. It’s crucial to test the solution on an inconspicuous area first to ensure colorfastness. If you notice any color bleeding, dilute the solution further or consider using a stain remover specifically designed for colored fabrics.
Q: How do I prevent stains from setting in the first place?
A: The best way to deal with stains is to prevent them from setting in the first place. Act quickly by blotting the stain with a clean cloth or paper towel as soon as it occurs. Avoid rubbing the stain, as this can spread it and make it more difficult to remove. If possible, rinse the stained area with cold water before applying any stain remover. You can also pretreat stains with a stain remover spray or stick before washing.
Q: Where can I share my experiences and results with this DIY stain removal easy technique?
A: We encourage you to share your experiences and results on social media using the hashtag #DIYStainRemoval. You can also leave comments on this article or share your tips and tricks in online forums and communities dedicated to DIY cleaning and stain removal. We love hearing from our readers and learning about their successes!

Leave a Comment