
Salt cleaning hacks – who knew something so simple could be so powerful around the house? I’m always on the lookout for easy, affordable ways to keep my home sparkling, and I’ve discovered that humble salt is a true cleaning champion. For centuries, salt has been valued not just for its flavor-enhancing properties, but also for its incredible cleaning abilities. Think back to a time before fancy detergents; salt was a staple for scrubbing, disinfecting, and deodorizing!
But why should you, my friend, embrace these salt cleaning hacks? Well, for starters, it’s incredibly budget-friendly. We all want to save a few bucks, right? Plus, it’s a natural alternative to harsh chemicals, making it safer for your family, your pets, and the environment. I’m all about creating a healthy home, and using salt cleaning hacks helps me do just that.
In this article, I’m going to share my favorite DIY salt cleaning tricks that will transform the way you think about household chores. From tackling stubborn stains to reviving dull surfaces, get ready to unlock the cleaning potential of this everyday ingredient. Let’s dive in and discover how these simple salt cleaning hacks can make your life easier and your home brighter!
DIY Salt Cleaning Hacks: Unleash the Power of Sodium Chloride!
Hey there, fellow DIY enthusiasts! I’m always on the lookout for simple, effective, and budget-friendly cleaning solutions. And guess what? I’ve discovered the amazing cleaning power of salt! Yes, that humble ingredient sitting in your pantry can do wonders around the house. Forget harsh chemicals; let’s explore some fantastic salt cleaning hacks that will leave your home sparkling.
General Salt Cleaning Tips
Before we dive into specific hacks, here are a few general tips to keep in mind:
* Choose the Right Salt: Table salt is fine for most cleaning tasks. However, for abrasive cleaning, like scrubbing a cast iron skillet, coarse salt (sea salt or kosher salt) works best.
* Test First: Always test any cleaning solution, even a salt-based one, on an inconspicuous area before applying it to the entire surface. This is especially important for delicate materials.
* Rinse Thoroughly: After cleaning with salt, always rinse the area thoroughly with water to remove any residue.
* Don’t Use on Certain Surfaces: Avoid using salt on polished surfaces, as it can scratch them. Also, be cautious when using salt on gold-plated items.
Hack 1: Cleaning a Cast Iron Skillet
Cast iron skillets are fantastic for cooking, but cleaning them can be a pain. Forget soap and harsh scrubbing; salt is your new best friend!
What You’ll Need:
* Coarse salt (sea salt or kosher salt)
* A clean, dry cloth or sponge
* Vegetable oil or other cooking oil
Step-by-Step Instructions:
1. Scrape off Excess Food: After cooking, use a spatula or scraper to remove any large pieces of food from the skillet.
2. Add Salt: While the skillet is still warm (but not hot!), pour a generous amount of coarse salt into the pan. The amount will depend on the size of your skillet, but aim for a layer that covers the bottom.
3. Scrub with Salt: Using a clean, dry cloth or sponge, scrub the skillet with the salt. The salt acts as a gentle abrasive, loosening stuck-on food particles. Apply firm, even pressure as you scrub. You’ll notice the salt turning brown as it absorbs the grease and food residue.
4. Rinse and Dry: Rinse the skillet thoroughly with hot water. Make sure all the salt is removed.
5. Dry Completely: Place the skillet on the stovetop over low heat to dry it completely. This prevents rust.
6. Season the Skillet: Once the skillet is dry, pour a small amount of vegetable oil (or other cooking oil) into the pan. Use a clean cloth or paper towel to rub the oil all over the inside and outside of the skillet, including the handle.
7. Heat the Skillet: Place the skillet upside down in a preheated oven at 350°F (175°C) for one hour. This helps the oil to polymerize and create a non-stick surface. Place a baking sheet underneath to catch any drips.
8. Cool and Store: Let the skillet cool completely in the oven before removing it. Your cast iron skillet is now clean, seasoned, and ready for your next culinary adventure!
Hack 2: Cleaning a Stained Coffee Mug
Coffee and tea stains can be stubborn, but salt can help lift them right out!
What You’ll Need:
* Salt (table salt is fine)
* Water
* A sponge or cloth
Step-by-Step Instructions:
1. Wet the Mug: Lightly wet the inside of the stained coffee mug with water.
2. Add Salt: Sprinkle a generous amount of salt into the mug, focusing on the stained areas.
3. Scrub Gently: Use a damp sponge or cloth to gently scrub the inside of the mug with the salt. The salt will act as a mild abrasive, helping to loosen the stains.
4. Rinse Thoroughly: Rinse the mug thoroughly with warm water to remove all traces of salt and loosened stains.
5. Repeat if Necessary: If the stains are particularly stubborn, repeat the process.
Hack 3: Cleaning a Scorched Iron
A scorched iron can leave marks on your clothes, so it’s important to keep it clean. Salt to the rescue!
What You’ll Need:
* Salt (table salt is fine)
* A clean cotton cloth or towel
* An iron
Step-by-Step Instructions:
1. Prepare the Surface: Lay a clean cotton cloth or towel on your ironing board.
2. Sprinkle Salt: Sprinkle a generous layer of salt onto the cloth.
3. Heat the Iron: Turn your iron on to the highest setting, but make sure the steam function is turned off.
4. Iron the Salt: Run the hot iron over the salt-covered cloth for a few minutes, applying gentle pressure. The salt will help to loosen and remove any residue from the iron’s soleplate.
5. Wipe Clean: Unplug the iron and let it cool completely. Once cool, wipe the soleplate with a clean, damp cloth to remove any remaining salt residue.
Hack 4: Cleaning a Sink Drain
A clogged or smelly sink drain is no fun. Salt can help clear it and freshen it up!
What You’ll Need:
* Salt (table salt is fine)
* Hot water
Step-by-Step Instructions:
1. Pour Salt Down the Drain: Pour about 1/2 cup of salt down the drain.
2. Flush with Hot Water: Immediately follow with a generous amount of hot water (boiling water is even better, but be careful!).
3. Let it Sit: Let the mixture sit in the drain for at least 30 minutes, or even overnight for stubborn clogs.
4. Flush Again: Flush the drain again with hot water to clear any remaining debris.
This method works by helping to break down grease and other buildup in the drain. The salt also acts as a natural deodorizer.
Hack 5: Cleaning Brass and Copper
Bring back the shine to your brass and copper items with a simple salt paste.
What You’ll Need:
* Salt (table salt is fine)
* White vinegar or lemon juice
* A soft cloth
Step-by-Step Instructions:
1. Make a Paste: In a small bowl, mix equal parts salt and white vinegar (or lemon juice) to form a paste.
2. Apply the Paste: Apply the paste to the brass or copper item, focusing on tarnished areas.
3. Rub Gently: Gently rub the paste onto the surface with a soft cloth.
4. Rinse Thoroughly: Rinse the item thoroughly with warm water.
5. Dry Completely: Dry the item completely with a clean cloth.
The acid in the vinegar or lemon juice helps to dissolve the tarnish, while the salt acts as a gentle abrasive.
Hack 6: Cleaning Sponges
Extend the life of your kitchen sponges and keep them fresh with a salt soak.
What You’ll Need:
* Salt (table salt is fine)
* Water
* A bowl
Step-by-Step Instructions:
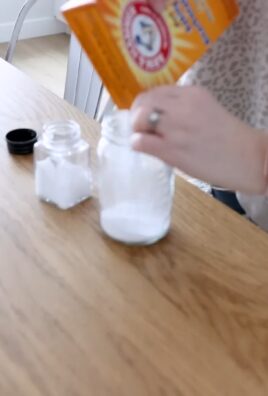
1. Prepare the Salt Solution: Fill a bowl with warm water and add a generous amount of salt (about 1/4 cup per quart of water).
2. Soak the Sponges: Submerge the sponges in the salt solution.
3. Let it Soak: Let the sponges soak for several hours, or even overnight.
4. Rinse and Squeeze: Rinse the sponges thoroughly with clean water and squeeze out any excess water.
The salt solution helps to kill bacteria and remove odors from the sponges.
Hack 7: Removing Mildew
Mildew can be a problem in damp areas like bathrooms. Salt can help!
What You’ll Need:
* Salt (table salt is fine)
* White vinegar
* A spray bottle
* A sponge or cloth
Step-by-Step Instructions:
1. Prepare the Solution: Mix equal parts salt and white vinegar in a spray bottle.
2. Spray the Affected Area: Spray the solution onto the mildewed area.
3. Let it Sit: Let the solution sit for at least 30 minutes.
4. Scrub and Rinse: Scrub the area with a sponge or cloth to remove the mildew. Rinse thoroughly with water.
The vinegar helps to kill the mildew, while the salt acts as a mild abrasive.
Hack 8: Cleaning Windows
Get streak-free windows with a simple salt solution.
What You’
Conclusion
So, there you have it! This simple yet incredibly effective **salt cleaning hacks** is a game-changer for anyone looking to simplify their cleaning routine and achieve sparkling results without harsh chemicals. We’ve explored how the abrasive nature of salt, combined with its natural disinfecting properties, can tackle a surprising range of cleaning challenges around your home. From reviving dull copper pots to scrubbing stubborn grime off your cast iron skillet, and even freshening up your garbage disposal, salt proves to be a versatile and budget-friendly cleaning agent.
But the benefits extend beyond just cost and convenience. By opting for salt as a primary cleaning ingredient, you’re making a conscious choice to reduce your exposure to potentially harmful chemicals found in many commercial cleaning products. This is particularly important for households with children, pets, or individuals with sensitivities. You’re also contributing to a more sustainable lifestyle by minimizing your reliance on plastic bottles and chemically-laden solutions.
Don’t limit yourself to the specific applications we’ve outlined. Feel free to experiment with different types of salt – coarse sea salt for heavy-duty scrubbing, fine table salt for delicate surfaces, or even Epsom salt for its added mineral benefits in certain cleaning tasks. You can also enhance the cleaning power of salt by combining it with other natural ingredients like lemon juice, vinegar, or baking soda. For instance, a paste of salt and lemon juice can work wonders on removing rust stains, while a mixture of salt and baking soda can effectively unclog drains.
Consider adding essential oils to your salt cleaning solutions for a pleasant aroma and added antibacterial properties. Lavender, tea tree, and eucalyptus oils are excellent choices. Just a few drops can transform your cleaning routine into a more sensory and enjoyable experience.
We understand that trying new cleaning methods can sometimes feel daunting, but we urge you to give these salt cleaning hacks a try. The simplicity and effectiveness of this method will surprise you. Start with a small, manageable task, like cleaning your cutting board or scrubbing your sink. Once you see the results, you’ll be hooked!
We’re confident that you’ll be amazed by the cleaning power of salt. It’s a natural, affordable, and effective alternative to conventional cleaning products. So, ditch the harsh chemicals and embrace the simplicity of salt.
Now, we want to hear from you! Have you tried any of these salt cleaning hacks? What were your results? Do you have any other creative uses for salt in cleaning? Share your experiences, tips, and tricks in the comments below. Let’s build a community of eco-conscious cleaners who are passionate about finding natural and effective solutions for a sparkling home. Your insights could inspire others to make the switch and discover the magic of salt cleaning! We are eager to learn from your experiences and expand our collective knowledge of this amazing cleaning agent. Let’s make cleaning a little bit easier, a little bit greener, and a whole lot more effective, one grain of salt at a time.
Frequently Asked Questions (FAQs)
Q: Is salt safe to use on all surfaces?
A: While salt is generally safe for many surfaces, it’s crucial to exercise caution and test it in an inconspicuous area first, especially on delicate or easily scratched materials. Avoid using coarse salt on polished surfaces like marble or granite, as it can cause scratches. Fine table salt is generally safer for these surfaces, but always test first. For wooden surfaces, use salt sparingly and avoid prolonged contact, as it can draw out moisture. Always wipe away any excess salt residue after cleaning.
Q: Can I use any type of salt for cleaning?
A: Yes, you can use various types of salt for cleaning, but each has its own advantages. Table salt is the most readily available and works well for general cleaning tasks. Coarse sea salt is excellent for scrubbing stubborn grime due to its abrasive texture. Epsom salt, while technically a mineral compound, can be used for cleaning and deodorizing, particularly in drains and garbage disposals. Kosher salt is another good option for scrubbing, as its larger crystals provide more cleaning power. Experiment with different types of salt to find what works best for your specific cleaning needs.
Q: How do I clean a cast iron skillet with salt?
A: Cleaning a cast iron skillet with salt is a simple and effective way to remove food residue without damaging the seasoning. After cooking, while the skillet is still warm (but not too hot to handle), pour in about a cup of coarse salt. Use a dry cloth or paper towel to scrub the salt around the skillet, dislodging any stuck-on food particles. The salt acts as a gentle abrasive, removing debris without stripping the seasoning. Once the skillet is clean, rinse it with warm water (avoid using soap, as it can remove the seasoning). Dry the skillet thoroughly with a clean towel and then place it on the stovetop over low heat for a few minutes to ensure it’s completely dry. Finally, apply a thin layer of oil to the skillet to maintain the seasoning.
Q: Can salt be used to unclog drains?
A: Yes, salt can be used to help unclog drains, especially when combined with other natural ingredients like baking soda and vinegar. Pour about 1/2 cup of baking soda down the drain, followed by 1/2 cup of salt. Then, pour 1 cup of vinegar down the drain. Let the mixture fizz and bubble for about 30 minutes. After 30 minutes, flush the drain with boiling water. This combination helps to break down grease and debris that are clogging the drain. For stubborn clogs, you may need to repeat the process.
Q: How do I remove rust stains with salt?
A: Salt can be effective in removing rust stains, especially when combined with lemon juice. Make a paste of salt and lemon juice, ensuring the paste is thick enough to adhere to the rust stain. Apply the paste to the rust stain and let it sit for several hours or even overnight. The acidity of the lemon juice helps to dissolve the rust, while the salt acts as a gentle abrasive to help lift the stain. After the paste has sat for the desired amount of time, scrub the area with a brush or cloth and rinse thoroughly with water. You may need to repeat the process for stubborn rust stains.
Q: Is salt safe for septic systems?
A: Yes, salt is generally considered safe for septic systems when used in moderation for cleaning purposes. The small amount of salt used in cleaning solutions is unlikely to disrupt the balance of bacteria in your septic tank. However, it’s always a good idea to avoid pouring large quantities of salt down the drain, as excessive amounts could potentially harm the beneficial bacteria that break down waste in your septic system.
Q: Can I use salt to clean my microwave?
A: Yes, you can use salt to clean your microwave. Mix a tablespoon of salt with a cup of water in a microwave-safe bowl. Place the bowl in the microwave and heat on high for several minutes, allowing the steam to loosen any splattered food particles. Carefully remove the bowl (it will be hot) and wipe down the interior of the microwave with a clean cloth or sponge. The steam and salt will help to soften and remove stubborn food stains.
Q: How can I deodorize my garbage disposal with salt?
A: To deodorize your garbage disposal with salt, pour about 1/2 cup of salt down the drain. Turn on the cold water and run the disposal for a few seconds. The salt will help to scrub away any food particles that are causing the odor. You can also add a few lemon or orange peels to the disposal along with the salt for a more refreshing scent. Avoid pouring grease or oil down the disposal, as this can contribute to odors and clogs.
Q: What are some other uses for salt in cleaning?
A: Beyond the applications mentioned above, salt can be used for a variety of other cleaning tasks. It can be used to clean cutting boards, remove water stains from wood furniture (mix salt with a little water to form a paste and gently rub onto the stain), clean coffee and tea stains from mugs, and even polish silver. Its versatility makes it a valuable addition to any eco-friendly cleaning arsenal. Remember to always test in an inconspicuous area first.

Leave a Comment