
Regrow Enoki Mushrooms at Home: Imagine harvesting a fresh batch of delicate, snow-white Enoki mushrooms right from your kitchen! Sounds like a gourmet dream, doesn’t it? Well, it’s more achievable than you think. This isn’t just about saving money on groceries; it’s about connecting with the magic of nature and experiencing the satisfaction of growing your own food.
For centuries, Enoki mushrooms, also known as “golden needle mushrooms,” have been a staple in East Asian cuisine, prized for their unique texture and subtle flavor. From stir-fries to hot pots, they add a delightful crunch and visual appeal to any dish. But what if I told you that you could bypass the grocery store and cultivate these culinary gems yourself?
In today’s world, where sustainability and self-sufficiency are becoming increasingly important, learning how to regrow Enoki mushrooms at home is a game-changer. Not only does it reduce your carbon footprint by minimizing transportation, but it also gives you complete control over the growing process, ensuring that your mushrooms are free from harmful pesticides and chemicals. Plus, let’s be honest, who wouldn’t want to impress their friends and family with their newfound mushroom-growing skills? This DIY project is perfect for beginners and seasoned gardeners alike, offering a fun and rewarding experience that will transform your kitchen into a mini mushroom farm. So, grab your supplies, and let’s embark on this exciting journey together!
Regrow Enoki Mushrooms at Home: A Fun and Frugal DIY Project
Hey there, fellow mushroom enthusiasts! Ever wondered if you could regrow those delicate, long-stemmed Enoki mushrooms you love in your stir-fries and soups? Well, guess what? You absolutely can! It’s a surprisingly simple and rewarding DIY project that’s perfect for beginners. I’m going to walk you through the entire process, step-by-step, so you can enjoy a fresh supply of Enoki mushrooms right from your own home. Let’s get started!
What You’ll Need
Before we dive in, let’s gather all the necessary materials. This will make the whole process smoother and more enjoyable.
* Enoki Mushroom Stems: This is the most important ingredient! Save the stems from a store-bought package of Enoki mushrooms. Make sure they look healthy and aren’t slimy or discolored.
* Cardboard: Plain, corrugated cardboard is ideal. Avoid cardboard with heavy printing or glossy coatings.
* Coffee Grounds: Used coffee grounds are a fantastic nutrient source for mushrooms. Make sure they’re cool and not too wet.
* Sawdust (Optional): Hardwood sawdust can be added to the substrate for extra nutrients and texture.
* Spray Bottle: For misting the mushrooms and maintaining humidity.
* Container: A clean plastic container with a lid or a resealable bag will work perfectly.
* Hydrogen Peroxide (3%): This is optional, but it helps to sterilize the stems and reduce the risk of contamination.
* Gloves: To keep everything clean and prevent contamination.
* Boiling Water: For pasteurizing the substrate.
Preparing the Substrate
The substrate is the foundation for your mushroom growth. It provides the necessary nutrients and moisture for the Enoki to thrive. We’ll be using a simple but effective mixture of cardboard and coffee grounds.
1. Tear the Cardboard: Tear the cardboard into small pieces, about 1-2 inches in size. The smaller the pieces, the easier it will be for the mushrooms to colonize.
2. Pasteurize the Cardboard: Place the torn cardboard in a heat-resistant bowl or container. Pour boiling water over the cardboard until it’s completely submerged. Let it soak for about an hour. This process helps to kill off any unwanted bacteria or mold spores that could compete with the Enoki mushrooms.
3. Drain the Cardboard: After an hour, carefully drain the water from the cardboard. Squeeze out as much excess water as possible. You want the cardboard to be damp, but not soaking wet.
4. Mix the Substrate: In a clean bowl, combine the drained cardboard with the used coffee grounds. A good ratio is about 2 parts cardboard to 1 part coffee grounds. If you’re using sawdust, add a small amount to the mixture as well. Mix everything thoroughly until it’s evenly distributed.
Inoculating the Stems
This is where the magic happens! We’ll be introducing the Enoki mushroom mycelium (the vegetative part of the fungus) to the prepared substrate.
1. Clean the Stems: Gently rinse the Enoki mushroom stems under cool water. Remove any remaining mushroom caps or debris.
2. Sterilize the Stems (Optional): If you want to be extra cautious, you can sterilize the stems with a diluted hydrogen peroxide solution. Mix 1 part 3% hydrogen peroxide with 9 parts water. Soak the stems in the solution for about 5 minutes, then rinse them thoroughly with clean water.
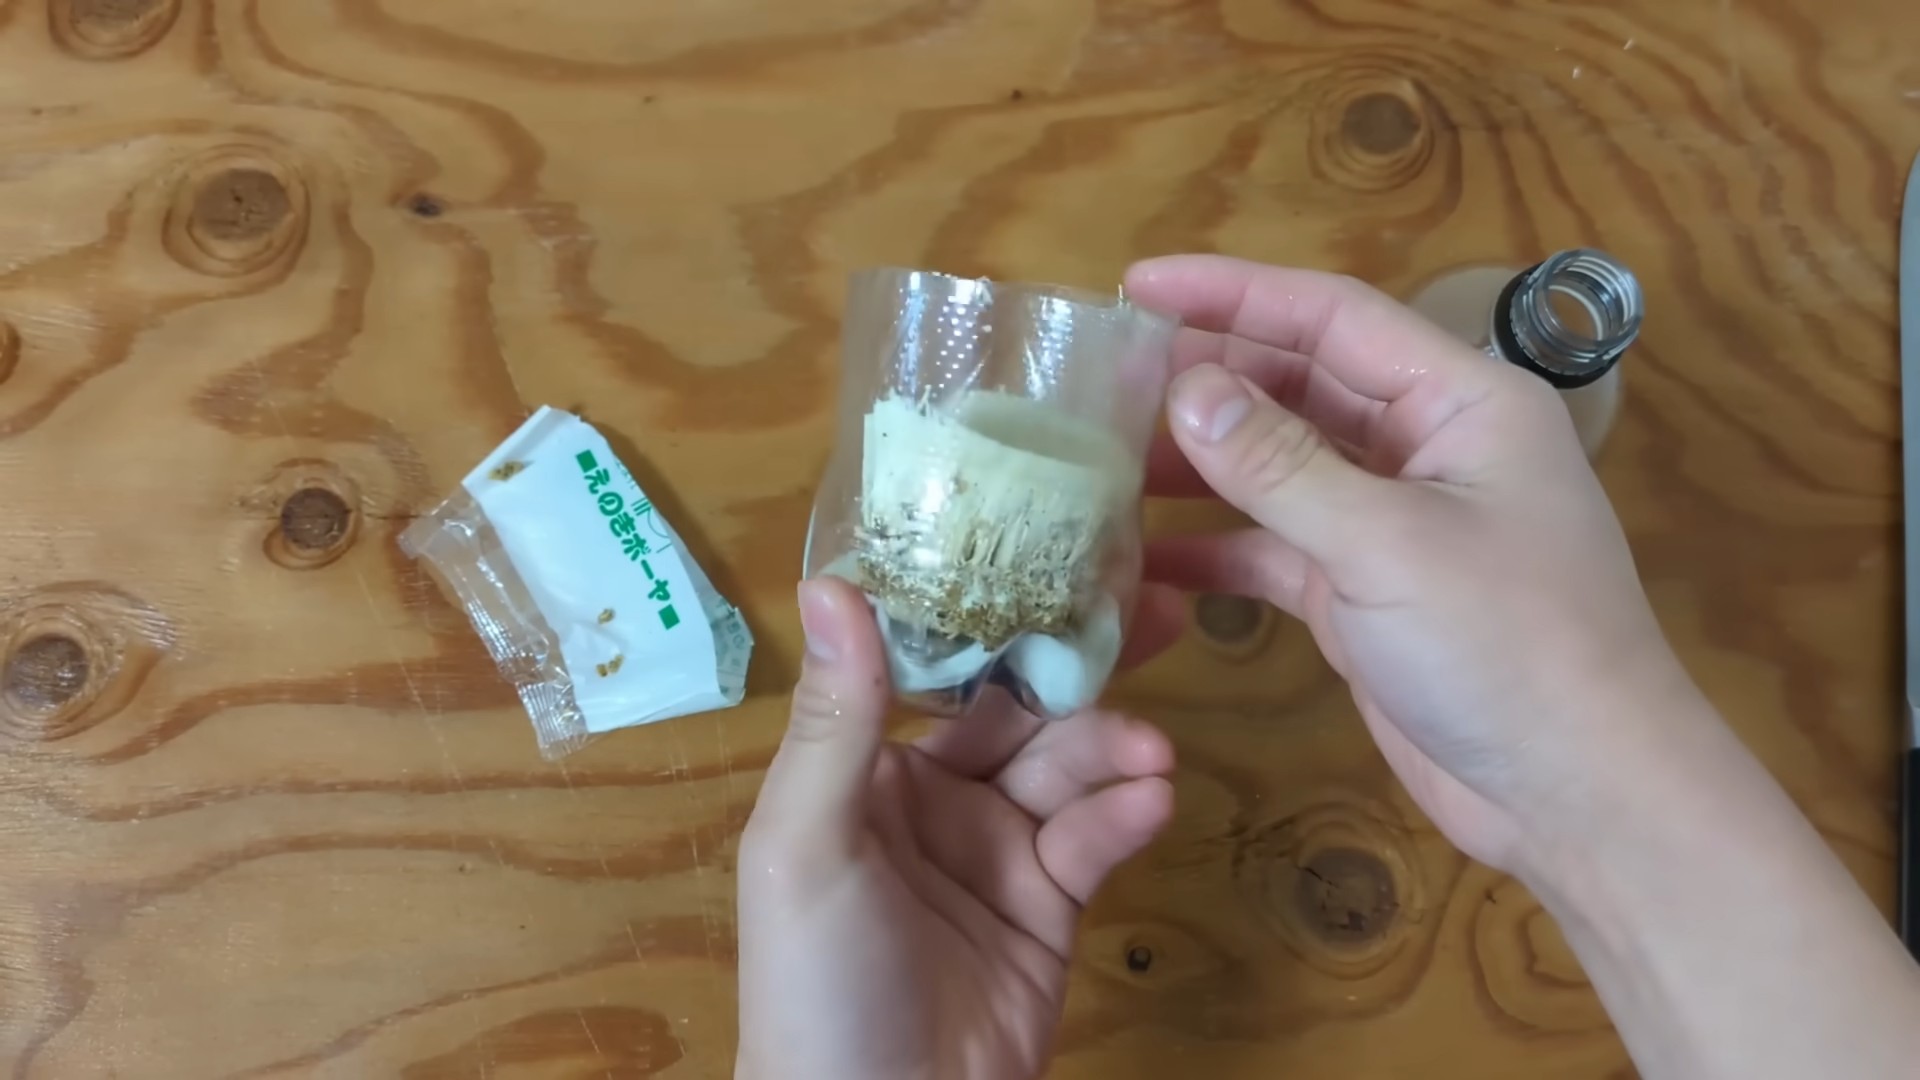
3. Place the Stems in the Substrate: Fill your container with the prepared substrate. Make small holes or indentations in the substrate and insert the Enoki mushroom stems into them. Space the stems about an inch or two apart. Make sure the cut ends of the stems are in contact with the substrate.
4. Cover the Stems: Gently cover the stems with a thin layer of the substrate. This will help to keep them moist and protected.
5. Mist the Substrate: Lightly mist the surface of the substrate with water from your spray bottle. You want to keep the substrate moist, but not waterlogged.
Incubation
Now, we need to create the ideal environment for the Enoki mycelium to colonize the substrate.
1. Seal the Container: Cover the container with a lid or seal the resealable bag. This will help to maintain humidity.
2. Create Airflow: If you’re using a container with a lid, poke a few small holes in the lid for ventilation. This will allow for some air exchange and prevent the buildup of excess moisture. If you’re using a resealable bag, leave it slightly open.
3. Find a Dark and Cool Place: Place the container in a dark and cool location, such as a closet or basement. The ideal temperature for Enoki mushroom colonization is between 55-65°F (13-18°C).
4. Monitor the Humidity: Check the substrate regularly to make sure it’s still moist. If it starts to dry out, mist it lightly with water.
5. Be Patient: It can take several weeks for the Enoki mycelium to fully colonize the substrate. You’ll know it’s working when you see a white, fuzzy growth spreading throughout the substrate.
Fruiting
Once the substrate is fully colonized, it’s time to encourage the mushrooms to fruit!
1. Introduce Light: Move the container to a location with indirect light. Enoki mushrooms need some light to trigger fruiting.
2. Lower the Temperature: Lower the temperature to around 40-50°F (4-10°C). This will help to stimulate mushroom formation. A refrigerator is often used for this step, but be careful not to let the substrate dry out.
3. Increase Humidity: Maintain high humidity levels by misting the substrate regularly. You can also place a humidity dome over the container.
4. Provide Airflow: Ensure adequate airflow to prevent the buildup of excess moisture and carbon dioxide. Open the container or bag for a few minutes each day.
5. Watch for Pinheads: After a week or two, you should start to see small mushroom “pinheads” forming on the surface of the substrate. These are the beginnings of your Enoki mushrooms!
Harvesting
The moment you’ve been waiting for!
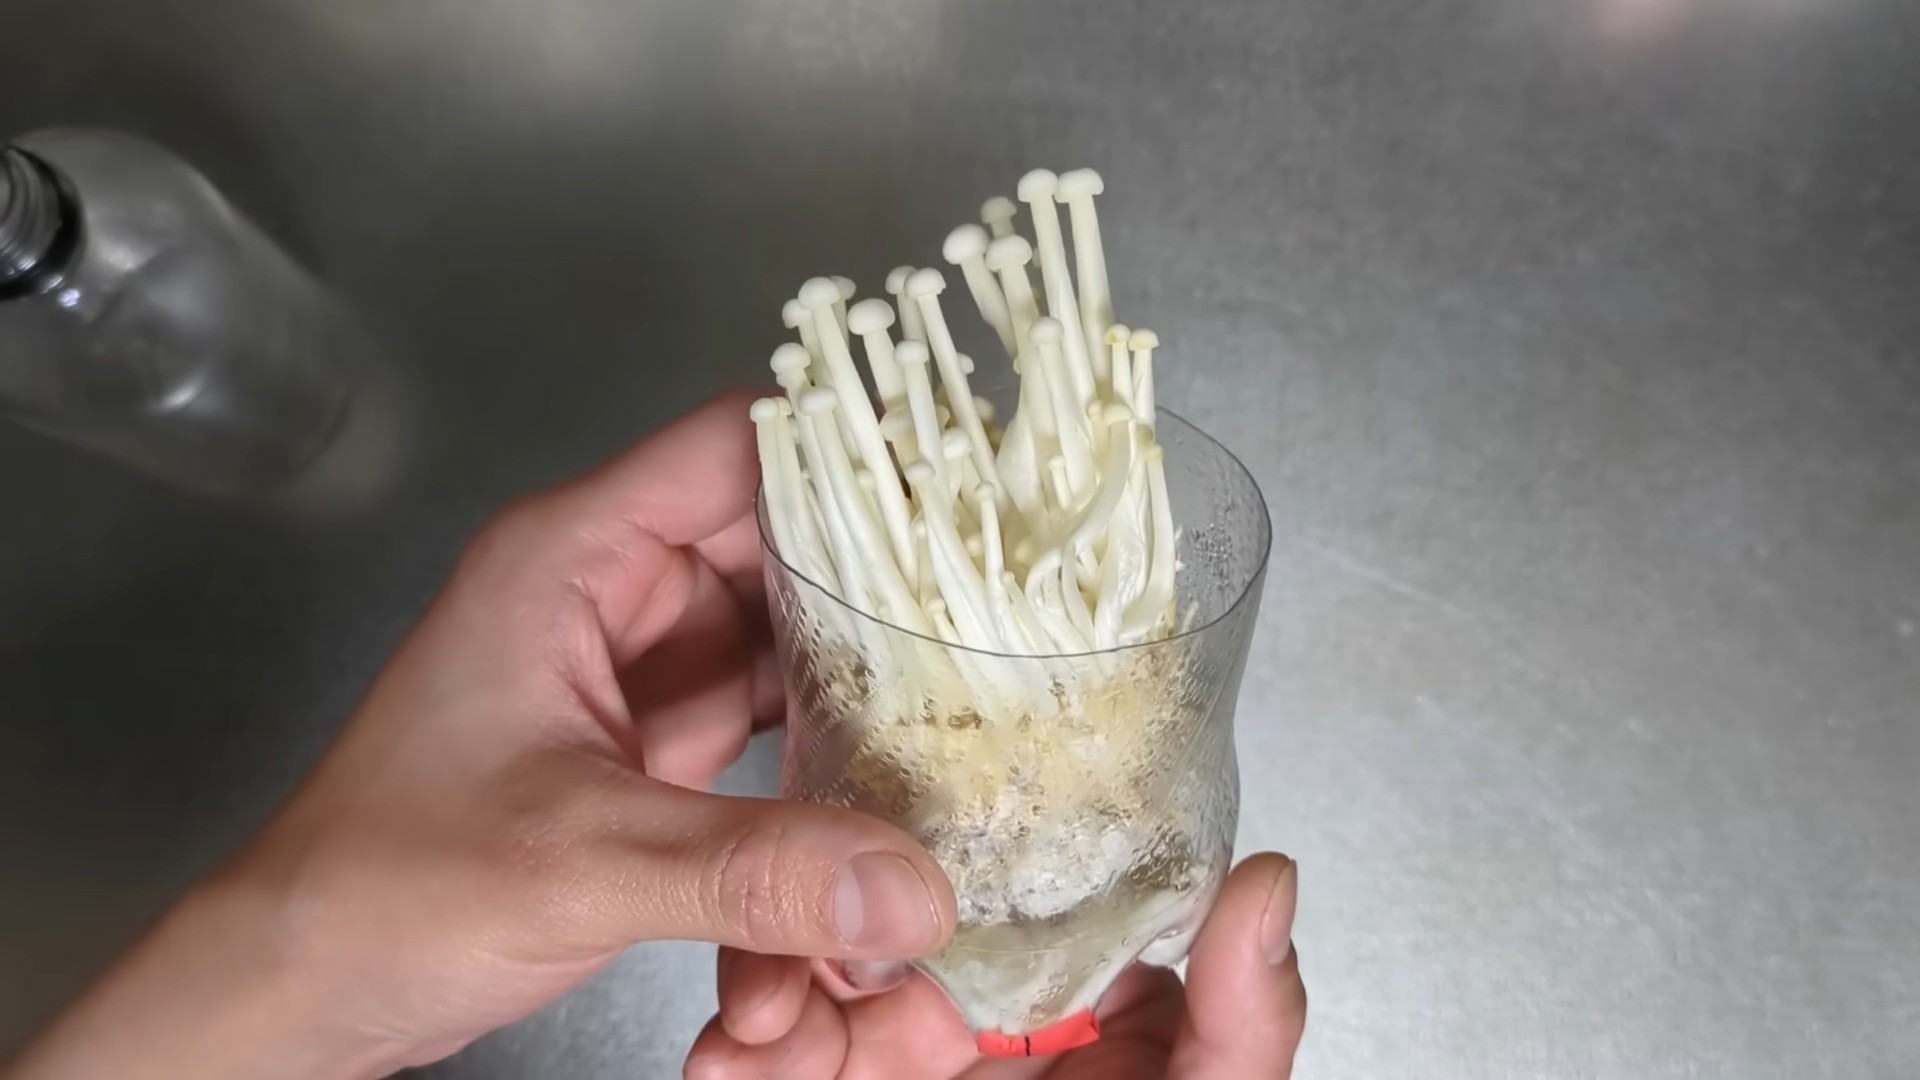
1. Harvest When Ready: Harvest the Enoki mushrooms when they reach the desired size. They’re typically ready to harvest when the stems are about 4-6 inches long.
2. Cut at the Base: Use a clean knife or scissors to cut the mushrooms at the base of the stems, close to the substrate.
3. Enjoy Your Harvest: Rinse the mushrooms gently and use them in your favorite recipes. They’re delicious in stir-fries, soups, and salads.
Troubleshooting
Sometimes, things don’t go exactly as planned. Here are a few common issues you might encounter and how to address them:
* Mold Growth: If you see any green, blue, or black mold growing on the substrate, it’s likely contamination. Unfortunately, you’ll need to discard the entire batch. To prevent mold growth, make sure to sterilize your equipment and maintain good hygiene throughout the process.
* Slow Colonization: If the mycelium is colonizing slowly, it could be due to low temperatures or insufficient moisture. Try moving the container to a slightly warmer location and misting the substrate more frequently.
* No Fruiting: If you’re not seeing any mushroom pinheads forming, it could be due to insufficient light, high temperatures, or low humidity. Try moving the container to a location with more indirect light, lowering the temperature, and increasing humidity.
* Dry Substrate: If the substrate is drying out too quickly, try using a container with a tighter seal or placing a humidity dome over the container.
Tips for Success
Here are a few extra tips to help you succeed in your Enoki mushroom growing adventure:
* Start with Healthy Stems: The quality of the Enoki mushroom stems is crucial for success. Choose stems that are firm, white, and free from blemishes.
* Maintain Good Hygiene: Cleanliness is essential to prevent contamination. Wash your hands thoroughly before handling the substrate and stems. Sterilize your equipment with a diluted bleach solution.
* Be Patient: Growing mushrooms takes time and patience. Don’t get discouraged if you don’t see results immediately. Just keep monitoring the substrate and adjusting the conditions as needed.
* Experiment: Don’t be afraid to experiment with different substrates and growing conditions. You might discover a method that works even better for you.
* Document Your Progress: Keep a journal of your progress, noting the dates, temperatures, humidity levels, and any other relevant information. This will help you to learn from your mistakes and improve your
Conclusion
So, there you have it! Regrowing Enoki mushrooms at home isn’t just a fun experiment; it’s a gateway to a sustainable and delicious addition to your culinary repertoire. We’ve walked you through the simple steps, demystified the process, and hopefully, ignited a spark of mycological curiosity within you.
Why is this DIY trick a must-try? Because it’s incredibly rewarding! Imagine the satisfaction of transforming kitchen scraps into a fresh, flavorful ingredient. Beyond the personal gratification, you’re also reducing food waste, contributing to a more eco-conscious lifestyle, and saving money on grocery bills. Plus, the delicate, slightly sweet flavor of homegrown Enoki mushrooms is simply unmatched by their commercially grown counterparts.
But the adventure doesn’t stop here. Feel free to experiment with different substrates. While we’ve recommended using the base of store-bought Enoki mushrooms, you could also try supplementing with coffee grounds or even finely shredded cardboard for added nutrients. Observe how these variations affect the growth rate, texture, and flavor of your mushrooms.
Consider different growing environments as well. While a cool, dark place is generally ideal, you might find that slightly varying the temperature or humidity can influence the appearance of your Enoki. Some growers have even successfully cultivated Enoki mushrooms in repurposed plastic containers or even old glass jars, adding a touch of upcycled charm to their mushroom farms.
Don’t be afraid to get creative with your culinary applications, too. While Enoki mushrooms are fantastic in soups, salads, and stir-fries, they can also be lightly battered and fried for a crispy snack, added to omelets for a delicate flavor boost, or even pickled for a tangy condiment. The possibilities are truly endless.
We wholeheartedly encourage you to embark on this exciting journey of regrowing Enoki mushrooms at home. It’s a simple, sustainable, and incredibly satisfying project that will not only enhance your cooking but also connect you with the fascinating world of fungi.
And most importantly, we want to hear about your experiences! Share your successes, your challenges, and your creative variations in the comments below. Let’s build a community of home mushroom growers and learn from each other’s adventures. Your insights could inspire others to take the plunge and discover the joy of cultivating their own delicious Enoki mushrooms. Happy growing!
Frequently Asked Questions (FAQ)
What exactly are Enoki mushrooms, and why should I bother regrowing them?
Enoki mushrooms (Flammulina velutipes) are a type of edible fungus characterized by their long, slender stems and small, button-like caps. They have a mild, slightly sweet flavor and a crisp texture, making them a popular addition to Asian cuisine, particularly in soups, salads, and stir-fries. Regrowing them at home offers several benefits: it reduces food waste by utilizing the often-discarded base of store-bought mushrooms, it’s a cost-effective way to enjoy fresh Enoki, and it’s a fun and educational project that connects you with the natural world. Plus, homegrown Enoki often boasts a superior flavor compared to commercially grown varieties.
How long does it take to regrow Enoki mushrooms?
The timeframe can vary depending on environmental conditions and the specific methods used, but generally, you can expect to see new growth within 1-2 weeks. It may take 3-4 weeks to harvest a substantial amount of mushrooms. Maintaining a cool, humid environment and providing adequate light (indirect) are crucial for optimal growth. Be patient, and don’t be discouraged if your first attempt doesn’t yield immediate results.
What kind of container should I use for regrowing Enoki mushrooms?
A clean, food-safe container with a lid is ideal. A plastic container, a glass jar, or even a repurposed takeout container can work well. The container should be large enough to accommodate the mushroom base and the growing medium (e.g., water or supplemented substrate). Make sure the container is thoroughly cleaned and sanitized to prevent contamination.
What is the best substrate for regrowing Enoki mushrooms?
For beginners, using clean water is the simplest method. However, supplementing the water with nutrients can enhance growth. You can add a small amount of sugar (like a pinch of honey or maple syrup) or coffee grounds to the water. More advanced growers might experiment with sterilized sawdust, shredded cardboard, or a mixture of these materials. Remember to sterilize any solid substrate before use to eliminate competing microorganisms.
How often should I change the water?
Change the water every 2-3 days to prevent bacterial growth and maintain a clean environment. Use filtered or distilled water if possible, as tap water may contain chlorine or other chemicals that can inhibit mushroom growth. When changing the water, gently rinse the mushroom base to remove any debris.
What if my Enoki mushrooms start to turn brown or moldy?
Browning can be a sign of dehydration or lack of nutrients. Ensure the mushrooms are kept in a humid environment and consider adding a small amount of sugar to the water. Mold growth indicates contamination. Remove any moldy parts immediately and thoroughly clean the container. If the mold persists, it’s best to start with a fresh mushroom base and a clean container.
Do Enoki mushrooms need light to grow?
While Enoki mushrooms don’t require direct sunlight, they do benefit from indirect light. A dark environment can lead to elongated, pale stems. A location with gentle, ambient light is ideal for promoting healthy growth and coloration.
Can I regrow Enoki mushrooms more than once from the same base?
Yes, you can often get multiple flushes (harvests) from the same mushroom base. After harvesting the first flush, remove any remaining mushroom stems and refresh the water or substrate. With proper care, you may be able to harvest several more times, although subsequent flushes may be smaller.
Are there any risks associated with eating homegrown Enoki mushrooms?
As with any homegrown food, there is a risk of contamination. Ensure you are using clean containers, sterilized substrates (if applicable), and clean water. Thoroughly inspect the mushrooms before consumption and discard any that show signs of mold or discoloration. If you are unsure about the safety of your homegrown Enoki, it’s best to err on the side of caution and discard them.
How do I harvest my Enoki mushrooms?
Once the Enoki mushrooms have reached a desired size (typically a few inches long), you can harvest them by gently cutting them off at the base with a clean knife or scissors. Avoid pulling them out, as this can damage the remaining mushroom base. After harvesting, store the Enoki mushrooms in the refrigerator in a paper bag or container for up to a week.
Leave a Comment