
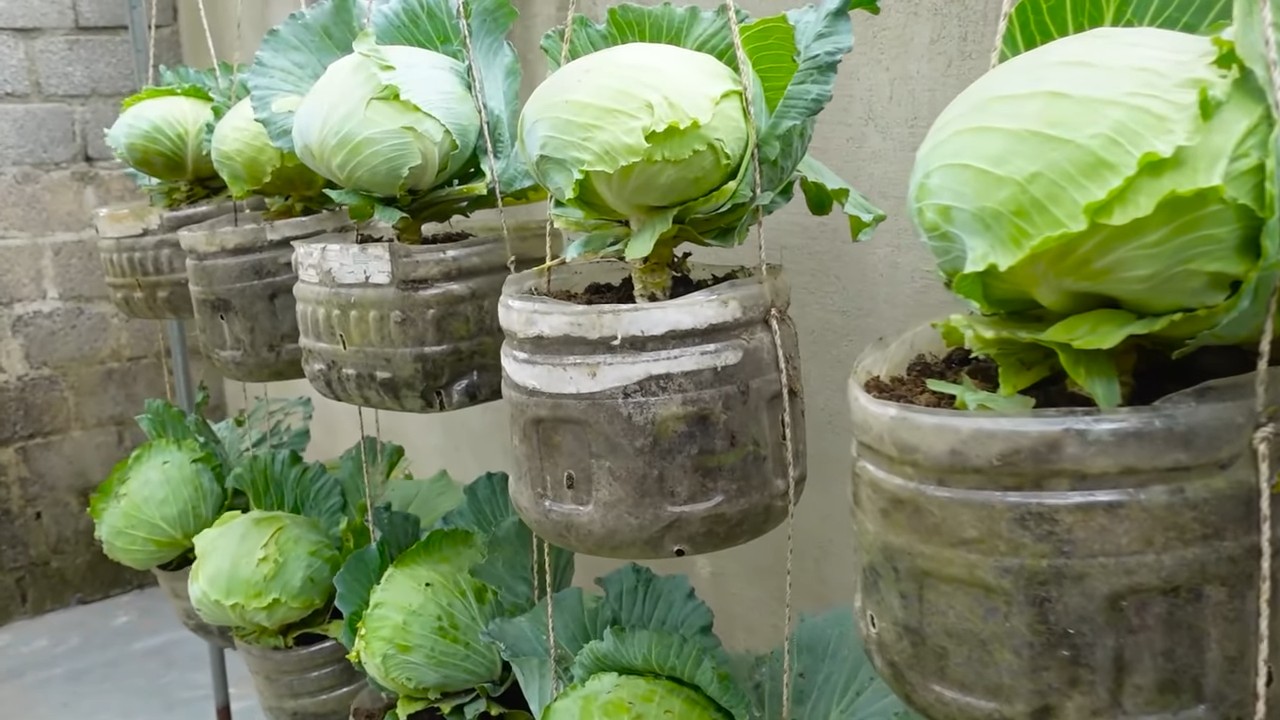
Plastic Bottle Cabbage Garden: Ever dreamt of harvesting your own crisp, delicious cabbages right outside your doorstep, even if you’re short on space? I know I have! Well, get ready to turn that dream into a reality with this incredibly simple and rewarding DIY project. We’re diving into the world of upcycling and gardening, combining the two to create a thriving plastic bottle cabbage garden.
Cabbage cultivation has a rich history, dating back thousands of years. From ancient Rome, where it was considered a medicinal plant, to its prominent role in countless culinary traditions worldwide, cabbage has always been a staple. But what if I told you that you could participate in this age-old tradition in a modern, sustainable way?
In today’s world, where space is often a luxury and environmental consciousness is paramount, this DIY trick is a game-changer. Many of us are eager to grow our own food, but are limited by small balconies, patios, or even just a lack of gardening experience. This method bypasses those limitations! By repurposing plastic bottles, we’re not only reducing waste but also creating a self-contained, easy-to-manage environment perfect for growing healthy, vibrant cabbages. Plus, it’s a fantastic way to teach kids about sustainability and where their food comes from. So, let’s get started and transform those discarded bottles into a flourishing plastic bottle cabbage garden!
DIY Vertical Cabbage Garden from Plastic Bottles
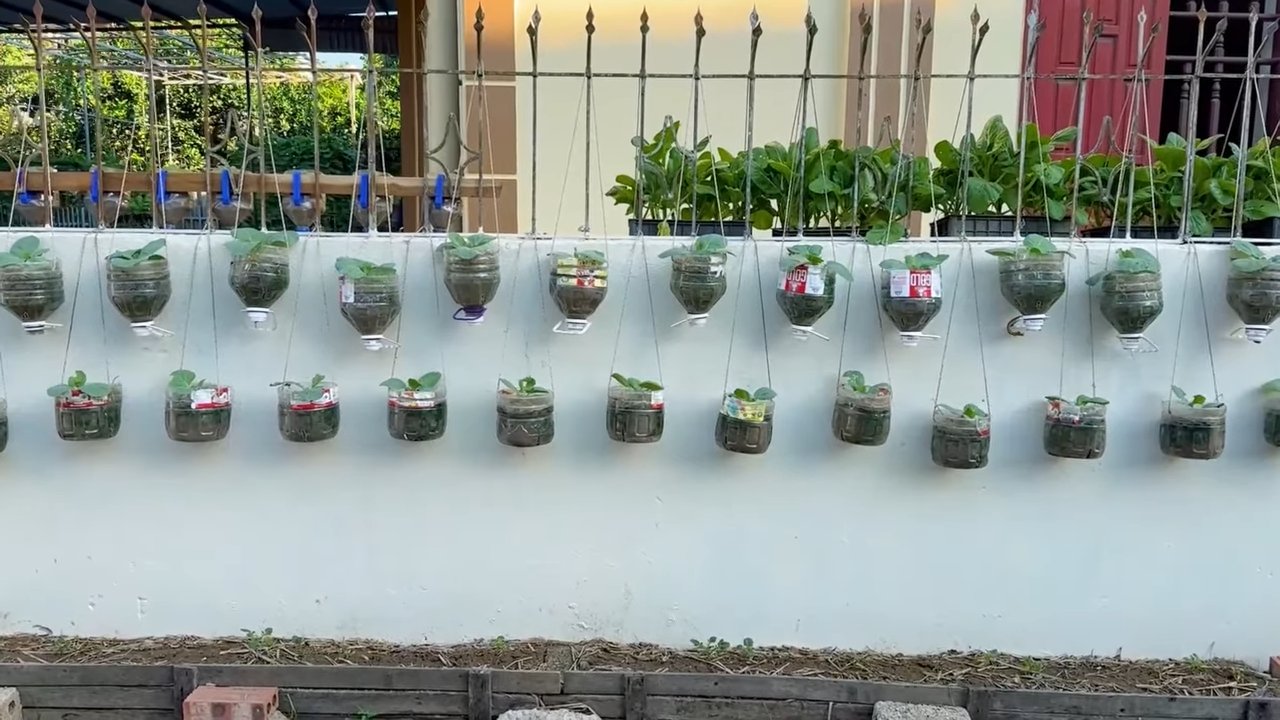
Hey there, fellow gardening enthusiasts! I’m super excited to share this awesome DIY project with you: creating a vertical cabbage garden using recycled plastic bottles. Not only is this a fantastic way to grow your own delicious cabbage, but it’s also a brilliant way to reduce plastic waste and maximize space, especially if you’re working with a small balcony or patio. Let’s dive in!
Materials You’ll Need
Before we get started, let’s gather all the necessary materials. Trust me, having everything ready beforehand will make the whole process much smoother.
* Plastic Bottles: You’ll need a good number of plastic bottles, ideally 2-liter ones. The more bottles you have, the bigger your vertical garden will be. Make sure they’re clean and dry.
* Cabbage Seedlings: Choose your favorite cabbage variety! I personally love growing both green and red cabbage for a colorful harvest.
* Potting Soil: A good quality potting soil is crucial for healthy cabbage growth.
* Scissors or Utility Knife: For cutting the plastic bottles. Be careful!
* Drill or Nail and Hammer: To create drainage holes.
* Strong Rope or Twine: To hang the bottles.
* Measuring Tape or Ruler: For accurate cutting and spacing.
* Marker: To mark cutting lines on the bottles.
* Gloves: To protect your hands.
* Watering Can or Hose: For watering your cabbage plants.
* Optional: Spray Paint: To decorate the bottles (optional, but fun!).
Preparing the Plastic Bottles
This is where the magic begins! We’re going to transform these ordinary plastic bottles into mini cabbage planters.
1. Clean the Bottles: Thoroughly wash each bottle with soap and water to remove any residue. Rinse them well and let them dry completely. This is important to prevent any contamination of your soil.
2. Mark the Cutting Lines: Using your marker and measuring tape, draw a rectangular or oval shape on the side of each bottle. This will be the opening where you’ll plant your cabbage seedlings. I usually make the opening about 4 inches wide and 6 inches long, but you can adjust it based on the size of your seedlings.
3. Cut the Openings: Carefully use your scissors or utility knife to cut along the marked lines. Be extra cautious when using a utility knife – slow and steady wins the race! I recommend wearing gloves for added protection.
4. Create Drainage Holes: Now, we need to make sure the water can drain properly to prevent root rot. Use your drill or nail and hammer to create several small holes in the bottom of each bottle. I usually make about 4-5 holes per bottle.
5. (Optional) Decorate the Bottles: If you want to add a personal touch to your vertical garden, now’s the time to get creative! You can spray paint the bottles in different colors, add stencils, or even draw fun designs with permanent markers. Just make sure the paint is completely dry before moving on to the next step.
Assembling the Vertical Garden
Alright, we’ve got our prepared bottles. Now let’s put it all together and create our vertical cabbage garden!
1. Cut the Rope or Twine: Determine the desired length of your vertical garden and cut the rope or twine accordingly. Remember to leave some extra length at the top for hanging. I usually cut several pieces of rope, each about 6-8 feet long, depending on how many bottles I want to stack.
2. Attach the Bottles to the Rope: This is where we’ll create the vertical structure. There are a couple of ways to do this:
* Method 1: Knotting: Make a knot in the rope at the desired height for the first bottle. Place the bottle on top of the knot, ensuring it’s secure. Repeat this process for each bottle, spacing them evenly apart. I usually leave about 10-12 inches between each bottle to allow the cabbage plants to grow comfortably.
* Method 2: Drilling Holes: Drill two small holes on opposite sides of each bottle, near the top. Thread the rope through the holes, securing each bottle in place. This method provides a more stable structure, especially if you’re using heavier bottles or plan to grow larger cabbage varieties.
3. Secure the Top: Once you’ve attached all the bottles, make a loop at the top of the rope for hanging. Make sure the loop is strong and secure enough to support the weight of the entire vertical garden.
Planting the Cabbage Seedlings
Time to get our hands dirty and plant those cabbage seedlings!
1. Fill the Bottles with Potting Soil: Carefully fill each bottle with potting soil, leaving about an inch of space at the top. Gently pat down the soil to remove any air pockets.
2. Plant the Seedlings: Dig a small hole in the center of each bottle and carefully place a cabbage seedling into the hole. Make sure the roots are covered with soil.
3. Water Thoroughly: Water the seedlings gently but thoroughly, until the water drains out of the drainage holes. This will help the soil settle and encourage root growth.
Caring for Your Vertical Cabbage Garden
Now that your vertical cabbage garden is all set up, it’s important to provide proper care to ensure healthy growth and a bountiful harvest.
* Sunlight: Cabbage plants need at least 6 hours of sunlight per day. Place your vertical garden in a sunny location, such as a balcony, patio, or near a window. If you don’t have enough natural sunlight, you can supplement with grow lights.
* Watering: Water your cabbage plants regularly, especially during hot and dry weather. Check the soil moisture by sticking your finger into the soil. If it feels dry, it’s time to water. Avoid overwatering, as this can lead to root rot.
* Fertilizing: Cabbage plants are heavy feeders, so it’s important to fertilize them regularly. Use a balanced fertilizer or a fertilizer specifically formulated for vegetables. Follow the instructions on the fertilizer package. I like to use a liquid fertilizer diluted in water and apply it every 2-3 weeks.
* Pest Control: Keep an eye out for pests, such as aphids, cabbage worms, and slugs. If you notice any pests, take action immediately. You can use organic pest control methods, such as insecticidal soap or neem oil. You can also handpick pests off the plants.
* Support: As your cabbage plants grow, they may become top-heavy. Provide support by staking the plants or using plant ties. This will prevent them from falling over.
* Harvesting: Cabbage is typically ready to harvest in 60-80 days, depending on the variety. The head should be firm and compact. To harvest, cut the head off the plant with a sharp knife, leaving a few outer leaves intact.
Troubleshooting
Even with the best care, you might encounter some challenges along the way. Here are a few common problems and how to solve them:
* Yellowing Leaves: This could be a sign of overwatering, underwatering, or nutrient deficiency. Check the soil moisture and adjust your watering schedule accordingly. Fertilize the plants with a balanced fertilizer.
* Slow Growth: This could be due to insufficient sunlight, poor soil, or pest infestation. Make sure your plants are getting enough sunlight and use a good quality potting soil. Check for pests and take action if necessary.
* Root Rot: This is caused by overwatering and poor drainage. Make sure your bottles have adequate drainage holes and avoid overwatering. If you suspect root rot, remove the affected plants and replant them in fresh soil.
* Pest Infestation: As mentioned earlier, keep an eye out for pests and take action immediately. Use organic pest control methods or handpick the pests off the plants.
Tips for Success
Here are a few extra tips to help you succeed with your vertical cabbage garden:
* Choose the Right Cabbage Variety: Some cabbage varieties are better suited for container gardening than others. Look for compact varieties that don’t grow too large.
* Use High-Quality Potting Soil: A good quality potting soil will provide the nutrients and drainage that your cabbage plants need to thrive.
* Water Regularly: Cabbage plants need consistent moisture, so water them regularly, especially during hot and dry weather.
* Fertilize Regularly: Cabbage plants are heavy feeders, so fertilize them regularly with a balanced fertilizer.
* Monitor for Pests: Keep an eye out for pests and take action immediately to prevent them from damaging your plants.
* Rotate Your Crops: To prevent soilborne diseases, rotate your crops each year. Don’t plant cabbage in the same spot year after year.
* Have Fun! Gardening should be enjoyable, so relax and have fun with your vertical cabbage garden.
I hope you found this
Conclusion
So, there you have it! Transforming humble plastic bottles into a thriving cabbage garden is not just a quirky DIY project; it’s a sustainable, space-saving, and surprisingly effective way to cultivate fresh, delicious vegetables right at your doorstep. We’ve explored the simple steps, from preparing your bottles to nurturing your cabbage seedlings, and hopefully, you’re now brimming with inspiration to embark on your own vertical gardening adventure.
But why is this DIY trick a must-try? Beyond the obvious environmental benefits of repurposing plastic waste, a plastic bottle cabbage garden offers several compelling advantages. Firstly, it’s incredibly space-efficient. Whether you have a sprawling backyard or a tiny balcony, you can easily create a vertical garden that maximizes your growing area. Secondly, it provides excellent drainage and aeration for your cabbage plants, promoting healthy root development and preventing waterlogging. Thirdly, it’s a cost-effective way to grow your own food, reducing your reliance on store-bought produce and saving you money in the long run. Finally, it’s a fun and rewarding project that connects you with nature and allows you to enjoy the satisfaction of harvesting your own homegrown vegetables.
Looking for variations to spice things up? Consider painting your plastic bottles with bright, cheerful colors to add a touch of personality to your garden. You can also experiment with different types of cabbage, such as red cabbage, savoy cabbage, or napa cabbage, to create a diverse and visually appealing display. For added support, especially if you’re growing larger cabbage varieties, you can reinforce your bottle structures with bamboo stakes or wooden dowels. And don’t forget to label each bottle with the type of cabbage you’re growing, so you can easily keep track of your plants.
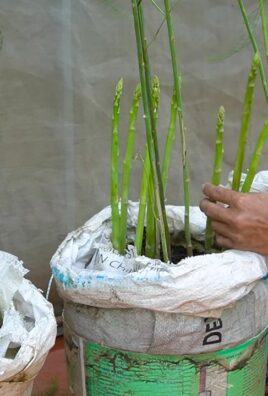
The possibilities are endless! This method isn’t just limited to cabbages either. You can adapt this technique for growing other leafy greens like lettuce, spinach, or kale. The key is to choose plants with relatively shallow root systems that can thrive in the confined space of a plastic bottle.
We wholeheartedly encourage you to give this DIY plastic bottle cabbage garden a try. It’s a simple, sustainable, and satisfying way to grow your own food and make a positive impact on the environment. Don’t be afraid to experiment, get creative, and have fun with it!
And most importantly, we want to hear about your experience! Share your photos, tips, and challenges in the comments section below. Let’s build a community of passionate gardeners who are committed to sustainable living and delicious homegrown vegetables. Your insights could inspire others to embark on their own plastic bottle gardening journey. So, grab your scissors, gather your plastic bottles, and get ready to grow some amazing cabbages! Let’s transform waste into wonder, one bottle at a time.
Frequently Asked Questions (FAQ)
What type of plastic bottles are best for this project?
Ideally, you should use sturdy, food-grade plastic bottles, such as those used for water, juice, or soda. Avoid using bottles that have contained harsh chemicals or cleaning products, as these could contaminate your soil and harm your plants. The size of the bottle will depend on the variety of cabbage you’re growing. Smaller bottles are suitable for compact varieties, while larger bottles are needed for larger, head-forming cabbages. Make sure the bottles are clean and free of any residue before you start.
How do I prepare the plastic bottles for planting?
First, thoroughly clean the bottles with soap and water to remove any dirt or debris. Then, cut a large rectangular opening in the side of each bottle, leaving enough space for the cabbage plant to grow. Make sure to smooth the edges of the opening to prevent any sharp edges that could damage the plants. You’ll also need to create drainage holes in the bottom of each bottle to prevent waterlogging. You can do this by poking several small holes with a nail or drill.
What type of soil should I use for my plastic bottle cabbage garden?
A well-draining, nutrient-rich potting mix is ideal for growing cabbages in plastic bottles. You can purchase a pre-made potting mix from your local garden center or create your own by combining equal parts compost, peat moss, and perlite or vermiculite. Avoid using garden soil, as it can be too heavy and compacted for container gardening.
How often should I water my cabbage plants in plastic bottles?
The frequency of watering will depend on the weather conditions and the type of soil you’re using. Generally, you should water your cabbage plants whenever the top inch of soil feels dry to the touch. Be sure to water thoroughly, allowing the water to drain out of the drainage holes in the bottom of the bottles. Avoid overwatering, as this can lead to root rot.
How much sunlight do cabbage plants need?
Cabbage plants need at least six hours of direct sunlight per day to thrive. Choose a sunny location for your plastic bottle cabbage garden, such as a south-facing balcony or patio. If you don’t have enough sunlight, you can supplement with grow lights.
Do I need to fertilize my cabbage plants in plastic bottles?
Yes, cabbage plants are heavy feeders and will benefit from regular fertilization. Use a balanced fertilizer that is specifically formulated for vegetables. Follow the instructions on the fertilizer package for application rates and frequency. You can also supplement with organic fertilizers, such as compost tea or fish emulsion.
How do I protect my cabbage plants from pests and diseases?
Cabbage plants are susceptible to a variety of pests and diseases, such as cabbage worms, aphids, and clubroot. To prevent these problems, inspect your plants regularly for signs of infestation or disease. You can use organic pest control methods, such as insecticidal soap or neem oil, to control pests. To prevent diseases, ensure good air circulation around your plants and avoid overwatering.
How long does it take for cabbages to mature in plastic bottles?
The time it takes for cabbages to mature will depend on the variety you’re growing and the growing conditions. Generally, cabbages take between 60 and 90 days to mature. You can harvest your cabbages when the heads are firm and compact.
Can I grow other vegetables in plastic bottles using this method?
Yes, you can grow other vegetables in plastic bottles using this method. Leafy greens like lettuce, spinach, and kale are particularly well-suited for container gardening. You can also grow herbs, such as basil, parsley, and cilantro. Just be sure to choose plants with relatively shallow root systems that can thrive in the confined space of a plastic bottle.
What do I do with the plastic bottles after I harvest my cabbages?
After you harvest your cabbages, you can reuse the plastic bottles for another planting season. Simply clean them thoroughly and replenish the soil. Alternatively, you can recycle the plastic bottles or repurpose them for other gardening projects.


Leave a Comment