
Peanut Sack Gardening: Ever dreamt of a bountiful garden bursting with fresh veggies and vibrant flowers, but thought you lacked the space or the green thumb? Well, dream no more! I’m here to tell you about a simple, ingenious, and incredibly rewarding DIY project that will transform your gardening experience: Peanut Sack Gardening!
For generations, resourceful gardeners around the world have sought innovative ways to cultivate plants in limited spaces. From ancient hanging gardens to modern-day container gardening, the desire to connect with nature and grow our own food has always been strong. Peanut Sack Gardening is a modern twist on this age-old tradition, offering a sustainable and accessible solution for urban dwellers, apartment residents, or anyone looking to maximize their gardening potential.
Why do you need this DIY trick? Because it’s a game-changer! Imagine turning humble peanut sacks – readily available and often discarded – into thriving vertical gardens. This method is not only eco-friendly, repurposing materials that would otherwise end up in landfills, but it also offers incredible benefits. Peanut Sack Gardening allows you to grow a surprising amount of produce in a small footprint, making it perfect for balconies, patios, or even sunny windowsills. Plus, it’s a fantastic way to control soil quality, prevent weeds, and enjoy fresh, homegrown goodness right at your fingertips. So, let’s dive in and discover how you can create your own thriving peanut sack garden!
DIY Peanut Sack Gardening: Grow Your Own Veggies in Style!
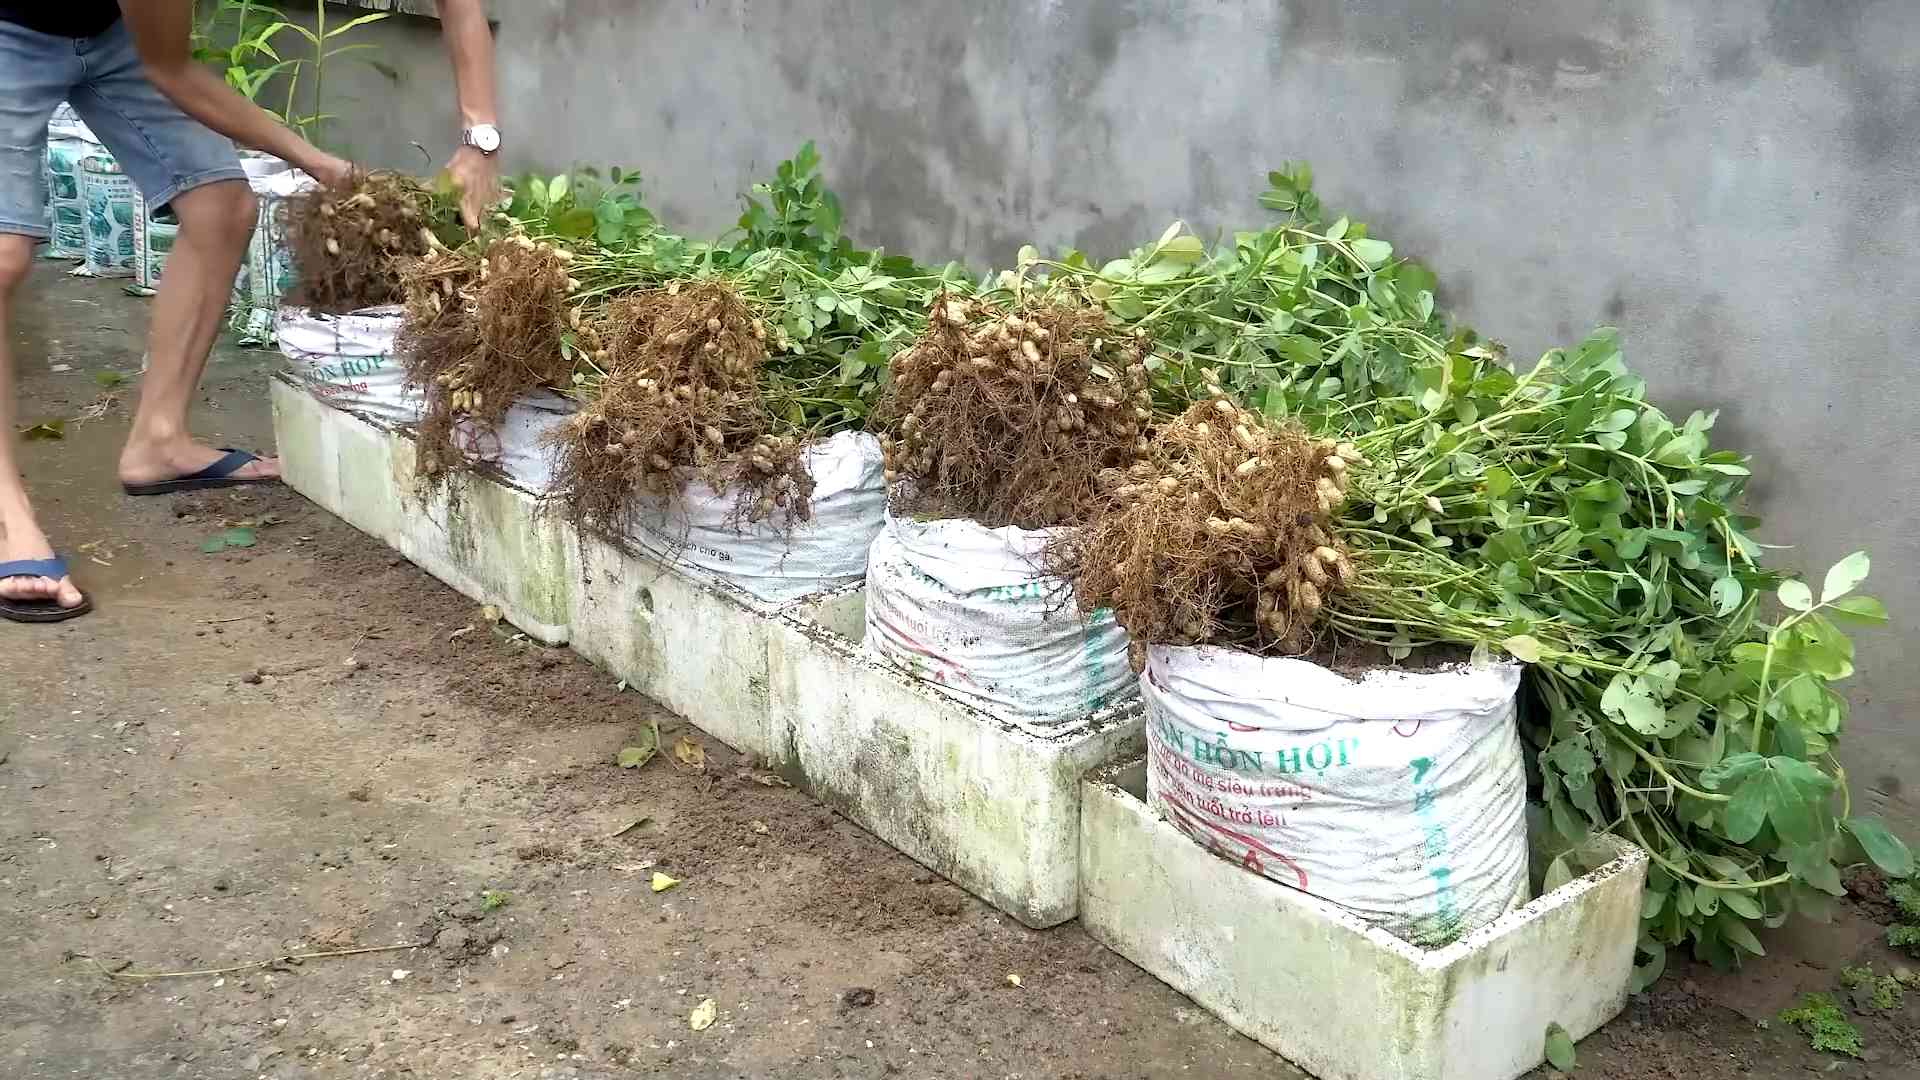
Hey there, fellow gardening enthusiasts! Are you looking for a creative, eco-friendly, and space-saving way to grow your own vegetables? Well, look no further! I’m going to walk you through how to create a fantastic garden using… peanut sacks! Yes, you read that right. Those sturdy, breathable sacks that usually end up in the trash can be transformed into amazing planters. This project is perfect for small spaces, balconies, or anyone who wants to add a rustic touch to their garden. Plus, it’s a great way to recycle and reduce waste. Let’s get started!
What You’ll Need
Before we dive in, let’s gather all the necessary materials. Trust me, having everything ready will make the process much smoother.
* **Peanut Sacks:** Obviously! You’ll need at least one, but I recommend having a few on hand in case you want to create a whole garden. Look for burlap or woven polypropylene sacks. Burlap is biodegradable and adds a lovely natural look, while polypropylene is more durable and water-resistant.
* **Potting Soil:** This is crucial for providing your plants with the nutrients they need. Choose a high-quality potting mix that drains well.
* **Seeds or Seedlings:** Decide what you want to grow! Leafy greens like lettuce and spinach, herbs like basil and mint, and even smaller vegetables like peppers and tomatoes do well in peanut sacks.
* **Gravel or Pebbles:** This will help with drainage and prevent the soil from becoming waterlogged.
* **Landscape Fabric (Optional):** This can help line the inside of the sack and prevent soil from seeping out. It also helps with water retention.
* **Scissors or Utility Knife:** For cutting the landscape fabric and making drainage holes.
* **Measuring Tape:** To measure the landscape fabric.
* **Staple Gun (Optional):** To secure the landscape fabric to the sack.
* **Watering Can or Hose:** For watering your plants.
* **Gloves:** To protect your hands.
* **A Sunny Spot:** Choose a location that gets at least 6 hours of sunlight per day.
Preparing the Peanut Sack
Okay, let’s get our hands dirty! The first step is to prepare the peanut sack for planting.
1. **Clean the Sack:** Give your peanut sack a good shake to remove any loose debris or peanut remnants. If it’s particularly dirty, you can gently wash it with water and let it dry completely.
2. **Create Drainage Holes:** This is super important! Without proper drainage, your plants will drown. Use your scissors or utility knife to poke several holes in the bottom of the sack. I usually make about 6-8 holes, spaced evenly apart.
3. **Line the Sack (Optional):** If you’re using landscape fabric, now’s the time to line the inside of the sack. This step is optional, but I highly recommend it, especially if you’re using a burlap sack, as it can help prevent the soil from drying out too quickly.
* Measure the inside of the sack. You’ll need enough fabric to cover the bottom and sides.
* Cut the landscape fabric to the appropriate size.
* Place the fabric inside the sack, making sure it covers the bottom and sides.
* Fold the top edge of the fabric over the top edge of the sack.
* Secure the fabric to the sack using a staple gun or by sewing it in place. If you don’t have a staple gun, you can simply fold the fabric over and let the soil hold it in place.
4. **Add Gravel or Pebbles:** Pour a layer of gravel or pebbles into the bottom of the sack. This will further improve drainage and prevent the soil from clogging the drainage holes. I usually add about 2-3 inches of gravel.
Planting Your Seeds or Seedlings
Now for the fun part – planting!
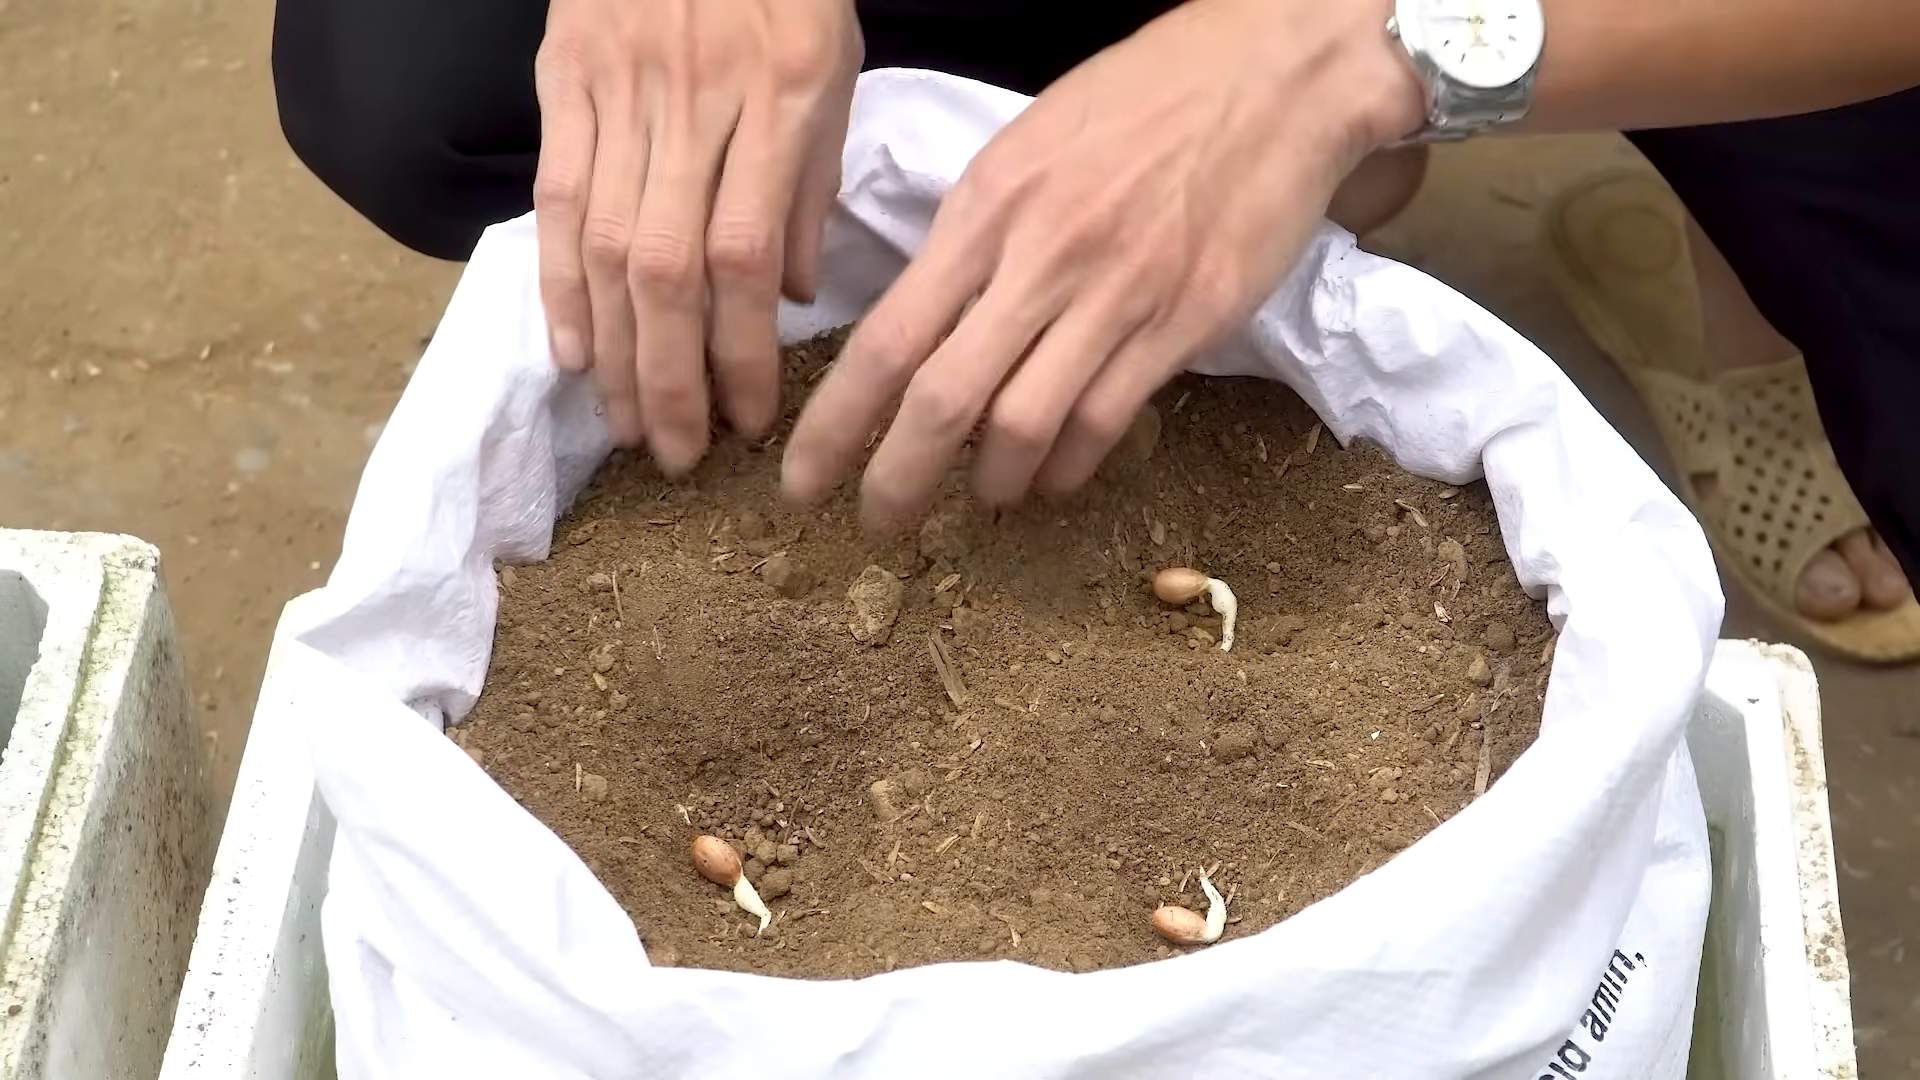
1. **Fill the Sack with Potting Soil:** Carefully fill the sack with potting soil, leaving about 2-3 inches of space at the top. Gently pat down the soil to remove any air pockets.
2. **Plant Your Seeds or Seedlings:** Follow the instructions on your seed packet or seedling label for proper planting depth and spacing.
* **For Seeds:** Make small holes in the soil, plant the seeds, and cover them with a thin layer of soil. Gently water the soil.
* **For Seedlings:** Dig a hole large enough to accommodate the root ball of the seedling. Carefully remove the seedling from its container and place it in the hole. Fill the hole with soil and gently pat it down. Water the seedling thoroughly.
3. **Water Thoroughly:** After planting, water the soil thoroughly until water drains out of the drainage holes. This will help settle the soil and ensure that the roots are properly hydrated.
4. **Add Mulch (Optional):** Adding a layer of mulch around your plants can help retain moisture, suppress weeds, and regulate soil temperature. I like to use straw, wood chips, or shredded leaves.
Caring for Your Peanut Sack Garden
Congratulations! You’ve successfully created a peanut sack garden. Now, it’s important to provide your plants with the care they need to thrive.
1. **Water Regularly:** Check the soil moisture regularly and water when the top inch of soil feels dry to the touch. Be careful not to overwater, as this can lead to root rot. The frequency of watering will depend on the weather, the type of plants you’re growing, and the type of sack you’re using. Burlap sacks tend to dry out faster than polypropylene sacks.
2. **Fertilize Regularly:** Plants growing in containers need regular fertilization to provide them with the nutrients they need. Use a balanced fertilizer according to the instructions on the label. I like to use a slow-release fertilizer, which provides nutrients over a longer period of time.
3. **Provide Support (If Needed):** Some plants, such as tomatoes and peppers, may need support as they grow. You can use stakes, trellises, or cages to provide support.
4. **Pest and Disease Control:** Keep an eye out for pests and diseases. If you notice any problems, take action immediately. You can use organic pest control methods, such as insecticidal soap or neem oil.
5. **Rotate Your Crops:** To prevent soil depletion and the buildup of pests and diseases, rotate your crops each season. This means planting different types of plants in the same sack each year.
6. **Move the Sacks (If Necessary):** If you live in an area with harsh weather, you may need to move your peanut sacks to a more sheltered location during extreme heat, cold, or storms.
Choosing the Right Plants
Not all plants are created equal when it comes to peanut sack gardening. Here are some of my favorite plants to grow in peanut sacks:
* **Leafy Greens:** Lettuce, spinach, kale, and arugula are all great choices for peanut sacks. They’re easy to grow and don’t require a lot of space.
* **Herbs:** Basil, mint, parsley, cilantro, and chives thrive in peanut sacks. They add flavor to your meals and are easy to care for.
* **Peppers:** Smaller pepper varieties, such as bell peppers and chili peppers, do well in peanut sacks.
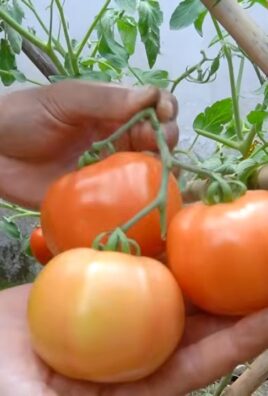
* **Tomatoes:** Dwarf or bush tomato varieties are ideal for peanut sacks. They don’t get too large and produce plenty of delicious tomatoes.
* **Strawberries:** Strawberries are a fun and rewarding crop to grow in peanut sacks.
* **Radishes:** Radishes are quick and easy to grow, making them a great choice for beginner gardeners.
* **Marigolds:** Marigolds are not only beautiful but also help deter pests.
Troubleshooting
Even with the best planning, you might encounter some challenges along the way. Here are some common problems and how to fix them:
* **Plants are Wilting:** This could be due to underwatering, overwatering, or heat stress. Check the soil moisture and adjust your watering schedule accordingly. If it’s hot, move the sacks to a shadier location.
* **Leaves are Turning Yellow:** This could be due to nutrient deficiency. Fertilize your plants with a balanced fertilizer.
* **Pests are Attacking Your Plants:** Identify the pest and take appropriate action. Use organic pest control methods whenever possible.
* **Soil is Drying Out Too Quickly:** This could be due to the type of sack you’re using or the weather conditions. Line the sack with landscape fabric or add a layer of mulch to help retain moisture.
* **Plants are Not Growing Well:** This could be due to poor soil quality, lack of sunlight, or improper watering. Make sure you’re using a high-quality potting mix, providing your plants with at least 6 hours of sunlight per day, and watering them properly.
Creative Ideas and Variations
Once you get the hang of peanut sack gardening, you can start experimenting with different ideas and variations.
* **Vertical Garden:** Hang your peanut sacks on a wall or fence to create a vertical garden
Conclusion
So, there you have it! Peanut sack gardening: a simple, sustainable, and surprisingly effective way to grow your own food, even with limited space. We’ve walked you through the process, highlighting the ease and affordability of this method. But why is this DIY trick a must-try? It boils down to several key factors:
First, it’s incredibly space-efficient. Forget sprawling gardens; peanut sack gardening allows you to cultivate a surprising amount of produce in a small footprint, making it perfect for balconies, patios, or even sunny corners indoors. Second, it’s budget-friendly. Reusing peanut sacks (or similar sturdy bags) minimizes costs, and you can often source soil and compost locally or even create your own. Third, it’s environmentally conscious. By repurposing materials and reducing your reliance on commercially grown produce, you’re contributing to a more sustainable lifestyle. Finally, it’s incredibly rewarding. There’s nothing quite like harvesting fresh vegetables or herbs that you’ve grown yourself, knowing you’ve nurtured them from seed to table.
But the beauty of peanut sack gardening lies in its adaptability. Feel free to experiment with different variations to suit your needs and preferences. For example, if you’re growing heavier plants like tomatoes or peppers, consider reinforcing the sack with extra layers or using a sturdier material altogether. You could also try creating a tiered system by stacking multiple sacks on top of each other, maximizing vertical space and creating a visually appealing display.
Another exciting variation is to incorporate companion planting. Research which plants thrive together and plant them in the same sack. For instance, basil and tomatoes are a classic combination, as basil is believed to deter pests and improve the flavor of tomatoes. Similarly, marigolds can help repel nematodes, which are common soil pests.
Don’t be afraid to get creative with your soil mix as well. While a basic blend of topsoil, compost, and perlite works well, you can customize it to suit the specific needs of your plants. For acid-loving plants like blueberries, add some peat moss to lower the pH. For plants that prefer well-draining soil, increase the amount of perlite or sand.
Remember, the key to successful peanut sack gardening is observation and adaptation. Pay close attention to your plants’ needs and adjust your watering, fertilizing, and pest control strategies accordingly.
We wholeheartedly encourage you to give peanut sack gardening a try. It’s a fun, educational, and ultimately satisfying experience that can connect you with nature and provide you with fresh, healthy food. Once you’ve tried it, we’d love to hear about your experience! Share your photos, tips, and challenges in the comments section below. Let’s build a community of peanut sack gardeners and learn from each other. What are you waiting for? Grab a peanut sack, some soil, and some seeds, and get growing! You might just surprise yourself with what you can achieve.
Frequently Asked Questions (FAQ)
What kind of peanut sack should I use?
Ideally, you want a sturdy, woven peanut sack made of burlap or a similar durable material. Avoid using plastic sacks, as they don’t breathe as well and can lead to drainage problems. If you can’t find a peanut sack specifically, you can use other large, strong bags, such as feed sacks or even heavy-duty reusable shopping bags. Just make sure they’re clean and free of any harmful chemicals. The size of the sack will depend on what you plan to grow. Smaller sacks are suitable for herbs and leafy greens, while larger sacks are needed for tomatoes, peppers, and other larger plants.
What kind of soil should I use for peanut sack gardening?
A good soil mix is crucial for successful peanut sack gardening. A basic mix consists of equal parts topsoil, compost, and perlite or vermiculite. The topsoil provides structure and nutrients, the compost adds organic matter and improves drainage, and the perlite or vermiculite helps with aeration and water retention. You can also add other amendments, such as bone meal for phosphorus or blood meal for nitrogen, depending on the needs of your plants. Avoid using garden soil directly from your yard, as it can be too heavy and compacted for container gardening.
How often should I water my peanut sack garden?
Watering frequency depends on several factors, including the weather, the type of plants you’re growing, and the size of the sack. In general, you should water your peanut sack garden when the top inch of soil feels dry to the touch. Water deeply until the water drains out of the bottom of the sack. Avoid overwatering, as this can lead to root rot. During hot, dry weather, you may need to water daily, while during cooler, wetter weather, you may only need to water every few days. A good way to check the moisture level is to stick your finger into the soil. If it feels dry, it’s time to water.
What kind of fertilizer should I use for peanut sack gardening?
Container gardens, including peanut sack gardens, require regular fertilization because the nutrients in the soil are quickly depleted. You can use either a liquid fertilizer or a slow-release granular fertilizer. Liquid fertilizers are applied more frequently, typically every 1-2 weeks, while slow-release fertilizers are applied less often, typically every 2-3 months. Choose a fertilizer that is formulated for the type of plants you’re growing. For example, a fertilizer high in nitrogen is good for leafy greens, while a fertilizer high in phosphorus is good for flowering and fruiting plants. Always follow the instructions on the fertilizer label.
How do I deal with pests and diseases in my peanut sack garden?
Pests and diseases can be a problem in any garden, including peanut sack gardens. To prevent problems, start with healthy plants and use a good quality soil mix. Regularly inspect your plants for signs of pests or diseases. If you find any, take action immediately. There are many organic pest control methods you can use, such as insecticidal soap, neem oil, and diatomaceous earth. For diseases, you can try using a copper fungicide or a baking soda solution. You can also attract beneficial insects to your garden, such as ladybugs and lacewings, which will help control pests.
Can I grow anything in a peanut sack garden?
While some plants are better suited for peanut sack gardening than others, you can grow a wide variety of vegetables, herbs, and flowers. Some popular choices include tomatoes, peppers, cucumbers, zucchini, lettuce, spinach, kale, basil, mint, and marigolds. Avoid growing large, sprawling plants like pumpkins or watermelons, as they will quickly outgrow the sack. When choosing plants, consider the size of the sack and the amount of sunlight available.
How do I overwinter my peanut sack garden?
Depending on your climate, you may be able to overwinter some of your plants in your peanut sack garden. Hardy plants like kale and spinach can often survive mild winters with some protection. To overwinter your plants, move the sacks to a sheltered location, such as a garage or shed. Water sparingly and avoid fertilizing during the winter months. In the spring, gradually acclimate your plants to the outdoors before moving them back to their original location. For plants that are not hardy, you can either bring them indoors or start new plants from seed in the spring.
How long will a peanut sack garden last?
The lifespan of a peanut sack garden depends on the material of the sack and the growing conditions. Burlap sacks will typically last for one to two growing seasons, while sturdier sacks made of synthetic materials can last for several years. To prolong the life of your sack, avoid overwatering, which can cause the sack to rot. You can also reinforce the sack with extra layers of material or use a liner to protect it from moisture. When the sack eventually wears out, you can simply replace it with a new one.
Is peanut sack gardening organic?
Peanut sack gardening can be organic, depending on the materials and methods you use. To ensure your garden is organic, use organic soil, compost, and fertilizer. Avoid using synthetic pesticides and herbicides. You can also practice companion planting and other organic pest control methods. By following these guidelines, you can create a healthy and sustainable peanut sack garden that provides you with fresh, organic produce.
Leave a Comment