
Harvest Bean Sprouts at Home: Imagine the satisfaction of adding fresh, crunchy bean sprouts to your salad, stir-fry, or sandwich, knowing you grew them yourself right in your kitchen! It’s easier than you think, and this DIY guide will show you exactly how to do it. For centuries, bean sprouts have been a staple in Asian cuisine, prized for their nutritional value and delicate flavor. From ancient medicinal practices to modern culinary delights, these little sprouts have a rich history.
But why should *you* learn to harvest bean sprouts at home? Well, store-bought sprouts can sometimes be a bit pricey, and there’s always the concern about freshness and potential contamination. Growing your own ensures you have a constant supply of the freshest, most delicious sprouts, free from any unwanted additives. Plus, it’s a fun and rewarding project that even beginners can master. I’m excited to share my favorite tips and tricks for successfully growing and harvesting bean sprouts in the comfort of your own home. Get ready to enjoy the taste of homegrown goodness!
Sprouting Bean Sprouts Yourself: A Simple Guide for Home
Hello dear DIY friends! Are you in the mood for fresh, crunchy bean sprouts but don’t feel like buying them at the supermarket? Then you’ve come to the right place! I’ll show you how you can easily and inexpensively grow your own bean sprouts at home. It’s super easy and a lot of fun! Plus, you’ll know exactly what’s in them and can enjoy the sprouts super fresh. Let’s get started!
What you need:
- Beans: Mung beans are best, but adzuki beans or lentils also work great. Make sure the beans are untreated and suitable for sprouting. Organic quality is, of course, always a good choice.
- A sprouting jar or a sprouting tower: A sprouting jar is a glass jar with a special sieve lid. A sprouting tower consists of several tiers in which the sprouts can germinate. Both work great, but for beginners, I recommend a sprouting jar as it’s easier to handle.
- A sieve or a fine cloth: For rinsing the sprouts.
- A dark place: Sprouts germinate best in the dark. A kitchen cabinet or a dark corner in the kitchen is ideal.
- Water: Preferably filtered water or boiled, cooled water.
- Patience: Sprouts need a few days to grow. But don’t worry, it’s faster than you think!
Step-by-Step Guide:
- Prepare the beans:
- First, you need to wash the beans thoroughly. Put them in a sieve and rinse them under running water until the water runs clear.
- Remove any damaged or discolored beans.
- Then, soak the beans in a bowl with plenty of water. The soaking time varies depending on the type of bean. Mung beans need about 8-12 hours, adzuki beans a little longer. The beans will swell during soaking, so make sure there is enough water.
- I usually do this in the evening, so the beans can soak overnight.
- Prepare the sprouting jar:
- Clean your sprouting jar or tower thoroughly with hot water and dish soap. Rinse it well afterwards to remove all soap residue.
- If you’re using a sprouting jar, screw the sieve lid on tightly.
- Put the beans in the sprouting jar:
- Drain the soaking water and rinse the beans thoroughly again.
- Put the soaked beans into the sprouting jar. Make sure the jar is not too full, as the sprouts will still grow. A layer of about 1-2 cm of beans is ideal.
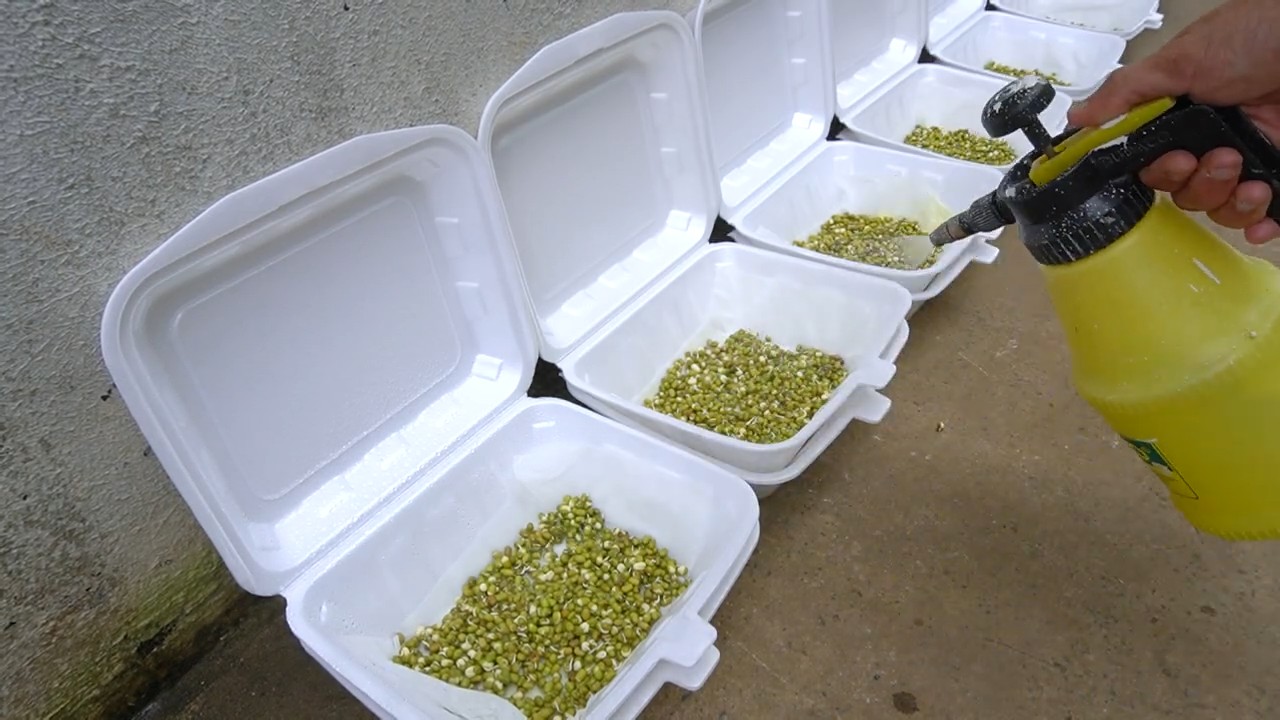
- Rinse the sprouts:
- This is the most important step! Sprouts must be rinsed regularly to prevent mold and to keep them moist.
- Rinse the sprouts at least twice a day, preferably in the morning and evening.
- Fill the sprouting jar with fresh water, swirl it gently so all sprouts are wetted, and then let the water drain out through the sieve lid.
- Then, place the sprouting jar at an angle in a bowl or a draining rack so that excess water can drain off. This is important to prevent the sprouts from sitting in water and rotting.
- Store in the dark:
- Place the sprouting jar in a dark place. A kitchen cabinet or a dark corner of the kitchen is ideal.
- Avoid direct sunlight, as it can dry out the sprouts.
- Repeat:
- Repeat the rinsing and dark storage for the next few days.
- After about 3-5 days, your sprouts should be ready to harvest. They will have developed small green leaflets and be nice and crunchy.
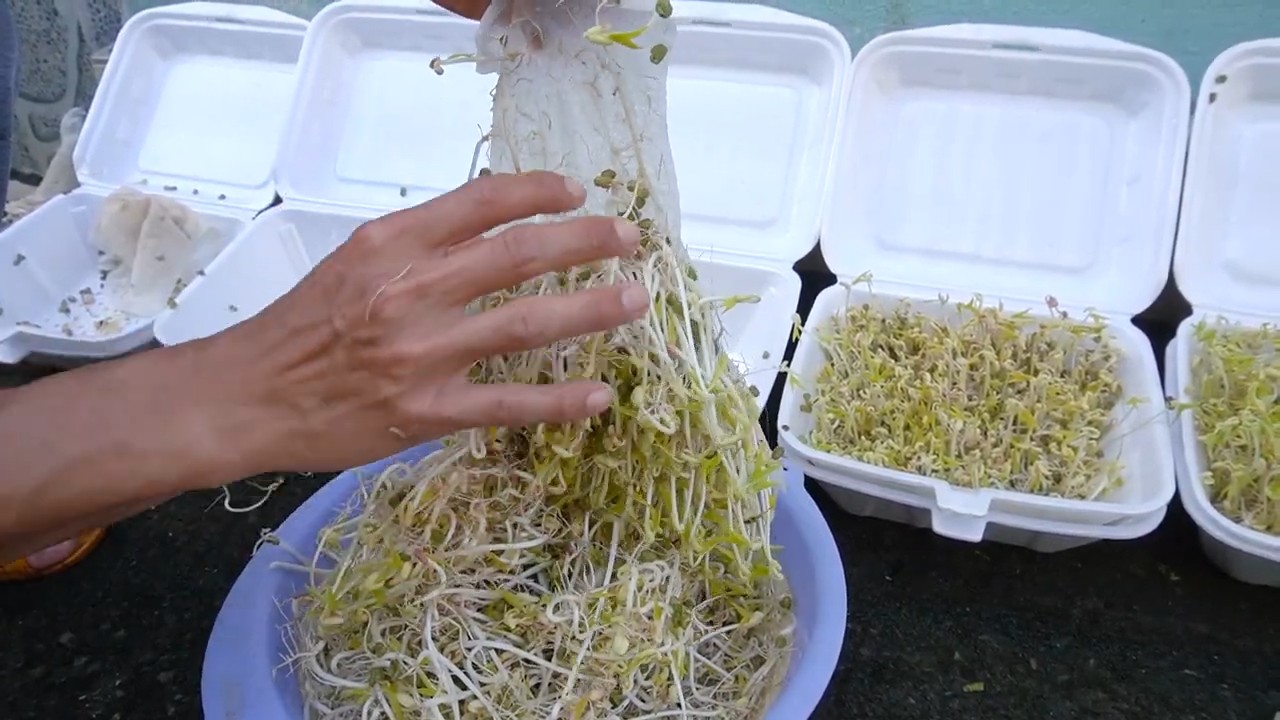
- Harvest:
- When the sprouts have reached the desired size, you can harvest them.
- Rinse the sprouts thoroughly one more time.
- Remove the seed husks, if desired. This is a bit tedious, but it’s worth it as the husks can sometimes taste a bit bitter. I usually don’t do this because it’s too much work for me.
- Let the sprouts drain well.
- Store:
- Store the sprouts in the refrigerator. Preferably in an airtight container or a plastic bag.
- They will keep for about 3-5 days in the fridge.
- Make sure the sprouts are not wet, as they can quickly become moldy.
Tips and Tricks for Perfect Bean Sprouts:
- Hygiene is important: Make sure all utensils are clean to prevent mold.
- Not too many beans: Don’t put too many beans in the sprouting jar, as the sprouts need space to grow.
- Rinse regularly: Regular rinsing is the key to healthy sprouts.
- Be patient: Sprouts take time to grow. Be patient and don’t get discouraged if it doesn’t work out the first time.
- Try different types of beans: Experiment with different types of beans to find your favorite.
- Eat sprouts raw or cooked: Sprouts can be eaten raw, for example in salads or as a topping for soups. They can also be briefly pan-fried or steamed.
- Sprouts as fertilizer: The rinsing water from the sprouts is an excellent fertilizer for your plants.
Possible Problems and Solutions:
- Mold: If the sprouts get moldy, it’s usually due to poor hygiene or insufficient rinsing. Remove the affected sprouts and rinse the remaining ones thoroughly. In the future, ensure better hygiene and rinse the sprouts regularly.
- Rotten sprouts: Rotten sprouts occur when they are too wet. Make sure the water can drain well and the sprouts are not sitting in water.
- No germination: If the beans don’t germinate, it could be due to the quality of the beans. Use only untreated beans that are suitable for sprouting. It could also be that the beans are too old.
Uses for Bean Sprouts:
Bean sprouts are incredibly versatile and can be used in many different dishes. Here are a few ideas:
- Salads: Bean sprouts are a great addition to salads. They bring freshness and crunch to the salad.
- Soups: Bean sprouts can be used as a topping for soups. They give the soup a special touch.
- Wok dishes: Bean sprouts are a classic in wok dishes. They are briefly stir-fried and retain their bite.
- Spring rolls: Bean sprouts are an important component of spring rolls.
- Sandwiches: Bean sprouts can also be used on sandwiches or wraps.
- Plain as a snack: Just like that, as a healthy snack in between!
I hope this guide has helped you and that you’ll soon have your own fresh bean sprouts on your plate! Have fun sprouting
Conclusion
So, there you have it! Harvesting your own bean sprouts at home is not just a fun project; it’s a gateway to fresher, more flavorful ingredients right at your fingertips. Forget those limp, sometimes questionable sprouts from the grocery store. With this simple DIY trick, you’re in control of the entire process, ensuring peak freshness and maximizing nutritional value.
Why is this a must-try? Because it’s incredibly easy, cost-effective, and significantly reduces food waste. Think about it: no more buying a whole container of sprouts only to use a handful and watch the rest wilt away in your refrigerator. You harvest only what you need, when you need it. Plus, the taste difference is remarkable. Homegrown bean sprouts boast a crisp, clean flavor that store-bought varieties simply can’t match.
But the benefits don’t stop there. This DIY project is also a fantastic way to introduce children to the wonders of gardening and the importance of healthy eating. It’s a hands-on learning experience that fosters curiosity and encourages them to try new foods.
Looking for variations? Absolutely! While mung beans are the most common choice for sprouting, don’t be afraid to experiment with other types of beans and seeds. Lentils, alfalfa, radish seeds, and even broccoli seeds can be sprouted using the same method. Each will offer a unique flavor and texture, adding exciting new dimensions to your salads, sandwiches, and stir-fries. Consider adding a touch of spice to your sprouting water for a subtle flavor infusion. A pinch of red pepper flakes or a clove of garlic can impart a delightful warmth to your sprouts.
Another variation involves the sprouting container itself. While a mason jar works perfectly well, you can also use a sprouting bag or a multi-tiered sprouting system for larger batches. These specialized containers often provide better air circulation and drainage, leading to even healthier and more robust sprouts.
We wholeheartedly encourage you to give this DIY bean sprout harvesting method a try. It’s a rewarding experience that will transform the way you think about fresh produce. And once you’ve tasted the difference between homegrown and store-bought, you’ll never go back.
Don’t just take our word for it, though. We want to hear about your experiences! Share your photos, tips, and variations in the comments below. Let us know what types of beans you’ve sprouted, what dishes you’ve used them in, and any challenges you’ve encountered along the way. Your feedback will not only help other readers but also contribute to a vibrant community of home sprouting enthusiasts. Let’s all learn and grow together! Mastering the art of **harvest bean sprouts at home** is easier than you think, and the rewards are well worth the effort. So, grab some beans, a jar, and get sprouting!
Frequently Asked Questions (FAQ)
What kind of beans are best for sprouting?
Mung beans are the most popular and easiest to sprout, making them a great starting point for beginners. However, you can also sprout lentils, adzuki beans, chickpeas, and even some types of peas. Just be sure to use beans specifically intended for sprouting or cooking, as some ornamental beans can be toxic. Avoid using dried beans that have been treated with pesticides or other chemicals. Always source your beans from a reputable supplier to ensure their safety and viability.
How long does it take to sprout beans?
The sprouting time varies depending on the type of bean and the ambient temperature. Generally, mung beans will sprout in 3-5 days. Lentils may take slightly less time, while chickpeas might require a day or two longer. The ideal temperature for sprouting is between 70-75°F (21-24°C). Warmer temperatures can accelerate the process, but also increase the risk of mold growth. Cooler temperatures will slow down sprouting. Check your sprouts twice a day and rinse them thoroughly to prevent spoilage.
How do I prevent mold growth?
Mold growth is a common concern when sprouting beans, but it can be easily prevented with proper hygiene and ventilation. The most important step is to rinse your sprouts thoroughly at least twice a day with cool, clean water. This removes any accumulated bacteria or fungal spores. Ensure that your sprouting container has adequate drainage and air circulation. Avoid overcrowding the container, as this can trap moisture and promote mold growth. If you notice any signs of mold, such as a fuzzy or slimy texture, discard the entire batch immediately.
Are bean sprouts safe to eat?
Yes, bean sprouts are generally safe to eat, but it’s crucial to follow proper hygiene practices during the sprouting process. Raw sprouts can harbor bacteria like Salmonella and E. coli, so it’s essential to rinse them thoroughly and store them properly. Some people, such as pregnant women, young children, and individuals with weakened immune systems, may be more susceptible to foodborne illnesses and should consider cooking their sprouts before eating them. Cooking sprouts eliminates the risk of bacterial contamination.
How should I store bean sprouts?
Once your bean sprouts have reached your desired length, drain them thoroughly and store them in an airtight container lined with a paper towel. The paper towel will absorb excess moisture and help prevent spoilage. Store the container in the refrigerator for up to a week. Check the sprouts daily and discard any that show signs of wilting or discoloration. It’s best to use your sprouts as soon as possible for optimal flavor and freshness.
Can I sprout beans in direct sunlight?
No, direct sunlight is not recommended for sprouting beans. Bean sprouts prefer a dark or dimly lit environment. Exposure to direct sunlight can cause them to become bitter and develop tough stems. Keep your sprouting container in a cupboard, pantry, or other dark location. A small amount of indirect light is fine, but avoid placing them near a sunny window.
What if my beans don’t sprout?
If your beans aren’t sprouting, there could be several reasons. First, ensure that your beans are viable and haven’t expired. Old beans may have a lower germination rate. Second, check the temperature. If it’s too cold, the beans may not sprout. Third, make sure you’re soaking the beans for the correct amount of time. Over-soaking can cause them to rot. Finally, ensure that your sprouting container is clean and free of contaminants. If you’ve tried all of these steps and your beans still aren’t sprouting, try a different batch of beans or a different sprouting method.
Can I use tap water for sprouting?
Yes, you can use tap water for sprouting, as long as it’s safe to drink. If your tap water is heavily chlorinated, you may want to let it sit for a few hours to allow the chlorine to dissipate before using it for sprouting. Alternatively, you can use filtered water. The most important thing is to use clean, fresh water for rinsing and soaking your sprouts.
How do I know when my bean sprouts are ready to harvest?
Your bean sprouts are ready to harvest when they have reached your desired length and have developed small leaves. The ideal length is typically around 1-2 inches. The leaves should be green and healthy-looking. Taste a few sprouts to ensure they have a crisp, fresh flavor. If they taste bitter or have an off-putting odor, discard the entire batch.


Leave a Comment