
Hanging sweet potatoes harvest – the very words conjure images of lush, cascading vines overflowing with vibrant, earthy treasures! Have you ever dreamt of transforming your balcony, patio, or even a sunny corner of your kitchen into a miniature, edible jungle? Well, you’re in the right place! This isn’t just about growing food; it’s about creating a living work of art, a conversation starter, and a source of immense satisfaction.
For centuries, cultures around the globe have recognized the sweet potato not only as a nutritional powerhouse but also as a symbol of abundance and prosperity. From the indigenous peoples of South America, who first cultivated this versatile root, to its widespread adoption in Asian cuisine, the sweet potato boasts a rich and fascinating history. Now, we’re taking this time-honored tradition and giving it a modern, DIY twist!
Let’s face it, space is often a premium, especially for urban dwellers. But that shouldn’t stop you from enjoying the joys of gardening and the unparalleled taste of homegrown produce. That’s where the magic of hanging sweet potatoes harvest comes in. This DIY guide will unlock the secrets to successfully growing these delicious tubers vertically, maximizing your yield while minimizing your footprint. Imagine the pride of harvesting your own sweet potatoes, knowing you nurtured them from tiny slips to plump, flavorful roots. Plus, it’s a fantastic way to impress your friends and family with your green thumb skills! So, grab your gardening gloves, and let’s embark on this exciting journey together!
DIY Hanging Sweet Potato Harvest: A Step-by-Step Guide
Hey there, fellow gardeners! I’m so excited to share this super cool and surprisingly easy way to harvest your sweet potatoes – by hanging them! Forget digging and potentially damaging those precious tubers. This method is gentle, efficient, and honestly, a lot more fun. Plus, it looks pretty darn cool while they’re curing. Let’s get started!
What You’ll Need
Before we dive in, let’s gather our supplies. This is a pretty low-cost project, which is always a win in my book!
* **Your Sweet Potato Vines:** Obviously! Make sure they’re ready for harvest. We’ll talk about signs of readiness in a bit.
* Sharp Pruning Shears or Garden Scissors: For cleanly cutting the vines.
* Heavy-Duty Twine or Baling Wire: Something strong enough to hold the weight of the sweet potatoes. I prefer twine for its natural look, but baling wire is super sturdy.
* Gloves: To protect your hands from dirt and any potential irritants from the vines.
* Newspaper or Cardboard: To lay down and protect your workspace.
* A Well-Ventilated, Dark, and Dry Space: For curing the sweet potatoes. A garage, shed, or even a spare room works well.
* Optional: A Scale: If you’re curious about the total weight of your harvest.
Determining Harvest Time: Knowing When They’re Ready
This is crucial! You don’t want to harvest too early or too late. Here’s what to look for:
* Days to Maturity: Check the seed packet or plant tag for the estimated days to maturity for your specific sweet potato variety. This is a good starting point.
* Yellowing Leaves: As the sweet potatoes mature, the leaves will start to yellow and may even develop some brown spots. This is a natural sign of the plant focusing its energy on the tubers.
* First Frost Warning: This is a big one! Sweet potatoes are sensitive to frost. If a frost is predicted, it’s time to harvest, even if they’re not quite “perfectly” ready. Frost can damage the tubers and make them rot.
* Test Dig (Optional): If you’re unsure, you can carefully dig up one plant to check the size and maturity of the sweet potatoes. Be gentle so you don’t damage the other plants.
Harvesting and Hanging: The Fun Part!
Okay, now for the main event! This is where we get our hands dirty (well, gloved, anyway).
1. Prepare Your Workspace: Lay down newspaper or cardboard in your chosen harvesting area. This will help contain the mess and protect your surfaces.
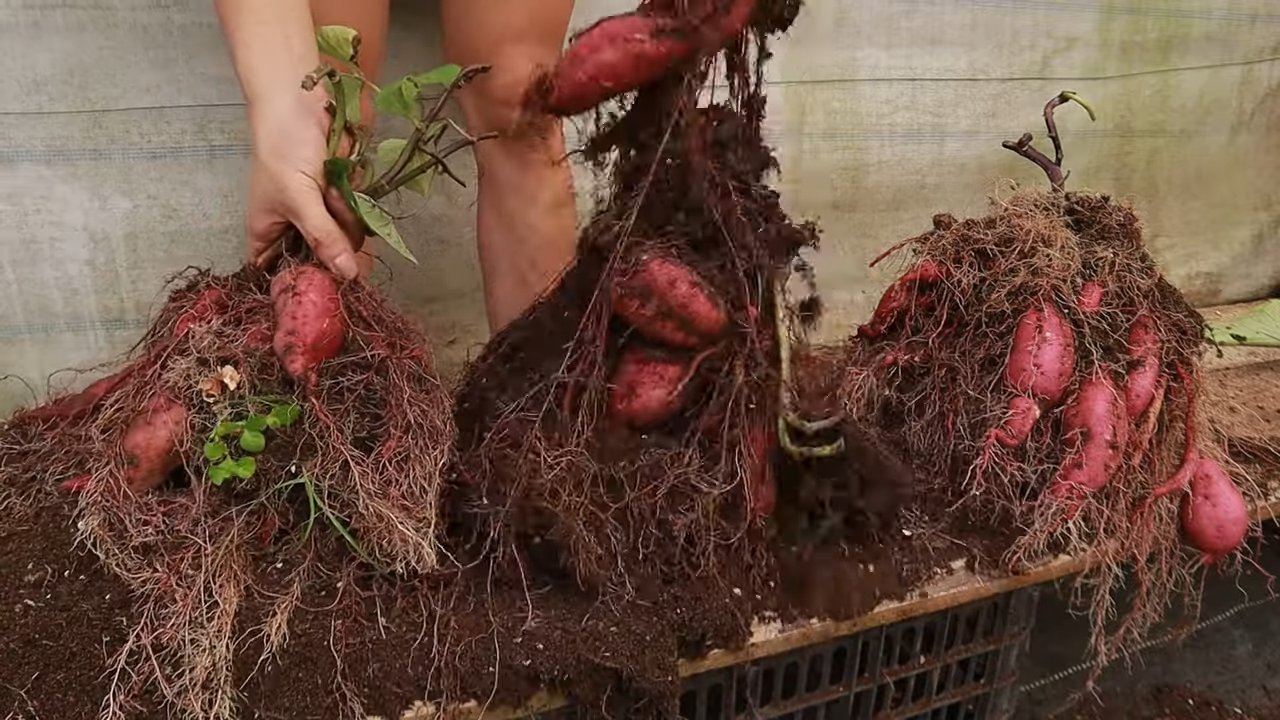
2. Carefully Cut the Vines: Using your pruning shears or garden scissors, cut the sweet potato vines about 6-8 inches above the ground. Be careful not to damage the sweet potatoes underneath. I like to cut them a little longer at first, just in case I need more vine to work with later.
3. Gently Lift the Vines: Now, gently lift the cut vines. You should see the sweet potatoes still attached to the roots. Be super careful not to pull or yank, as this could break the sweet potatoes off the vine. We want them to stay attached for the hanging process.
4. Inspect the Sweet Potatoes: Take a look at your sweet potatoes. Remove any that are obviously damaged or rotten. These won’t cure properly and could spoil the rest.
5. Prepare the Twine or Wire: Cut lengths of twine or wire long enough to hang the vines with the sweet potatoes attached. You’ll need to estimate the length based on where you plan to hang them. I usually cut mine about 3-4 feet long, just to be safe.
6. Attach the Twine or Wire: This is where the magic happens! Carefully wrap the twine or wire around the base of the cut vines, just above the sweet potatoes. Make sure it’s secure, but not so tight that it damages the vines. I like to create a loop at the top for easy hanging.
7. Hang the Vines: Find a sturdy place to hang your sweet potato vines. This could be a rafter in your garage, a hook in your shed, or even a clothesline. Make sure the area is well-ventilated, dark, and dry. This is crucial for proper curing.
8. Space Them Out: Hang the vines so that the sweet potatoes aren’t touching each other. This will allow for good air circulation and prevent rot.
9. Repeat: Repeat steps 2-8 for all of your sweet potato vines.
Hey there, fellow gardeners! I’m so excited to share this super cool and surprisingly easy way to harvest your sweet potatoes – by hanging them! Forget digging and potentially damaging those precious tubers. This method is gentle, efficient, and honestly, a lot more fun. Plus, it looks pretty darn cool while they’re curing. Let’s get started!
What You’ll Need
Before we dive in, let’s gather our supplies. This is a pretty low-cost project, which is always a win in my book!
* **Your Sweet Potato Vines:** Obviously! Make sure they’re ready for harvest. We’ll talk about signs of readiness in a bit.
* Sharp Pruning Shears or Garden Scissors: For cleanly cutting the vines.
* Heavy-Duty Twine or Baling Wire: Something strong enough to hold the weight of the sweet potatoes. I prefer twine for its natural look, but baling wire is super sturdy.
* Gloves: To protect your hands from dirt and any potential irritants from the vines.
* Newspaper or Cardboard: To lay down and protect your workspace.
* A Well-Ventilated, Dark, and Dry Space: For curing the sweet potatoes. A garage, shed, or even a spare room works well.
* Optional: A Scale: If you’re curious about the total weight of your harvest.
Determining Harvest Time: Knowing When They’re Ready
This is crucial! You don’t want to harvest too early or too late. Here’s what to look for:
* Days to Maturity: Check the seed packet or plant tag for the estimated days to maturity for your specific sweet potato variety. This is a good starting point.
* Yellowing Leaves: As the sweet potatoes mature, the leaves will start to yellow and may even develop some brown spots. This is a natural sign of the plant focusing its energy on the tubers.
* First Frost Warning: This is a big one! Sweet potatoes are sensitive to frost. If a frost is predicted, it’s time to harvest, even if they’re not quite “perfectly” ready. Frost can damage the tubers and make them rot.
* Test Dig (Optional): If you’re unsure, you can carefully dig up one plant to check the size and maturity of the sweet potatoes. Be gentle so you don’t damage the other plants.
Harvesting and Hanging: The Fun Part!
Okay, now for the main event! This is where we get our hands dirty (well, gloved, anyway).
1. Prepare Your Workspace: Lay down newspaper or cardboard in your chosen harvesting area. This will help contain the mess and protect your surfaces.
2. Carefully Cut the Vines: Using your pruning shears or garden scissors, cut the sweet potato vines about 6-8 inches above the ground. Be careful not to damage the sweet potatoes underneath. I like to cut them a little longer at first, just in case I need more vine to work with later.
3. Gently Lift the Vines: Now, gently lift the cut vines. You should see the sweet potatoes still attached to the roots. Be super careful not to pull or yank, as this could break the sweet potatoes off the vine. We want them to stay attached for the hanging process.
4. Inspect the Sweet Potatoes: Take a look at your sweet potatoes. Remove any that are obviously damaged or rotten. These won’t cure properly and could spoil the rest.
5. Prepare the Twine or Wire: Cut lengths of twine or wire long enough to hang the vines with the sweet potatoes attached. You’ll need to estimate the length based on where you plan to hang them. I usually cut mine about 3-4 feet long, just to be safe.
6. Attach the Twine or Wire: This is where the magic happens! Carefully wrap the twine or wire around the base of the cut vines, just above the sweet potatoes. Make sure it’s secure, but not so tight that it damages the vines. I like to create a loop at the top for easy hanging.
7. Hang the Vines: Find a sturdy place to hang your sweet potato vines. This could be a rafter in your garage, a hook in your shed, or even a clothesline. Make sure the area is well-ventilated, dark, and dry. This is crucial for proper curing.
8. Space Them Out: Hang the vines so that the sweet potatoes aren’t touching each other. This will allow for good air circulation and prevent rot.
9. Repeat: Repeat steps 2-8 for all of your sweet potato vines.
Curing Your Sweet Potatoes: The Key to Sweetness
Curing is essential for developing the sweetness and flavor of your sweet potatoes. It also helps them heal any minor scratches or bruises and extends their storage life.
1. Maintain the Right Conditions: The ideal curing conditions are warm (80-85°F or 27-29°C) and humid (80-90% humidity) for 4-7 days. This can be tricky to achieve in a home environment, but do your best.
2. Increase Humidity (If Needed): If your curing space is too dry, you can increase the humidity by placing a pan of water nearby or using a humidifier. Just be careful not to get the sweet potatoes wet.
3. Monitor for Rot: Check the sweet potatoes regularly for signs of rot. Remove any that are starting to spoil to prevent the rot from spreading.
4. After the Initial Curing Period: After 4-7 days, move the sweet potatoes to a cooler (55-60°F or 13-16°C), drier, and still dark location for long-term storage.
Storing Your Cured Sweet Potatoes: Keeping Them Fresh
Proper storage is key to enjoying your sweet potatoes for months to come.
1. Choose the Right Location: As mentioned above, a cool, dry, and dark place is ideal. A root cellar, unheated basement, or even a cool pantry can work well.
2. Avoid Refrigeration: Do not refrigerate sweet potatoes! This will cause them to develop a hard core and lose their flavor.
3. Handle with Care: Sweet potatoes are delicate, so handle them with care to avoid bruising.
4. Check Regularly: Check your stored sweet potatoes regularly for signs of rot. Remove any that are starting to spoil.
Troubleshooting: Common Issues and Solutions
Even with the best planning, things can sometimes go wrong. Here are a few common issues and how to address them:
* Sweet Potatoes Rotting During Curing: This is usually caused by too much moisture or poor ventilation. Make sure the sweet potatoes are not touching each other and that the air is circulating well. Remove any rotting sweet potatoes immediately.
* Sweet Potatoes Not Sweet Enough: This could be due to harvesting too early or not curing them properly. Make sure you harvest when the leaves are yellowing and follow the curing instructions carefully.
* Pests: While hanging, sweet potatoes are less susceptible to ground-dwelling pests. However, keep an eye out for any signs of infestation and take appropriate action.
Enjoying Your Harvest: Time to Eat!
After all that hard work, it’s time to enjoy the fruits (or rather, tubers) of your labor! Sweet potatoes are incredibly versatile and can be used in a variety of dishes. Roast them, bake them, mash them, or even make sweet potato fries. The possibilities are endless!
I hope you found this guide helpful. Happy harvesting, and happy eating!
Conclusion
So, there you have it! Transforming your sweet potato harvest into stunning, space-saving hanging planters is more than just a clever gardening hack; it’s a sustainable way to extend the life of your precious crop, add a touch of rustic charm to your home, and even propagate new sweet potato plants. This DIY trick is a must-try for anyone looking to maximize their harvest, embrace eco-friendly practices, and enjoy the beauty of nature indoors.
Why is this method so compelling? First, it addresses the common issue of storage space. Sweet potatoes, while delicious and nutritious, can take up significant room when stored traditionally. Hanging them not only frees up valuable shelf space but also allows for better air circulation, potentially prolonging their shelf life. Second, it’s visually appealing. Imagine a cascade of vibrant green vines spilling from your hanging sweet potatoes, adding a unique and organic element to your kitchen or patio. It’s a conversation starter and a testament to your resourcefulness.
But the benefits don’t stop there. As the sweet potatoes sprout, you can harvest the greens for salads or stir-fries, adding a fresh, homegrown element to your meals. And if you’re feeling adventurous, you can even take cuttings from the sprouts and propagate new sweet potato plants, effectively multiplying your harvest for the following year.
Consider these variations to personalize your hanging sweet potato planters:
* Variety is the Spice of Life: Experiment with different varieties of sweet potatoes. Each variety will produce slightly different foliage and may have varying sprouting rates.
* Container Choices: While burlap sacks offer a rustic aesthetic, you can also use other breathable materials like old t-shirts or even repurposed plastic containers with drainage holes. Just ensure the material allows for adequate air circulation.
* Adding Support: For larger sweet potatoes, consider adding a support structure within the container to prevent the weight from tearing the material. A simple wire mesh or even a few strategically placed sticks can do the trick.
* Fertilizing: While not strictly necessary, a diluted liquid fertilizer can encourage more vigorous growth of the sprouts. Be careful not to over-fertilize, as this can lead to excessive foliage growth at the expense of the sweet potato itself.
* Location, Location, Location: Experiment with different locations to find the sweet spot for your hanging planters. Sweet potatoes need bright, indirect light to thrive. Avoid direct sunlight, which can scorch the leaves.
We wholeheartedly encourage you to give this DIY trick a try. It’s a rewarding project that combines practicality, sustainability, and aesthetics. And most importantly, it’s a fun way to connect with nature and appreciate the bounty of your garden.
Don’t be shy! Share your experiences with us. We’d love to see photos of your hanging sweet potato planters and hear about any tips or tricks you discover along the way. Let’s create a community of resourceful gardeners who are passionate about maximizing their harvest and minimizing waste. So go ahead, embrace the challenge, and transform your sweet potato harvest into a stunning display of natural beauty. You’ll be amazed at the results!
Frequently Asked Questions (FAQ)
What kind of sweet potatoes work best for hanging?
Any variety of sweet potato can be used for hanging, but larger, more mature sweet potatoes tend to sprout more readily. Look for sweet potatoes that are firm, free from blemishes, and have a few “eyes” or small sprouts already starting to emerge. Organic sweet potatoes are often preferred, as they are less likely to have been treated with sprout inhibitors. Beauregard, Jewel, and Garnet varieties are all excellent choices. Experimenting with different varieties can also be a fun way to see which ones thrive best in your specific environment.
How long will it take for the sweet potatoes to sprout?
The time it takes for sweet potatoes to sprout can vary depending on several factors, including the variety of sweet potato, the temperature, and the humidity. Generally, you can expect to see sprouts emerging within 2-4 weeks. To speed up the process, you can place the sweet potatoes in a warm, humid environment. Misting them regularly with water can also help to encourage sprouting. Patience is key!
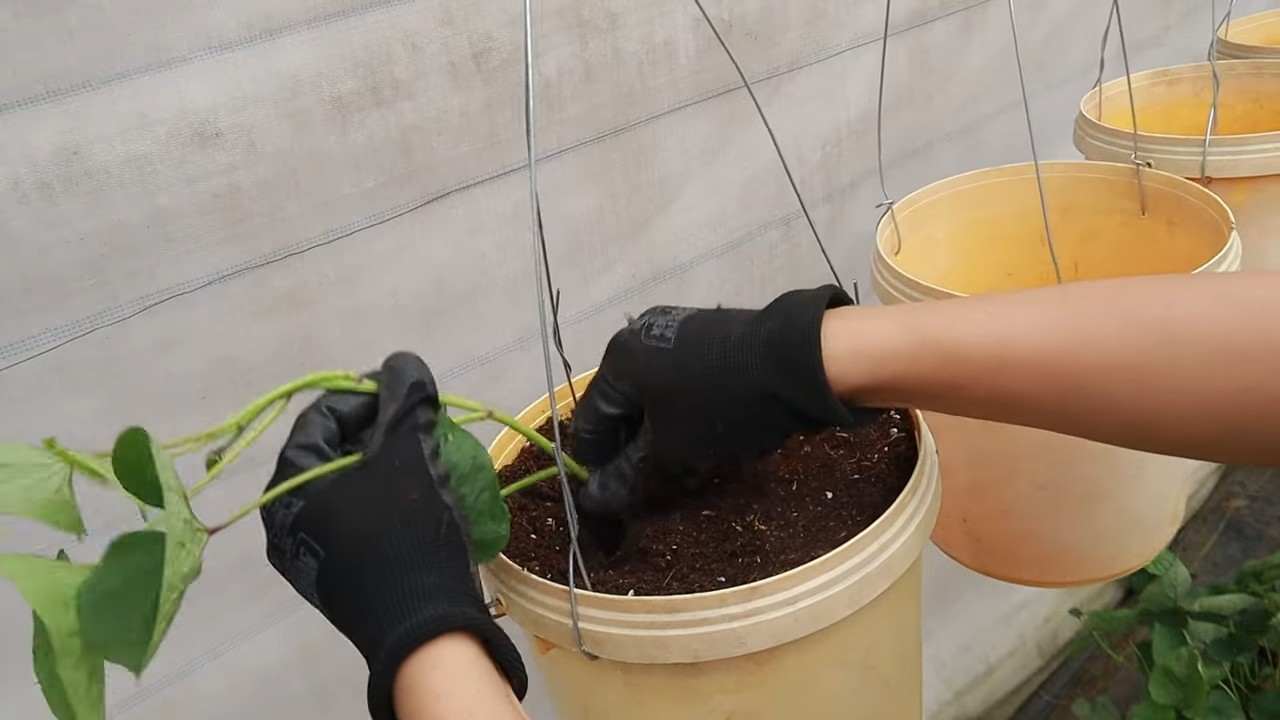
What kind of soil should I use for the hanging sweet potatoes?
A well-draining potting mix is ideal for hanging sweet potatoes. Avoid using garden soil, as it can be too heavy and compact, which can hinder root growth. A mix of peat moss, perlite, and vermiculite is a good option. You can also add some compost to the mix to provide additional nutrients. Ensure that the container you are using has adequate drainage holes to prevent waterlogging.
How often should I water the hanging sweet potatoes?
Water your hanging sweet potatoes regularly, especially during hot, dry weather. The soil should be kept consistently moist, but not waterlogged. Check the soil moisture by sticking your finger into the soil. If the top inch feels dry, it’s time to water. Avoid watering the foliage directly, as this can increase the risk of fungal diseases.
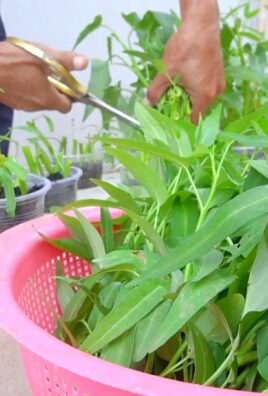
Can I eat the sweet potato greens?
Yes, sweet potato greens are edible and nutritious. They have a mild, slightly sweet flavor and can be used in salads, stir-fries, or as a cooked green vegetable. Harvest the greens when they are young and tender. Avoid eating any greens that are wilted or discolored.
How do I propagate new sweet potato plants from the sprouts?
Once the sprouts have grown to be several inches long, you can carefully remove them from the sweet potato. Place the sprouts in a glass of water, making sure that the bottom portion of the stem is submerged. Within a few days, roots will begin to develop. Once the roots are about an inch long, you can transplant the sprouts into individual pots filled with potting mix.
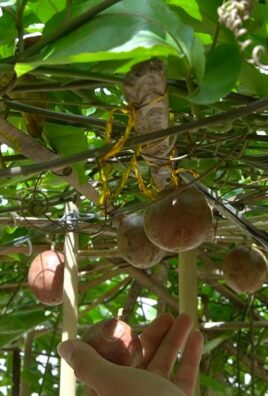
How long will the hanging sweet potatoes last?
The lifespan of hanging sweet potatoes can vary depending on the conditions. Generally, they will last for several months, or even up to a year, as long as they are kept in a cool, dry place and are not exposed to frost. As the sweet potatoes age, they may begin to shrivel or soften. This is a natural process and does not necessarily mean that they are no longer viable.
What if my sweet potatoes start to rot?
If you notice any signs of rot, such as soft spots or mold, remove the affected sweet potato immediately to prevent the rot from spreading to the other sweet potatoes. Ensure that the sweet potatoes are stored in a well-ventilated area and are not exposed to excessive moisture.
Can I hang sweet potatoes outdoors?
Yes, you can hang sweet potatoes outdoors, but you need to consider the climate. Sweet potatoes are sensitive to frost, so they should only be hung outdoors in areas with mild winters. In colder climates, you can bring the hanging sweet potatoes indoors during the winter months.
Is this a good way to store my entire sweet potato harvest?
While hanging sweet potatoes is a fun and visually appealing way to store some of your harvest, it’s not necessarily the most efficient method for storing a large quantity of sweet potatoes. For long-term storage of your entire harvest, consider traditional methods such as curing and storing them in a cool, dry, and dark place. However, hanging a few sweet potatoes can be a great way to enjoy the beauty of your harvest and have fresh greens readily available.

Leave a Comment