
Growing Yacon at Home can seem like an exotic gardening adventure, but trust me, it’s more achievable than you think! Have you ever dreamt of harvesting sweet, juicy tubers right from your own backyard? Imagine the satisfaction of pulling up a plant and discovering a treasure trove of deliciousness – that’s the magic of Yacon!
Yacon, also known as the Peruvian ground apple, has a rich history rooted in the Andes Mountains, where it has been cultivated for centuries. Indigenous cultures valued it not only for its sweet taste but also for its medicinal properties. Now, you can bring a piece of that ancient tradition to your own garden.
Why should you try growing Yacon at home? Well, besides the sheer joy of gardening, Yacon offers a unique and healthy alternative to traditional sweeteners. Its low glycemic index makes it a fantastic option for those watching their sugar intake. Plus, it’s incredibly versatile – you can eat it raw, bake it, juice it, or even turn it into syrup! In this DIY guide, I’ll share all my secrets and tips to help you successfully cultivate this amazing plant, even if you’re a beginner gardener. Get ready to embark on a rewarding journey and enjoy the sweet rewards of your labor!
Growing Yacon at Home: A Gardener’s Guide to This Sweet Root Vegetable
Yacon, also known as the Peruvian ground apple, is a fascinating and delicious root vegetable that’s becoming increasingly popular among home gardeners. It’s known for its sweet, slightly crunchy texture and its health benefits, being low in calories and high in prebiotics. I’ve been growing yacon in my garden for a few years now, and I’m excited to share my experiences and guide you through the process of growing your own!
Understanding Yacon: The Basics
Before we dive into the how-to, let’s understand what yacon is and what it needs to thrive. Yacon is a perennial plant, but it’s typically grown as an annual in colder climates. The edible parts are the large, tuberous roots that grow underground. These roots store inulin, a type of sugar that the human body doesn’t digest, making yacon a great option for people watching their sugar intake.
* Climate: Yacon prefers a long growing season with warm days and cool nights. It’s hardy in zones 7-10, but can be grown in colder zones with proper protection.
* Sunlight: Yacon needs at least 6-8 hours of sunlight per day.
* Soil: Well-drained, fertile soil is essential. Yacon doesn’t like soggy conditions.
* Propagation: Yacon is typically propagated from rhizomes, which are the knobby, crown-like structures at the base of the plant.
* Harvest: The roots are harvested in the fall, after the foliage has died back.
Getting Started: Preparing for Planting
The key to a successful yacon harvest starts with proper preparation. Here’s what you need to do before planting:
1. Source Your Rhizomes: The first step is to find a reliable source for yacon rhizomes. You can often find them at local nurseries, online seed suppliers, or even from other gardeners. Look for healthy rhizomes that are firm and have visible buds or “eyes.”
2. Timing is Everything: Start your rhizomes indoors about 6-8 weeks before the last expected frost. This gives them a head start and ensures a longer growing season. If you live in a warmer climate, you can plant them directly in the ground after the last frost.
3. Prepare Your Seed Trays or Pots: Use seed trays or small pots filled with a well-draining potting mix. I like to use a mix of peat moss, perlite, and vermiculite.
4. Planting the Rhizomes: Plant the rhizomes horizontally, about 2 inches deep, with the buds facing upwards. Water gently after planting.
5. Provide Warmth and Light: Place the seed trays or pots in a warm, sunny location, or under grow lights. Keep the soil consistently moist, but not waterlogged.
6. Patience is a Virtue: It may take a few weeks for the rhizomes to sprout. Be patient and continue to provide warmth, light, and moisture.
Transplanting Your Yacon Seedlings
Once your seedlings have developed a few sets of true leaves, it’s time to transplant them into the garden.
1. Harden Off the Seedlings: Before transplanting, you need to “harden off” the seedlings. This means gradually exposing them to outdoor conditions over a period of about a week. Start by placing them outside for a few hours each day, gradually increasing the amount of time they spend outdoors. This will help them adjust to the sun, wind, and temperature changes.
2. Choose the Right Location: Select a sunny spot in your garden with well-drained soil. Yacon plants can get quite large, so give them plenty of space. I recommend spacing them about 3-4 feet apart.
3. Prepare the Soil: Amend the soil with compost or other organic matter to improve its fertility and drainage. Yacon prefers slightly acidic soil, so you can also add a bit of sulfur if your soil is alkaline.
4. Dig the Planting Holes: Dig holes that are large enough to accommodate the root balls of the seedlings.
5. Transplant Carefully: Gently remove the seedlings from their pots and place them in the planting holes. Backfill with soil and water thoroughly.
6. Mulch for Moisture and Weed Control: Apply a layer of mulch around the plants to help retain moisture, suppress weeds, and regulate soil temperature. I like to use straw or wood chips.
Caring for Your Yacon Plants
Once your yacon plants are in the ground, they’ll need regular care to thrive.
1. Watering: Water the plants regularly, especially during dry periods. Yacon needs consistent moisture, but avoid overwatering, which can lead to root rot.
2. Fertilizing: Fertilize the plants every few weeks with a balanced fertilizer. I like to use a liquid fertilizer diluted to half strength.
3. Weeding: Keep the area around the plants free of weeds. Weeds can compete with the yacon for nutrients and water.
4. Staking (Optional): Yacon plants can get quite tall and may need staking to prevent them from falling over. Bamboo stakes or tomato cages work well.
5. Pest and Disease Control: Yacon is generally resistant to pests and diseases, but keep an eye out for common garden pests like aphids and slugs. If you notice any problems, treat them promptly with an appropriate insecticide or fungicide. I prefer using organic options whenever possible.
Harvesting Your Yacon Roots
The most exciting part of growing yacon is the harvest! Here’s how to know when and how to harvest your yacon roots:
1. Timing the Harvest: The best time to harvest yacon is in the fall, after the foliage has died back. This usually happens after the first frost. The frost signals the plant to stop growing and to transfer its energy into the roots.
2. Cutting Back the Foliage: Before harvesting, cut back the foliage to about 6 inches above the ground.
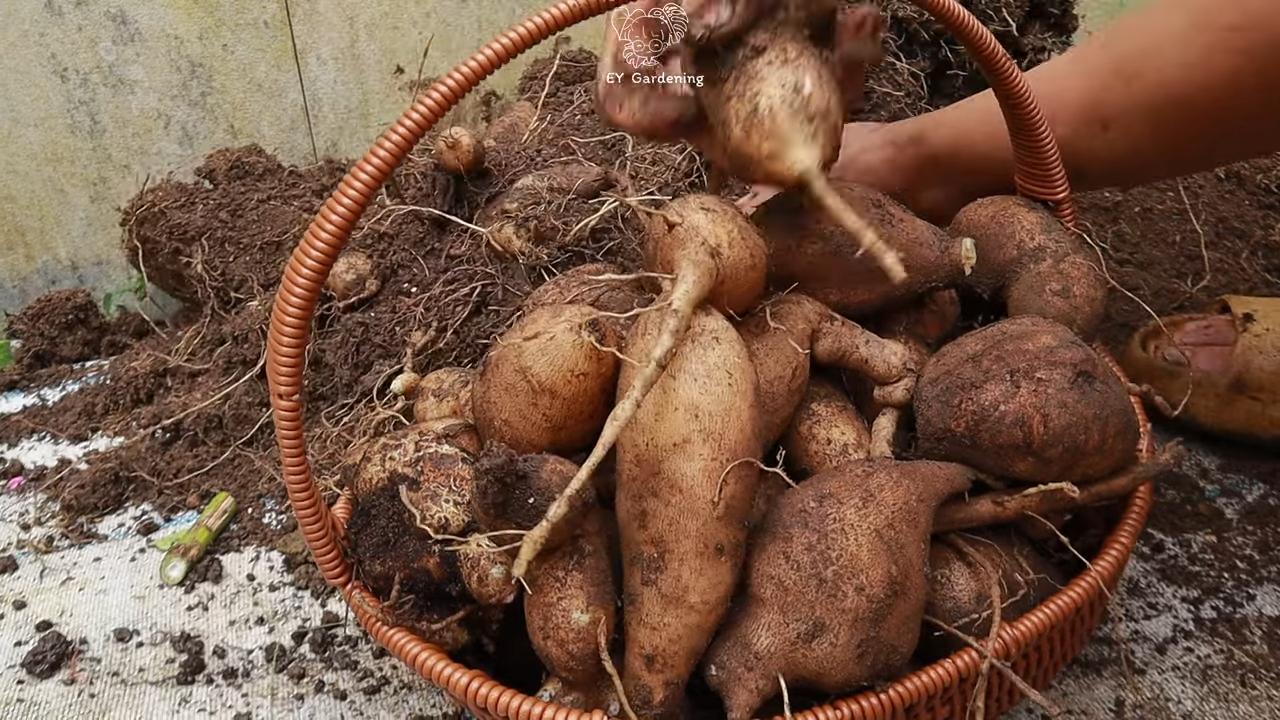
3. Digging Up the Roots: Use a garden fork or shovel to carefully dig up the roots. Be gentle, as the roots can be brittle and easily damaged.
4. Separating the Roots: Separate the edible tuberous roots from the rhizomes. The rhizomes are the knobby, crown-like structures at the base of the plant. You can save these rhizomes to plant next year.
5. Curing the Roots: After harvesting, the yacon roots need to be cured for a few days to a few weeks. This process converts the starches in the roots into sugars, making them sweeter and more flavorful. To cure the roots, place them in a cool, dark, and well-ventilated place. I usually cure mine in my garage.
6. Storing the Roots: After curing, the yacon roots can be stored in a cool, dark, and dry place for several months. I store mine in the refrigerator in a plastic bag.
Propagating Yacon: Saving Your Rhizomes
As I mentioned earlier, you can save the rhizomes from your yacon plants to propagate them next year. Here’s how:
1. Selecting the Rhizomes: Choose healthy, firm rhizomes with visible buds or “eyes.”
2. Cleaning the Rhizomes: Gently clean the rhizomes to remove any dirt or debris.
3. Storing the Rhizomes: Store the rhizomes in a cool, dark, and slightly moist place. I like to store mine in a plastic bag filled with slightly damp peat moss.
4. Checking on the Rhizomes: Check on the rhizomes periodically to make sure they haven’t dried out or rotted. If they start to dry out, mist them with water. If they start to rot, discard them.
5. Planting the Rhizomes: In the spring, plant the rhizomes as described earlier.
Enjoying Your Yacon Harvest
Now that you’ve harvested and cured your yacon roots, it’s time to enjoy them! Yacon can be eaten raw, cooked, or juiced.
* Raw: Yacon has a crisp, juicy texture and a sweet, slightly apple-like flavor when eaten raw. It’s great in salads, slaws, or as a snack.
* Cooked: Yacon can be roasted, stir-fried, or added to soups and stews. Cooking yacon brings out its sweetness and softens its texture.
* Juiced: Yacon juice is a refreshing and healthy drink. It’s also a great way to get your daily dose of prebiotics.
I personally love to slice it thinly and add it to my salads for a bit of sweetness and crunch. I’ve also roasted it with other root vegetables, and it’s absolutely delicious!
Troubleshooting: Common Yacon Growing Problems
Even with the best care, you may encounter some problems when growing yacon. Here are a few common issues and how to address them:
Conclusion
Growing yacon at home is more than just a gardening project; it’s an investment in your health, your culinary adventures, and your connection to the natural world. This remarkable plant, with its crisp, sweet tubers and versatile leaves, offers a unique and rewarding experience for gardeners of all levels. From the initial planting to the final harvest, each step of the process is filled with anticipation and the promise of a delicious and nutritious reward.
The benefits of cultivating your own yacon extend far beyond simply having access to fresh produce. You gain complete control over the growing process, ensuring that your yacon is free from harmful pesticides and herbicides. You also reduce your carbon footprint by eliminating the need for transportation and packaging associated with store-bought produce. And perhaps most importantly, you experience the satisfaction of nurturing a plant from seed to table, a connection that is deeply fulfilling and enriching.
But the true magic of growing yacon at home lies in its versatility. The tubers, with their refreshing sweetness and crisp texture, can be enjoyed raw in salads, roasted as a healthy alternative to potatoes, or even juiced for a naturally sweet beverage. The leaves, often overlooked, are a treasure trove of antioxidants and can be used to make a delicious and healthful tea.
Don’t be afraid to experiment with different varieties of yacon to find the ones that best suit your taste and growing conditions. Some varieties are sweeter than others, while some are more resistant to pests and diseases. Consider starting with a small patch of yacon and expanding your planting as you gain experience.
And remember, growing yacon at home is a journey, not a destination. There will be challenges along the way, but the rewards are well worth the effort. So, grab your gardening gloves, prepare your soil, and embark on this exciting adventure. We encourage you to try this DIY trick and discover the joy of growing your own yacon.
We’d love to hear about your experiences! Share your tips, tricks, and recipes with us in the comments below. Let’s build a community of yacon enthusiasts and inspire others to discover the wonders of this amazing plant. What are you waiting for? Start growing yacon at home today!
Variations and Suggestions
* Yacon Syrup: Reduce yacon juice over low heat to create a natural, low-glycemic sweetener.
* Yacon Chips: Thinly slice yacon tubers and bake them for a healthy and crunchy snack.
* Yacon Tea Blend: Combine dried yacon leaves with other herbs like mint or lemon balm for a flavorful and aromatic tea.
* Companion Planting: Plant yacon alongside other vegetables like beans or peas to improve soil health and deter pests.
* Soil Amendments: Incorporate compost or aged manure into the soil to provide essential nutrients for yacon growth.
Frequently Asked Questions (FAQ)
What is yacon and why should I grow it?
Yacon (Smallanthus sonchifolius) is a perennial plant native to the Andes region of South America. It’s grown for its crisp, sweet tubers, which are low in calories and high in inulin, a prebiotic fiber that promotes gut health. Growing yacon at home allows you to enjoy fresh, healthy produce, control the growing process, and reduce your environmental impact. Plus, it’s a fun and rewarding gardening experience!
How do I start growing yacon at home?
You can start yacon from crowns (the top part of the tuber with buds) or from rhizomes (underground stems). Plant the crowns or rhizomes in well-drained soil in a sunny location, typically in the spring after the last frost. Space the plants about 2-3 feet apart to allow for ample growth.
What kind of soil does yacon need?
Yacon prefers well-drained soil that is rich in organic matter. Amend your soil with compost or aged manure before planting to improve its fertility and drainage. A slightly acidic to neutral pH (around 6.0-7.0) is ideal.
How much sunlight does yacon need?
Yacon thrives in full sun, requiring at least 6-8 hours of direct sunlight per day. Insufficient sunlight can result in smaller tubers and reduced yields.
How often should I water yacon?
Water yacon regularly, especially during dry periods. Keep the soil consistently moist but not waterlogged. Avoid overhead watering, as this can increase the risk of fungal diseases.
When is the best time to harvest yacon?
Yacon tubers are typically harvested in the fall, after the first frost has killed back the foliage. Dig up the tubers carefully, avoiding damage to the skin. The tubers will become sweeter after being cured in the sun for a few days.
How do I cure yacon tubers?
After harvesting, cure the yacon tubers by leaving them in the sun for a few days. This process converts some of the starches into sugars, making the tubers sweeter and more palatable. Store the cured tubers in a cool, dark, and dry place.
Can I eat yacon leaves?
Yes, yacon leaves are edible and can be used to make a healthy and refreshing tea. The leaves are rich in antioxidants and have a slightly bitter taste. Dry the leaves before using them for tea.
Are there any pests or diseases that affect yacon?
Yacon is generally resistant to pests and diseases, but it can be susceptible to slugs, snails, and fungal diseases. Protect your plants from slugs and snails by using organic pest control methods. Prevent fungal diseases by providing good air circulation and avoiding overhead watering.
How do I store yacon tubers?
Store yacon tubers in a cool, dark, and dry place, such as a root cellar or basement. The tubers can be stored for several months if properly cured and stored. Avoid storing yacon tubers in the refrigerator, as this can cause them to become bitter.
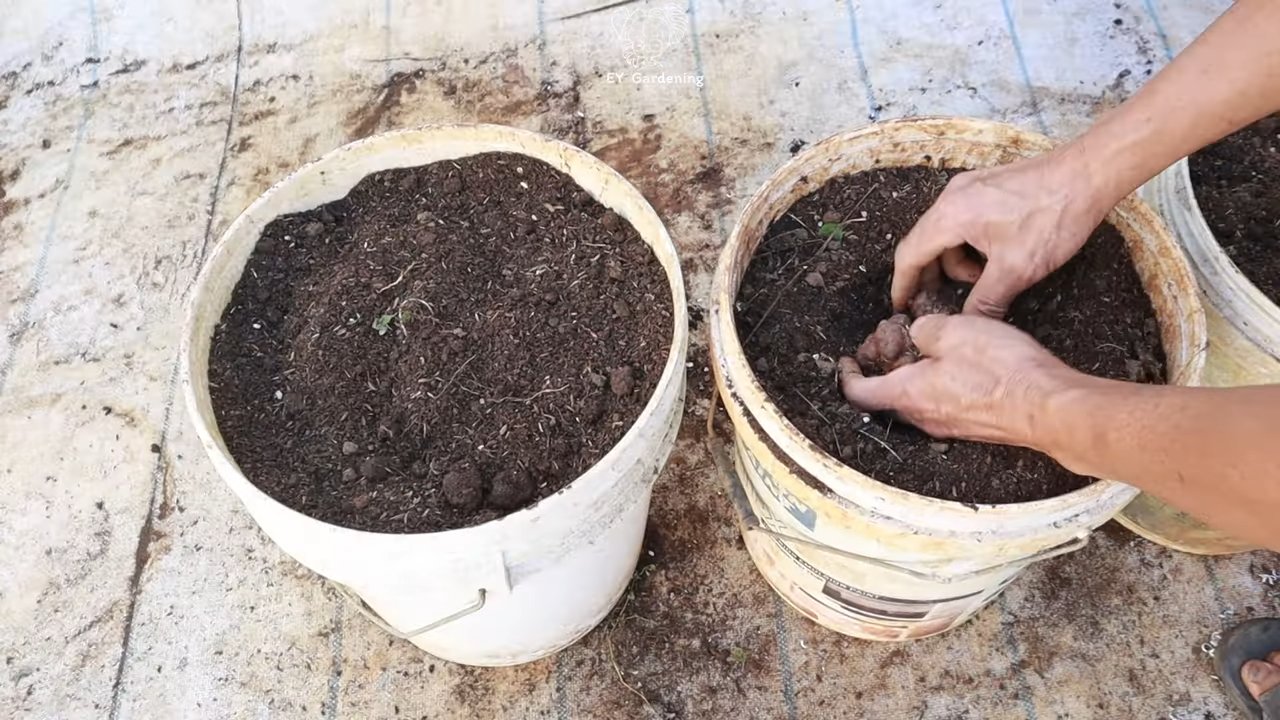
Can I grow yacon in containers?
Yes, you can grow yacon in containers, but you will need a large container (at least 20 gallons) to accommodate the plant’s extensive root system. Use a well-draining potting mix and provide regular watering and fertilization.
Is yacon a perennial or an annual?
Yacon is a perennial plant in warmer climates (zones 8-10), meaning it will come back year after year. In colder climates, it is typically grown as an annual, as the tubers may not survive freezing temperatures. However, you can dig up the tubers in the fall and store them indoors over the winter, then replant them in the spring.
What are the health benefits of yacon?
Yacon is a good source of inulin, a prebiotic fiber that promotes gut health. It is also low in calories and has a low glycemic index, making it a healthy alternative to other sweeteners. Yacon may also help to regulate blood sugar levels and improve cholesterol levels.
Where can I buy yacon crowns or rhizomes?
You can buy yacon crowns or rhizomes from online nurseries, garden centers, or local farmers markets. Make sure to purchase from a reputable source to ensure that you are getting healthy and disease-free plants.
What are some creative ways to use yacon in cooking?
Yacon can be used in a variety of culinary applications. It can be eaten raw in salads, roasted as a healthy alternative to potatoes, juiced for a naturally sweet beverage, or used to make yacon syrup, a low-glycemic sweetener. Experiment with different recipes and discover your favorite ways to enjoy this versatile vegetable.

Leave a Comment