
Growing Winged Beans Easily can transform your garden into a vibrant, productive space, and I’m here to show you how! Forget complicated gardening techniques and expensive equipment. This article is packed with simple, effective DIY tricks and hacks that will have you harvesting delicious winged beans in no time, even if you’re a complete beginner.
Winged beans, also known as asparagus peas or Goa beans, have a rich history, particularly in Southeast Asia and Papua New Guinea, where they’ve been cultivated for centuries. They’re not just delicious; they’re incredibly nutritious, offering a complete protein source and a wealth of vitamins and minerals. Imagine adding this powerhouse vegetable to your diet, all grown right in your own backyard!
So, why do you need these DIY tricks for growing winged beans easily? Well, while winged beans are relatively easy to grow, a few clever hacks can significantly boost your yield and protect your plants from common problems. I’ll share my favorite tips for creating the perfect growing environment, supporting your vines, and preventing pests, all using readily available materials and simple techniques. Let’s get started and unlock the secrets to a bountiful winged bean harvest!
Growing Winged Beans: Your DIY Guide for an Exotic Harvest
Hello garden friends! I’m totally excited to show you today how you can easily grow these fascinating and super nutritious winged beans (Psophocarpus tetragonolobus) yourself. These climbing plants are not only beautiful but also incredibly versatile in the kitchen. Believe me, once you’ve tried the taste of fresh winged beans, you’ll love them!
What are Winged Beans Anyway?
Before we get started, a quick info: Winged beans, also known as Goa beans, are tropical legumes native to Southeast Asia. What’s special about them is that almost all parts of the plant are edible: the young pods, the leaves, the flowers, the roots, and even the ripe seeds. They are rich in proteins, vitamins, and minerals – a real superfood!
Why Grow Winged Beans Yourself?
- Freshness and Taste: Homegrown winged beans simply taste unbeatable. You can harvest them when they are perfectly ripe and have developed their full flavor.
- Sustainability: You know exactly what’s happening in your garden and can do without pesticides and unnecessary transportation.
- Uniqueness: Winged beans are not available everywhere. By growing them yourself, you’ll always have an exotic delicacy at hand.
- Challenge and Joy: It’s just fun to try something new and watch the plants grow and thrive.
The Preparation: What You Need
Before we start growing, we should make sure we have everything we need. Here is a list of things you’ll need:
- Winged bean seeds: You can get these at well-stocked garden centers or online. Make sure the seeds are fresh and viable.
- Seedling pots or trays: For starting indoors.
- Seed starting mix: This is low in nutrients and loose, ideal for seed germination.
- Garden soil: For planting out in the garden bed or in larger pots.
- Compost or organic fertilizer: To enrich the soil and provide the plants with nutrients.
- Climbing support: Winged beans are climbing plants and need a sturdy support, e.g., a trellis, a fence, or a frame.
- Watering can or garden hose: For regular watering.
- Gardening tools: Spade, rake, possibly a small trowel.
- A sunny location: Winged beans love the sun!
- Patience: Growing takes time and care.
Step-by-Step Guide: How to Succeed with Cultivation
Now let’s get down to it! Here is a detailed guide on how you can successfully grow your own winged beans:
1. Starting Indoors (optional, but recommended)
Starting indoors gives the plants a head start and extends the growing season.
- Prepare seeds: To speed up germination, you can soak the seeds in lukewarm water for 24 hours before sowing. This softens the seed coat.
- Sowing: Fill the seedling pots with seed starting mix and press it down lightly. Place 2-3 seeds per pot about 2-3 cm deep into the soil. Cover the seeds with soil and water them gently.
- Location: Place the pots in a warm and bright place. A temperature of 20-25°C is ideal for germination.
- Moisture: Keep the soil moist, but not wet. Avoid waterlogging, as this can lead to mold.
- Germination: Germination usually takes 1-2 weeks. As soon as the first seedlings appear, you can remove the weaker ones, leaving only the strongest seedling per pot.
2. Planting Outdoors
As soon as the temperatures rise and there is no more danger of frost (usually from mid-May), the young plants can be moved outdoors.
- Hardening off: Before you plant the plants in the bed or in larger pots, you should harden them off for a few days. Place them outdoors for a few hours during the day and bring them back in at night. This way, they slowly get used to the changed conditions.
- Prepare the soil: Loosen the soil in the bed or in the pots well and enrich it with compost or organic fertilizer. Winged beans prefer a nutrient-rich and well-draining soil.
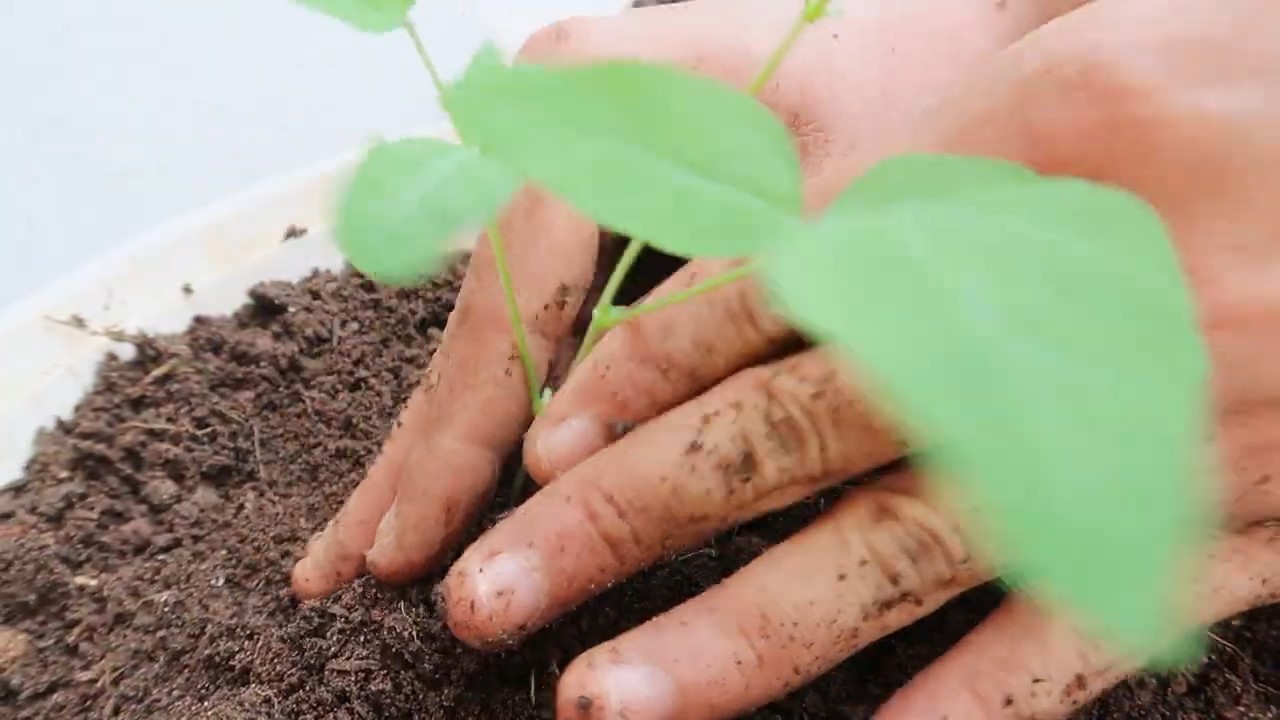
- Planting: Dig a hole that is slightly larger than the root ball of the young plants. Carefully place the plants in it, fill the hole with soil, press the soil down lightly, and water the plants thoroughly.
- Spacing: Ensure sufficient spacing between the plants. A distance of 50-60 cm is ideal so they have enough space to grow.
- Install climbing support: Make sure the climbing support is stable and well-secured. The winged beans will climb it and need good support.
3. Care: Keeping Your Winged Beans Healthy and Strong
Proper care is crucial for a bountiful harvest.
- Watering: Water the plants regularly, especially during dry periods. Make sure the soil is always slightly moist, but avoid waterlogging.
- Fertilizing: Fertilize the plants regularly with an organic fertilizer or compost. This ensures healthy growth and abundant flowering.
- Weeding: Keep the bed or pots free of weeds. Weeds compete with the winged beans for nutrients and water.
- Pests and diseases: Check the plants regularly for pests and diseases. If necessary, you can use organic pesticides.
- Pruning: Regularly remove side shoots to promote the formation of flowers and pods.
- Support climbing: Help the plants climb by regularly attaching them to the climbing support.
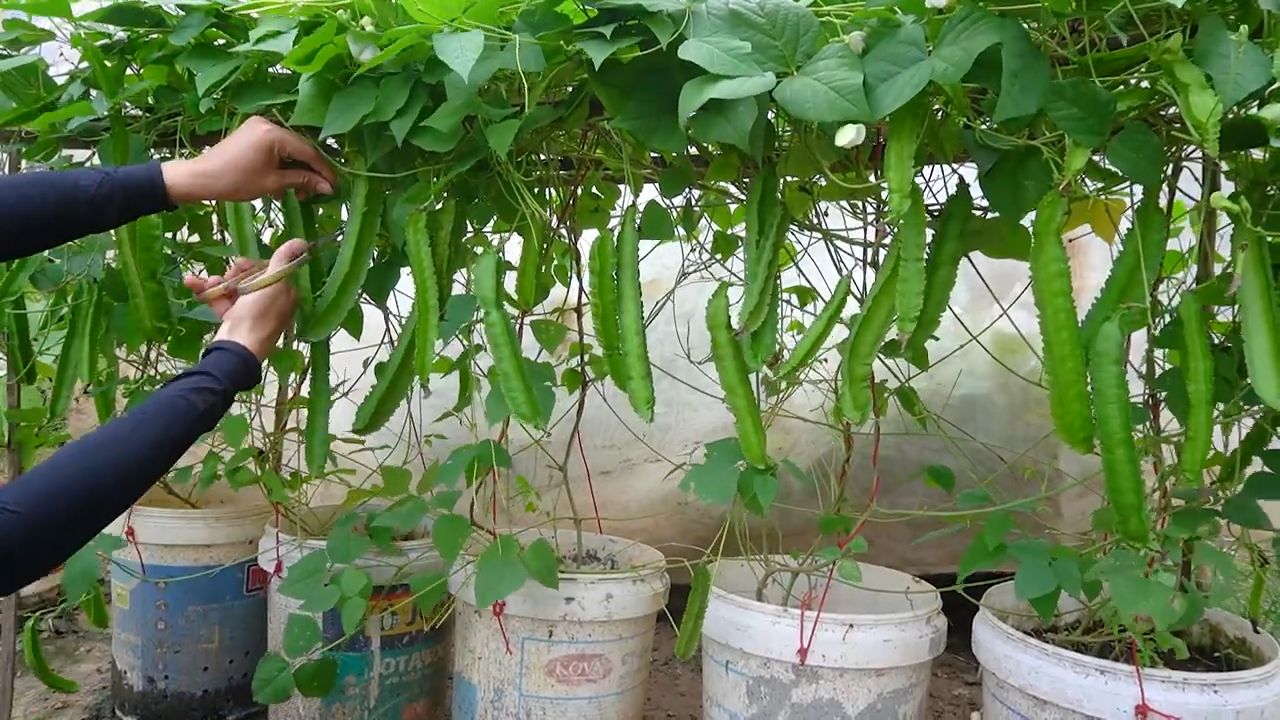
4. The Harvest: When and How to Harvest Your Winged Beans
The harvest season usually begins about 2-3 months after planting.
- Harvesting pods: Harvest the pods when they are young and tender, about 15-20 cm long. They should not yet have any hard fibers. The more you harvest, the more pods will form.
- Harvesting leaves and flowers: The leaves and flowers can also be harvested and used in salads or soups.
- Harvesting roots: The roots can be harvested in the fall when the plant dies back. They are rich in protein and can be prepared like potatoes.
- Harvesting seeds: If you want to save seeds for next year, let some pods ripen on the plant until they are dry and brown. Harvest the seeds and store them in a cool and dry place.
Culinary Use: What You Can Do with Your Winged Beans
Winged beans are incredibly versatile in the kitchen. Here are a few ideas of what you can conjure up with them:
In salads: The leaves and flowers can be used raw in salads. They give the salad a special touch.
Steamed or fried: The young pods can be steamed or fried like green beans. They taste slightly sweet and have a pleasant texture.
Conclusion
So, there you have it! Growing winged beans easily is not just a possibility; it’s an achievable reality with a little planning and the right approach. We’ve explored the key steps, from selecting the perfect location and preparing the soil to providing adequate support and managing potential pests. But why should you embark on this journey of cultivating your own winged beans?
Firstly, consider the unparalleled freshness and flavor. Store-bought vegetables, even the best ones, simply can’t compare to the vibrant taste of produce harvested straight from your own garden. Winged beans, with their unique texture and subtly sweet, nutty flavor, are a true culinary delight when freshly picked. Imagine adding them to stir-fries, salads, or curries, knowing that you nurtured them from seed to table.
Secondly, growing your own winged beans is an incredibly rewarding experience. It connects you to the natural world, provides a sense of accomplishment, and allows you to appreciate the effort that goes into producing the food we eat. Plus, it’s a fantastic way to get some exercise and fresh air!
Thirdly, you have complete control over the growing process. You can choose to use organic methods, avoiding harmful pesticides and herbicides, ensuring that your winged beans are as healthy and nutritious as possible. This is particularly important for those concerned about the environmental impact of conventional agriculture.
But the benefits don’t stop there. Growing winged beans easily also offers opportunities for experimentation and customization. Want to try a different variety? Go for it! Curious about companion planting? Explore the possibilities! The world of gardening is full of exciting discoveries, and winged beans are a great place to start.
Variations and Suggestions:
* Vertical Gardening: If you’re short on space, consider growing winged beans in containers on a balcony or patio. Use a trellis or other support structure to encourage vertical growth.
* Companion Planting: Plant winged beans alongside other beneficial plants, such as basil or marigolds, to deter pests and attract pollinators.
* Seed Saving: Save seeds from your best-performing plants to ensure a continuous supply of winged beans for years to come.
* Culinary Creativity: Experiment with different ways to prepare winged beans. Try grilling them, steaming them, or adding them to soups and stews.
We encourage you to take the plunge and try growing winged beans easily. It’s a fun, rewarding, and delicious experience that you won’t regret. Don’t be afraid to experiment, learn from your mistakes, and most importantly, enjoy the process.
And now, we want to hear from you! Share your experiences, tips, and tricks in the comments below. What challenges did you face? What successes did you achieve? What are your favorite ways to prepare winged beans? Let’s create a community of winged bean enthusiasts and learn from each other. Happy gardening!
Frequently Asked Questions (FAQ)
What is the best time of year to plant winged beans?
Winged beans are a warm-season crop, so the best time to plant them is after the last frost, when the soil has warmed up to at least 65°F (18°C). In most regions, this is typically in late spring or early summer. If you live in a warmer climate with a longer growing season, you may be able to plant them earlier. Consider your local climate and growing conditions when determining the optimal planting time. You can also start seeds indoors 4-6 weeks before the last expected frost to get a head start on the growing season.
How much sunlight do winged beans need?
Winged beans thrive in full sun, which means they need at least 6-8 hours of direct sunlight per day. Insufficient sunlight can lead to stunted growth, reduced flowering, and lower yields. Choose a planting location that receives ample sunlight throughout the day. If you’re growing winged beans in containers, make sure to place them in a sunny spot. If you live in a particularly hot climate, some afternoon shade may be beneficial to prevent the plants from overheating.
What type of soil is best for growing winged beans?
Winged beans prefer well-drained, fertile soil with a slightly acidic to neutral pH (6.0-7.0). Amend the soil with compost or other organic matter to improve drainage, fertility, and water retention. Avoid heavy clay soils, as they can become waterlogged and hinder root growth. If your soil is particularly poor, consider growing winged beans in raised beds or containers filled with a high-quality potting mix. A soil test can help you determine the pH and nutrient levels of your soil and guide you in making necessary amendments.
How often should I water winged beans?
Winged beans need consistent moisture, especially during flowering and pod development. Water deeply and regularly, especially during dry spells. Avoid overwatering, as this can lead to root rot. A good rule of thumb is to water when the top inch of soil feels dry to the touch. Mulching around the plants can help retain moisture and suppress weeds. Drip irrigation is an efficient way to deliver water directly to the roots of the plants.
What kind of support do winged beans need?
Winged beans are climbing plants and require a strong support structure to grow properly. A trellis, fence, or sturdy stakes are all suitable options. The support should be at least 6-8 feet tall to accommodate the vigorous growth of the vines. Train the vines to climb the support structure as they grow. Regular pruning can help maintain the shape of the plants and prevent them from becoming too dense.
Are winged beans susceptible to any pests or diseases?
Winged beans are generally resistant to pests and diseases, but they can be susceptible to certain problems, such as aphids, spider mites, and fungal diseases. Inspect your plants regularly for signs of infestation or disease. Treat any problems promptly with appropriate organic or chemical controls. Good air circulation and proper watering practices can help prevent fungal diseases. Companion planting with herbs like basil or marigolds can help deter pests.
How long does it take for winged beans to mature?
Winged beans typically take 60-90 days to mature, depending on the variety and growing conditions. The pods are ready to harvest when they are young and tender, usually about 6-8 inches long. Regular harvesting encourages continued pod production. The leaves, flowers, and roots of winged beans are also edible and can be harvested at various stages of growth.
Can I grow winged beans in containers?
Yes, you can grow winged beans in containers, provided that the containers are large enough to accommodate the root system and the plants have adequate support. Choose containers that are at least 12 inches in diameter and depth. Use a high-quality potting mix and provide regular watering and fertilization. Place the containers in a sunny location and provide a trellis or other support structure for the vines to climb.
Are winged beans nitrogen fixers?
Yes, winged beans are nitrogen-fixing plants, meaning they have the ability to convert atmospheric nitrogen into a form that plants can use. This is due to a symbiotic relationship with nitrogen-fixing bacteria in the soil. Nitrogen fixation enriches the soil and reduces the need for nitrogen fertilizers.
How do I save seeds from winged beans?
To save seeds from winged beans, allow the pods to mature completely on the vine until they are dry and brown. Harvest the pods and remove the seeds. Dry the seeds thoroughly in a cool, dry place for several weeks. Store the dried seeds in an airtight container in a cool, dark place. Properly stored seeds can remain viable for several years.

Leave a Comment