
Growing Tomatoes at Home can feel like a daunting task, especially if you’re new to gardening. But what if I told you that with a few clever tricks and DIY hacks, you could be harvesting juicy, flavorful tomatoes right from your own backyard (or balcony!) in no time? Forget those bland, store-bought tomatoes – we’re talking about sun-ripened goodness bursting with flavor!
The history of tomato cultivation is fascinating, dating back to the Aztecs and Incas. These cultures recognized the potential of this vibrant fruit, and now, centuries later, we can easily cultivate them ourselves. However, modern life often leaves us short on time and space, making traditional gardening methods seem impractical. That’s where these DIY tricks come in.
Let’s face it, everyone loves a fresh tomato! But the truth is, many people struggle with growing tomatoes at home successfully. They face challenges like pests, diseases, lack of space, or simply not knowing the right techniques. This article is your ultimate guide to overcoming those hurdles. I’m going to share simple, effective DIY solutions that will help you maximize your tomato yield, minimize problems, and enjoy the satisfaction of harvesting your own delicious, homegrown tomatoes. Get ready to transform your gardening game!
Growing Tomatoes at Home: A Beginner’s Guide to Juicy Success
Hey there, fellow gardening enthusiasts! I’m so excited to share my tried-and-true method for growing delicious, juicy tomatoes right in your own backyard (or even on your balcony!). Forget those bland, store-bought tomatoes – nothing beats the taste of a homegrown beauty, ripened to perfection under the sun. This guide is designed for beginners, so don’t worry if you’ve never grown anything before. I’ll walk you through every step, from choosing the right variety to troubleshooting common problems. Let’s get started!
Choosing the Right Tomato Variety
Before you even think about planting, you need to decide what kind of tomatoes you want to grow. There are literally hundreds of varieties, each with its own unique flavor, size, and growth habit. Here’s a breakdown to help you choose:
* **Determinate vs. Indeterminate:** This is the most important distinction. Determinate tomatoes grow to a certain size and then produce all their fruit at once, making them ideal for canning. Indeterminate tomatoes, on the other hand, keep growing and producing fruit throughout the season. I personally prefer indeterminate varieties because I love having a continuous supply of fresh tomatoes.
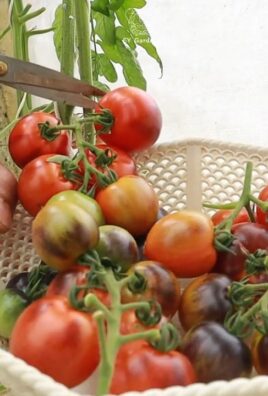
* **Tomato Size:** Do you want tiny cherry tomatoes, medium-sized slicers, or giant beefsteaks? Cherry tomatoes are great for snacking and salads, slicers are perfect for sandwiches, and beefsteaks are impressive and flavorful.
* **Disease Resistance:** Look for varieties that are resistant to common tomato diseases like Fusarium wilt (F), Verticillium wilt (V), and Tomato Mosaic Virus (TMV). This will save you a lot of headaches later on.
* **Days to Maturity:** This tells you how long it will take for the tomatoes to ripen after planting. Choose varieties that are appropriate for your climate and growing season.
My personal favorites include:
* **’Sungold’ (Cherry, Indeterminate):** Incredibly sweet and flavorful.
* **’Early Girl’ (Slicer, Determinate):** Reliable and early-producing.
* **’Roma’ (Plum, Determinate):** Perfect for making sauce.
* **’Brandywine’ (Beefsteak, Indeterminate):** Heirloom variety with exceptional flavor.
Starting Your Tomato Plants
You have two options here: you can either start your tomato plants from seed indoors, or you can buy seedlings from a nursery. Starting from seed gives you more control over the varieties you grow, but it requires a bit more effort and planning. Buying seedlings is easier and faster, but you’ll have fewer choices.
Starting from Seed (Indoor Method)
1. **Gather Your Supplies:** You’ll need tomato seeds, seed starting trays or small pots, seed starting mix (not regular potting soil!), a spray bottle, a heat mat (optional but recommended), and a grow light (also optional but helpful).
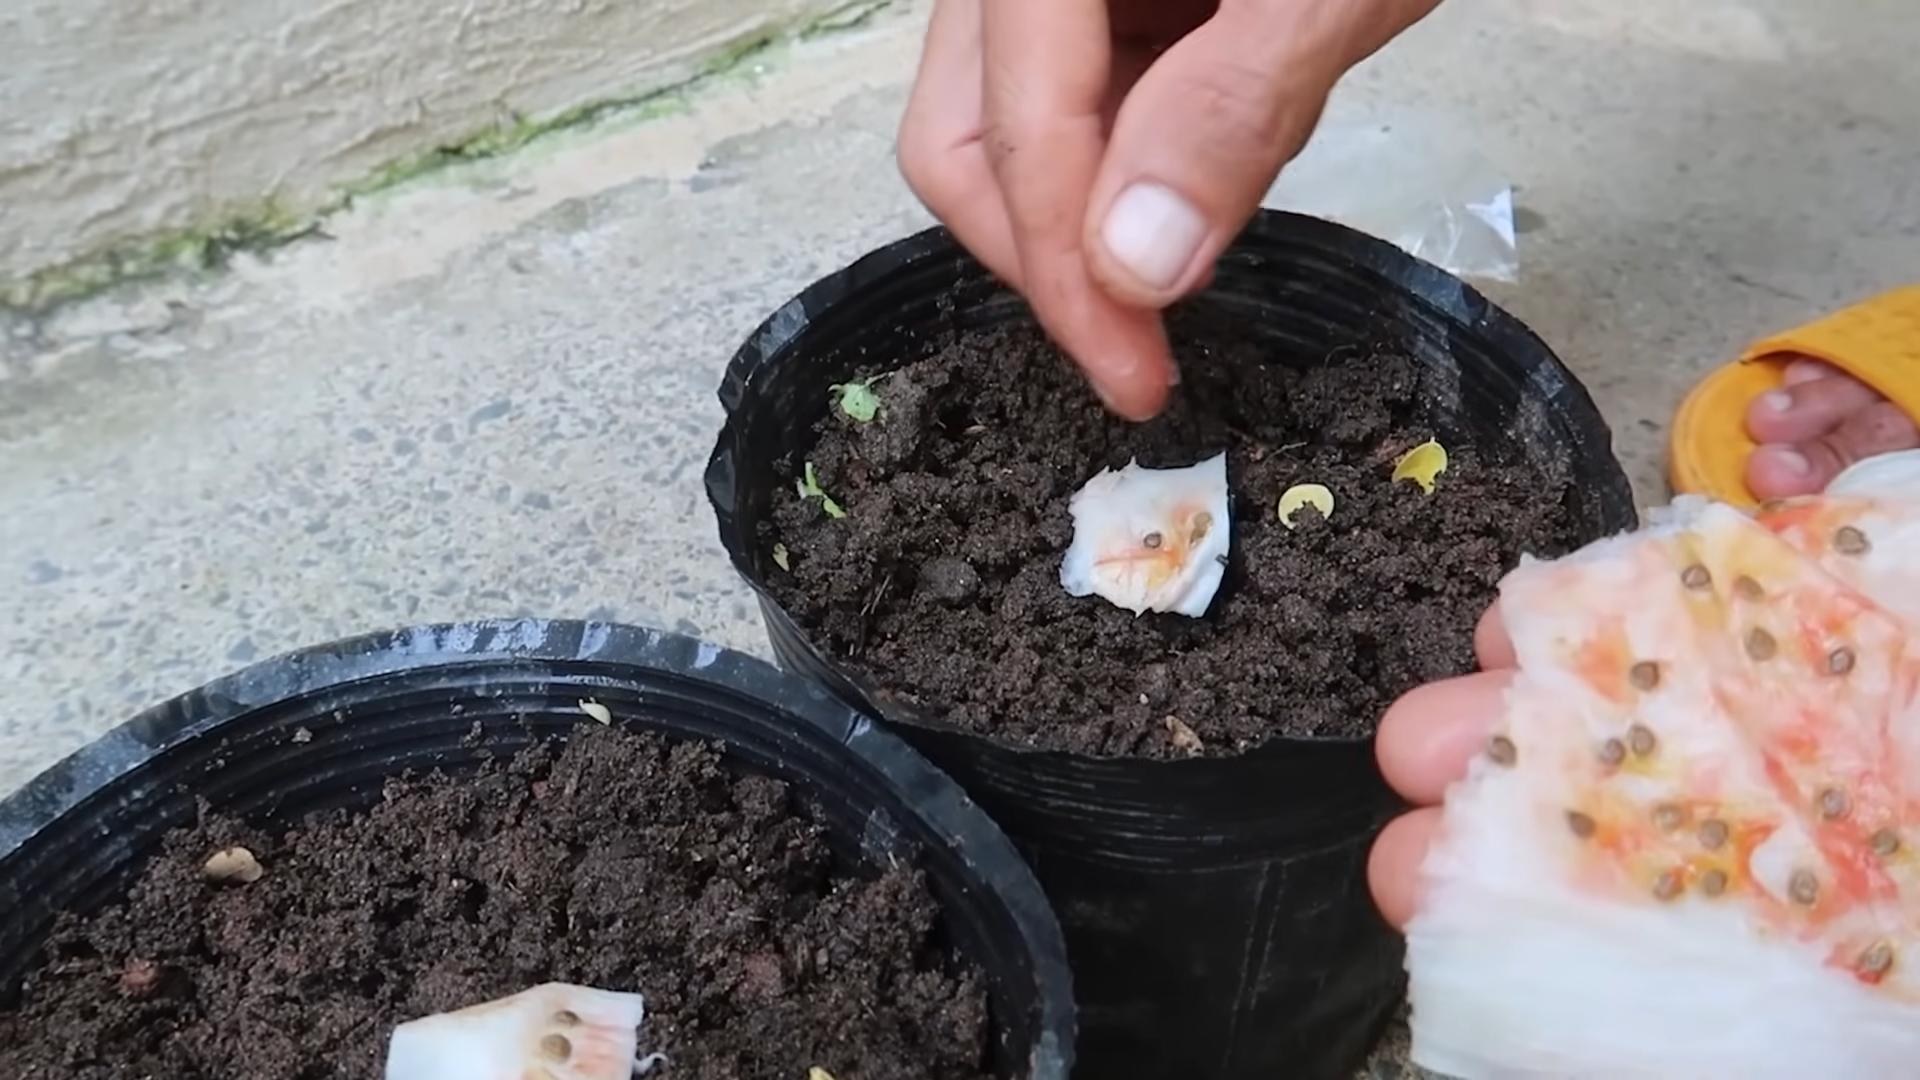
2. **Sow the Seeds:** Fill the seed starting trays or pots with seed starting mix. Moisten the mix with the spray bottle until it’s damp but not soggy. Sow the tomato seeds about 1/4 inch deep, and gently cover them with more mix.
3. **Provide Warmth and Light:** Place the trays or pots on a heat mat (if using) and under a grow light (if using). The ideal temperature for germination is around 75-85°F (24-29°C). If you don’t have a heat mat or grow light, you can place the trays or pots in a warm, sunny location.
4. **Keep the Soil Moist:** Check the soil moisture daily and mist with the spray bottle as needed to keep it damp. Don’t overwater, as this can lead to damping off, a fungal disease that can kill seedlings.
5. **Transplant Seedlings:** Once the seedlings have developed their first set of true leaves (the leaves that look like miniature tomato leaves, not the initial seed leaves), you can transplant them into larger pots. Handle the seedlings gently, and be careful not to damage the roots.
Buying Seedlings (Outdoor Method)
1. **Choose Healthy Seedlings:** Look for seedlings that are about 6-8 inches tall, with thick stems and healthy green leaves. Avoid seedlings that are leggy (tall and spindly), yellowed, or have any signs of disease or pests.
2. **Harden Off Seedlings:** Before planting the seedlings outdoors, you need to harden them off. This means gradually exposing them to outdoor conditions over a period of about a week. Start by placing them in a sheltered location for a few hours each day, and gradually increase the amount of time they spend outdoors. This will help them acclimate to the sun, wind, and temperature changes.
Planting Your Tomato Plants
Now comes the fun part: planting your tomato plants in the garden!
1. **Choose a Sunny Location:** Tomatoes need at least 6-8 hours of sunlight per day to thrive. Choose a location in your garden that gets plenty of sun.
2. **Prepare the Soil:** Tomatoes prefer well-drained soil that is rich in organic matter. Amend the soil with compost or aged manure before planting. I like to add a handful of bone meal to each planting hole to provide phosphorus, which promotes root growth.
3. **Dig the Holes:** Dig holes that are deep enough to bury the bottom third of the tomato plant’s stem. This will encourage the plant to develop more roots along the buried stem, resulting in a stronger, healthier plant.
4. **Plant the Seedlings:** Gently remove the seedlings from their pots and loosen the roots slightly. Place the seedlings in the holes and backfill with soil. Water thoroughly.
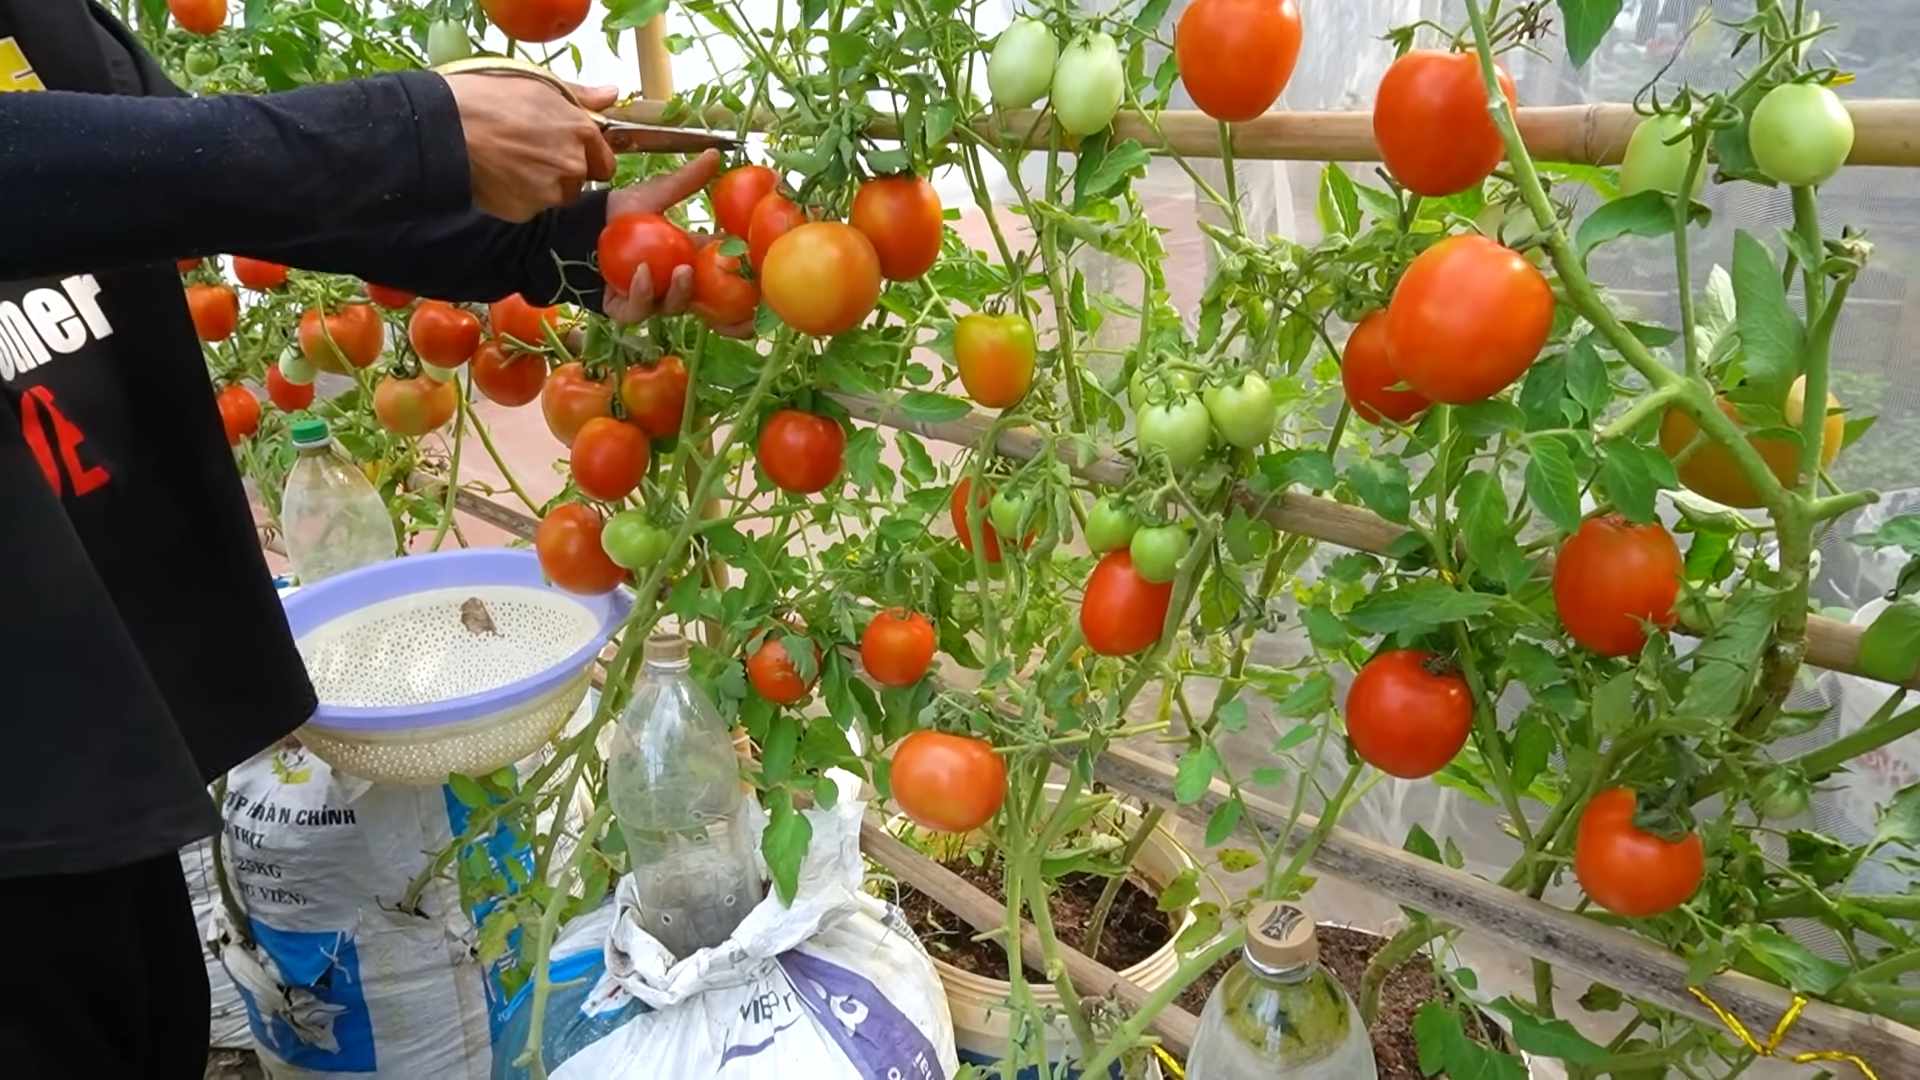
5. **Stake or Cage the Plants:** Tomato plants, especially indeterminate varieties, need support to prevent them from falling over. You can use stakes, cages, or trellises to provide support. I prefer cages because they provide all-around support and are easy to install.
Caring for Your Tomato Plants
Once your tomato plants are in the ground, they’ll need regular care to thrive.
1. **Watering:** Water deeply and regularly, especially during hot, dry weather. Aim to water at the base of the plant to avoid wetting the foliage, which can lead to disease.
2. **Fertilizing:** Fertilize your tomato plants every 2-3 weeks with a balanced fertilizer. Look for a fertilizer that is specifically formulated for tomatoes. I like to use a liquid fertilizer that I can apply with a watering can.
3. **Pruning:** Pruning is important for indeterminate tomato varieties. Remove the suckers (the small shoots that grow between the main stem and the branches) to encourage the plant to focus its energy on producing fruit. Determinate varieties generally don’t need pruning.
4. **Mulching:** Apply a layer of mulch around the base of the plants to help retain moisture, suppress weeds, and regulate soil temperature. I like to use straw or shredded leaves as mulch.
5. **Pest and Disease Control:** Keep an eye out for pests and diseases. Common tomato pests include aphids, tomato hornworms, and whiteflies. Common tomato diseases include early blight, late blight, and blossom end rot. Treat any problems promptly with appropriate insecticides or fungicides. For blossom end rot, which is caused by calcium deficiency, you can add calcium to the soil or spray the plants with a calcium solution.
Harvesting Your Tomatoes
The moment you’ve been waiting for! Tomatoes are ready to harvest when they are fully colored and slightly soft to the touch. Gently twist the tomato off the vine, being careful not to damage the plant.
Tips for Harvesting:
* Harvest tomatoes in the morning, when they are at their coolest.
* Handle tomatoes gently to avoid bruising.
* Store tomatoes at room temperature, out of direct sunlight. Don’t refrigerate them, as this can affect their flavor and texture.
Troubleshooting Common Tomato Problems
Even with the best care, you may encounter some problems when growing tomatoes. Here are some common issues and how to fix them:
* **Blossom End Rot:** This is caused by calcium deficiency. Add calcium to the soil or spray the plants with a calcium solution. Ensure consistent watering.
* **Early Blight:** This is a fungal disease that causes dark spots on the leaves. Remove infected leaves and spray the plants with a fungicide.
* **Late Blight:** This is a more serious fungal disease that can quickly kill tomato plants. Remove infected plants and spray the remaining plants with a fungicide.
* **Tomato Hornworms:** These are large green caterpillars that can devour tomato plants. Handpick them off the plants or spray them with Bacillus thuringiensis (Bt), a natural insecticide.
* **Aphids:** These are small, sap-sucking insects that can weaken tomato plants. Spray the plants with insecticidal soap or neem oil.
Growing tomatoes at home can be incredibly rewarding. With a little bit of effort and attention, you can enjoy a bountiful harvest of delicious, homegrown tomatoes all season long. Happy gardening!
Conclusion
So, there you have it! Growing tomatoes at home, while it might seem daunting at first, is an incredibly rewarding experience. From the vibrant colors to the unmatched flavor of a sun-ripened tomato plucked straight from your own vine, the benefits far outweigh the effort. We’ve covered everything from seed starting to pest control, equipping you with the knowledge to cultivate a thriving tomato garden, even if you’re a complete beginner.
But why is this DIY approach a must-try? Simply put, it’s about control and quality. Store-bought tomatoes, while convenient, often lack the intense flavor and nutritional value of homegrown varieties. They’re frequently picked before they’re fully ripe to withstand transportation and storage, sacrificing taste in the process. When you grow your own, you choose the variety, control the growing conditions, and harvest at peak ripeness, resulting in a tomato that’s bursting with flavor and packed with nutrients. Plus, you know exactly what’s going into your food – no mystery chemicals or pesticides.
Beyond the superior taste and health benefits, growing tomatoes at home is also a fantastic way to connect with nature and learn about the food you eat. It’s a therapeutic activity that can reduce stress and provide a sense of accomplishment. Watching your tiny seedlings grow into mature plants laden with fruit is an incredibly satisfying experience.
Looking for variations to spice things up? Consider experimenting with different tomato varieties. From the classic beefsteak to the sweet cherry tomato, the tangy Roma to the unique heirloom varieties, there’s a tomato out there for every palate. You can also try growing tomatoes in containers if you have limited space, or even explore vertical gardening techniques to maximize your yield. Companion planting is another great way to enhance your tomato garden. Basil, marigolds, and carrots are all excellent companions that can help deter pests and improve the flavor of your tomatoes. Don’t be afraid to experiment with different fertilizers and soil amendments to find what works best for your growing conditions.
Don’t be intimidated by the learning curve. Every gardener, even the most experienced, started somewhere. Embrace the challenges, learn from your mistakes, and most importantly, have fun! The joy of biting into a juicy, homegrown tomato is well worth the effort.
Now it’s your turn! We encourage you to take the plunge and start your own tomato garden. Whether you have a sprawling backyard or just a sunny windowsill, there’s a way to grow tomatoes at home. Share your experiences with us in the comments below. We’d love to hear about your favorite varieties, your biggest challenges, and your most successful tips. Let’s build a community of tomato-growing enthusiasts and inspire others to experience the joy of homegrown goodness. Happy gardening!
Frequently Asked Questions (FAQ)
What is the best time to start growing tomatoes from seed?
The ideal time to start growing tomatoes from seed depends on your local climate and the length of your growing season. In general, you should start seeds indoors 6-8 weeks before the last expected frost. This allows the seedlings to develop a strong root system before being transplanted outdoors. To determine the best time for your area, consult your local extension office or a gardening calendar specific to your region. Remember to harden off your seedlings gradually by exposing them to outdoor conditions for increasing periods of time before transplanting them permanently.
What kind of soil is best for growing tomatoes?
Tomatoes thrive in well-draining soil that is rich in organic matter. A slightly acidic soil pH of 6.0 to 6.8 is ideal. Before planting, amend your soil with compost, aged manure, or other organic materials to improve its fertility and drainage. If your soil is heavy clay, consider adding sand or perlite to improve drainage. You can also purchase a high-quality potting mix specifically formulated for vegetables if you’re growing tomatoes in containers. Regular soil testing can help you determine if your soil is lacking any essential nutrients and guide your fertilization strategy.
How often should I water my tomato plants?
Tomato plants need consistent watering, especially during hot, dry weather. Water deeply and regularly, aiming to keep the soil consistently moist but not waterlogged. A good rule of thumb is to water when the top inch of soil feels dry to the touch. Avoid overhead watering, as this can promote fungal diseases. Instead, water at the base of the plant, using a soaker hose or drip irrigation system if possible. Mulching around your tomato plants can also help retain moisture in the soil and reduce the need for frequent watering.
What are some common tomato pests and diseases, and how can I prevent them?
Tomatoes are susceptible to a variety of pests and diseases, including aphids, whiteflies, tomato hornworms, blossom end rot, early blight, and late blight. To prevent these problems, practice good garden hygiene. Remove any diseased leaves or plants promptly, and keep your garden free of weeds. Use insecticidal soap or neem oil to control aphids and whiteflies. Handpick tomato hornworms as you find them. To prevent blossom end rot, ensure consistent watering and add calcium to the soil if necessary. Choose disease-resistant tomato varieties whenever possible. Crop rotation can also help prevent the buildup of soilborne diseases.
How do I know when my tomatoes are ripe?
The best way to tell if a tomato is ripe is to look at its color and feel its texture. Ripe tomatoes will be uniformly colored and slightly soft to the touch. The color will vary depending on the variety, but generally, ripe tomatoes will be red, pink, yellow, or orange. Gently squeeze the tomato; it should give slightly but not be mushy. The tomato should also detach easily from the vine with a gentle twist. The aroma of a ripe tomato is also a good indicator; it should have a sweet, earthy scent.
Can I grow tomatoes in containers?
Yes, you can absolutely grow tomatoes in containers! Choose a large container, at least 20 gallons in size, with good drainage holes. Use a high-quality potting mix specifically formulated for vegetables. Select determinate tomato varieties, which are more compact and bushier than indeterminate varieties. Provide adequate support for the plants, such as a stake or cage. Water regularly and fertilize every 2-3 weeks with a balanced fertilizer. Place the container in a sunny location that receives at least 6-8 hours of sunlight per day.
What is the difference between determinate and indeterminate tomato varieties?
Determinate tomato varieties grow to a certain size and then stop, producing all of their fruit at once. They are typically more compact and bushier, making them well-suited for containers and smaller gardens. Indeterminate tomato varieties continue to grow and produce fruit throughout the growing season. They require staking or caging to support their growth. Choose the variety that best suits your growing space and preferences.
How can I improve the flavor of my homegrown tomatoes?
Several factors can influence the flavor of your homegrown tomatoes. Choose high-quality tomato varieties known for their flavor. Provide adequate sunlight, water, and nutrients. Avoid overwatering, as this can dilute the flavor. Allow the tomatoes to ripen fully on the vine before harvesting. Soil health is also crucial; amend your soil with compost and other organic materials to improve its fertility. Consider adding a small amount of Epsom salts to the soil to boost magnesium levels, which can enhance flavor.
What should I do with green tomatoes at the end of the season?
Don’t let those green tomatoes go to waste! There are several ways to use them. You can fry them, pickle them, or use them in chutneys and relishes. You can also ripen them indoors by placing them in a paper bag with a ripe banana or apple. The ethylene gas released by the ripe fruit will help the green tomatoes ripen. Store the bag in a cool, dark place and check the tomatoes regularly.
How do I save tomato seeds for next year?
Saving tomato seeds is a great way to preserve your favorite varieties and save money. Choose ripe, healthy tomatoes from disease-free plants. Squeeze the seeds and pulp into a jar and add a small amount of water. Let the mixture ferment for 3-4 days, stirring occasionally. This process will help remove the gelatinous coating around the seeds. Rinse the seeds thoroughly and spread them out on a paper towel to dry completely. Store the dried seeds in an airtight container in a cool, dark, and dry place.
Leave a Comment