
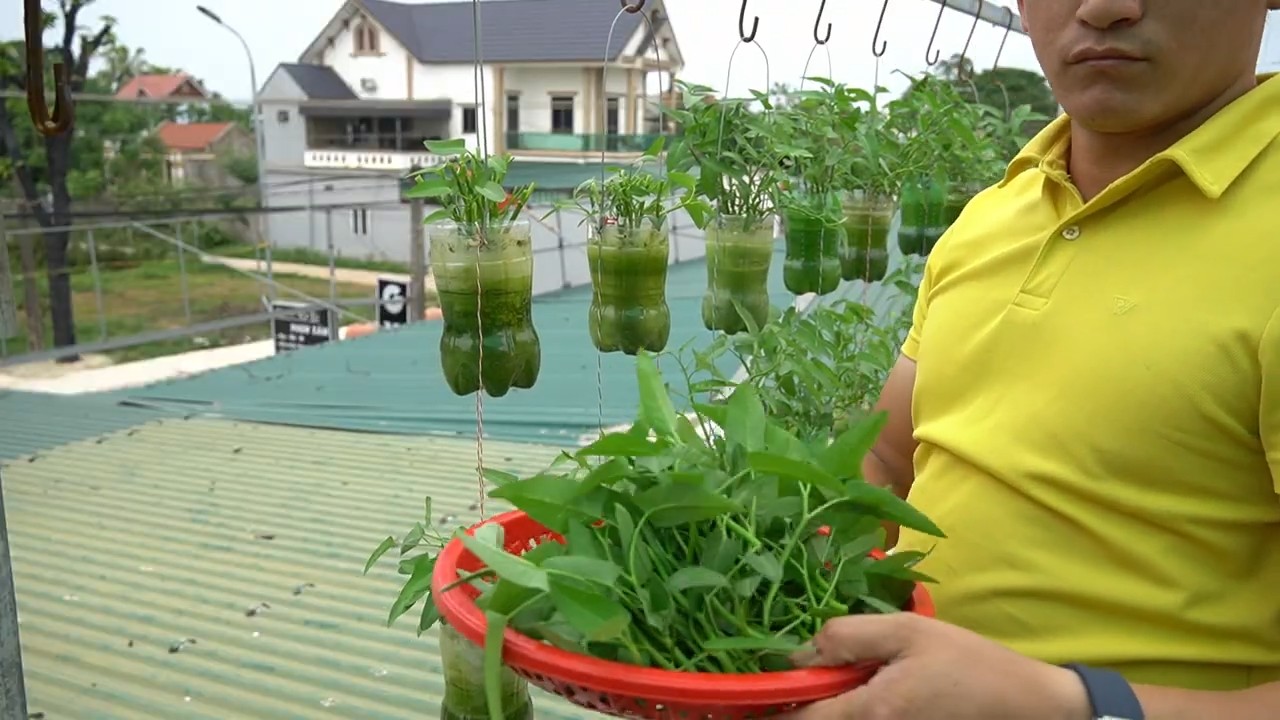
Growing Spinach in Plastic Bottles: Who knew turning trash into treasure could be so delicious and nutritious? I’m so excited to share this incredibly simple and rewarding DIY project with you! Forget those expensive raised beds and complicated gardening setups. We’re going back to basics, embracing sustainability, and creating a thriving spinach patch right in our own backyards (or balconies!) using something we often discard: plastic bottles.
The concept of container gardening, while seemingly modern, has roots stretching back centuries. From the Hanging Gardens of Babylon to the humble window boxes of Victorian England, people have always found creative ways to cultivate plants in limited spaces. But this particular twist – repurposing plastic – adds a crucial layer of environmental consciousness to the tradition. It’s a small act with a big impact, reducing waste while providing fresh, homegrown goodness.
Let’s face it, in today’s busy world, finding the time and space for a traditional garden can feel overwhelming. That’s where this DIY trick comes in. Growing Spinach in Plastic Bottles is perfect for apartment dwellers, beginner gardeners, or anyone looking for a low-cost, low-effort way to enjoy fresh, organic spinach. Plus, it’s a fantastic way to teach kids about sustainability and where their food comes from. So, grab those empty bottles, and let’s get started on this fun and rewarding project! I promise, you’ll be amazed at how easy it is to have a constant supply of fresh spinach right at your fingertips.
Spinat Anbauen in Plastikflaschen: Ein DIY-Gartenprojekt für Jedermann
Hallo Gartenfreunde! Habt ihr Lust, frischen Spinat direkt vor eurer Haustür zu ernten, auch wenn ihr keinen Garten habt? Dann seid ihr hier genau richtig! Ich zeige euch, wie ihr mit einfachen Plastikflaschen einen kleinen, aber feinen Spinatgarten zaubern könnt. Das ist nicht nur super nachhaltig, weil wir Plastikmüll recyceln, sondern auch kinderleicht und macht richtig Spaß!
Was ihr braucht:
* Plastikflaschen: Am besten eignen sich große PET-Flaschen (z.B. von Wasser oder Saft). Je größer die Flasche, desto mehr Platz für den Spinat.
* Spinatsamen: Achtet auf eine Sorte, die für den Anbau im Frühjahr und Herbst geeignet ist.
* Erde: Hochwertige Pflanzerde ist wichtig für ein gutes Wachstum.
* Schere oder Messer: Zum Zuschneiden der Flaschen.
* Bohrer oder Nagel: Für die Drainage-Löcher.
* Gießkanne oder Sprühflasche: Zum Bewässern.
* Optional: Kieselsteine oder Tonscherben für die Drainage.
* Optional: Etiketten und Stift zum Beschriften.
Vorbereitung der Plastikflaschen
Bevor wir mit dem Bepflanzen loslegen, müssen wir die Plastikflaschen vorbereiten. Das ist aber ganz einfach, versprochen!
1. Reinigung: Spült die Plastikflaschen gründlich mit warmem Wasser und Spülmittel aus. So entfernt ihr alle Rückstände und sorgt für eine saubere Umgebung für eure Spinatpflanzen. Lasst sie danach gut trocknen.
2. Zuschneiden: Jetzt kommt der spaßige Teil! Es gibt verschiedene Möglichkeiten, die Flaschen zuzuschneiden. Ich zeige euch zwei Varianten:
* Variante 1: Horizontaler Schnitt: Schneidet die Flasche horizontal in der Mitte durch. Der obere Teil wird später umgedreht und in den unteren Teil gesteckt. So entsteht ein kleiner Topf.
* Variante 2: Vertikaler Schnitt: Schneidet die Flasche vertikal auf einer Seite auf. So entsteht eine Art “Balkonkasten”. Diese Variante eignet sich gut, wenn ihr mehrere Spinatpflanzen nebeneinander anbauen wollt.
Wichtig: Achtet darauf, dass die Schnittkanten nicht zu scharf sind. Ihr könnt sie eventuell mit Schleifpapier etwas glätten.
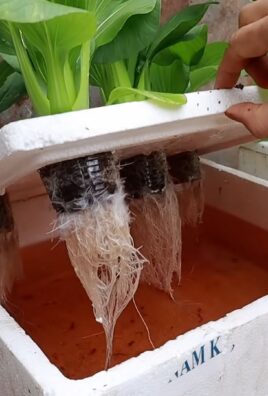
3. Drainage-Löcher: Damit das Wasser gut ablaufen kann und keine Staunässe entsteht, bohrt oder nagelt ihr einige Löcher in den Boden der Flaschen. Das ist besonders wichtig, wenn ihr die horizontale Schnittvariante verwendet.
4. Optional: Drainage-Schicht: Um die Drainage noch zu verbessern, könnt ihr eine Schicht Kieselsteine oder Tonscherben auf den Boden der Flaschen legen. Das verhindert, dass die Erde die Löcher verstopft.
Spinat säen und pflanzen
Jetzt geht es ans Eingemachte! Wir bepflanzen unsere vorbereiteten Plastikflaschen mit Spinat.
1. Erde einfüllen: Füllt die Flaschen mit hochwertiger Pflanzerde. Lasst dabei etwa 2-3 cm Platz bis zum Rand.
2. Samen säen: Verteilt die Spinatsamen gleichmäßig auf der Erde. Achtet darauf, dass die Samen nicht zu dicht liegen, damit die Pflanzen genügend Platz zum Wachsen haben. Eine Faustregel ist, etwa 1-2 cm Abstand zwischen den Samen zu lassen.
3. Samen bedecken: Bedeckt die Samen mit einer dünnen Schicht Erde (ca. 0,5 cm).
4. Angießen: Gießt die Erde vorsichtig mit einer Gießkanne oder Sprühflasche an. Die Erde sollte gut durchfeuchtet sein, aber nicht zu nass.
5. Optional: Beschriften: Beschriftet die Flaschen mit dem Namen der Pflanze (Spinat) und dem Datum der Aussaat. So behaltet ihr den Überblick.
Pflege des Spinats
Damit euer Spinat gut gedeiht, braucht er die richtige Pflege. Keine Sorge, das ist nicht schwer!
1. Standort: Spinat braucht einen hellen Standort, aber keine direkte Mittagssonne. Ein halbschattiger Platz ist ideal.
2. Bewässerung: Haltet die Erde immer feucht, aber vermeidet Staunässe. Gießt regelmäßig, besonders an warmen Tagen.
3. Düngung: Spinat ist ein Starkzehrer und braucht ausreichend Nährstoffe. Düngt ihn regelmäßig mit einem organischen Dünger.
4. Schutz vor Schädlingen: Achtet auf Schädlinge wie Blattläuse oder Schnecken. Bei Bedarf könnt ihr natürliche Schädlingsbekämpfungsmittel einsetzen.
5. Ernte: Spinat kann geerntet werden, sobald die Blätter groß genug sind. Schneidet die äußeren Blätter ab, damit die inneren Blätter weiterwachsen können.
Zusätzliche Tipps und Tricks
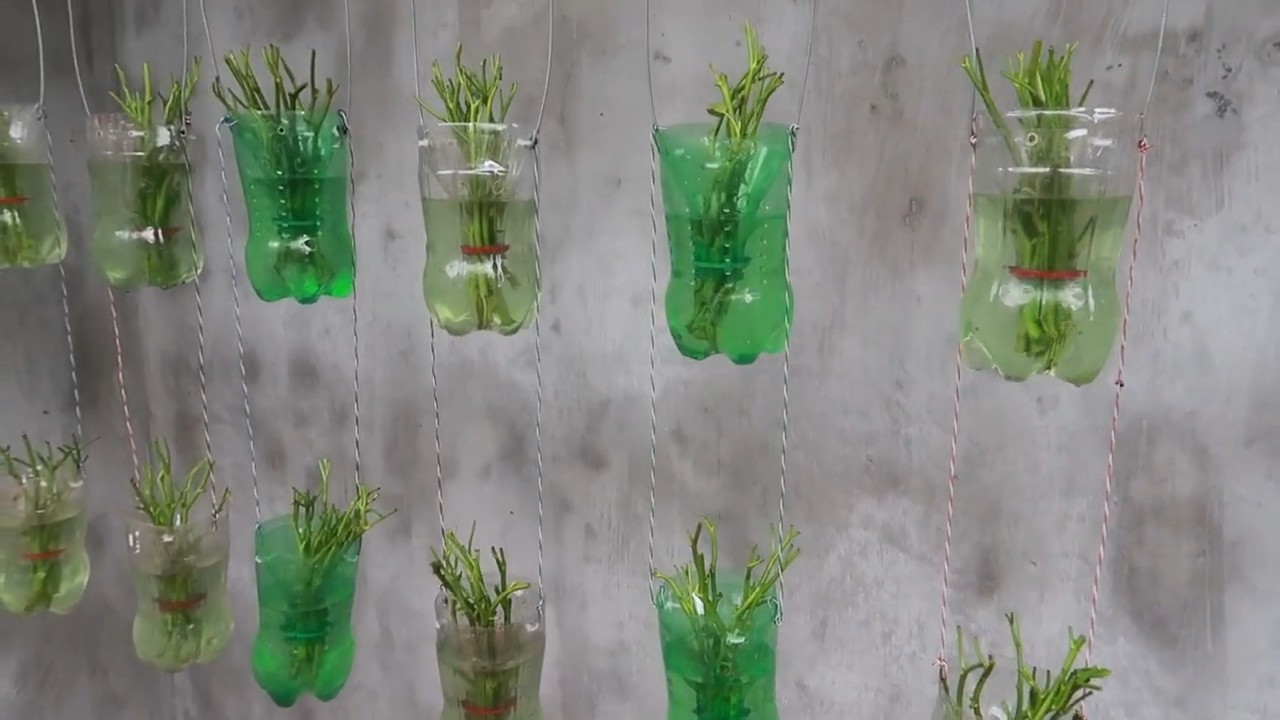
* Vertikaler Garten: Wenn ihr mehrere Plastikflaschen habt, könnt ihr einen vertikalen Garten anlegen. Befestigt die Flaschen an einer Wand oder einem Zaun. Das spart Platz und sieht toll aus!
* Upcycling: Verwendet alte Joghurtbecher oder andere Behälter als Anzuchttöpfe für die Spinatsamen.
* Mulchen: Bedeckt die Erde mit einer Schicht Mulch (z.B. Stroh oder Rasenschnitt). Das hält die Feuchtigkeit im Boden und unterdrückt Unkraut.
* Sortenwahl: Es gibt verschiedene Spinatsorten. Informiert euch, welche Sorte für eure Region und euren Standort am besten geeignet ist.
* Kombination mit anderen Pflanzen: Spinat lässt sich gut mit anderen Pflanzen wie Radieschen oder Salat kombinieren.
Häufige Probleme und Lösungen
* Gelbe Blätter: Gelbe Blätter können ein Zeichen für Nährstoffmangel sein. Düngt den Spinat mit einem organischen Dünger.
* Schädlinge: Bei Befall mit Schädlingen könnt ihr natürliche Schädlingsbekämpfungsmittel einsetzen.
* Staunässe: Staunässe kann zu Wurzelfäule führen. Achtet auf eine gute Drainage und gießt nicht zu viel.
* Schlechte Keimung: Schlechte Keimung kann an alten Samen oder zu trockener Erde liegen. Verwendet frische Samen und haltet die Erde feucht.
Warum Spinat im Plastikflaschen anbauen?
* Nachhaltigkeit: Wir recyceln Plastikmüll und schonen die Umwelt.
* Platzsparend: Auch auf kleinstem Raum können wir frischen Spinat anbauen.
* Kostengünstig: Wir sparen Geld, weil wir keinen Spinat kaufen müssen.
* Gesund: Wir ernten frischen, gesunden Spinat ohne Pestizide.
* Spaß: Es macht einfach Spaß, seinen eigenen Spinat anzubauen!
Fazit
Ich hoffe, ich konnte euch mit dieser Anleitung inspirieren, euren eigenen Spinat in Plastikflaschen anzubauen. Es ist ein tolles Projekt, das nicht nur Spaß macht, sondern auch einen Beitrag zur Nachhaltigkeit leistet. Probiert es aus und lasst mich wissen, wie es euch gefallen hat! Viel Erfolg beim Gärtnern!
Conclusion
So, there you have it! Growing spinach in plastic bottles isn’t just a quirky gardening experiment; it’s a game-changer for anyone looking to enjoy fresh, homegrown greens regardless of space constraints or budget. We’ve walked you through the simple steps, highlighting the benefits of this innovative method, and hopefully, dispelled any doubts you might have had.
Why is this DIY trick a must-try? Because it democratizes gardening. It empowers you to cultivate your own food, connect with nature, and reduce your environmental footprint, all within the confines of a recycled plastic bottle. Imagine the satisfaction of harvesting vibrant, nutrient-rich spinach leaves, knowing you nurtured them from seed to table using a sustainable and cost-effective approach. This method is particularly beneficial for urban dwellers with limited garden space, apartment residents with balconies, or anyone simply looking for a fun and engaging gardening project.
But the beauty of this method lies not only in its practicality but also in its adaptability. Feel free to experiment with different types of plastic bottles. Larger bottles can accommodate more plants, while smaller bottles are perfect for smaller spaces or for teaching children about gardening. You can also explore different potting mixes. While we recommended a standard potting mix, you can amend it with compost or other organic materials to further enrich the soil and boost spinach growth. Consider adding a slow-release fertilizer to provide your spinach plants with a steady supply of nutrients.
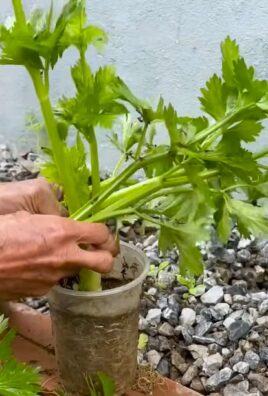
Furthermore, don’t limit yourself to just spinach! This method can be adapted to grow other leafy greens like lettuce, kale, or even herbs like basil and parsley. The possibilities are endless! Think of creating a vertical garden wall using multiple plastic bottle planters, adding a touch of greenery and freshness to your living space. You could even paint the bottles to add a splash of color and personality to your garden.
We strongly encourage you to give this DIY spinach growing method a try. It’s a rewarding experience that connects you with nature, promotes sustainability, and provides you with a delicious and healthy harvest. The process of growing spinach in plastic bottles is not only simple and affordable but also incredibly satisfying.
Once you’ve embarked on your plastic bottle gardening adventure, we’d love to hear about your experience! Share your photos, tips, and challenges with us in the comments section below. Let’s build a community of resourceful gardeners who are passionate about sustainable living and homegrown goodness. What bottle types did you use? What were your biggest challenges? What successes did you have? Your insights can help others learn and grow, literally! Let’s cultivate a greener future, one plastic bottle at a time. So, grab those bottles, get your hands dirty, and start growing! Happy gardening!
Frequently Asked Questions (FAQ)
1. What type of plastic bottles are best for growing spinach?
Ideally, you should use food-grade plastic bottles, such as those used for water, juice, or soda. These are generally considered safe for growing edible plants. Avoid using bottles that previously contained harsh chemicals or cleaning products, as these could contaminate the soil and affect the spinach. PET (Polyethylene Terephthalate) bottles, commonly used for water and soda, are a good choice. Ensure the bottles are thoroughly cleaned before use. The size of the bottle will determine how many spinach plants you can grow in each. Larger bottles (2-3 liters) are suitable for multiple plants, while smaller bottles (500ml-1 liter) are better for single plants or smaller varieties of spinach.
2. What kind of soil should I use for growing spinach in plastic bottles?
A well-draining potting mix is essential for growing healthy spinach. You can use a commercially available potting mix or create your own by combining equal parts of garden soil, compost, and perlite or vermiculite. The compost provides nutrients, while the perlite or vermiculite improves drainage and aeration. Avoid using heavy clay soil, as it can become waterlogged and suffocate the roots. Adding a slow-release fertilizer to the potting mix can provide your spinach plants with a steady supply of nutrients throughout their growth cycle.
3. How often should I water my spinach plants in plastic bottles?
The frequency of watering depends on several factors, including the weather, the size of the bottle, and the type of potting mix. Generally, you should water your spinach plants when the top inch of soil feels dry to the touch. Avoid overwatering, as this can lead to root rot. Ensure the bottles have adequate drainage holes to prevent water from accumulating at the bottom. During hot weather, you may need to water more frequently. Check the soil moisture regularly and adjust your watering schedule accordingly.
4. How much sunlight do spinach plants need when grown in plastic bottles?
Spinach thrives in full sun to partial shade. Ideally, your spinach plants should receive at least 4-6 hours of direct sunlight per day. If you live in a hot climate, providing some afternoon shade can help prevent the leaves from wilting or scorching. If you’re growing spinach indoors, you may need to supplement with artificial light, such as a grow light. Position the grow light about 6-12 inches above the plants and provide 12-14 hours of light per day.
5. How do I protect my spinach plants from pests and diseases when growing in plastic bottles?
Regularly inspect your spinach plants for signs of pests or diseases. Common pests that affect spinach include aphids, spider mites, and slugs. You can control these pests by handpicking them off the plants, spraying them with insecticidal soap, or using diatomaceous earth. To prevent diseases, ensure good air circulation around the plants and avoid overwatering. If you notice any signs of disease, such as yellowing or spotting leaves, remove the affected leaves immediately. You can also use organic fungicides to control fungal diseases.
6. How long does it take for spinach to grow in plastic bottles?
Spinach is a relatively fast-growing crop. You can typically harvest your first spinach leaves about 4-6 weeks after planting. The exact time will depend on the variety of spinach, the growing conditions, and the size of the plants. You can harvest spinach leaves as needed, starting with the outer leaves. This allows the inner leaves to continue growing. Regular harvesting encourages continued production.
7. Can I grow spinach in plastic bottles indoors?
Yes, you can successfully grow spinach in plastic bottles indoors, especially if you have a sunny windowsill or access to grow lights. Ensure the plants receive adequate light and maintain a consistent temperature. Indoor growing can protect your spinach from extreme weather conditions and pests.
8. What are some variations I can try when growing spinach in plastic bottles?
There are many creative variations you can explore! Consider creating a vertical garden by hanging multiple plastic bottle planters on a wall or fence. You can also paint the bottles to add a decorative touch. Experiment with different types of potting mixes or add companion plants, such as marigolds or basil, to deter pests. You can also try growing different varieties of spinach, such as baby spinach, savoy spinach, or flat-leaf spinach.
9. How do I harvest spinach from plastic bottles?
Harvesting spinach is easy. Simply use scissors or your fingers to snip off the outer leaves, leaving the inner leaves to continue growing. Avoid pulling the entire plant out of the bottle, as this will prevent further harvests. Harvest regularly to encourage continued production.
10. Is growing spinach in plastic bottles environmentally friendly?
Yes, growing spinach in plastic bottles is an environmentally friendly practice. It repurposes plastic waste, reduces the need for commercially grown spinach (which often involves transportation and packaging), and allows you to grow your own food sustainably. It’s a small but meaningful step towards a more sustainable lifestyle.

Leave a Comment