
Growing radishes at home can be surprisingly simple and incredibly rewarding! Imagine plucking crisp, peppery radishes straight from your own garden, adding a vibrant crunch to your salads or a zesty kick to your tacos. Forget those bland, store-bought radishes – we’re talking about homegrown flavor explosions!
Radishes have a rich history, dating back to ancient times. They were cultivated in Egypt before the pyramids were even built! These humble root vegetables have been a staple in diets across the globe for centuries, prized for their quick growth and nutritional benefits. But let’s be honest, sometimes getting them to grow perfectly can feel a bit tricky.
That’s where these DIY tricks and hacks come in. Have you ever struggled with radishes that are too small, too spicy, or just plain refuse to sprout? You’re not alone! Many home gardeners face these challenges. This article is your ultimate guide to mastering the art of growing radishes at home. I’m going to share my tried-and-true secrets for achieving a bountiful harvest of perfectly crisp, flavorful radishes, even if you’re a complete beginner. Get ready to transform your garden and your plate!
Growing Radishes Yourself: A Comprehensive DIY Guide
Hello garden friends! I am so excited to show you today how you can easily grow crisp, delicious radishes at home. Radishes are super uncomplicated, grow quickly, and are perfect for beginner gardeners. So, let’s roll up our sleeves and get started!
Why Grow Radishes Yourself?
- Freshness and Flavor: Homegrown radishes simply taste better! They are crunchier and have a more intense flavor than those from the supermarket.
- Quick Harvest: Radishes are lightning-fast growers. You can harvest your first crop within 3-4 weeks.
- Space-Saving: Radishes don’t need much space and are therefore also suitable for balconies and small gardens.
- Easy to Grow: They are very low-maintenance and forgive a mistake or two.
- Healthy: Radishes are rich in vitamins and minerals.
What You Need for Radish Cultivation
- Radish seeds: Choose a variety you like. There are red, white, yellow, and even purple radishes.
- Soil: Loose, humus-rich soil is ideal. You can mix garden soil with compost or sand.
- Container (optional): If you don’t have a garden, you can also grow radishes in pots or balcony boxes.
- Watering can or garden hose: For regular watering.
- Gardening tools: A small shovel or a dibber for sowing.
- Fertilizer (optional): An organic fertilizer can promote growth.
Preparation: The Key to Success
Good preparation is important before we start sowing.
- Choose a location: Radishes love the sun, but a semi-shady location is also fine. Make sure the location is well-ventilated.
- Prepare the soil: Loosen the soil thoroughly and remove stones and weeds. Mix in compost or sand to improve drainage.
- Prepare the container (if necessary): Choose a pot or balcony box with sufficient drainage holes. Fill the container with the prepared soil.
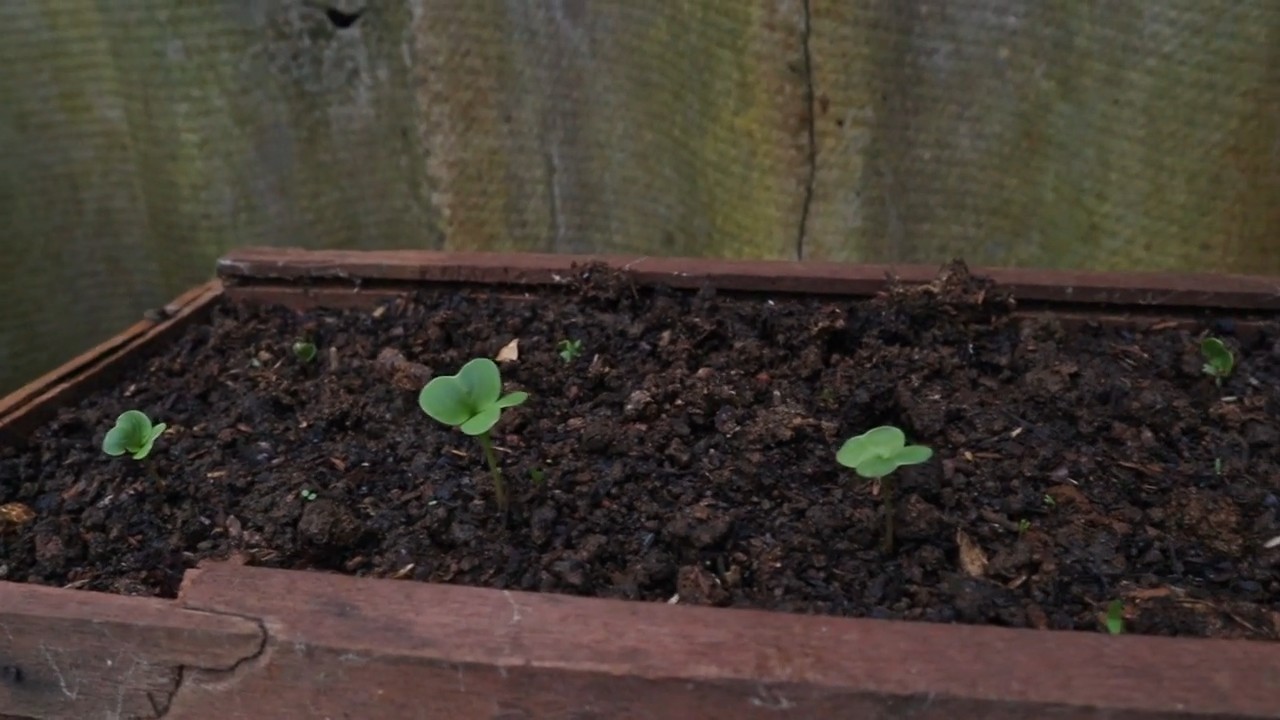
Sowing: How to Do It Right
Now for the exciting part: sowing the radish seeds.
- Make seed furrows: Make seed furrows in the soil with a dibber or a finger. The furrows should be about 1-2 cm deep and have a distance of 10-15 cm from each other.
- Sow the seeds: Place the radish seeds in the seed furrows. Make sure the seeds are not too close together. A distance of 2-3 cm between the seeds is ideal.
- Cover the seeds: Cover the seeds with a thin layer of soil.
- Water in: Water the soil gently so that the seeds are not washed away.
The Care: So Your Radishes Thrive Magnificently
After sowing, proper care is crucial for a bountiful harvest.
- Watering: Keep the soil evenly moist, but not wet. Radishes need sufficient water, especially during germination and growth.
- Weeding: Regularly remove weeds so that the radishes do not have to compete for nutrients and light.
- Thinning (pricking out): If the radishes are too close together, you should thin them out. Remove the weakest plants so that the remaining ones have enough space to grow. The distance between the plants should be about 5 cm.
- Fertilizing (optional): If you wish, you can fertilize the radishes with an organic fertilizer. Be sure to use the fertilizer sparingly, as too much fertilizer can promote the growth of the leaves but neglect the roots.
- Pest protection: Radishes can be infested by flea beetles. These small beetles eat holes in the leaves. To deter them, you can place an insect net over the plants or spray the leaves regularly with water.
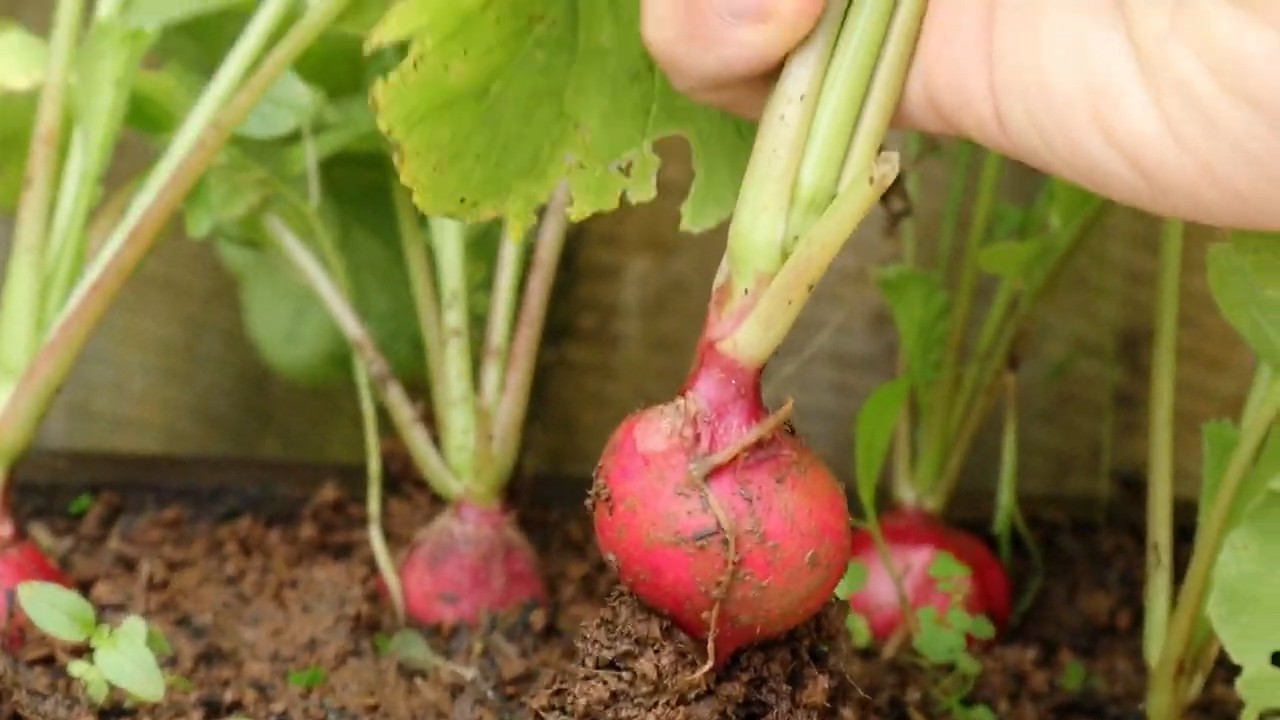
The Harvest: The Reward for Your Efforts
After about 3-4 weeks, you can harvest your first radishes.
- Harvest time: The radishes are ready to harvest when they have reached a size of about 2-3 cm.
- Harvesting: Carefully pull the radishes out of the ground. If the soil is too dry, you can moisten it a little beforehand to make pulling them out easier.
- Storage: Remove the leaves and wash the radishes thoroughly. They will keep for a few days in the refrigerator.
Common Problems and Solutions
- Radishes don’t get big: This can be due to too little sun, too dry soil, or being too close together. Ensure a sunny location, regular watering, and sufficient distance between the plants.
- Radishes are spicy: This can be due to too little water or too high temperatures. Water the radishes regularly and harvest them early before they become too spicy.
- Radishes crack: This can be due to irregular watering. Make sure to keep the soil evenly moist.
- Flea beetle infestation: Place an insect net over the plants or spray the leaves regularly with water.
Growing Radishes in Pots: Here’s How
Even without a garden, you can easily grow radishes in pots or balcony boxes.
- Pot size: Choose a pot with a diameter of at least 15 cm.
- Soil: Use a loose, humus-rich soil.
- Sowing: Sow the seeds as described above.
- Care: Water the radishes regularly and fertilize them if necessary.
- Location: Place the pot in a sunny or semi-shady location.
Radish Varieties: A Small Selection
There are many different radish varieties that differ in color, shape, and taste. Here are some popular varieties:
- Red Round: A classic, red radish variety with a mild taste.
- Icicle: An oblong, white radish variety with a pungent taste.
- French Breakfast: An oblong, red-and-white radish variety with a mild taste.
- Yellow Round: A yellow radish variety with a mild taste.
- Viola: A purple radish variety with a pungent taste.
Radishes in the Kitchen: Versatile and Delicious
Radishes are not only healthy but also versatile in the kitchen.
- Raw: Radishes taste great plain as a snack or in a salad.
- Grilled: Grilled radishes are a delicious side dish for meat or fish.
- Pickled: Pickled radishes are a great addition to sandwiches or burgers.
- Radish leaves: The leaves of the radishes are also edible. They can be used in a salad or as a vegetable side dish.
Additional Tips for a Successful Radish Harvest
Soil temperature: The ideal soil temperature for the germination of radish seeds is between 12 and 20 degrees Celsius.
Sow in intervals: To be able to harvest radishes continuously, you should sow new seeds every 2-3 weeks.
Conclusion
So, there you have it! Growing radishes at home isn’t just about saving a few dollars at the grocery store; it’s about connecting with the earth, enjoying the unparalleled freshness of homegrown produce, and experiencing the sheer joy of nurturing something from seed to table. We’ve walked you through the simple steps, debunked common myths, and armed you with the knowledge to cultivate a thriving radish patch, even if you’re a complete beginner.
Why is this DIY trick a must-try? Because store-bought radishes simply can’t compare to the crisp, peppery bite of radishes you’ve grown yourself. The flavor is more intense, the texture is more satisfying, and you have complete control over the growing process, ensuring they’re free from unwanted chemicals and pesticides. Plus, it’s incredibly rewarding to harvest something you’ve nurtured with your own hands.
But the fun doesn’t stop there! Feel free to experiment with different varieties of radishes. Try the classic Cherry Belle for its vibrant red color and mild flavor, or venture into the world of French Breakfast radishes with their elongated shape and delicate taste. For a spicier kick, explore the Black Spanish radish, or for a milder, almost sweet flavor, try the Easter Egg blend with its rainbow of colors. You can also experiment with companion planting. Radishes are known to deter pests from other plants, making them excellent companions for carrots, lettuce, and cucumbers. Plant them strategically in your garden to create a symbiotic relationship that benefits all your crops.
Consider succession planting to enjoy a continuous harvest of radishes throughout the growing season. Sow a new batch of seeds every two weeks to ensure a steady supply of these delicious root vegetables. You can even grow radishes in containers on your balcony or patio if you don’t have a traditional garden space. Just make sure to choose a pot that’s at least 6 inches deep and provides good drainage.
Don’t be afraid to get your hands dirty and embrace the learning process. Gardening is all about experimentation and discovery. You might encounter challenges along the way, but don’t let that discourage you. Every mistake is an opportunity to learn and improve your gardening skills.
We wholeheartedly encourage you to give growing radishes at home a try. It’s a simple, satisfying, and incredibly rewarding experience that will transform the way you think about fresh produce. Once you’ve tasted the difference between homegrown and store-bought radishes, you’ll never go back!
And most importantly, we want to hear about your experiences! Share your radish-growing adventures with us in the comments below. Tell us about your favorite varieties, your biggest challenges, and your most successful harvests. We’re eager to learn from your experiences and build a community of passionate radish growers. Post pictures of your radish bounty on social media using #HomegrownRadishes and inspire others to join the fun. Let’s spread the word about the joys of growing your own food and celebrate the deliciousness of homegrown radishes!
Frequently Asked Questions (FAQ)
What is the best time of year to plant radishes?
Radishes are cool-season crops, meaning they thrive in cooler temperatures. The best time to plant them is in early spring or late summer/early fall. In spring, sow seeds as soon as the ground can be worked, typically 2-4 weeks before the last expected frost. For a fall harvest, plant seeds about 4-6 weeks before the first expected frost. Avoid planting radishes during the heat of summer, as they tend to bolt (go to seed) quickly in hot weather, resulting in poor-quality roots.
How much sunlight do radishes need?
Radishes need at least 6 hours of sunlight per day to grow properly. Choose a location in your garden that receives full sun for optimal growth. If you’re growing radishes in containers, make sure to place them in a sunny spot on your balcony or patio. While they can tolerate some partial shade, especially in hotter climates, insufficient sunlight can lead to leggy growth and smaller roots.
What kind of soil is best for growing radishes?
Radishes prefer loose, well-drained soil that is rich in organic matter. Amend your soil with compost or well-rotted manure before planting to improve its fertility and drainage. Avoid heavy clay soils, as they can hinder root development. The ideal soil pH for radishes is between 6.0 and 7.0. You can test your soil pH using a soil testing kit and adjust it accordingly with lime or sulfur.
How often should I water my radishes?
Radishes need consistent moisture to grow quickly and develop plump, juicy roots. Water them regularly, especially during dry spells. Aim to keep the soil consistently moist but not waterlogged. Overwatering can lead to root rot, while underwatering can cause the roots to become tough and bitter. A good rule of thumb is to water deeply whenever the top inch of soil feels dry to the touch.
How long does it take for radishes to mature?
One of the great things about radishes is that they mature very quickly. Most varieties are ready to harvest in just 3-4 weeks from planting. Check the seed packet for the specific maturity time of the variety you’re growing. To harvest, gently pull the radishes from the soil when they reach the desired size. Don’t let them get too large, as they can become woody and bitter.
Why are my radishes cracking?
Radish roots can crack for several reasons, but the most common is inconsistent watering. Fluctuations in soil moisture can cause the roots to expand and contract, leading to cracks. To prevent cracking, water your radishes regularly and consistently, especially during dry periods. Mulching around the plants can also help to retain moisture in the soil. Another possible cause of cracking is overcrowding. Thin your radish seedlings to ensure they have enough space to grow properly.
Why are my radishes all tops and no bottoms?
If your radishes are producing lots of leafy growth but small or nonexistent roots, there are a few possible causes. One common reason is that the soil is too rich in nitrogen. Nitrogen promotes leafy growth, but it can inhibit root development. Avoid using high-nitrogen fertilizers when growing radishes. Another possible cause is insufficient sunlight. Radishes need at least 6 hours of sunlight per day to grow properly. Make sure they are planted in a sunny location. Overcrowding can also contribute to this problem. Thin your radish seedlings to give them enough space to grow.
Can I eat radish greens?
Yes, radish greens are perfectly edible and quite nutritious! They have a peppery flavor similar to the roots, but slightly milder. You can use them in salads, stir-fries, soups, or as a garnish. Choose young, tender greens for the best flavor and texture. Wash them thoroughly before using. Radish greens are a good source of vitamins A and C, as well as calcium and iron.
How do I store radishes after harvesting?
To store radishes, remove the greens and wash the roots thoroughly. Place them in a plastic bag or container lined with a damp paper towel. Store them in the refrigerator for up to 1-2 weeks. The greens can be stored separately in a plastic bag in the refrigerator for a few days.
Are there any pests or diseases that affect radishes?
Radishes are generally pest-resistant, but they can be susceptible to certain pests and diseases. Common pests include flea beetles, root maggots, and aphids. Flea beetles can chew small holes in the leaves, while root maggots can damage the roots. Aphids can suck the sap from the plants, weakening them. To control these pests, you can use insecticidal soap, neem oil, or row covers. Common diseases that affect radishes include damping-off and white rust. Damping-off is a fungal disease that can kill seedlings, while white rust causes white pustules on the leaves. To prevent these diseases, avoid overwatering, provide good air circulation, and use disease-resistant varieties.

Leave a Comment