
Growing okra rooftop garden might sound like a whimsical dream, but trust me, it’s an achievable and incredibly rewarding reality! Imagine stepping onto your rooftop oasis, not just for a breath of fresh air, but to harvest your own plump, vibrant okra. Forget those bland, store-bought veggies – we’re talking about homegrown goodness bursting with flavor and nutrients.
Okra, also known as “lady’s fingers,” has a rich history, tracing back to ancient Ethiopia and Egypt. It’s been a staple in cuisines across the globe for centuries, from Southern comfort food to flavorful curries. But beyond its culinary appeal, growing your own okra offers a unique connection to this heritage.
Why should you consider this DIY rooftop adventure? Well, for starters, space is often a premium in urban environments. A rooftop garden allows you to maximize your available area and create a beautiful, productive space where you can enjoy fresh air and sunshine. Plus, growing okra rooftop garden is a fantastic way to reduce your carbon footprint, enjoy organic produce, and impress your friends with your green thumb skills. I’m excited to share some simple yet effective DIY tricks and hacks that will help you cultivate a thriving okra patch right above your head. Let’s get started!
Growing Okra on Your Rooftop: A DIY Guide to Urban Gardening Success
Hey there, fellow gardening enthusiasts! Ever dreamt of transforming your rooftop into a lush, productive garden? Well, I’m here to tell you it’s totally achievable, and growing okra is a fantastic place to start! Okra is a heat-loving veggie that thrives in sunny spots, making it perfect for rooftop conditions. Plus, fresh, homegrown okra is simply delicious. Let’s dive into how you can create your own rooftop okra oasis!
Choosing the Right Location and Container
Before we get our hands dirty, let’s talk about location and containers. These are crucial for a successful rooftop garden.
* Sunlight is Key: Okra needs at least 6-8 hours of direct sunlight per day. Observe your rooftop throughout the day to identify the sunniest spot.
* Weight Considerations: Rooftops have weight limits. Check with a structural engineer or building management to determine the maximum weight your roof can handle. Soil, water, and mature plants can get heavy!
* Container Size Matters: Okra plants can grow quite tall (3-6 feet!), so you’ll need large containers. I recommend containers that are at least 12-18 inches in diameter and 12 inches deep. The bigger, the better, as it gives the roots plenty of room to spread.
* Drainage is Essential: Make sure your containers have drainage holes to prevent waterlogging. Soggy roots are a surefire way to kill your okra plants.
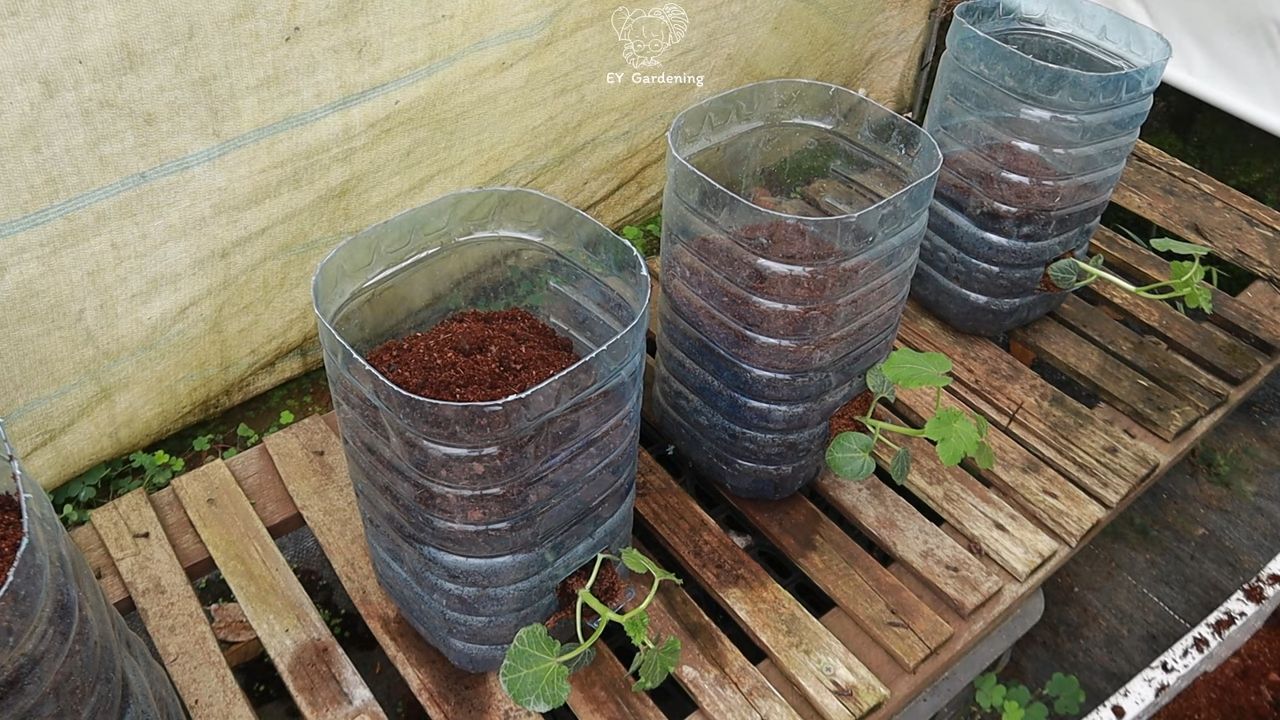
* Material Options: You can use plastic, terracotta, or even repurposed containers like large buckets or tubs. Just ensure they are food-grade if you’re using repurposed materials.
* Consider Mobility: If you live in an area with harsh winters, consider using containers with wheels or casters. This will allow you to easily move your okra plants indoors when the weather turns cold.
Preparing Your Containers and Soil
Now that we’ve chosen our location and containers, let’s get them ready for planting!
* Cleaning Your Containers: If you’re using old containers, give them a good scrub with soap and water to remove any dirt or debris.
* Adding Drainage Material: Place a layer of gravel or broken pottery at the bottom of each container to improve drainage. This prevents the drainage holes from getting clogged with soil.
* Choosing the Right Soil: Okra prefers well-draining, fertile soil. I recommend using a high-quality potting mix specifically formulated for vegetables. Avoid using garden soil, as it can be too heavy and compact for container gardening.
* Amending the Soil: To further improve the soil’s fertility, you can amend it with compost or aged manure. This will provide your okra plants with essential nutrients. I usually add about 25% compost to my potting mix.
* Filling the Containers: Fill your containers with the prepared soil, leaving a few inches of space at the top. This will make watering easier and prevent soil from spilling over the sides.
Planting Your Okra Seeds or Seedlings
Alright, the moment we’ve been waiting for – planting our okra!
* Starting from Seeds: Okra is best grown from seeds, as it doesn’t transplant well. You can start seeds indoors 4-6 weeks before the last expected frost, or direct sow them in your containers after the soil has warmed up.
1. Indoor Starting: Fill small pots or seed trays with potting mix. Sow 2-3 seeds per pot, about 1/2 inch deep. Keep the soil moist and warm (around 70-80°F). Once the seedlings emerge, thin them to one plant per pot.
2. Direct Sowing: Sow seeds directly into your containers, about 1/2 inch deep and 6-12 inches apart. Water gently and keep the soil moist until the seeds germinate.
* Transplanting Seedlings (If Necessary): If you started your seeds indoors, carefully transplant the seedlings into your containers after the last frost. Dig a hole large enough to accommodate the root ball, gently remove the seedling from its pot, and place it in the hole. Backfill with soil and water thoroughly.
* Spacing: Space your okra plants 12-18 inches apart in the containers. This will give them enough room to grow and prevent overcrowding.
* Watering After Planting: Water your newly planted okra seeds or seedlings thoroughly. This will help settle the soil and encourage root growth.
Caring for Your Okra Plants
Now that your okra is planted, it’s time to provide it with the care it needs to thrive.
* Watering: Okra needs consistent watering, especially during hot, dry weather. Water deeply whenever the top inch of soil feels dry to the touch. Avoid overwatering, as this can lead to root rot.
* Fertilizing: Okra is a heavy feeder, so it needs regular fertilization. Use a balanced fertilizer (e.g., 10-10-10) every 2-3 weeks. You can also use organic fertilizers like compost tea or fish emulsion.
* Mulching: Apply a layer of mulch around your okra plants to help retain moisture, suppress weeds, and regulate soil temperature. Straw, wood chips, or shredded leaves are all good options.
* Pruning: Pruning isn’t usually necessary for okra, but you can remove any yellowing or dead leaves to improve air circulation and prevent disease.
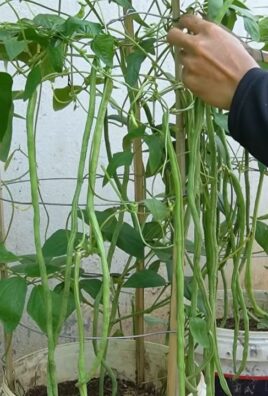
* Staking: As your okra plants grow taller, they may need staking to prevent them from falling over. Use bamboo stakes or tomato cages to provide support.
* Pest and Disease Control: Keep an eye out for common okra pests like aphids, flea beetles, and spider mites. You can control these pests with insecticidal soap or neem oil. Okra is also susceptible to diseases like powdery mildew and root rot. Prevent these diseases by providing good air circulation and avoiding overwatering.
Harvesting Your Okra
The best part of growing okra is, of course, harvesting it!
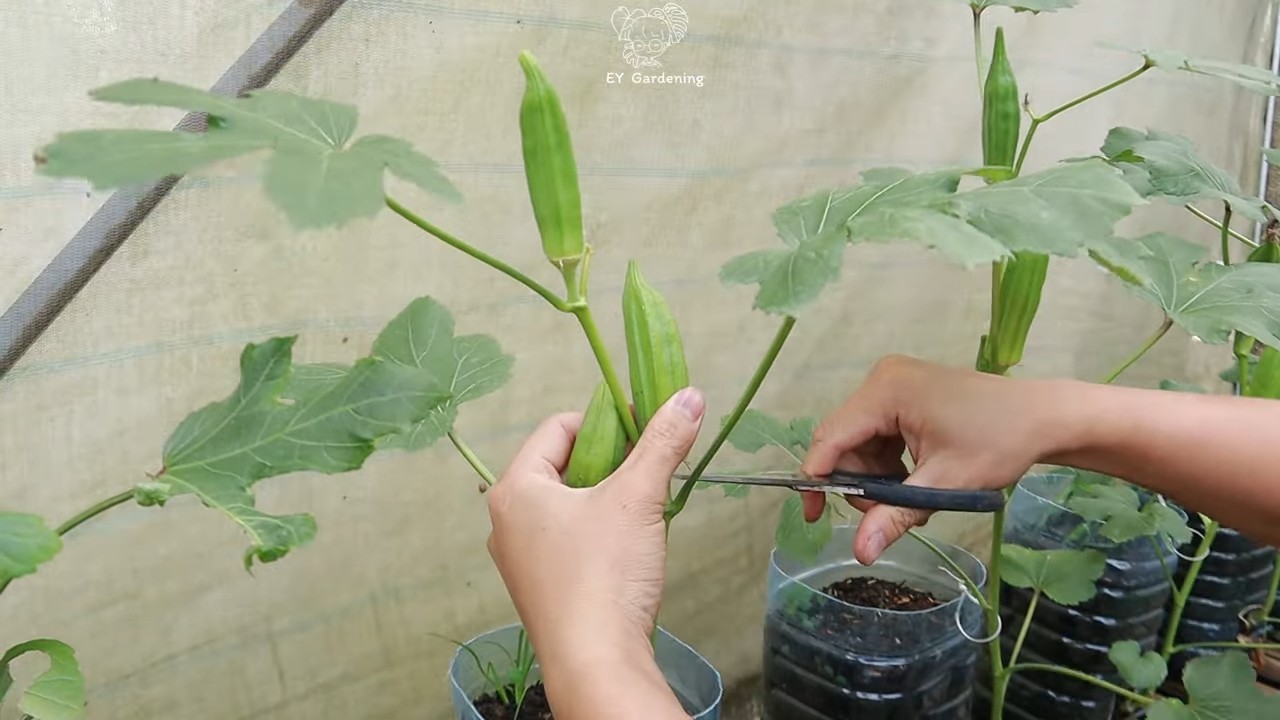
* Harvest Time: Okra pods are ready to harvest about 50-60 days after planting. Harvest them when they are 2-4 inches long and still tender.
* Harvesting Technique: Use a sharp knife or scissors to cut the pods from the plant. Wear gloves, as the pods can be prickly.
* Harvesting Frequency: Harvest your okra pods every 1-2 days to encourage continued production. If you let the pods get too large, they will become tough and fibrous.
* Storage: Freshly harvested okra can be stored in the refrigerator for up to a week. You can also freeze or pickle okra for longer storage.
Troubleshooting Common Okra Problems
Even with the best care, you might encounter some problems while growing okra. Here are a few common issues and how to address them:
* Yellowing Leaves: Yellowing leaves can be caused by a variety of factors, including nutrient deficiencies, overwatering, or pest infestations. Check the soil’s pH and nutrient levels, adjust your watering schedule, and treat any pests as needed.
* Lack of Pod Production: If your okra plants are not producing pods, it could be due to insufficient sunlight, poor soil fertility, or lack of pollination. Ensure your plants are getting enough sunlight, fertilize them regularly, and consider hand-pollinating the flowers if necessary.
* Stunted Growth: Stunted growth can be caused by compacted soil, root rot, or pest infestations. Improve soil drainage, avoid overwatering, and treat any pests as needed.
* Pest Infestations: Common okra pests include aphids, flea beetles, and spider mites. Control these pests with insecticidal soap or neem oil. You can also attract beneficial insects to your garden to help control pests naturally.
* Diseases: Okra is susceptible to diseases like powdery mildew and root rot. Prevent these diseases by providing good air circulation and avoiding overwatering. Treat any infected plants with a fungicide.
Extending the Growing Season
If you live in an area with a short growing season, you can extend the okra season by using these techniques:
* Starting Seeds Indoors: Start your okra seeds indoors 4-6 weeks before the last expected frost. This will give your plants a head start on the growing season.
* Using Row Covers: Cover your okra plants with row covers to protect them from frost and cold temperatures.
* Growing in Containers: Growing okra in containers allows you to move the plants indoors when the weather turns cold.
* Choosing Early-Maturing Varieties: Select okra varieties that mature quickly, such as ‘Clemson Spineless’ or ‘Emerald’.
Choosing the Right Okra Variety
There are many different okra varieties to choose from, each with its own unique characteristics. Here are a few popular varieties:
* Clemson Spineless: This is a classic okra variety that produces dark green, spineless pods. It’s a reliable and productive choice.
* Emerald:
Conclusion
So, there you have it! Transforming your rooftop into a thriving okra haven is not only achievable, but also incredibly rewarding. We’ve walked you through the essential steps, from selecting the right varieties to nurturing your plants for a bountiful harvest. But why is this DIY rooftop okra garden a must-try?
Firstly, it’s about reclaiming your space. Urban living often means sacrificing green spaces, but with this project, you’re bringing nature right to your doorstep. Imagine stepping out onto your rooftop and being greeted by the vibrant green foliage and the promise of fresh, homegrown okra. It’s a small oasis in the concrete jungle.
Secondly, it’s about control. You know exactly what goes into your okra – no harmful pesticides, no questionable fertilizers. You’re providing your family with healthy, organic produce, grown with love and care. This is especially important in a world where food sources are increasingly industrialized.
Thirdly, it’s about sustainability. By growing your own food, you’re reducing your carbon footprint. You’re cutting down on transportation costs and supporting a more localized food system. Every okra pod you harvest is a step towards a more sustainable lifestyle.
But the benefits don’t stop there. Growing okra on your rooftop can also be a therapeutic experience. The act of nurturing plants, watching them grow, and harvesting the fruits of your labor can be incredibly calming and fulfilling. It’s a chance to connect with nature and escape the stresses of daily life.
Ready to take your rooftop garden to the next level? Consider these variations:
* Companion Planting: Enhance your okra patch by planting basil, marigolds, or other companion plants. These can help deter pests and attract beneficial insects, creating a healthier ecosystem for your okra.
* Vertical Gardening: If space is limited, explore vertical gardening techniques. Use trellises or climbing structures to support your okra plants and maximize your growing area.
* Succession Planting: Extend your harvest season by planting okra seeds every few weeks. This will ensure a continuous supply of fresh okra throughout the growing season.
* Different Varieties: Experiment with different okra varieties to find your favorites. From the classic Clemson Spineless to the colorful Burgundy okra, there’s a variety to suit every taste.
We believe that anyone can successfully grow okra on their rooftop, regardless of their gardening experience. With a little planning, some dedication, and the tips we’ve shared, you’ll be enjoying fresh, homegrown okra in no time.
So, what are you waiting for? Grab your seeds, prepare your containers, and get ready to embark on this exciting gardening adventure. We’re confident that you’ll be amazed by the results.
And most importantly, we want to hear about your experience! Share your photos, tips, and stories with us. Let’s create a community of rooftop okra growers and inspire others to embrace the joys of urban gardening. Don’t forget to use the hashtag #RooftopOkraGarden when you share your journey on social media. We can’t wait to see what you create! This **DIY okra** project is more than just growing vegetables; it’s about creating a sustainable, beautiful, and rewarding space in the heart of the city.
Frequently Asked Questions (FAQ)
What is the best time of year to start growing okra on my rooftop?
Okra thrives in warm weather, so the best time to start planting is in late spring or early summer, after the last frost. The soil temperature should be at least 65°F (18°C) for optimal germination. In warmer climates, you can even get away with planting in early summer for a fall harvest. Consider your local climate and growing season when determining the best time to plant. If you live in an area with a short growing season, you may want to start your seeds indoors a few weeks before the last frost to give them a head start.
What type of soil is best for growing okra in containers on a rooftop?
Okra prefers well-draining, fertile soil with a slightly acidic to neutral pH (6.0-7.0). A good potting mix for containers should consist of a blend of compost, peat moss or coco coir, and perlite or vermiculite. This combination provides good drainage, aeration, and nutrient retention. Avoid using garden soil in containers, as it can become compacted and doesn’t drain well. You can also amend your potting mix with slow-release fertilizer to provide a steady supply of nutrients to your okra plants.
How much sunlight does okra need to grow well on a rooftop?
Okra requires at least 6-8 hours of direct sunlight per day to thrive. Choose a location on your rooftop that receives ample sunlight throughout the day. If your rooftop is partially shaded, try to position your containers in the sunniest spot. If you’re growing okra indoors, you may need to supplement with grow lights to ensure they receive enough light. Insufficient sunlight can lead to leggy plants with poor fruit production.
How often should I water my okra plants on the rooftop?
Water your okra plants regularly, especially during hot, dry weather. The soil should be kept consistently moist, but not waterlogged. Check the soil moisture by sticking your finger about an inch deep into the soil. If it feels dry, it’s time to water. Water deeply, allowing the water to drain out of the bottom of the container. Avoid overhead watering, as this can promote fungal diseases. Mulching around the base of the plants can help retain moisture and suppress weeds.
What are some common pests and diseases that affect okra, and how can I prevent them?
Common pests that affect okra include aphids, flea beetles, and okra stink bugs. You can prevent pest infestations by regularly inspecting your plants and removing any pests you find. You can also use organic pest control methods, such as insecticidal soap or neem oil. Common diseases that affect okra include powdery mildew and root rot. To prevent these diseases, ensure good air circulation around your plants and avoid overwatering. If you notice any signs of disease, remove the affected leaves or plants immediately.
How do I know when my okra is ready to harvest?
Okra pods are typically ready to harvest 50-65 days after planting. Harvest the pods when they are 2-4 inches long and still tender. Use a sharp knife or scissors to cut the pods from the plant. Harvest regularly to encourage continued production. Overripe okra pods can become tough and fibrous.
Can I grow okra in a small container on my rooftop?
While okra plants can grow quite large, you can successfully grow them in containers as small as 5 gallons. However, larger containers (10 gallons or more) are recommended for better growth and fruit production. Choose a sturdy container with good drainage holes.
What fertilizer should I use for my rooftop okra garden?
Okra benefits from regular fertilization. Use a balanced fertilizer (e.g., 10-10-10) or a fertilizer specifically formulated for vegetables. Apply fertilizer according to the package directions. You can also amend your soil with compost or other organic matter to provide a slow-release source of nutrients.
How can I encourage more okra production on my rooftop plants?
Regular harvesting is key to encouraging more okra production. The more you harvest, the more the plant will produce. Also, make sure your plants are getting enough sunlight, water, and nutrients. Pruning the lower leaves of the plant can also improve air circulation and encourage more fruit production.
Is it safe to grow okra on my rooftop? Are there any weight concerns?
Before starting a rooftop garden, it’s essential to consult with a structural engineer or building professional to ensure that your roof can support the added weight of the soil, containers, and plants. Okra plants themselves are not particularly heavy, but the weight can add up, especially after watering. Also, consider the potential for water runoff and ensure that your rooftop has adequate drainage to prevent water damage.

Leave a Comment