
Growing mushrooms countertop has never been easier, and I’m so excited to share these simple DIY tricks with you! Forget those expensive grocery store prices and the mystery of where your fungi friends came from. Imagine harvesting fresh, delicious mushrooms right from your kitchen – it’s a lot more achievable than you might think!
For centuries, mushroom cultivation was shrouded in secrecy, often associated with ancient cultures and alchemists guarding their precious knowledge. From the shiitake logs of Japan to the truffle hunters of France, the art of cultivating these delicacies was a closely held tradition. Now, we’re bringing that tradition into the 21st century, making it accessible to everyone, even those with limited space.
Why should you try growing mushrooms countertop? Well, besides the obvious benefit of having a constant supply of fresh, organic mushrooms, it’s also incredibly rewarding. It’s a fascinating project that connects you to the natural world, even in the heart of your home. Plus, it’s a fantastic way to reduce your carbon footprint and know exactly where your food is coming from. In this article, I’ll guide you through easy-to-follow steps and share my favorite tips and tricks for successful countertop mushroom cultivation. Get ready to embark on a fun and delicious adventure!
Grow Your Own Gourmet Mushrooms: A Countertop Adventure!
Hey there, fellow fungi fanatics! Ever dreamed of harvesting your own delicious mushrooms right in your kitchen? Well, dream no more! I’m going to walk you through a super fun and surprisingly easy DIY project: growing mushrooms on your countertop. We’ll be focusing on oyster mushrooms because they’re relatively forgiving for beginners, grow quickly, and taste amazing. Get ready to impress your friends (and your taste buds!) with your newfound mycological skills.
What You’ll Need: The Mushroom Growing Arsenal
Before we dive in, let’s gather our supplies. Don’t worry, you probably have a lot of this stuff already!
* Oyster Mushroom Spawn: This is the heart of our operation! You can find it online or at some garden centers. Make sure it’s fresh and from a reputable source. I usually get mine in a bag of sawdust spawn.
* Straw: This will be our growing medium. Wheat straw is ideal, but other types of straw can work too. Just make sure it’s clean and free of mold.
* Large Bucket or Tub: Big enough to hold all your straw and water for pasteurization.
* Heat Source: A stove, propane burner, or even a large electric kettle will do. We need to heat water to pasteurize the straw.
* Large Heat-Resistant Bag: A filter patch bag specifically designed for mushroom growing is best. These bags allow for gas exchange while keeping contaminants out. You can also use oven bags, but you’ll need to poke small holes for air exchange after filling.
* Spray Bottle: For misting the mushrooms as they grow.
* Rubbing Alcohol: For sanitizing surfaces and tools.
* Gloves: To keep things sterile.
* Thermometer: To monitor the water temperature during pasteurization.
* Optional: Calcium Carbonate (Agricultural Lime) – This helps adjust the pH of the straw, making it more favorable for mushroom growth.
Phase 1: Preparing the Straw – Pasteurization is Key!
This is arguably the most important step. Pasteurization kills off competing organisms that could prevent your mushrooms from thriving. Think of it as clearing the playing field for your oyster mushrooms to dominate!
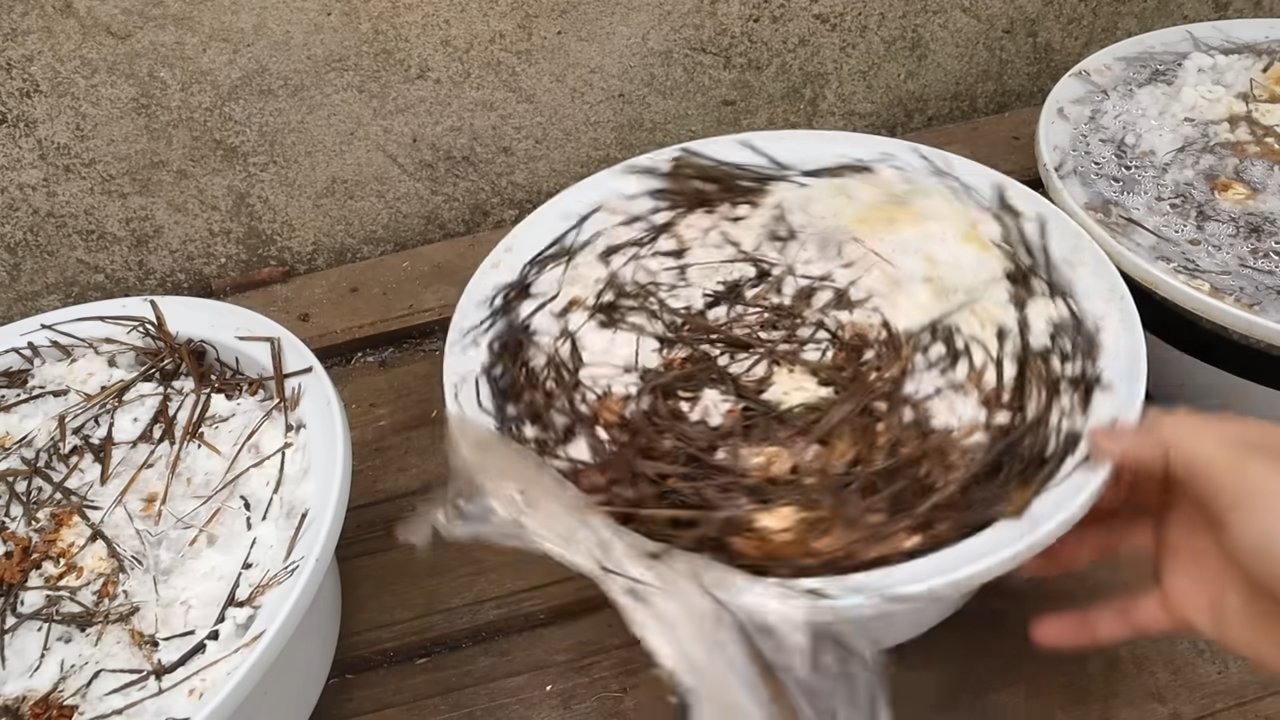
1. Chop the Straw: Using scissors or a knife, chop the straw into smaller pieces, about 2-3 inches long. This makes it easier to pack into the bag and allows the mycelium (the mushroom’s root system) to colonize it more effectively.
2. Soak the Straw: Fill your bucket or tub with water. Add the chopped straw and make sure it’s completely submerged. You might need to weigh it down with a brick or a heavy object. Let it soak for at least 2 hours, or even overnight. This hydrates the straw, which is essential for mushroom growth.
3. Pasteurize the Straw: Drain the soaked straw. Now, fill your bucket with fresh water and heat it to 160-180°F (71-82°C). This is the sweet spot for pasteurization – hot enough to kill unwanted organisms, but not so hot that it damages the straw.
4. Submerge and Maintain Temperature: Place the soaked straw into the hot water. You might need to do this in batches depending on the size of your bucket. Make sure the straw is fully submerged. Maintain the water temperature between 160-180°F (71-82°C) for 60-90 minutes. Use your thermometer to monitor the temperature closely. I usually use a large pot on my stovetop and check the temperature every 15 minutes, adjusting the heat as needed.
5. Drain and Cool: After pasteurization, carefully drain the hot water. Let the straw cool down to room temperature. This is crucial! You don’t want to add the mushroom spawn to hot straw, as it will kill the mycelium. I usually spread the straw out on a clean surface to cool faster.
Phase 2: Inoculation – Planting the Seeds of Deliciousness
Now for the fun part – introducing the oyster mushroom spawn to the prepared straw!
1. Sanitize Everything: Before you start, thoroughly sanitize your work surface, your hands (wear gloves!), and the outside of your mushroom spawn bag with rubbing alcohol. This minimizes the risk of contamination.
2. Prepare the Bag: Open your heat-resistant bag. If you’re using an oven bag, carefully poke several small holes (about ¼ inch in diameter) around the bag for air exchange.
3. Layer Straw and Spawn: Now, it’s time to layer the straw and spawn. Start by placing a layer of straw at the bottom of the bag. Then, sprinkle a generous amount of mushroom spawn over the straw. Repeat this process, layering straw and spawn, until the bag is full. Aim for about 10-20% spawn by weight. That means if you have 10 pounds of straw, you’ll want about 1-2 pounds of spawn. I usually try to make sure the final layer is spawn.
4. Seal the Bag: If you’re using a filter patch bag, simply seal it according to the manufacturer’s instructions. If you’re using an oven bag, twist the top of the bag tightly and secure it with a zip tie or rubber band.
5. Incubation Time: Place the bag in a dark, warm place (around 70-75°F or 21-24°C). A closet, basement, or even under your bed can work. Avoid direct sunlight. Now, the waiting game begins! The mycelium will start to colonize the straw.
Phase 3: Fruiting – Witnessing the Magic of Mushrooms
This is where the real excitement begins! After a few weeks, you should start to see white, fuzzy mycelium spreading throughout the straw.
1. Check for Colonization: After about 2-3 weeks, the straw should be almost completely covered in white mycelium. It will look like a fluffy, white blanket. This means the straw is fully colonized and ready to fruit.
2. Introduce Light and Humidity: Once the bag is fully colonized, it’s time to introduce light and humidity. Move the bag to a location with indirect light. A countertop near a window is ideal.
3. Cut Slits in the Bag: Using a clean knife or scissors, cut several slits (about 2-3 inches long) in the bag where you want the mushrooms to grow. These slits will provide access to fresh air and encourage fruiting.
4. Maintain Humidity: Oyster mushrooms need high humidity to fruit properly. Mist the bag and the surrounding area with water several times a day to keep the humidity up. You can also place a humidity dome or a plastic bag over the bag to help retain moisture. Just make sure to vent it regularly to prevent mold growth. I often mist the inside of the bag as well, being careful not to directly soak the mycelium.
5. Watch Them Grow!: Within a few days to a week, you should start to see tiny mushroom “pins” forming at the slits. These pins will rapidly grow into mature oyster mushrooms.
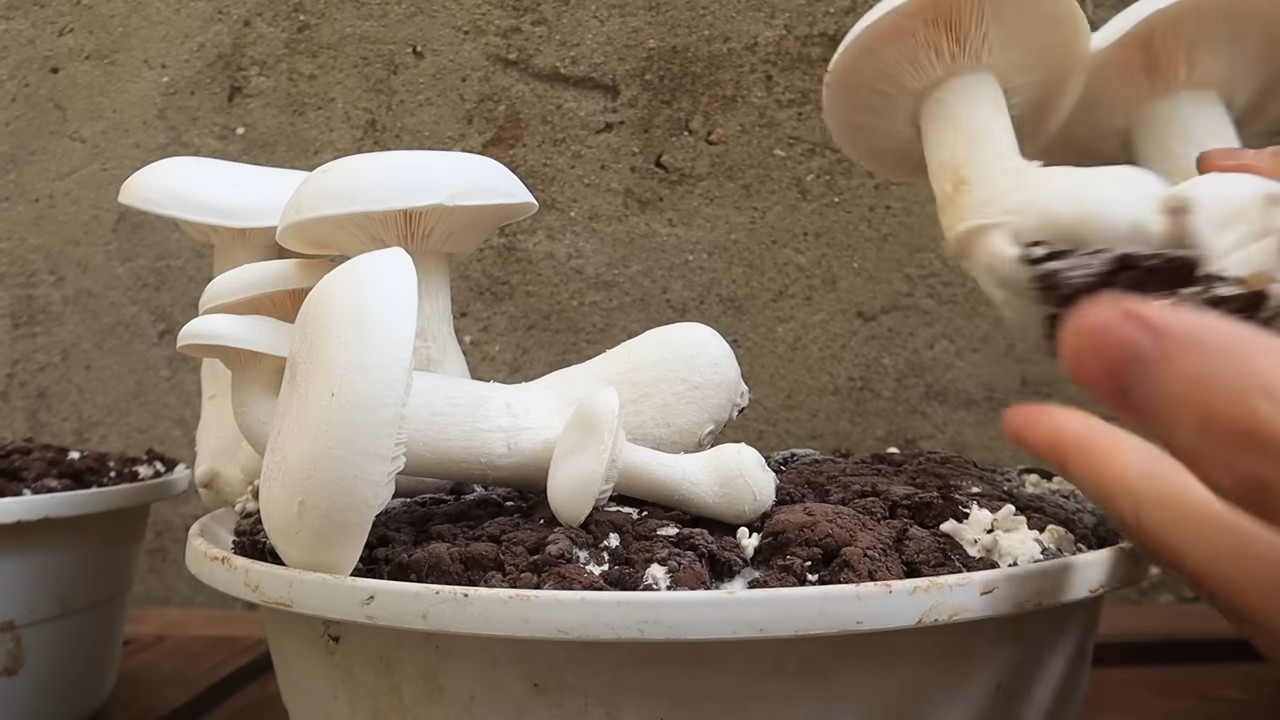
6. Harvest Time: Harvest the mushrooms when the caps are fully formed and the edges are still slightly curled downwards. Don’t wait too long, or they’ll start to drop spores. To harvest, simply twist and pull the mushrooms off the straw.
Phase 4: Subsequent Flushes – More Mushrooms, More Fun!
After your first harvest, don’t throw away the straw! You can often get several more “flushes” of mushrooms from the same bag.
1. Soak the Straw (Again!): After harvesting, soak the straw in cold water for 12-24 hours. This rehydrates the straw and encourages another flush of mushrooms.
2. Drain and Repeat: Drain the straw and repeat the fruiting process (steps 2-6 from Phase 3).
3. Expect Diminishing Returns: Each subsequent flush will likely produce fewer mushrooms than the previous one. After 2-3 flushes, the straw will be depleted of nutrients, and it’s time to start a new bag.
Troubleshooting: Common Mushroom Growing Challenges
Even with the best intentions, things can sometimes go wrong. Here are a few common problems and how to deal with them:
* Contamination: If you see green, black, or other colored mold growing on the straw, it’s contaminated. Unfortunately, there’s not much you can do at this point except discard the bag. To prevent contamination, make sure to pasteurize the straw properly and sanitize everything thoroughly.
* Slow Colonization: If the mycelium is growing very slowly, it could be due to low temperatures, poor spawn quality, or contamination. Make sure the temperature is within the optimal range (70-75°F or 21-24°C) and that your spawn is fresh.
*
Conclusion
So, there you have it! Growing mushrooms on your countertop isn’t just a quirky experiment; it’s a gateway to fresh, flavorful fungi right at your fingertips. We’ve walked you through the process, highlighting the simplicity and accessibility of this rewarding DIY project. Forget those expensive, pre-packaged mushrooms from the grocery store – imagine the satisfaction of harvesting your own, knowing exactly where they came from and how they were grown.
This method offers a unique blend of sustainability and culinary delight. By cultivating your own mushrooms, you’re reducing your carbon footprint and minimizing reliance on industrial agriculture. Plus, the taste of freshly harvested, homegrown mushrooms is simply unparalleled. The vibrant flavors and textures will elevate your dishes to a whole new level.
But the benefits extend beyond just taste and environmental consciousness. Growing mushrooms on your countertop is also an incredibly educational and engaging activity. It’s a fantastic way to learn about the fascinating world of fungi, observe the life cycle of these incredible organisms, and connect with nature in a tangible way. It’s a project that can be enjoyed by individuals of all ages and backgrounds, from seasoned gardeners to curious beginners.
Don’t be afraid to experiment! Once you’ve mastered the basics, you can explore different varieties of mushrooms. Oyster mushrooms are a great starting point, but you could also try shiitake, lion’s mane, or even more exotic species. Each variety offers its own unique flavor profile and growing requirements, so there’s always something new to discover. You can also experiment with different substrates, such as coffee grounds, straw, or hardwood sawdust, to see which works best for your chosen mushroom variety.
Consider adding companion plants to your mushroom growing setup. Herbs like basil or parsley can thrive in the humid environment and may even offer some protection against pests. You can also use your spent mushroom substrate as a nutrient-rich compost for your garden, further reducing waste and promoting sustainable practices.
Growing mushrooms on your countertop is a truly rewarding experience. It’s a chance to connect with nature, learn new skills, and enjoy the delicious fruits (or rather, fungi) of your labor. So, what are you waiting for? Gather your supplies, follow our simple instructions, and embark on your own mushroom-growing adventure today!
We’re confident that you’ll be amazed by the results. And once you’ve harvested your first batch of homegrown mushrooms, we encourage you to share your experience with us and the wider community. Post photos of your mushroom-growing setup, share your favorite recipes, and let us know what you’ve learned along the way. Together, we can spread the word about the joys and benefits of growing mushrooms at home.
Ready to Grow?
Don’t hesitate to dive in! The initial setup is minimal, and the rewards are immense. From adding a gourmet touch to your meals to understanding the fascinating world of mycology, this DIY project is a win-win.
Share Your Success!
We’d love to see your mushroom-growing journey. Tag us in your photos and videos on social media, and let us know what you’ve learned. Your experiences can inspire others to try this rewarding DIY project.
Frequently Asked Questions (FAQ)
Q: What kind of mushrooms are easiest to grow on a countertop?
A: Oyster mushrooms are generally considered the easiest and most forgiving variety for beginners. They are fast-growing, relatively tolerant of environmental fluctuations, and produce a generous yield. They also thrive on a wide range of substrates, making them a versatile choice for countertop cultivation. Other good options for beginners include shiitake and lion’s mane, although these may require slightly more attention to detail.
Q: What is the best substrate to use for growing mushrooms on a countertop?
A: The best substrate depends on the type of mushroom you’re growing. Oyster mushrooms do well on straw, coffee grounds, or even cardboard. Shiitake mushrooms prefer hardwood sawdust or logs. Lion’s mane mushrooms also thrive on hardwood sawdust. It’s important to choose a substrate that is free from contaminants and properly sterilized or pasteurized to prevent the growth of unwanted molds and bacteria. Coffee grounds are a popular choice because they are readily available and already partially sterilized by the brewing process.
Q: How much light do mushrooms need to grow?
A: Mushrooms don’t need direct sunlight. In fact, direct sunlight can be harmful and dry them out. They prefer indirect light or even low-light conditions. A spot near a window that doesn’t receive direct sunlight is ideal. You can also use artificial light, such as a fluorescent or LED grow light, if natural light is not available. The key is to provide enough light for the mushrooms to orient themselves and grow upwards, but not so much that they become stressed or dehydrated.
Q: How long does it take to grow mushrooms on a countertop?
A: The time it takes to grow mushrooms varies depending on the variety and the growing conditions. Oyster mushrooms can typically be harvested within 1-2 weeks of pinning (the formation of small mushroom buds). Shiitake mushrooms may take several weeks or even months to fruit, depending on the size of the log or substrate block. Lion’s mane mushrooms typically take 2-3 weeks to mature. It’s important to be patient and provide the mushrooms with the optimal conditions for growth.
Q: How do I know when my mushrooms are ready to harvest?
A: The best time to harvest mushrooms is when the caps are fully developed but before they start to release spores. For oyster mushrooms, this is typically when the caps are still slightly curled downwards. For shiitake mushrooms, it’s when the caps have flattened out and the edges are starting to curl upwards. For lion’s mane mushrooms, it’s when the spines are fully developed and starting to turn slightly brown. It’s always better to harvest slightly early than to wait too long and risk the mushrooms releasing spores, which can make them less palatable.
Q: How do I prevent contamination when growing mushrooms on a countertop?
A: Preventing contamination is crucial for successful mushroom cultivation. Start by using clean and sterilized equipment and substrates. Pasteurize or sterilize your substrate properly to kill any unwanted microorganisms. Maintain a clean growing environment and avoid introducing contaminants. Use a spray bottle to mist the mushrooms with distilled water, as tap water may contain chlorine or other chemicals that can inhibit growth. If you notice any signs of mold or contamination, remove the affected area immediately to prevent it from spreading.
Q: Can I reuse the substrate after harvesting mushrooms?
A: Yes, you can often get multiple flushes (harvests) from the same substrate. After harvesting the first flush, soak the substrate in water for a few hours to rehydrate it. Then, drain the excess water and return the substrate to its growing environment. You may need to adjust the temperature and humidity to encourage a second flush. The yield of subsequent flushes may be lower than the first, but it’s still a great way to maximize your harvest. Once the substrate is exhausted, you can use it as a nutrient-rich compost for your garden.
Q: What are some common problems when growing mushrooms on a countertop and how can I fix them?
A: Some common problems include slow growth, small mushrooms, and contamination. Slow growth can be caused by low temperatures, insufficient humidity, or poor ventilation. Small mushrooms can be caused by lack of nutrients or overcrowding. Contamination can be caused by using unsterilized substrates or equipment. To fix these problems, adjust the temperature and humidity to the optimal range for your chosen mushroom variety, provide adequate ventilation, and ensure that your substrates and equipment are properly sterilized. If you encounter contamination, remove the affected area immediately and consider starting over with a fresh substrate.
Q: Is growing mushrooms on my countertop safe?
A: Yes, growing edible mushrooms on your countertop is generally safe, as long as you follow proper hygiene and sanitation practices. It’s important to use clean and sterilized equipment and substrates to prevent the growth of harmful molds and bacteria. Only grow edible mushroom varieties that you are certain are safe to consume. If you are unsure about the identity of a mushroom, do not eat it. Always wash your hands thoroughly after handling mushrooms or substrates. If you have any allergies or sensitivities, consult with a healthcare professional before consuming homegrown mushrooms.
Leave a Comment