
Growing Malabar Spinach can seem intimidating, but trust me, it’s easier than you think! Have you ever dreamed of stepping into your backyard and harvesting vibrant, leafy greens for a delicious and nutritious meal? Well, with a few simple tricks and a little DIY spirit, that dream can become a reality. I’m here to guide you through the process of cultivating this amazing plant right in your own home garden.
Malabar Spinach, also known as Basella alba, isn’t actually spinach at all! It’s a vining plant with origins in tropical Asia and Africa, where it’s been a culinary staple for centuries. Think of it as a heat-loving spinach alternative, perfect for those warmer climates where traditional spinach struggles. It’s been used in traditional medicine and cuisine for generations, valued for its nutritional benefits and unique flavor.
Why should you learn these DIY tricks for growing Malabar Spinach? Because it’s a fantastic way to add fresh, healthy greens to your diet without relying on store-bought produce. Plus, it’s incredibly rewarding to nurture a plant from seed to harvest. These hacks will help you overcome common challenges, maximize your yield, and enjoy a bountiful supply of this delicious and versatile vegetable. Let’s get started and unlock the secrets to successful home gardening!
Growing Malabar Spinach: A Beginner’s Guide to This Delicious Climbing Green
Hey there, fellow gardening enthusiasts! I’m so excited to share my experience with growing Malabar spinach. This isn’t your typical spinach; it’s a heat-loving, climbing vine that produces thick, succulent leaves perfect for salads, stir-fries, and soups. If you’re looking for a spinach alternative that thrives in warm weather, Malabar spinach is your answer. Let’s dive into how you can grow your own!
Choosing Your Variety and Starting Seeds
Before we get our hands dirty, let’s talk about choosing the right variety and getting those seeds started. There are two main types of Malabar spinach: green-stemmed and red-stemmed. The red-stemmed variety is often considered more ornamental, with vibrant red stems and veins, while the green-stemmed variety is known for its slightly milder flavor. Honestly, I’ve grown both, and I love them equally!
Here’s how I start my Malabar spinach seeds:
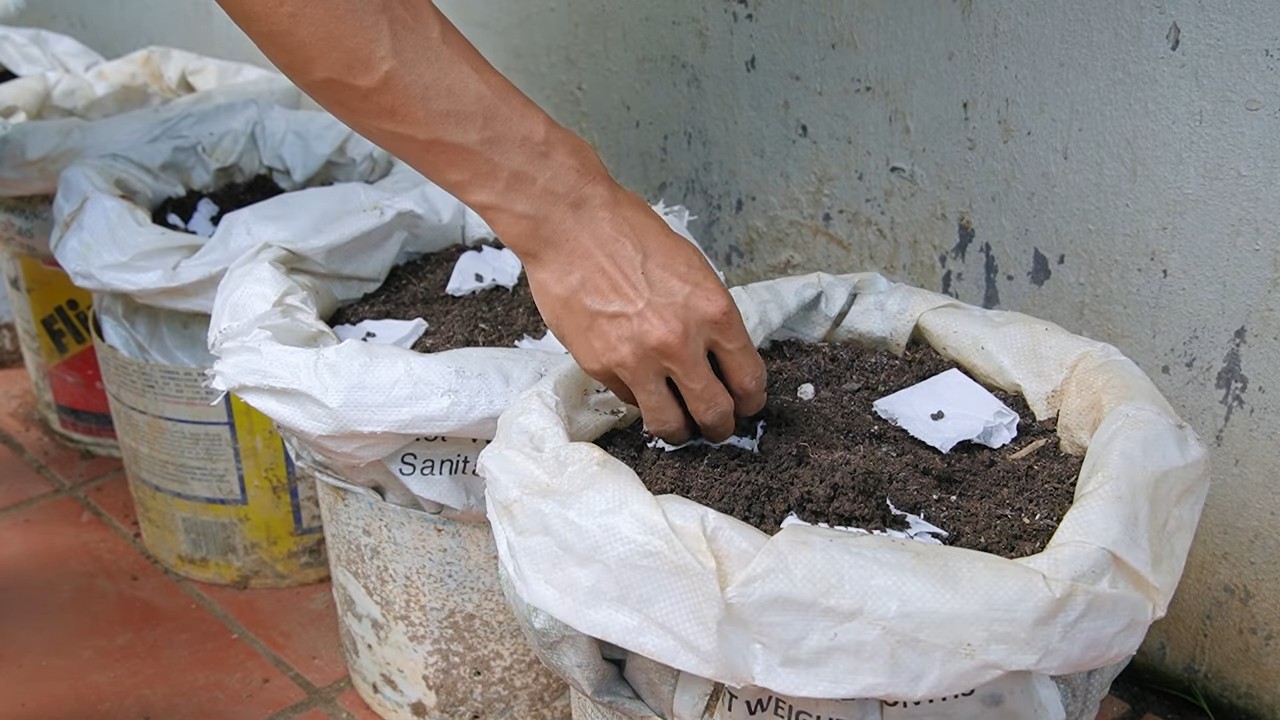
1. Soaking the Seeds: Malabar spinach seeds have a tough outer coating, which can make germination a bit slow. To speed things up, I soak the seeds in warm water for 24-48 hours before planting. This helps soften the seed coat and encourages sprouting. I usually use a small bowl and change the water once or twice during the soaking period.
2. Starting Indoors (Optional): While you can directly sow Malabar spinach seeds in the ground, I prefer to start them indoors about 4-6 weeks before the last expected frost. This gives them a head start and ensures a longer growing season. I use seed starting trays and a good quality seed starting mix.
* Fill the seed starting trays with the seed starting mix.
* Make a small indentation (about 1/2 inch deep) in each cell.
* Place one or two soaked seeds in each indentation.
* Cover the seeds with the seed starting mix and gently water.
* Keep the soil consistently moist but not waterlogged.
* Place the trays in a warm location (around 70-75°F) or use a heat mat to encourage germination.
3. Direct Sowing: If you live in a warm climate with a long growing season, you can directly sow the seeds in the ground after the last frost. Make sure the soil temperature is at least 65°F.
* Choose a sunny location with well-drained soil.
* Prepare the soil by loosening it and adding compost or other organic matter.
* Sow the seeds about 1/2 inch deep and 2-3 inches apart.
* Water gently and keep the soil consistently moist.
Transplanting Seedlings and Preparing the Growing Area
Once your seedlings have developed a few sets of true leaves (usually after a couple of weeks), it’s time to transplant them into their permanent home. Malabar spinach needs plenty of space to grow, so I recommend spacing the plants about 12-18 inches apart.
1. Hardening Off Seedlings: Before transplanting, it’s crucial to harden off your seedlings. This process gradually acclimates them to outdoor conditions, preventing transplant shock. For about a week before transplanting, I place the seedlings outdoors for a few hours each day, gradually increasing the amount of time they spend outside. I make sure to protect them from direct sunlight and strong winds during this process.
2. Preparing the Soil: Malabar spinach thrives in rich, well-drained soil. Before transplanting, I amend the soil with plenty of compost or other organic matter. This improves drainage, provides essential nutrients, and helps retain moisture. I also like to add a slow-release fertilizer to give the plants a boost.
3. Transplanting:
* Dig a hole that is slightly larger than the root ball of the seedling.
* Gently remove the seedling from the tray, being careful not to damage the roots.
* Place the seedling in the hole and backfill with soil.
* Water thoroughly.
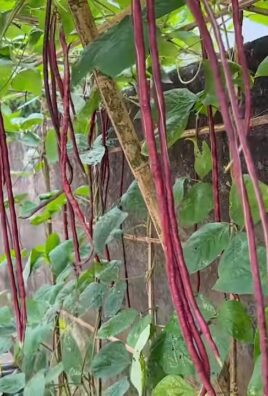
4. Providing Support: Malabar spinach is a climbing vine, so it needs a trellis, fence, or other support structure to grow on. I’ve used everything from bamboo stakes to chicken wire trellises, and they all work well. The important thing is to provide a sturdy support that the vine can easily climb. I usually install the support structure at the time of transplanting to avoid disturbing the plants later.
Caring for Your Malabar Spinach
Now that your Malabar spinach is planted, it’s time to focus on providing the care it needs to thrive.
1. Watering: Malabar spinach needs consistent moisture, especially during hot weather. I water deeply whenever the top inch of soil feels dry. Avoid overwatering, as this can lead to root rot. I also like to use a soaker hose or drip irrigation to water at the base of the plants, which helps prevent fungal diseases.
2. Fertilizing: Malabar spinach is a heavy feeder, so it benefits from regular fertilization. I fertilize every 2-3 weeks with a balanced liquid fertilizer or compost tea. You can also side-dress the plants with compost or aged manure.
3. Mulching: Mulching helps retain moisture, suppress weeds, and regulate soil temperature. I use a layer of organic mulch, such as straw, wood chips, or shredded leaves, around the base of the plants.
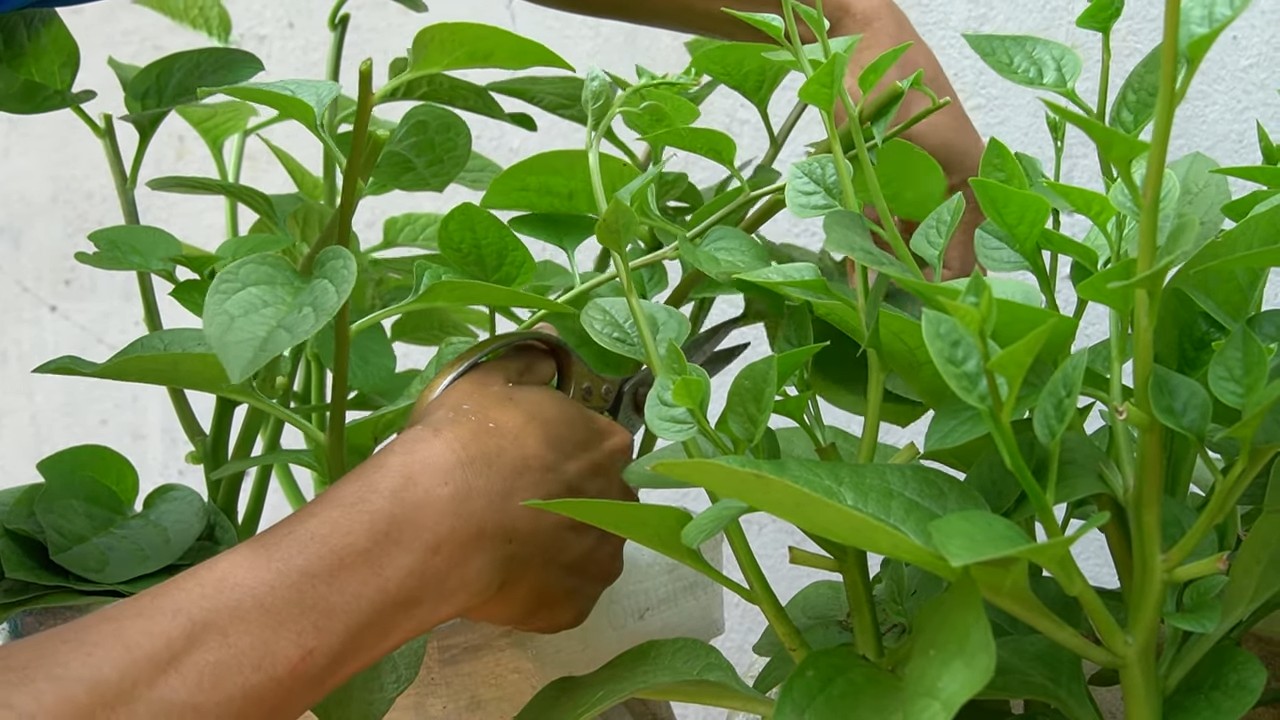
4. Pruning: Regular pruning encourages bushier growth and prevents the vine from becoming too leggy. I pinch back the tips of the vines regularly to promote branching. You can also prune off any yellowing or damaged leaves.
5. Pest and Disease Control: Malabar spinach is relatively pest and disease resistant, but it can occasionally be affected by aphids, spider mites, or fungal diseases. I inspect my plants regularly for any signs of pests or diseases. If I find any, I treat them with organic pest control methods, such as insecticidal soap or neem oil. For fungal diseases, I use a copper fungicide.
Harvesting and Using Your Malabar Spinach
The best part about growing Malabar spinach is, of course, harvesting and enjoying the delicious leaves! You can start harvesting the leaves as soon as the plant is large enough, usually about 6-8 weeks after transplanting.
1. Harvesting: I harvest the leaves by snipping them off with scissors or pruning shears. I usually harvest the younger, more tender leaves, as they have the best flavor. You can harvest the leaves continuously throughout the growing season.
2. Using Malabar Spinach: Malabar spinach can be used in a variety of dishes. It can be eaten raw in salads, cooked in stir-fries, soups, and stews, or used as a substitute for spinach in other recipes. The leaves have a slightly mucilaginous texture, which some people find off-putting. However, this texture disappears when the leaves are cooked. I love adding Malabar spinach to my stir-fries and soups for a healthy and delicious boost.
3. Storing Malabar Spinach: Freshly harvested Malabar spinach can be stored in the refrigerator for up to a week. I wrap the leaves in a damp paper towel and store them in a plastic bag. You can also freeze Malabar spinach for longer storage. To freeze, blanch the leaves in boiling water for 2 minutes, then plunge them into ice water. Drain well and store in freezer bags.
Troubleshooting Common Problems
Even with the best care, you might encounter some problems while growing Malabar spinach. Here are a few common issues and how to address them:
* Slow Germination: As mentioned earlier, Malabar spinach seeds can be slow to germinate. Soaking the seeds before planting can help speed things up. Make sure the soil temperature is warm enough (at least 65°F).
* Yellowing Leaves: Yellowing leaves can be a sign of nutrient deficiency, overwatering, or underwatering. Check the soil moisture and adjust your watering accordingly. Fertilize with a balanced fertilizer to provide essential nutrients.
* Pest Infestations: Aphids and spider mites are common pests of Malabar spinach. Inspect your plants regularly and treat any infestations with organic pest control methods.
* Fungal Diseases: Fungal diseases can be a problem in humid conditions. Provide good air circulation around the plants and avoid overwatering. Treat any fungal diseases with a copper fungicide.
Enjoying Your Homegrown Malabar Spinach
Growing Malabar spinach is a rewarding experience that provides you with a delicious and nutritious leafy green throughout the warm season. With a little bit of care and attention, you can enjoy a bountiful harvest of this unique and versatile vegetable. So, get out there and start growing your own Malabar spinach today! You won’t regret it!
Conclusion
So, there you have it! Growing Malabar Spinach at home is not only achievable but also incredibly rewarding. We’ve walked through the simple steps, from sourcing your seeds or cuttings to nurturing your vibrant, leafy greens. But why is this DIY trick a must-try?
Firstly, consider the freshness factor. Store-bought spinach, even when organic, can’t compare to the just-picked flavor and nutritional value of homegrown Malabar Spinach. You’re getting the absolute peak of taste and vitamins, straight from your garden to your plate.
Secondly, think about the cost savings. While the initial investment in seeds or a cutting might seem like a small expense, the continuous harvest you’ll enjoy throughout the growing season will quickly offset that cost. You’ll be saving money while enjoying a healthier, more delicious alternative to commercially grown spinach.
Thirdly, and perhaps most importantly, growing your own Malabar Spinach connects you to your food in a way that buying it from the store simply can’t. You’ll gain a deeper appreciation for the process, the effort involved, and the bounty that nature provides. It’s a truly satisfying experience.
But the benefits don’t stop there. Malabar Spinach is a versatile ingredient that can be used in a wide variety of dishes. Try adding it to stir-fries, soups, salads, or even smoothies for a nutritional boost. Its slightly peppery flavor adds a unique dimension to your culinary creations.
Variations and Suggestions
Don’t be afraid to experiment! Here are a few ideas to get you started:
* **Vertical Gardening:** If you’re short on space, consider growing Malabar Spinach in a vertical garden. Its vining nature makes it perfect for climbing trellises or fences.
* **Container Gardening:** Malabar Spinach thrives in containers, making it an excellent choice for balconies or patios. Just be sure to choose a pot that’s large enough to accommodate its root system.
* **Companion Planting:** Plant Malabar Spinach alongside other vegetables like tomatoes, peppers, or eggplants to create a mutually beneficial relationship.
* **Seed Saving:** Once your Malabar Spinach plants mature, you can save the seeds for future planting. This is a great way to ensure a continuous supply of this delicious and nutritious green.
* Spice it up: Add a little bit of chili powder to the soil to give your Malabar Spinach a little bit of a kick.
We wholeheartedly encourage you to give this DIY trick a try. It’s a simple, affordable, and rewarding way to enjoy fresh, healthy, and delicious Malabar Spinach right from your own backyard.
Once you’ve embarked on your Malabar Spinach growing journey, we’d love to hear about your experiences! Share your tips, tricks, and photos in the comments section below. Let’s create a community of Malabar Spinach enthusiasts and learn from each other. Happy growing!
Frequently Asked Questions (FAQ)
What are the ideal growing conditions for Malabar Spinach?
Malabar Spinach thrives in warm, humid climates with plenty of sunlight. Aim for at least 6 hours of direct sunlight per day. The ideal temperature range is between 70°F and 90°F (21°C and 32°C). The soil should be well-draining and rich in organic matter. Amend your soil with compost or aged manure before planting to provide the necessary nutrients. Consistent moisture is also crucial, so water regularly, especially during dry spells. Mulching around the plants can help retain moisture and suppress weeds.
How long does it take for Malabar Spinach to grow?
Malabar Spinach is a relatively fast-growing plant. You can expect to start harvesting leaves within 60-70 days from planting seeds. If you’re starting with cuttings, the growth process may be even faster. The plant will continue to produce leaves throughout the growing season, which can last for several months in warm climates. Regular harvesting encourages further growth, so don’t be afraid to snip off leaves as needed.
Is Malabar Spinach a perennial or an annual?
Malabar Spinach is typically grown as an annual in most climates, meaning it completes its life cycle in one growing season. However, in tropical or subtropical regions where temperatures remain consistently warm, it can behave as a short-lived perennial, meaning it can live for more than two years. If you live in a colder climate, you’ll need to replant it each year.
What are some common pests and diseases that affect Malabar Spinach?
Malabar Spinach is generally resistant to many common pests and diseases. However, it can occasionally be affected by aphids, spider mites, or snails. Inspect your plants regularly for any signs of infestation and take appropriate action if necessary. You can often control these pests with organic methods, such as spraying with insecticidal soap or neem oil. Good air circulation and proper watering practices can also help prevent fungal diseases.
How do I harvest Malabar Spinach?
Harvesting Malabar Spinach is easy. Simply snip off the leaves and tender stems as needed. You can harvest individual leaves or entire stems, depending on your preference. Regular harvesting encourages the plant to produce more leaves, so don’t be shy about picking them. It’s best to harvest in the morning when the leaves are at their freshest.
Can I eat Malabar Spinach raw?
While Malabar Spinach is edible raw, it has a slightly mucilaginous texture that some people may find unappealing. Cooking it briefly, such as in a stir-fry or soup, can help reduce this texture and enhance its flavor. The leaves can also be added to salads, but it’s best to use young, tender leaves for a milder taste.
How do I store Malabar Spinach after harvesting?
To store Malabar Spinach after harvesting, wash the leaves thoroughly and pat them dry. Wrap them in a damp paper towel and place them in a plastic bag or container in the refrigerator. They should stay fresh for several days. You can also freeze Malabar Spinach for longer storage. Blanch the leaves in boiling water for a minute or two, then plunge them into ice water to stop the cooking process. Drain well and freeze in freezer bags or containers.
Can I grow Malabar Spinach indoors?
Yes, you can grow Malabar Spinach indoors, but it requires a bit more effort. You’ll need to provide it with plenty of light, either from a sunny window or a grow light. The plant also needs consistent moisture and good air circulation. Choose a large pot with well-draining soil and fertilize regularly. Be prepared to provide a trellis or other support for the vines to climb.
Is Malabar Spinach nutritious?
Yes, Malabar Spinach is a highly nutritious vegetable. It’s a good source of vitamins A and C, as well as iron, calcium, and fiber. It’s also low in calories and fat. Adding Malabar Spinach to your diet can help boost your immune system, improve your digestion, and promote overall health.
Where can I find Malabar Spinach seeds or cuttings?
You can find Malabar Spinach seeds at many online seed retailers or at your local garden center. Cuttings can be obtained from established plants. If you know someone who is already growing Malabar Spinach, ask if they’re willing to share a cutting. Alternatively, you can sometimes find Malabar Spinach plants at nurseries or farmers’ markets.

Leave a Comment