
Growing Long Squash at Home can seem like a daunting task, conjuring images of sprawling vines taking over your entire backyard. But what if I told you that with a few clever tricks and a little DIY spirit, you could be harvesting impressive, elongated squash right from your own garden, even if you’re short on space?
For centuries, squash has been a staple crop in many cultures, providing sustenance and playing a significant role in traditional cuisine. From the ancient civilizations of the Americas to the bustling markets of Asia, the versatility of squash has made it a beloved ingredient worldwide. Now, you can bring that rich history to your own table!
Many gardeners shy away from growing long squash varieties, fearing they require too much room or are simply too difficult to manage. But that’s where these DIY tricks come in! I’m going to share some simple, effective techniques that will help you maximize your yield, minimize space requirements, and enjoy the satisfaction of harvesting your own homegrown long squash. Whether you’re a seasoned gardener or just starting out, these tips will empower you to successfully growing long squash at home and impress your friends and family with your impressive harvest. Get ready to roll up your sleeves and transform your garden into a squash-growing paradise!

Growing Long Pumpkins Yourself: My Ultimate DIY Guide
Hello dear garden friends! Have you ever wondered how to grow those impressively long pumpkins you sometimes see at markets? I’ve tried it and am excited to share my experiences and tips with you. It’s not as hard as you might think, and with a little patience and the right tricks, you too can soon be harvesting your own giant pumpkins.
What You Need: The Preparation
Before we get started, here is a list of the things you will need for this project:
- Pumpkin seeds: Choose a variety known for its length, e.g., “Tromboncino” or “Snake Gourd.” I have had very good experiences with Tromboncino.
- Seed starting pots: Small pots or seed trays for starting indoors.
- Seed starting mix: Special soil for starting seedlings.
- Garden soil: High-quality garden soil for the bed.
- Compost: Ripe compost for soil improvement.
- Fertilizer: Organic fertilizer or slow-release fertilizer for pumpkins.
- Watering can or hose: For watering the plants.
- Plant stakes or trellis: To support the long shoots.
- Mulch material: Straw, wood chips, or grass clippings for mulching.
- Scissors or knife: For pruning the shoots.
- Patience: Pumpkins need time and care to grow.
Step-by-Step Guide: From Seed to Giant Harvest
Here is a detailed guide on how you can grow your own long pumpkins:
1. Starting Indoors (approx. 4-6 weeks before the last frost)
- Prepare seeds: To speed up germination, you can soak the seeds in lukewarm water for 24 hours. This helps to soften the hard shell.
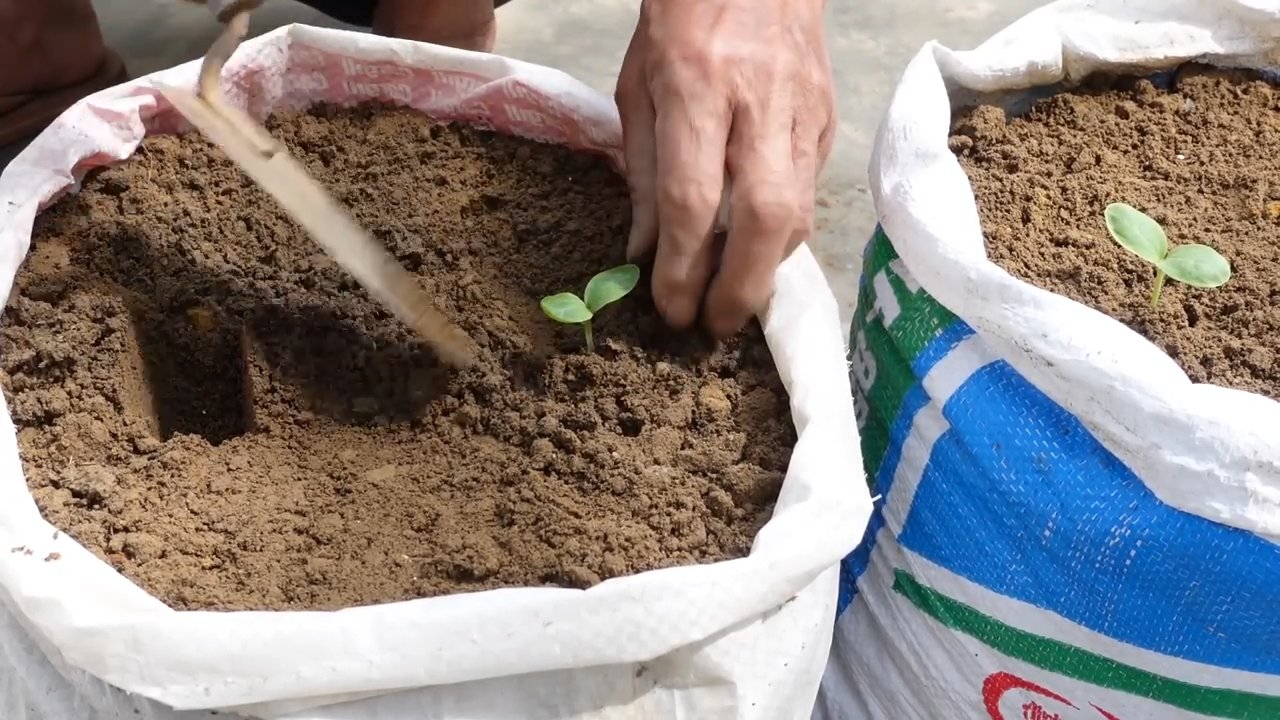
- Sowing: Fill the seed starting pots with seed starting mix. Place one seed about 2-3 cm deep in each pot.
- Watering: Water the soil gently so that it is moist but not wet.
- Location: Place the pots in a warm and bright place. A windowsill or a greenhouse is ideal. The optimal germination temperature is 20-25°C.
- Patience: The first seedlings should appear after about 7-14 days. Keep the soil moist.
2. Preparing the Bed
- Location choice: Pumpkins love the sun! Choose a sunny location with at least 6 hours of direct sunlight per day.
- Prepare the soil: Pumpkins are heavy feeders and need nutrient-rich soil. Dig over the bed and mix in plenty of compost.
- Fertilizing: Additionally, add organic fertilizer or slow-release fertilizer to the soil. I like to use horn shavings or compost tea.
- Install trellis: Since the pumpkin shoots get very long, they need a trellis. You can use plant stakes, a lattice, or a trellis. Make sure the support is stable.
3. Planting Out (after the last frost)
- Hardening off: Before you plant the seedlings in the bed, you should harden them off for a few days. Place them outdoors during the day and bring them back in at night.
- Planting: Dig holes in the bed that are slightly larger than the seed starting pots. Carefully place the seedlings in the holes and fill them with soil.
- Watering: Water the plants thoroughly after planting.
- Spacing: Ensure sufficient spacing between the plants. Depending on the variety, you should plan for about 1-2 meters of space.
4. Care During the Growth Phase
- Watering: Pumpkins need a lot of water, especially during the flowering and fruiting period. Water regularly, preferably in the morning, so the leaves can dry. Avoid waterlogging.
- Fertilizing: Fertilize the plants regularly with organic fertilizer or compost tea. I fertilize every 2-3 weeks.
- Pruning: To promote fruit growth, you can prune the side shoots. Also, remove withered leaves and flowers.
- Mulching: Mulch the soil around the plants with straw, wood chips, or grass clippings. This keeps the soil moist, suppresses weeds, and protects the fruits from direct contact with the ground.
- Pest protection: Regularly check the plants for pests like slugs, aphids, or squash flies. If necessary, you can use biological pesticides.
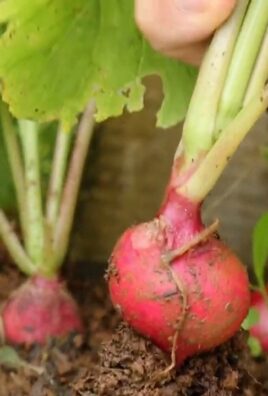
5. The Harvest
- Signs of ripeness: The pumpkins are ripe when the rind is hard and sounds hollow when tapped. The stems should be dry and woody.
- Harvesting: Cut the pumpkins from the vine with a sharp knife or scissors. Leave a stem of about 5-10 cm.
- Storage: Store the pumpkins in a cool, dry, and well-ventilated place. They will keep for several months this way.
Special Tips for Long Pumpkins
- Choose the right variety: Not all pumpkin varieties are suitable for long pumpkins. Choose varieties like “Tromboncino,” “Snake Gourd,” or special breeds for long pumpkins.
- Trellis: A sturdy trellis is essential, as the long shoots are heavy.
- Pruning: By pruning the side shoots, you can concentrate the plant’s energy on developing the fruits.
- Support: If the pumpkins get very long, it may be useful to support them additionally to prevent them from breaking off. You can, for example, attach them to the trellis with strips of fabric.
- Regular checks: Regularly check the pumpkins for damage or diseases. Remove damaged fruits to prevent the spread of diseases.
Challenges and Solutions
- Slugs: Slugs can quickly eat young pumpkin plants bare. Protect the plants with slug fences or slug pellets.
- Aphids: Aphids suck plant sap and can weaken the plants. Combat them with natural remedies like nettle tea or ladybugs.
- Squash flies: The larvae of the squash fly eat into the fruits and can make them unusable. Protect the plants with nets or combat the flies with biological insecticides.
- Downy mildew: Downy mildew is a fungal disease that appears as yellow spots on the leaves. Ensure good ventilation for the plants and combat the fungus with fungicides.
Conclusion
With a little planning, patience, and the right tricks, you too can grow long pumpkins in your garden. It’s a rewarding project that is not only fun but also brings a bountiful harvest. I hope my guide helps you with this! Good luck and have fun gardening!
Conclusion
So, there you have it! Growing long squash at home isn’t just a gardening project; it’s an adventure in flavor, a testament to your green thumb, and a rewarding experience that yields delicious results. We’ve explored the ins and outs of nurturing these impressive vegetables, from selecting the right seeds and preparing the soil to providing the necessary support and warding off pests.
Why is this DIY trick a must-try? Because it empowers you to cultivate a unique and versatile ingredient right in your own backyard. Imagine the satisfaction of harvesting a squash that stretches beyond your expectations, knowing you played an integral role in its impressive growth. Store-bought squash simply can’t compare to the freshness and flavor of a homegrown variety, especially when you’ve poured your heart and soul into its cultivation. Plus, it’s a fantastic conversation starter!
But the journey doesn’t end with the basic techniques. Feel free to experiment with different varieties of long squash. Tromboncino squash, with its nutty flavor and smooth texture, is a popular choice. Or perhaps you’d like to try the Lagenaria siceraria, also known as bottle gourd, which can be used for both culinary and crafting purposes.
Consider variations in your growing methods too. Try companion planting with herbs like basil or marigolds to deter pests naturally. Experiment with different types of fertilizers to see which yields the best results in your specific soil conditions. You can even try training your squash vines along different structures, like arches or pergolas, to create a stunning visual display in your garden.
Ultimately, the key to successful long squash cultivation lies in observation, patience, and a willingness to learn. Pay close attention to your plants’ needs, adapt your approach as necessary, and don’t be afraid to experiment.
We wholeheartedly encourage you to embark on this rewarding gardening endeavor. The taste of success, quite literally, is well worth the effort. And once you’ve harvested your impressive long squash, we’d love to hear about your experience! Share your photos, tips, and recipes with us and the wider gardening community. Let’s inspire each other to grow bigger, better, and more delicious squash! This journey of **growing long squash** is not just about the harvest; it’s about the joy of connecting with nature and the satisfaction of creating something truly special.
Frequently Asked Questions (FAQ)
What is the best time to start growing long squash?
The ideal time to start growing long squash depends on your local climate. Generally, you should start seeds indoors about 4-6 weeks before the last expected frost. If you live in a warmer climate with a longer growing season, you can direct sow the seeds outdoors once the soil has warmed up to at least 60°F (15°C). Make sure to check your local frost dates to determine the best timing for your region.
What kind of soil is best for growing long squash?
Long squash thrives in well-drained, fertile soil that is rich in organic matter. Before planting, amend your soil with compost, aged manure, or other organic amendments to improve its structure and nutrient content. The ideal soil pH for long squash is between 6.0 and 7.5. A soil test can help you determine your soil’s pH and nutrient levels, allowing you to make necessary adjustments.
How much sunlight do long squash plants need?
Long squash plants require at least 6-8 hours of direct sunlight per day to thrive. Choose a planting location that receives ample sunlight throughout the day. If you live in a particularly hot climate, some afternoon shade may be beneficial to prevent the plants from overheating.
How often should I water my long squash plants?
Long squash plants need consistent moisture, especially during hot, dry weather. Water deeply and regularly, aiming to keep the soil consistently moist but not waterlogged. A good rule of thumb is to water when the top inch of soil feels dry to the touch. Mulching around the plants can help retain moisture and suppress weeds. Drip irrigation or soaker hoses are excellent options for delivering water directly to the roots.
What kind of support do long squash plants need?
Long squash vines can grow quite long and heavy, so providing adequate support is crucial. You can use trellises, fences, or sturdy stakes to support the vines. As the squash fruits develop, you may need to provide additional support to prevent them from breaking off the vine. Slings made from fabric or netting can be used to cradle the developing squash.
How do I prevent pests and diseases from affecting my long squash plants?
Several pests and diseases can affect long squash plants, including squash bugs, squash vine borers, powdery mildew, and blossom-end rot. To prevent these problems, practice good garden hygiene, such as removing plant debris and weeds regularly. Companion planting with herbs like basil or marigolds can help deter pests. Inspect your plants regularly for signs of pests or diseases and take action promptly. Organic pest control methods, such as insecticidal soap or neem oil, can be effective for controlling many common pests. Ensure good air circulation around the plants to minimize the risk of fungal diseases.
How long does it take for long squash to mature?
The time it takes for long squash to mature varies depending on the variety and growing conditions. Generally, it takes about 90-120 days from planting to harvest. Check the seed packet or plant tag for specific information on the maturity time for your chosen variety.
How do I know when my long squash is ready to harvest?
The best way to determine when your long squash is ready to harvest is to check the seed packet or plant tag for specific information on the maturity time and appearance of the mature fruit. Generally, the squash is ready to harvest when the skin is firm and the color is uniform. The stem should also be dry and slightly shrunken. Use a sharp knife or pruning shears to cut the squash from the vine, leaving a few inches of stem attached.
Can I eat long squash raw?
Some varieties of long squash, such as zucchini, can be eaten raw. However, other varieties, such as butternut squash, are best cooked before eating. Check the specific variety you are growing to determine whether it is suitable for raw consumption.
How do I store long squash after harvesting?
The storage life of long squash varies depending on the variety and storage conditions. Winter squash varieties, such as butternut squash, can be stored for several months in a cool, dry place. Summer squash varieties, such as zucchini, have a shorter storage life and should be used within a week or two. Store squash in a single layer in a well-ventilated area. Avoid storing squash near ethylene-producing fruits, such as apples and bananas, as this can shorten their storage life.
What are some ways to use long squash in cooking?
Long squash is a versatile ingredient that can be used in a variety of dishes. It can be roasted, grilled, sautéed, steamed, or pureed. It can be added to soups, stews, casseroles, and salads. It can also be used to make breads, muffins, and pies. The possibilities are endless! Experiment with different recipes and flavor combinations to discover your favorite ways to enjoy long squash.

Leave a Comment