
Growing Garlic in Water might sound like something out of a science fiction movie, but trust me, it’s a super simple and rewarding project you can easily tackle at home! Have you ever tossed a sprouting garlic clove, thinking it was past its prime? Well, hold on! Those little green shoots are actually a treasure trove of potential, and with this easy DIY trick, you can transform them into fresh, flavorful greens right on your windowsill.
For centuries, cultures around the world have recognized the potent properties of garlic, not just for its culinary uses but also for its medicinal benefits. From ancient Egypt, where garlic was given to pyramid builders for strength, to traditional Chinese medicine, where it’s used to boost immunity, garlic has a rich and fascinating history. Now, we’re taking this ancient ingredient and giving it a modern, sustainable twist!
Why should you try growing garlic in water? Because it’s incredibly easy, requires minimal space, and provides you with a constant supply of fresh garlic greens to add to salads, soups, and stir-fries. Plus, it’s a fantastic way to reduce food waste and add a touch of green to your indoor space. I know I always feel a little bit more accomplished when I can grow something myself, and this is a great way to start! So, let’s dive in and learn how to turn those forgotten garlic cloves into a thriving little garden.
Regrowing Garlic in Water: A Simple DIY Guide
Hey there, fellow plant enthusiasts! Ever find yourself with a lone garlic clove that’s starting to sprout? Don’t toss it! You can easily regrow garlic in water, adding a touch of green to your kitchen and potentially even harvesting garlic greens for a flavorful addition to your meals. I’m going to walk you through the whole process, step-by-step. It’s super easy, even if you don’t have a green thumb!
What You’ll Need
Before we dive in, let’s gather our supplies. This is a pretty low-key project, so you probably already have most of this stuff lying around:
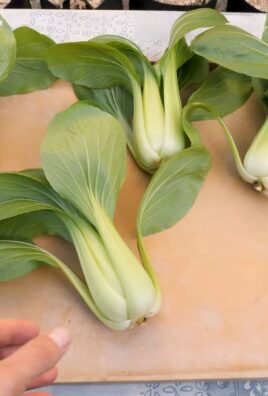
- Garlic Cloves: Choose cloves that are firm, plump, and ideally already showing signs of sprouting. Don’t worry if they’re not sprouting yet, though; they’ll usually sprout in water.
- A Small Container: A small glass, jar, or even a shallow dish will work perfectly. Just make sure it’s wide enough to hold the garlic clove(s) and stable enough to not tip over easily.
- Water: Tap water is fine, but filtered water is even better.
- Optional: Small pebbles or gravel (for added stability and aesthetics).
Step-by-Step Instructions: Bringing Your Garlic Back to Life
Okay, let’s get started! This is where the magic happens.
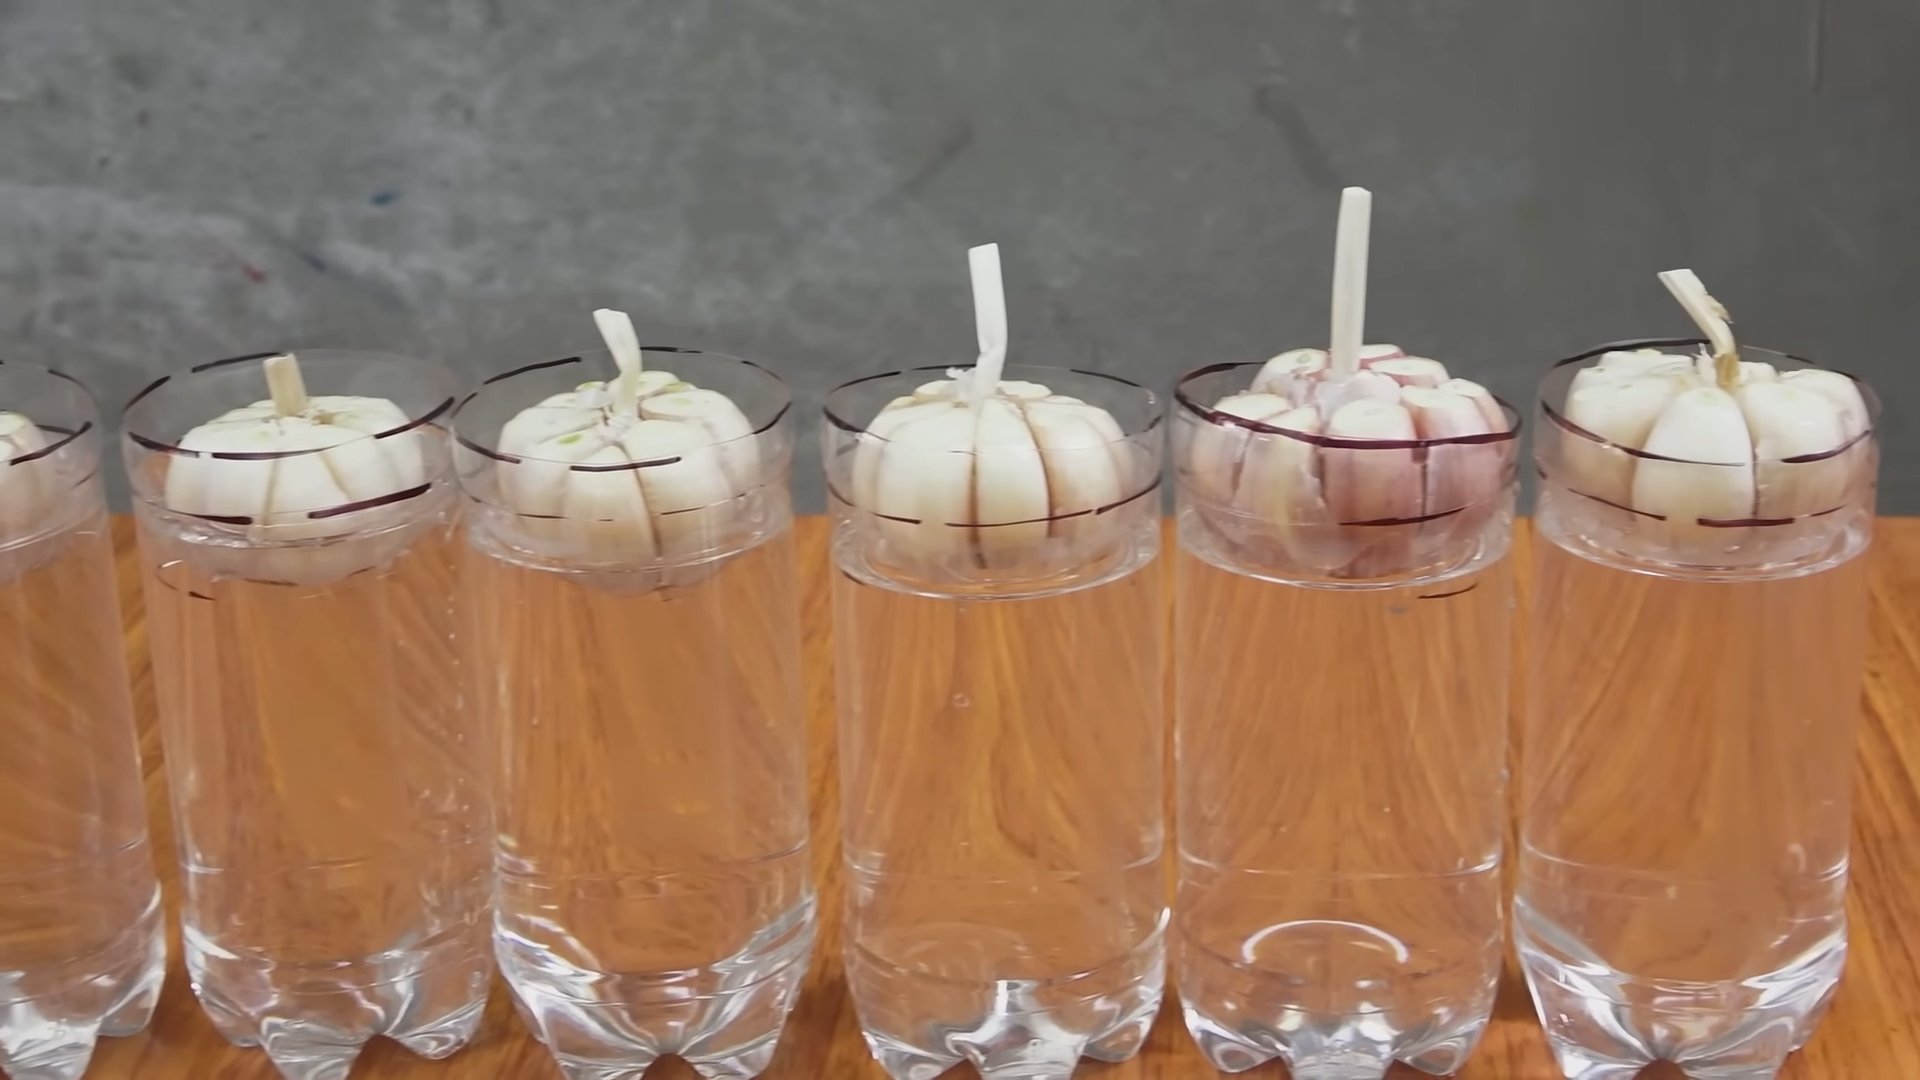
- Prepare Your Garlic Clove(s): Gently separate the clove(s) you want to regrow from the garlic bulb. Be careful not to damage the root end (the flatter end where the roots will emerge). You don’t need to peel the clove. The papery skin actually helps protect it.
- Prepare Your Container: If you’re using pebbles or gravel, add a layer to the bottom of your container. This isn’t strictly necessary, but it can help keep the garlic clove upright and prevent it from tipping over. Plus, it looks nice!
- Add Water: Pour water into your container, filling it to a level that will just touch the bottom of the garlic clove. You want the root end to be submerged, but the rest of the clove should remain dry. This prevents rot.
- Position the Garlic: Place the garlic clove in the container with the root end facing down. If you’re using pebbles, you can nestle the clove among them to keep it stable.
- Find a Sunny Spot: Place your container in a bright, sunny location. A windowsill is ideal. Garlic loves sunlight!
- Maintain the Water Level: This is crucial! Check the water level every day or two and add more water as needed to keep the root end submerged. Don’t let the water dry out completely.
- Observe and Wait: Within a few days, you should start to see roots emerging from the bottom of the clove and green shoots sprouting from the top. This is so exciting!
- Harvesting Garlic Greens (Optional): Once the green shoots are several inches tall, you can start harvesting them. Simply snip off the tops with scissors. The greens have a mild garlic flavor and can be used in salads, soups, stir-fries, or as a garnish. Don’t harvest all the greens at once, as this will weaken the plant.
- Consider Planting in Soil (Optional): If you want to grow a full garlic bulb, you can eventually transplant the sprouted clove into soil. Once the roots are well-developed and the green shoots are several inches tall, plant the clove in a pot or garden bed with the root end down and the green shoots facing up. Make sure the soil is well-draining and the location receives plenty of sunlight.
Troubleshooting and Tips
Even with the simplest projects, things can sometimes go a little sideways. Here are a few common issues and how to address them:
- Rotting: If your garlic clove starts to rot, it’s usually because it’s sitting in too much water. Make sure only the root end is submerged. You can also try changing the water more frequently. If the rot is severe, it’s best to discard the clove and start with a fresh one.
- No Sprouting: Sometimes, a garlic clove just won’t sprout. This could be due to a number of factors, such as the clove being too old or damaged. Try using a different clove from a different bulb.
- Yellowing Leaves: Yellowing leaves can indicate a lack of nutrients or too much water. Make sure the soil (if you’ve planted it) is well-draining and consider adding a diluted liquid fertilizer.
- Pests: While growing garlic in water is generally pest-free, if you transplant it to soil, you may encounter pests like aphids. Keep an eye out for them and treat them accordingly with insecticidal soap or other organic pest control methods.
Harvesting Garlic Greens: A Flavorful Bonus
As I mentioned earlier, you can harvest the green shoots that sprout from the garlic clove. These garlic greens are a delicious and versatile ingredient.
- When to Harvest: Wait until the greens are at least 4-6 inches tall before harvesting.
- How to Harvest: Use scissors to snip off the tops of the greens, leaving about an inch or two of growth. This will encourage the plant to produce more greens.
- How to Use: Garlic greens can be used in a variety of dishes. Chop them up and add them to salads, soups, stir-fries, omelets, or use them as a garnish. They have a milder garlic flavor than the bulb, so you can use them more liberally.
- Storage: Store garlic greens in the refrigerator in a plastic bag or container. They will last for several days.
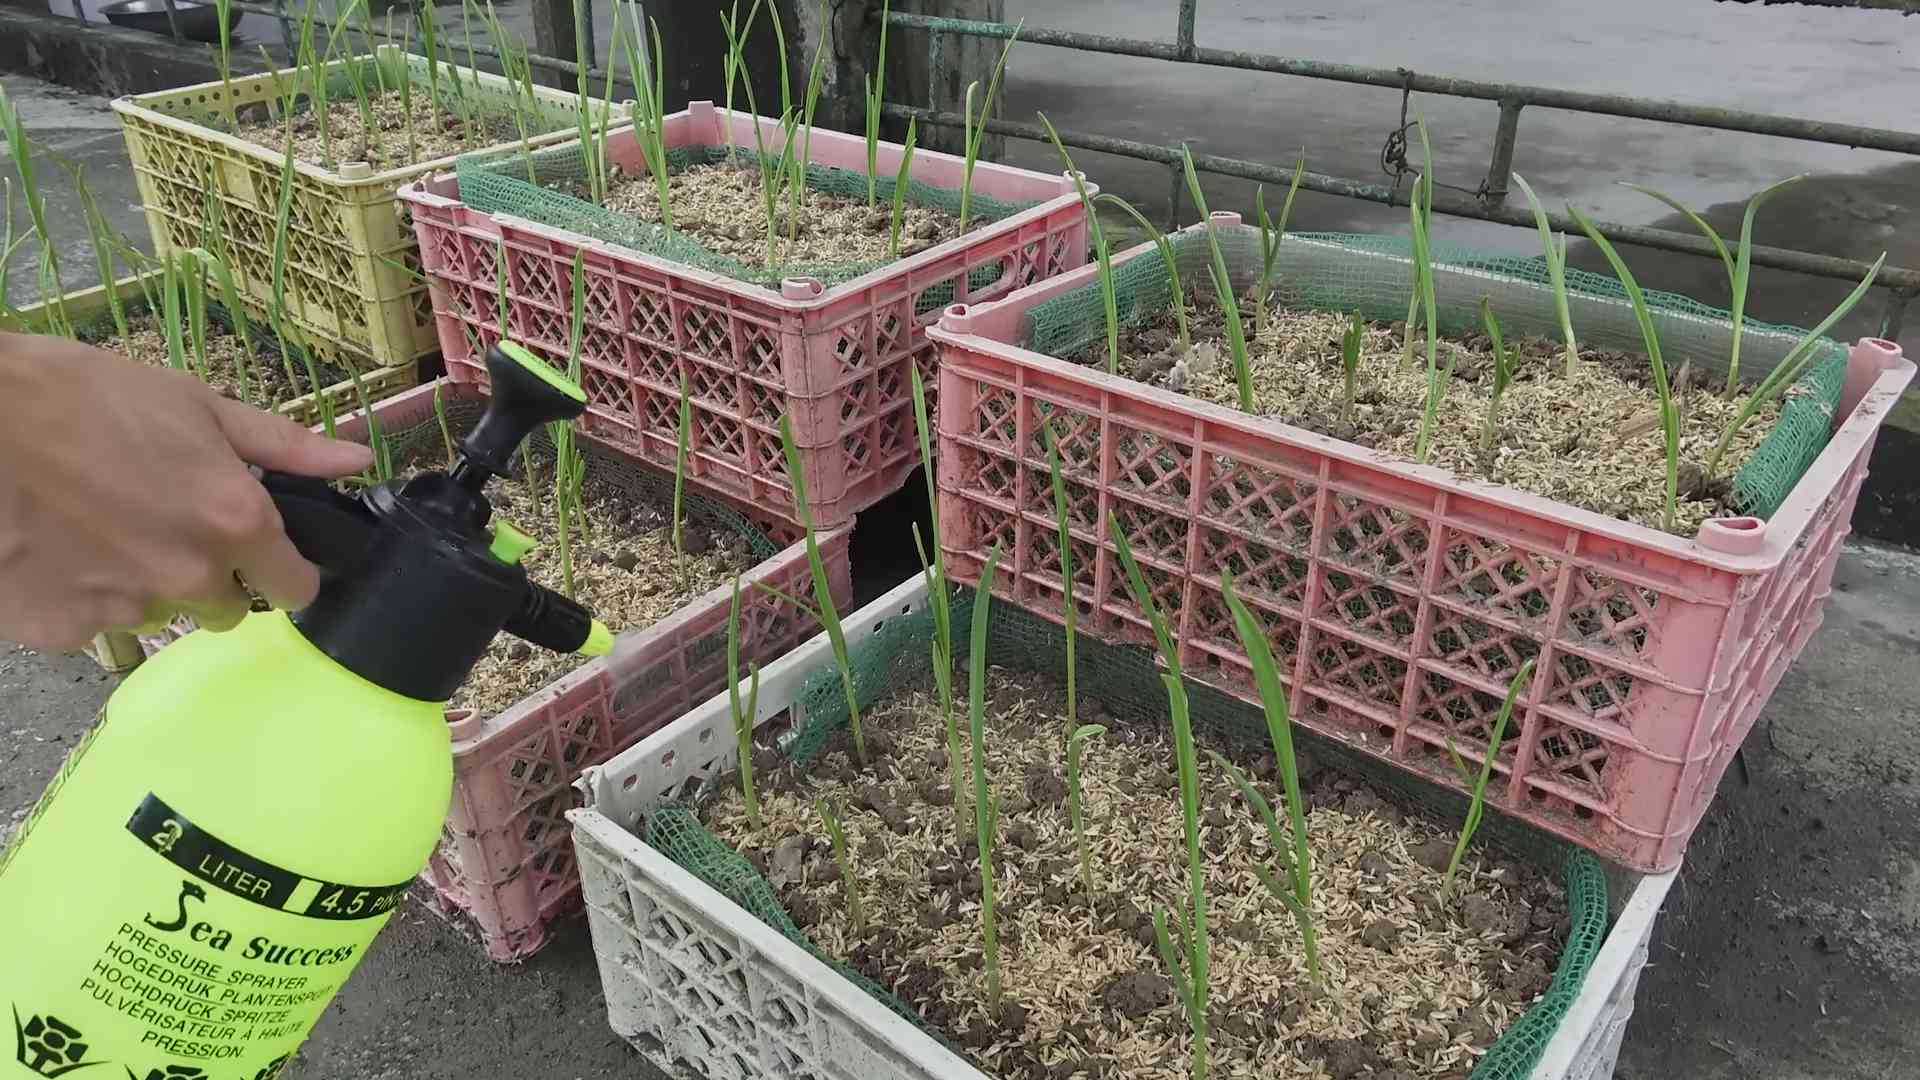
From Water to Soil: Growing a Full Garlic Bulb
While regrowing garlic in water is a fun and easy way to get some fresh greens, you can also transplant the sprouted clove into soil to grow a full garlic bulb. This requires a bit more effort and patience, but it’s definitely rewarding.
Choosing the Right Time to Transplant
The best time to transplant your garlic clove into soil is when the roots are well-developed and the green shoots are several inches tall. This usually takes a few weeks.
Preparing the Soil
Garlic prefers well-draining soil that is rich in organic matter. Before planting, amend the soil with compost or other organic material.
Planting the Clove
Dig a hole that is about 2-3 inches deep. Place the garlic clove in the hole with the root end down and the green shoots facing up. Cover the clove with soil and gently water it.
Caring for Your Garlic Plant
* Sunlight: Garlic needs at least 6 hours of sunlight per day.
* Watering: Water regularly, especially during dry periods. Avoid overwatering, as this can lead to rot.
* Fertilizing: Fertilize every few weeks with a balanced fertilizer.
* Weeding: Keep the area around the garlic plant free of weeds.
* Mulching: Mulch around the plant to help retain moisture and suppress weeds.
Harvesting Your Garlic Bulb
Garlic bulbs are typically ready to harvest in late summer or early fall, about 8-9 months after planting. The leaves will start to turn yellow and brown, and the bulb will be plump and firm.
To harvest, carefully dig up the bulb with a garden fork. Cure the bulbs by hanging them in a cool, dry, well-ventilated place for several weeks. This will help them to store longer.
Why Regrow Garlic in Water?
You might be wondering, “Why bother regrowing garlic in water?” Well, there are several good reasons:
- It’s a fun and easy project: It’s a great way to get kids involved in gardening and learn about plant growth.
- It’s a sustainable way to use food scraps: Instead of throwing away sprouting garlic cloves, you can give them a new life.
- You can harvest fresh garlic greens: Garlic greens are a delicious and versatile ingredient that you can use in a variety of dishes.
- You can potentially grow a full garlic bulb: If you transplant the sprouted clove into soil, you can grow your own garlic.
- It’s a great way to add a touch of green to your kitchen: A container of growing garlic can brighten up any space.
So, there you have it! Everything you need to know to regrow garlic in water. It’s a simple, rewarding, and sustainable project that anyone can do. Give it a try and let me know how it goes! Happy growing!
Conclusion
So, there you have it! Growing garlic in water is not just a quirky gardening experiment; it’s a genuinely rewarding and surprisingly simple way to enjoy fresh garlic greens right from your kitchen. Forget those wilting, sad-looking bunches at the grocery store. With this easy DIY trick, you can have a constant supply of flavorful, vibrant greens to elevate your culinary creations.
Why is this a must-try? Because it’s incredibly low-maintenance, requires minimal space, and transforms kitchen scraps into something delicious and useful. It’s a fantastic project for beginners, a fun activity for kids, and a sustainable way to reduce food waste. Plus, the aesthetic appeal of those little garlic shoots sprouting in a jar adds a touch of green to any windowsill.
But don’t stop there! Experiment with different varieties of garlic to discover which ones produce the most flavorful greens. Try using different types of water – filtered, tap, or even rainwater (if you’re feeling adventurous). You can also play around with the placement of your garlic. While a sunny windowsill is ideal, you might find that a slightly shadier spot works better in the heat of summer.
Consider using the garlic-infused water to water your other houseplants. It can act as a natural pest repellent and provide a boost of nutrients. You can also chop the garlic greens and freeze them in ice cube trays for later use in soups, stews, or sauces.
The possibilities are endless! The key is to have fun and embrace the process. This method of growing garlic in water is a gateway to a more sustainable and flavorful lifestyle.
We wholeheartedly encourage you to give this DIY trick a try. It’s a small change that can make a big difference in your kitchen and your connection to the food you eat. And most importantly, we want to hear about your experience! Share your photos, tips, and variations in the comments below. Let’s build a community of garlic-growing enthusiasts and inspire others to embrace the joy of homegrown goodness. What are you waiting for? Grab a garlic clove and get started today! You’ll be amazed at how easy it is to cultivate your own little patch of freshness, right in your own home.
Frequently Asked Questions (FAQs)
What kind of garlic should I use for growing in water?
You can use any type of garlic clove for growing in water. However, organic garlic is generally recommended to avoid any potential pesticide residue. Softneck varieties tend to produce more greens, but hardneck varieties will also work. Experiment with different types to see which ones you prefer in terms of flavor and growth rate. Remember that the quality of the garlic clove will directly impact the quality of the greens. Choose firm, healthy cloves without any signs of mold or rot.
How long does it take for the garlic to sprout?
Generally, you should start to see sprouts within a few days to a week. The exact time will depend on factors such as the variety of garlic, the temperature, and the amount of light it receives. Warmer temperatures and ample sunlight will encourage faster growth. Be patient, and don’t be discouraged if it takes a little longer. As long as the clove is firm and healthy, it should eventually sprout.
How often should I change the water?
It’s important to change the water every 1-2 days to prevent bacterial growth and keep the garlic healthy. Stagnant water can lead to rot and unpleasant odors. When changing the water, gently rinse the garlic clove to remove any accumulated debris. This will also help to aerate the roots and promote healthy growth.
What do I do if the garlic clove starts to rot?
If you notice any signs of rot, such as a slimy texture or a foul odor, remove the affected clove immediately. Rot can spread quickly and contaminate the other cloves. To prevent rot, ensure that you are changing the water regularly and that the garlic clove is not submerged too deeply. Only the bottom portion of the clove should be in contact with the water.
How much light does the garlic need?
Garlic greens thrive in bright, indirect sunlight. A sunny windowsill is an ideal location. However, avoid placing the garlic in direct sunlight, especially during the hottest part of the day, as this can scorch the leaves. If you don’t have a sunny windowsill, you can supplement with artificial light, such as a grow light.
Can I eat the garlic bulb after harvesting the greens?
While the garlic bulb will continue to grow roots, it won’t develop into a full-sized bulb like it would in soil. The energy is primarily directed towards producing the greens. You can technically eat the bulb, but it will likely be small and not as flavorful as a fully grown bulb. It’s best to focus on enjoying the greens and then compost the bulb when it’s no longer producing.
How often can I harvest the garlic greens?
You can harvest the garlic greens as needed, once they reach a few inches in height. Use scissors to snip off the greens, leaving about an inch or two of growth. This will encourage the plant to continue producing new greens. Avoid cutting off all the greens at once, as this can weaken the plant.
Are there any pests or diseases that affect garlic grown in water?
Growing garlic in water is generally less susceptible to pests and diseases than growing it in soil. However, you may occasionally encounter issues such as fungus gnats or mold. To prevent these problems, ensure that you are using clean water, changing it regularly, and providing adequate ventilation. If you notice any signs of pests or diseases, you can try spraying the greens with a diluted solution of neem oil or insecticidal soap.
Can I grow other herbs or vegetables in water using the same method?
Yes, you can! This method works well for growing a variety of herbs and vegetables in water, including basil, mint, lettuce, and green onions. The principles are the same: provide clean water, adequate light, and regular water changes. Experiment with different plants to see what works best for you.
Is growing garlic in water a sustainable practice?
Absolutely! Growing garlic in water is a highly sustainable practice. It reduces food waste by allowing you to use garlic cloves that might otherwise go to waste. It also eliminates the need for soil, fertilizers, and pesticides, making it an environmentally friendly way to grow your own food. Furthermore, it reduces your reliance on commercially grown garlic, which often involves long-distance transportation and intensive farming practices. By growing your own garlic greens in water, you’re taking a small but significant step towards a more sustainable lifestyle.
Leave a Comment