
Growing Garlic at Home can seem intimidating, but trust me, it’s one of the most rewarding and surprisingly simple gardening projects you can undertake! Imagine the satisfaction of harvesting your own pungent, flavorful garlic, knowing exactly where it came from and how it was grown. For centuries, garlic has been revered not just for its culinary uses, but also for its medicinal properties, playing a significant role in various cultures around the world.
But let’s be honest, who wants to rely solely on store-bought garlic when you can have a constant supply right in your backyard (or even on your balcony)? This DIY guide is your ticket to unlocking the secrets of successful home garlic cultivation. We’ll break down the process into easy-to-follow steps, revealing clever tricks and hacks that will ensure a bountiful harvest, even if you’re a complete beginner.
Why do you need this DIY trick? Because store-bought garlic often lacks the intense flavor of homegrown varieties, and let’s face it, it can be expensive! Plus, growing garlic at home allows you to choose from a wider range of varieties, each with its unique taste and characteristics. Get ready to ditch the bland and embrace the bold – let’s get planting!
Growing Garlic: Your DIY Guide for a Bountiful Harvest!
Hey everyone! I love garlic. Really, I love it! And what’s better than growing it yourself? It’s easier than you think, and the result is incomparably fresher and more aromatic than garlic from the supermarket. In this guide, I’ll show you step-by-step how to grow your own garlic—whether in the garden or in a pot on the balcony. Let’s get started!
What You Need: The Preparation
Before we begin, we’ll need the right equipment and materials. Here’s a list to make sure you have everything on hand:
-
Garlic cloves: The most important thing! Organic garlic from a health food store or farmer’s market is best. Avoid supermarket garlic, as it has often been treated to prevent sprouting.
-
Garden soil or potting mix: Loose, humus-rich soil is ideal. If you’re growing in a pot, use high-quality potting mix.
-
Compost or organic fertilizer: For an extra dose of nutrients.
-
Garden tools: Spade or shovel (for the garden), small trowel (for pots), possibly a rake.
-
Watering can or garden hose: For watering.
-
Mulch material (optional): Straw, leaves, or grass clippings to keep the soil moist and suppress weeds.
-
Pots (optional): If you want to grow in a pot, choose pots with adequate drainage.
The Right Time: When to Plant?
The best time to plant garlic is in the fall, about 4-6 weeks before the first frost. This gives the cloves enough time to develop roots before winter arrives. In Germany, this is usually September or October. If you plant garlic in the spring, the harvest will be smaller, but it’s still possible.
Step-by-Step Guide: Planting Garlic
Now let’s get down to business! Here is a detailed guide on how to successfully plant your garlic:
-
Prepare the soil:
-
In the garden: Loosen the soil with a spade or shovel. Remove stones and weeds. Work in compost or organic fertilizer to enrich the soil with nutrients.
-
In a pot: Fill the pot with potting mix. Make sure the pot has adequate drainage so water can flow out easily.
-
-
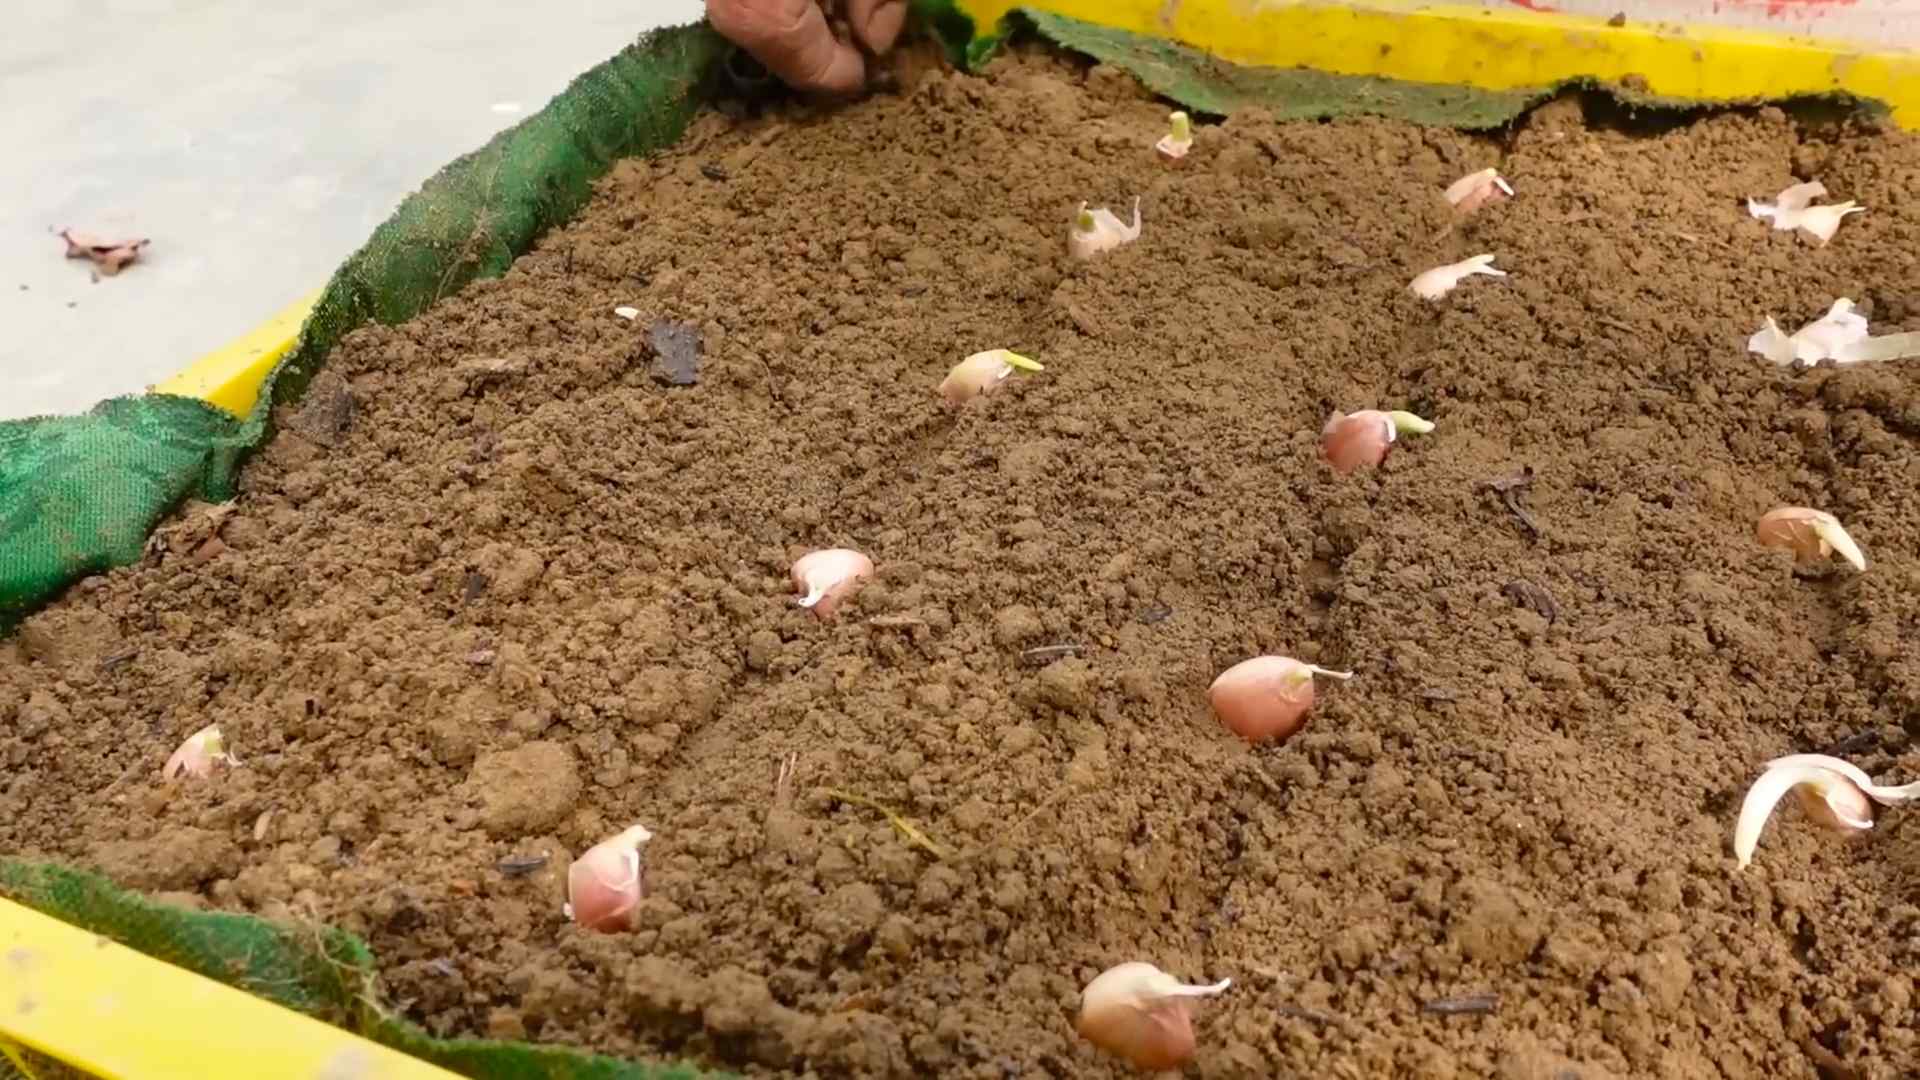
Prepare the garlic cloves:
-
Carefully separate the garlic cloves from the bulb. Be careful not to damage the outer skin of the cloves.
-
Choose the largest and healthiest cloves. These will produce the best plants.
-
-
Plant the cloves:
-
In the garden: Plant the cloves with the pointed side up. The distance between cloves should be about 10-15 cm, and the distance between rows about 20-30 cm. The cloves should be about 5-8 cm deep in the earth.
-
In a pot: Also, plant the cloves with the pointed side up. The distance between cloves should be about 5-8 cm. Make sure the cloves have enough space to develop.
-
-
Watering:
-
Water the planted cloves thoroughly. The soil should be moist, but not wet.
-
-
Mulching (optional):
-
Cover the soil with a layer of mulch material (straw, leaves, or grass clippings). This helps to keep the soil moist, suppress weeds, and protect the garlic plants from frost.
-
Care During Growth: How to Keep Your Garlic Healthy
After planting, it’s important to take good care of the garlic so it can grow optimally. Here are a few tips:
-
Watering: Water the garlic regularly, especially during dry periods. Make sure the soil doesn’t dry out, but avoid waterlogging.
-
Weed control: Regularly remove weeds growing around the garlic. Weeds compete with garlic for nutrients and water.
-
Fertilizing: Fertilize the garlic in the spring with an organic fertilizer or compost. This gives it an extra growth boost.
-
Remove flower scapes: If the garlic forms flower stalks (so-called “garlic scapes”), you should remove them. This directs the plant’s energy into developing the bulb.
The Harvest: When is the Garlic Ready?
The harvest time for garlic is usually in the summer, around July or August. Here are a few signs that your garlic is ready:
-
The leaves are starting to turn yellow and fall over.
-
The bulbs are plump and well-developed.
-
If you dig up a bulb, you’ll see that the outer skin is dry and papery.
Step-by-Step Guide: Harvesting Garlic
-
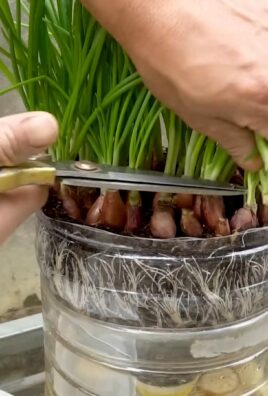
Digging up: Carefully dig up the garlic bulbs with a garden fork or spade. Be careful not to damage the bulbs.
-
Cleaning: Remove the soil from the bulbs. Gently shake it off or brush it with a soft brush.
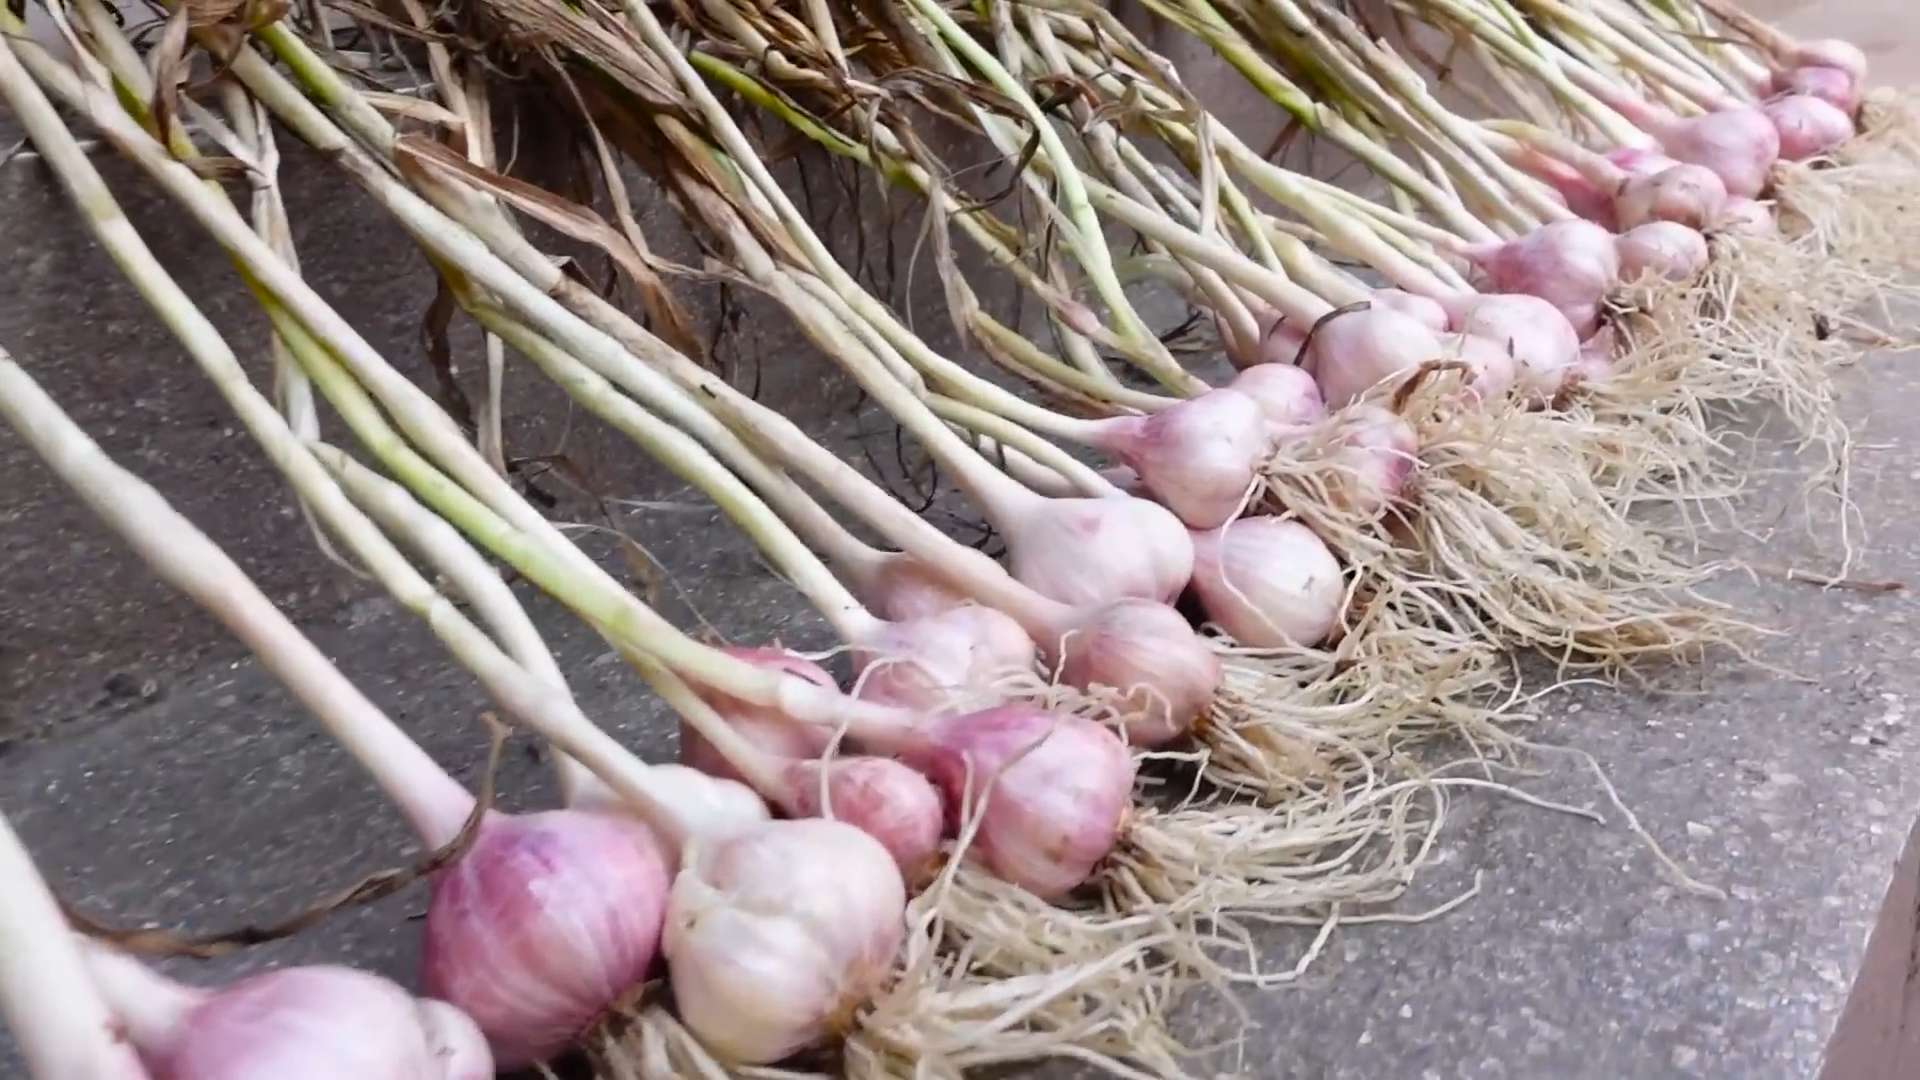
-
Drying: Tie the garlic plants into bundles and hang them in a dry, airy place. You can also lay them out on a wire rack. Let the garlic dry for about 2-3 weeks.
-
Storing: After drying, cut off the roots and leaves. Store the garlic in a cool, dry, and dark place. It will keep for several months this way.
Growing Garlic in a Pot: An Alternative for Balconies and Patios
No garden? No problem! Garlic can also be wonderfully grown in a pot. Here are a few tips for pot cultivation:
-
Pot size: Choose a pot with a diameter of at least 20 cm and a depth of at least 20 cm.
-
Soil: Use high-quality potting mix.
-
Drainage: Make sure the pot has sufficient drainage so water can flow out easily.
-
Location: Place the pot in a sunny location.
-
Watering: Water the garlic regularly, especially during dry periods.
-
Fertilizing: Fertilize the garlic in the spring with an organic fertilizer or compost.
Choosing a Variety: Which Garlic is Right for You?
There are different types of garlic that vary in taste, size, and storability. Here are a few popular varieties:
-
‘German Extra Hardy’: A robust variety with a strong flavor.
-
‘Music’: A popular variety with large cloves and a mild flavor.
-
‘Spanish Roja’: An aromatic variety with a spicy flavor.
-
‘Elephant Garlic’: Not actually a true garlic, but more of a leek variety. It has very large cloves and a mild taste.
Common Problems and Solutions: What to Do When Something Goes Wrong?
Problems can also arise when growing garlic. Here are a few common problems and how you can solve them:
-
Yellow leaves: Yellow leaves can be a sign of nutrient deficiency, lack of water, or disease. Check the watering and fertilize the garlic if necessary.
-
Mold: Mold can occur if the garlic is too moist.
Conclusion
So, there you have it! Growing garlic at home is not only achievable, but it’s also incredibly rewarding. From the satisfaction of nurturing something from a single clove to the unparalleled flavor of homegrown garlic, the benefits are numerous. We’ve walked you through the process, from selecting the right garlic variety to harvesting your bountiful crop. But why is this DIY trick a must-try?
Firstly, consider the taste. Store-bought garlic, while convenient, often lacks the pungent, robust flavor of freshly grown garlic. When you grow your own, you control the entire process, ensuring optimal growing conditions and harvesting at the peak of ripeness. This translates to a flavor explosion in your dishes that you simply can’t replicate with commercially available options.
Secondly, think about the cost savings. While there’s an initial investment in good quality seed garlic, you’ll quickly recoup that cost with the amount of garlic you harvest. Plus, you can save some of your harvest to replant the following year, creating a sustainable cycle of fresh garlic production.
Thirdly, growing garlic at home is an incredibly satisfying and educational experience. It connects you to the natural world, teaches you about plant life cycles, and provides a sense of accomplishment that’s hard to beat. It’s a fantastic activity for families, allowing children to learn about where their food comes from and fostering a love for gardening.
But the benefits don’t stop there. Homegrown garlic is often fresher and contains higher levels of allicin, the compound responsible for garlic’s health benefits. This means you’re not only adding delicious flavor to your meals, but you’re also boosting your immune system.
Ready to take your garlic game to the next level?
Here are a few suggestions and variations to consider:
* Experiment with different varieties: Don’t limit yourself to just one type of garlic. Explore the world of garlic varieties and discover your favorites. From the mild and sweet flavor of softneck garlic to the intense heat of hardneck varieties, there’s a garlic for every palate.
* Garlic Scapes: Don’t forget about the scapes! These curly flower stalks that emerge from hardneck garlic are a culinary delicacy. Harvest them in the spring and use them in pesto, stir-fries, or as a flavorful addition to soups and stews.
* Companion Planting: Garlic is a great companion plant for many vegetables. Plant it near tomatoes, peppers, and eggplant to deter pests and improve their growth.
* Container Gardening: If you don’t have a garden, you can still grow garlic in containers. Choose a large pot with good drainage and use a high-quality potting mix.
We encourage you to try this DIY trick and experience the joy of growing your own garlic. It’s easier than you think, and the rewards are well worth the effort. Don’t be afraid to experiment and find what works best for you.
Once you’ve harvested your first crop, we’d love to hear about your experience! Share your tips, tricks, and photos with us in the comments below. Let’s create a community of garlic growers and inspire others to embrace the joys of homegrown goodness. Happy growing!
Frequently Asked Questions (FAQ)
Q: What is the best time of year to plant garlic?
A: The best time to plant garlic is in the fall, typically 4-6 weeks before the ground freezes. This allows the garlic cloves to establish roots before winter sets in. In colder climates, this is usually around October or November. In milder climates, you can plant garlic as late as December or January. Spring planting is possible, but the bulbs may not be as large.
Q: What kind of soil is best for growing garlic?
A: Garlic thrives in well-drained, fertile soil that is rich in organic matter. Amend your soil with compost or well-rotted manure before planting to improve its fertility and drainage. A slightly acidic to neutral pH (around 6.0 to 7.0) is ideal. Avoid heavy clay soils, as they can retain too much moisture and cause the garlic cloves to rot. If you have clay soil, consider growing garlic in raised beds or containers.
Q: How deep should I plant garlic cloves?
A: Plant garlic cloves about 2-3 inches deep, with the pointed end facing up. Space the cloves about 6-8 inches apart in rows that are 12-18 inches apart. This spacing allows the garlic plants to have enough room to grow and develop large bulbs.
Q: How much water does garlic need?
A: Garlic needs consistent moisture, especially during the spring when the bulbs are actively growing. Water deeply whenever the top inch of soil feels dry to the touch. Avoid overwatering, as this can lead to rot. During the winter months, garlic needs less water.
Q: How do I know when my garlic is ready to harvest?
A: Garlic is typically ready to harvest in late spring or early summer, about 8-9 months after planting. The leaves will start to turn yellow and brown, and the stems may begin to fall over. To check if the bulbs are ready, carefully dig up a few plants and inspect the bulbs. The bulbs should be plump and well-formed, with papery skins.
Q: Can I grow garlic in containers?
A: Yes, you can grow garlic in containers. Choose a large pot (at least 12 inches in diameter) with good drainage. Use a high-quality potting mix and plant the garlic cloves as you would in the ground. Water regularly and fertilize every few weeks with a balanced fertilizer.
Q: What are garlic scapes, and what do I do with them?
A: Garlic scapes are the curly flower stalks that emerge from hardneck garlic varieties in the spring. They are a culinary delicacy and can be harvested when they are still tender and curled. To harvest scapes, simply cut them off near the base of the plant. They can be used in pesto, stir-fries, soups, and other dishes. Removing the scapes encourages the plant to put more energy into bulb development.
Q: How do I store garlic after harvesting?
A: After harvesting, cure the garlic bulbs by laying them out in a well-ventilated area for 2-3 weeks. This allows the skins to dry and harden, which helps to prevent rot. Once the garlic is cured, you can braid the stems together and hang them in a cool, dry place. Alternatively, you can trim the stems and roots and store the bulbs in a mesh bag or basket. Properly stored garlic can last for several months.
Q: What are some common pests and diseases that affect garlic?
A: Some common pests that affect garlic include aphids, thrips, and nematodes. Diseases that can affect garlic include white rot, bulb rot, and downy mildew. To prevent pests and diseases, choose disease-resistant varieties, practice good crop rotation, and avoid overwatering. If you notice any signs of pests or diseases, treat them promptly with appropriate organic or chemical controls.
Q: Can I use store-bought garlic to grow my own?
A: While you can technically try to grow garlic from store-bought cloves, it’s generally not recommended. Store-bought garlic may have been treated with chemicals to prevent sprouting, and it may also carry diseases. It’s best to use seed garlic from a reputable source to ensure that you’re planting healthy, disease-free cloves. Seed garlic is specifically grown for planting and is more likely to produce a successful crop.
Leave a Comment