
Growing corn in bags might sound a little unconventional, right? But trust me, it’s a game-changer for anyone with limited space or less-than-ideal soil! For centuries, corn has been a staple crop, deeply woven into the cultures of the Americas, providing sustenance and playing a vital role in traditions. Think of the ancient Mayans, who revered corn as a sacred gift. Now, we’re taking this ancient grain and adapting its cultivation to our modern lives, bringing the farm to our patios and balconies.
Let’s face it, not everyone has acres of farmland to dedicate to growing their own food. That’s where this DIY trick comes in! Growing corn in bags allows you to enjoy the taste of fresh, homegrown corn, even if you only have a small sunny spot. Imagine biting into a sweet, juicy ear of corn that you nurtured from a tiny seed, all within the confines of a simple bag. It’s incredibly rewarding, and I’m here to show you exactly how to do it. This method is also fantastic for controlling soil quality, preventing pests, and even extending your growing season. So, ditch the store-bought corn and let’s get our hands dirty (or, well, bag-dirty!) with this easy and effective gardening hack!
Growing Corn in Bags: A DIY Guide to Urban Farming
Hey there, fellow gardening enthusiasts! Ever dreamed of having fresh, homegrown corn but thought you didn’t have the space? Well, I’m here to tell you that you absolutely can grow corn, even if you only have a balcony, patio, or small yard. The secret? Growing corn in bags! It’s a surprisingly simple and rewarding project, and I’m going to walk you through every step.
Why Grow Corn in Bags?
Before we dive in, let’s talk about why this method is so great:
* Space-Saving: This is the biggest advantage! Bags take up far less space than a traditional cornfield.
* Portability: You can move your corn plants around to chase the sun or protect them from harsh weather.
* Improved Soil Control: You get to choose the perfect soil mix for your corn, ensuring optimal growth.
* Reduced Weeding: Bags limit weed growth, making maintenance a breeze.
* Early Harvest: The soil in bags warms up faster, potentially leading to an earlier harvest.
What You’ll Need
Here’s a list of everything you’ll need to get started:
* Large, Sturdy Bags: Think heavy-duty garbage bags, burlap sacks, or even grow bags specifically designed for plants. The bigger, the better! Aim for at least 20-gallon capacity.
* Potting Mix: A well-draining potting mix is crucial. I recommend a mix of compost, peat moss (or coco coir), and perlite or vermiculite.
* Corn Seeds: Choose a variety that’s suitable for your climate and growing season. Sweet corn is a popular choice!
* Slow-Release Fertilizer: This will provide your corn plants with a steady supply of nutrients.
* Watering Can or Hose: For, well, watering!
* Trowel or Shovel: For filling the bags with soil.
* Stakes (Optional): For extra support, especially as the corn plants get tall.
* Twine or Plant Ties (Optional): To secure the stalks to the stakes.
* Gloves: To keep your hands clean.
Step-by-Step Instructions: Planting Your Corn
Alright, let’s get our hands dirty! Here’s how to plant your corn seeds in bags:
1. Prepare the Bags: First, make sure your bags have drainage holes. If you’re using garbage bags, poke several holes in the bottom. This is super important to prevent waterlogging, which can rot the roots.
2. Fill the Bags: Now, fill each bag with your potting mix, leaving about 4-6 inches of space at the top. This space will help with watering and prevent soil from spilling out.
3. Add Fertilizer: Mix in the slow-release fertilizer according to the package instructions. This will give your corn a good start.
4. Plant the Seeds: Plant 3-4 corn seeds per bag, about 1-2 inches deep. Space them evenly around the center of the bag. Planting multiple seeds ensures that at least one will germinate successfully.
5. Water Thoroughly: Gently water the soil until it’s evenly moist but not soggy.
6. Choose a Sunny Location: Corn needs at least 6-8 hours of direct sunlight per day. Place your bags in a sunny spot where they’ll get plenty of light.
7. Wait and Watch: Keep the soil consistently moist, but not waterlogged. Germination usually takes about 7-10 days.
### Caring for Your Corn Plants
Once your corn seedlings emerge, it’s time to focus on their care. Here’s what you need to do:
1. Thin the Seedlings: Once the seedlings are a few inches tall, thin them to the strongest one or two plants per bag. This will give them enough space to grow and thrive. I know it’s hard to choose, but trust me, it’s for the best!
2. Water Regularly: Corn needs a lot of water, especially during hot weather. Water deeply whenever the top inch of soil feels dry.
3. Fertilize Again: About 4-6 weeks after planting, side-dress your corn plants with more slow-release fertilizer or a liquid fertilizer. Follow the package instructions for application rates.
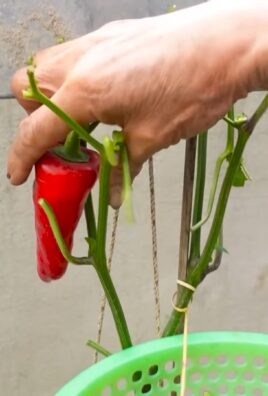
4. Provide Support: As your corn plants grow taller, they may need support to prevent them from falling over, especially in windy conditions. Insert stakes into the bags near the plants and tie the stalks to the stakes with twine or plant ties. Be gentle so you don’t damage the stalks.
5. Watch for Pests and Diseases: Keep an eye out for common corn pests like corn earworms and aphids. Treat any infestations promptly with insecticidal soap or other appropriate methods. Also, watch for signs of diseases like corn smut or rust. Remove any affected leaves or plants to prevent the spread of disease.
### Pollination: The Key to Corn on the Cob
Corn is wind-pollinated, which means the pollen from the tassels (the male flowers at the top of the plant) needs to reach the silks (the female flowers that emerge from the developing ears). Here’s how to help the pollination process:
1. Plant in Blocks: Plant your corn bags close together in a block formation rather than in a single row. This will increase the chances of successful pollination.
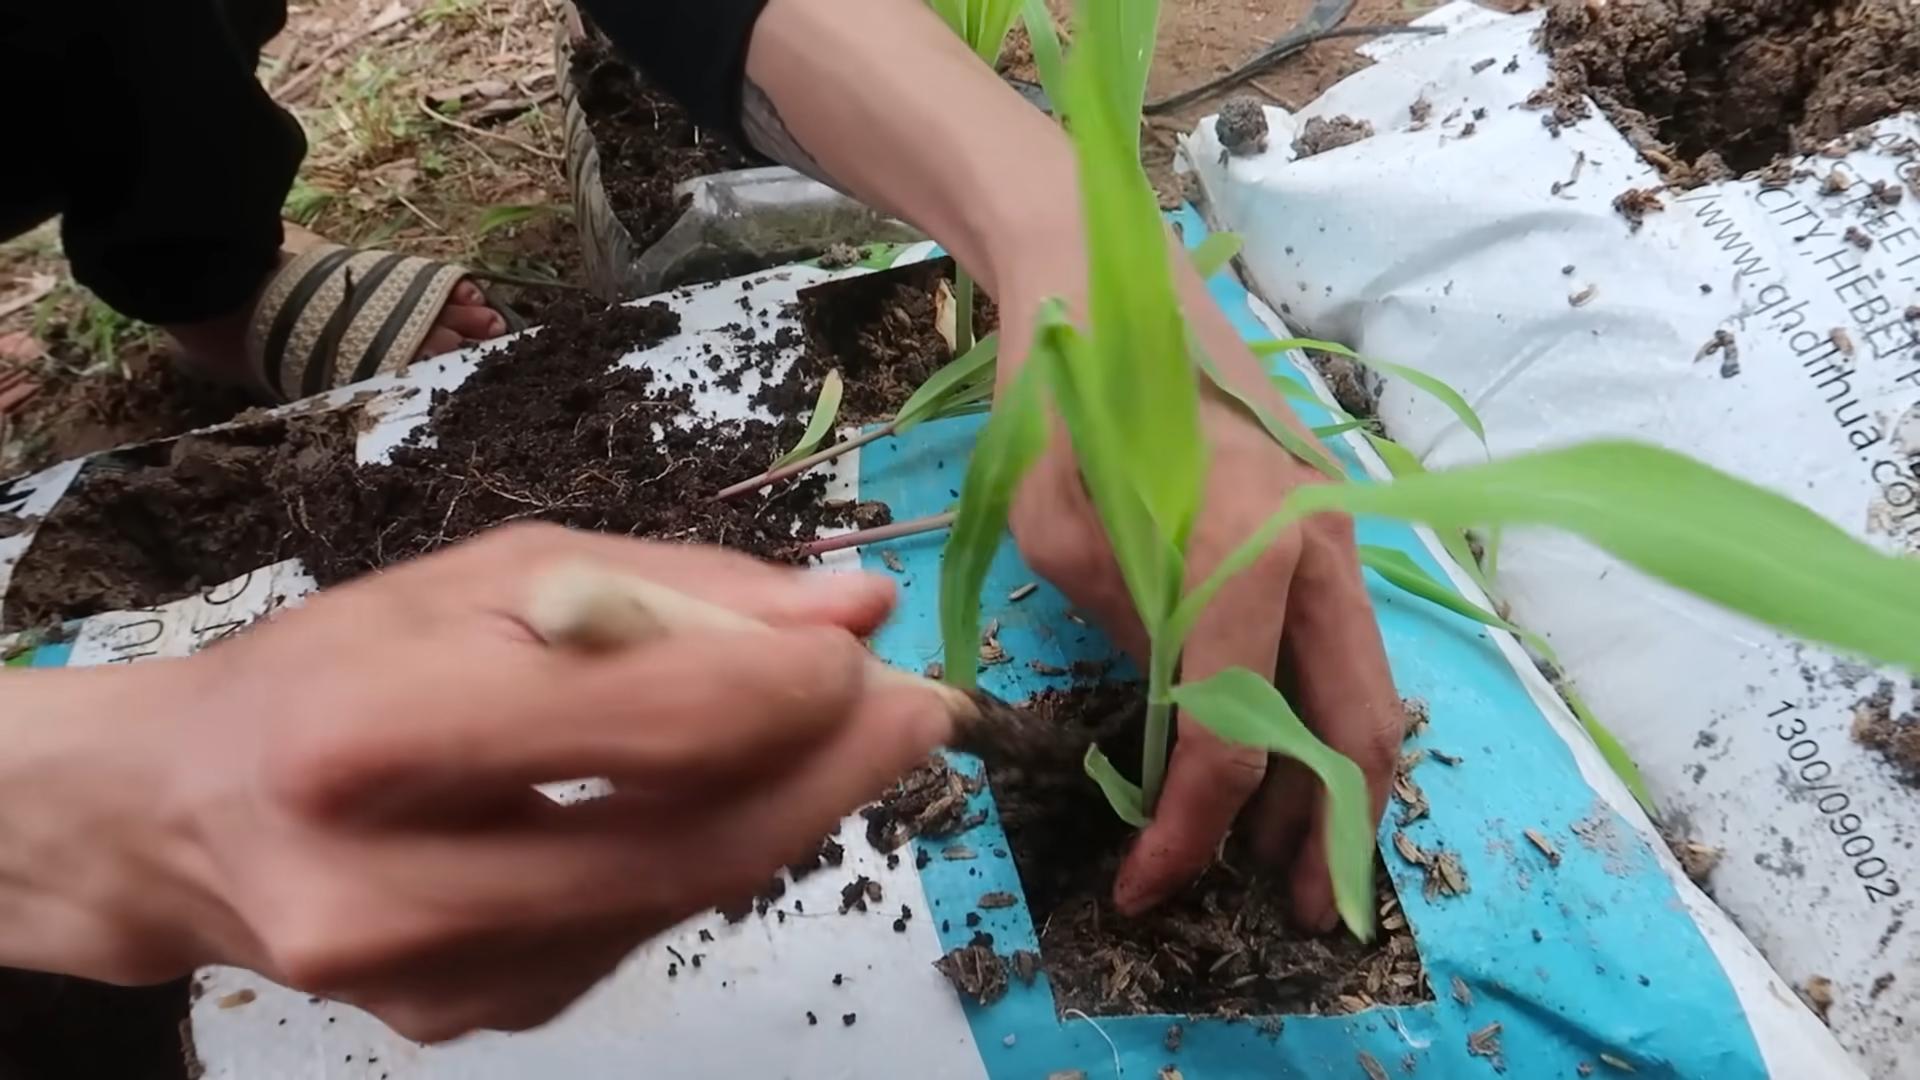
2. Hand-Pollination (Optional): If you’re concerned about pollination, you can hand-pollinate your corn plants. Gently shake the tassels over the silks to release the pollen. You can also collect pollen from the tassels with a small brush and apply it directly to the silks.
3. Ensure Adequate Watering: Water stress can reduce pollen production and silk receptivity, so make sure your corn plants are getting enough water.
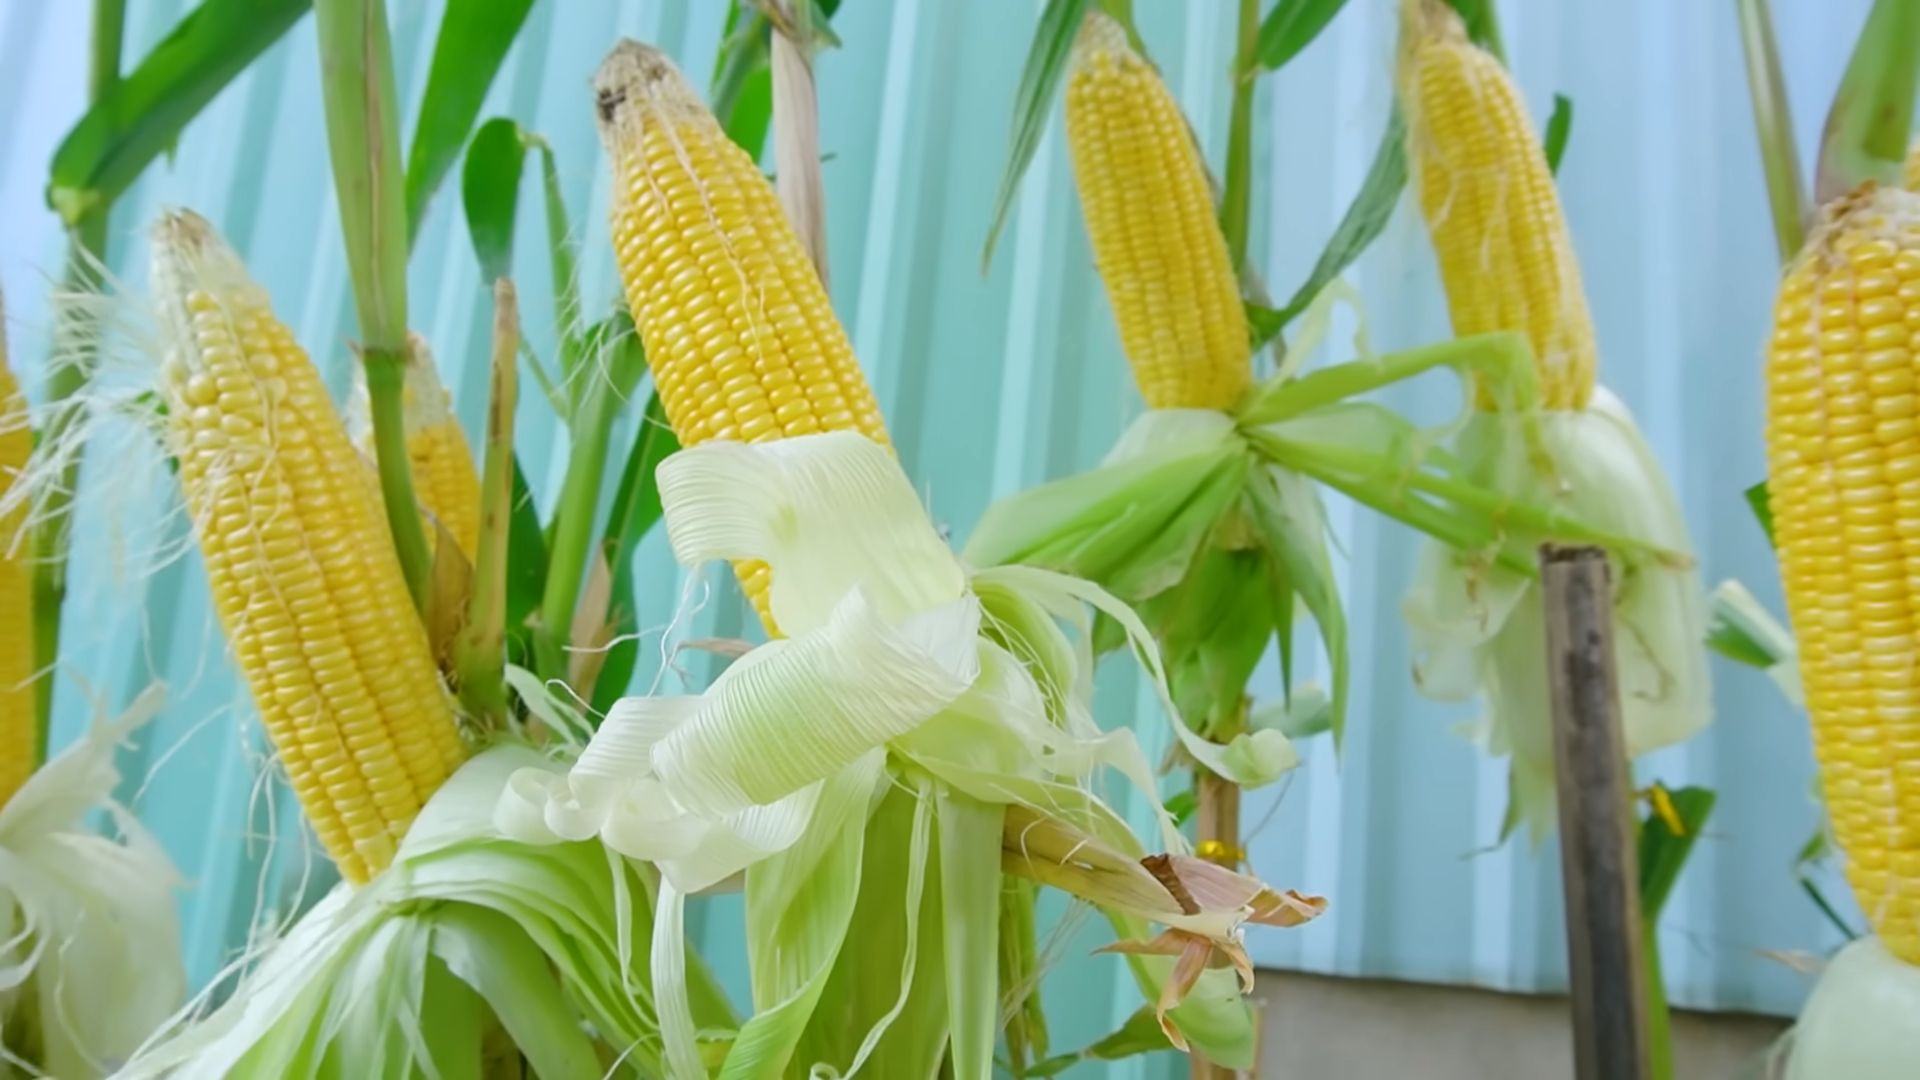
### Harvesting Your Corn
The moment we’ve all been waiting for! Here’s how to know when your corn is ready to harvest:
1. Check the Silks: The silks should turn brown and dry.
2. Feel the Ears: Gently squeeze the ears. They should feel plump and full.
3. Peel Back the Husk: Carefully peel back a small portion of the husk and puncture a kernel with your fingernail. If the liquid is milky, the corn is ready to harvest. If it’s clear, it needs more time. If it’s doughy, it’s overripe.
4. Harvest Carefully: Twist the ear downward and snap it off the stalk.
### Troubleshooting
Here are a few common problems you might encounter and how to fix them:
* Poor Germination: Make sure your seeds are fresh and viable. Also, ensure the soil is warm enough for germination.
* Yellowing Leaves: This could be a sign of nutrient deficiency. Fertilize your corn plants with a balanced fertilizer.
* Stunted Growth: This could be due to lack of sunlight, water, or nutrients. Make sure your corn plants are getting enough of all three.
* Pest Infestations: Treat any pest infestations promptly with appropriate methods.
* Poor Pollination: Follow the tips above to improve pollination.
### Choosing the Right Corn Variety
Selecting the right corn variety is crucial for success. Consider these factors:
* Days to Maturity: Choose a variety that will mature within your growing season.
* Plant Height: Some corn varieties grow taller than others. Choose a variety that’s suitable for the size of your bags and the amount of space you have.
* Sweetness: Sweet corn varieties vary in sweetness. Choose one that suits your taste.
* Disease Resistance: Choose a variety that’s resistant to common corn diseases in your area.
Some popular sweet corn varieties for home gardens include:
* ‘Early Sunglow’: A very early variety that’s great for short growing seasons.
* ‘Honey Select’: A very sweet and flavorful variety.
* ‘Silver Queen’: A classic white sweet corn variety.
* ‘Golden Bantam’: An heirloom variety with a rich, corny flavor.
### Reusing Your Bags
After you’ve harvested your corn, you can reuse the bags for other plants. Just remove the old corn stalks and roots, amend the soil with fresh compost, and you’re good to go! You can grow other vegetables, flowers, or even herbs in the bags.
Final Thoughts
Growing corn in bags is a fun and rewarding project that anyone can do. With a little bit of effort and attention, you can enjoy fresh, homegrown corn right from your own backyard, balcony, or patio. So, what are you waiting for? Get started today and experience the joy of growing your own food! Happy gardening!
Conclusion
So, there you have it! Growing corn in bags is not just a quirky gardening experiment; it’s a game-changer for anyone with limited space, challenging soil, or simply a desire for a more controlled growing environment. We’ve walked you through the process, highlighting the benefits and addressing potential pitfalls. But why is this DIY trick a must-try?
Firstly, the sheer convenience is undeniable. Imagine fresh, sweet corn just steps from your door, without the back-breaking labor of tilling a traditional garden plot. Container gardening, especially with something as substantial as corn, offers unparalleled control over soil quality, watering, and pest management. You can tailor the growing conditions to perfectly suit your corn’s needs, maximizing yield and flavor.
Secondly, growing corn in bags opens up possibilities for those who thought fresh corn was beyond their reach. Apartment dwellers with balconies, suburbanites with small patios, and even those with poor soil conditions can now enjoy the taste of homegrown corn. It’s a democratizing force in the world of gardening, bringing the joy of fresh produce to a wider audience.
Thirdly, it’s a fantastic learning experience. Whether you’re a seasoned gardener or a complete novice, growing corn in bags offers a unique opportunity to observe the plant’s life cycle up close. You’ll gain a deeper understanding of its needs and how to meet them, making you a more knowledgeable and confident gardener overall.
But the fun doesn’t stop there! Feel free to experiment with different varieties of corn. Try a colorful heirloom variety for a visual treat, or a super-sweet variety for an extra burst of flavor. You can also experiment with companion planting. Consider adding some nitrogen-fixing beans or peas to the bag to help nourish your corn plants. Marigolds can also be planted around the base of the bag to deter pests.
Another variation to consider is the type of bag you use. While we’ve focused on large grow bags, you can also use repurposed burlap sacks or even large plastic containers with drainage holes. Just be sure the container is large enough to accommodate the corn’s root system.
Don’t be afraid to get creative and adapt the process to your own unique circumstances. The key is to provide your corn plants with plenty of sunlight, water, and nutrients.
We are confident that you will find growing corn in bags a rewarding and delicious experience. It’s a simple, effective, and surprisingly productive way to enjoy fresh, homegrown corn, no matter where you live.
So, what are you waiting for? Grab some grow bags, some potting mix, and some corn seeds, and get started today! We can’t wait to hear about your experiences. Share your photos, tips, and questions in the comments below. Let’s build a community of bag-grown corn enthusiasts! Let us know what challenges you faced and what worked best for you. Your insights will help others succeed in their own corn-growing adventures. Happy gardening!
Frequently Asked Questions (FAQ)
What size bag is best for growing corn?
The ideal bag size for growing corn is at least 20 gallons, but larger is generally better. A 25-30 gallon bag will provide ample space for the corn’s root system to develop fully. The depth of the bag is also important; aim for a bag that is at least 18 inches deep to allow for proper root growth. If you are planting multiple corn stalks in one bag, you will need a larger bag. For example, if you plan to plant three corn stalks, a 40-50 gallon bag would be more appropriate. Using a bag that is too small will restrict root growth, leading to stunted plants and reduced yields.
What type of soil should I use in the bag?
A well-draining potting mix is essential for growing corn in bags. Avoid using garden soil, as it can become compacted and waterlogged in a container. A good potting mix will consist of a blend of peat moss, perlite, and vermiculite. You can also add compost to the mix to provide additional nutrients. Look for a potting mix that is specifically formulated for vegetables, as these mixes tend to have a higher nutrient content. Before planting, amend the potting mix with a slow-release fertilizer to provide a steady supply of nutrients throughout the growing season.
How often should I water corn grown in bags?
Corn grown in bags will need to be watered regularly, especially during hot, dry weather. Check the soil moisture daily by sticking your finger into the soil. If the top inch of soil feels dry, it’s time to water. Water deeply, until water drains out of the bottom of the bag. Avoid overwatering, as this can lead to root rot. During periods of heavy rain, you may need to reduce watering frequency. Consider using a moisture meter to accurately gauge soil moisture levels. Mulching around the base of the corn stalks can help to retain moisture in the soil.
How much sunlight does corn need when grown in bags?
Corn requires at least 6-8 hours of direct sunlight per day to thrive. Choose a location for your bags that receives full sun throughout the day. If you live in a particularly hot climate, you may need to provide some afternoon shade to prevent the plants from overheating. If you are growing corn indoors, you will need to supplement with artificial lighting. Use grow lights that are specifically designed for plants, and position them close to the corn stalks. Rotate the bags regularly to ensure that all sides of the plants receive adequate sunlight.
How do I pollinate corn grown in bags?
Corn is wind-pollinated, so you may need to assist with pollination if you are growing it in a sheltered location. When the tassels (the male flowers at the top of the plant) begin to shed pollen, gently shake the stalks to release the pollen. You can also collect the pollen in a container and then sprinkle it onto the silks (the female flowers that emerge from the ears of corn). Repeat this process every day for several days to ensure that all of the silks are pollinated. You can also use a small paintbrush to transfer pollen from the tassels to the silks.
What are some common pests and diseases that affect corn grown in bags?
Common pests that can affect corn include corn earworms, aphids, and spider mites. Regularly inspect your plants for signs of infestation, and take action promptly if you notice any pests. You can use insecticidal soap or neem oil to control pests. Diseases that can affect corn include rust, smut, and leaf blight. Choose disease-resistant varieties of corn to minimize the risk of disease. Ensure good air circulation around the plants to prevent fungal diseases. Remove any infected leaves or stalks promptly.
Can I grow different varieties of corn in the same bag?
It is generally not recommended to grow different varieties of corn in the same bag, as they can cross-pollinate. Cross-pollination can result in kernels that are not true to type, and the flavor and texture of the corn may be affected. If you want to grow different varieties of corn, it is best to plant them in separate bags and space them far apart to minimize the risk of cross-pollination.
How do I know when my corn is ready to harvest?
Corn is typically ready to harvest about 20-25 days after the silks emerge. The silks will turn brown and dry, and the ears of corn will feel plump and full. To check for ripeness, peel back a portion of the husk and puncture a kernel with your fingernail. If the liquid that comes out is milky, the corn is ready to harvest. If the liquid is clear, the corn is not yet ripe. If the liquid is doughy, the corn is overripe. Harvest the corn by twisting the ear off of the stalk.
Can I reuse the soil in the bags for next year’s corn crop?
It is generally not recommended to reuse the soil in the bags for next year’s corn crop, as it may be depleted of nutrients and harbor pests or diseases. However, you can amend the soil with compost and fertilizer to improve its quality. Alternatively, you can use the soil for other plants that are not as demanding as corn. Consider using the old soil as a base for a compost pile.
Is growing corn in bags as productive as growing it in the ground?
While growing corn in bags may not be quite as productive as growing it in a large, well-prepared garden plot, it can still be a very rewarding experience. The yield will depend on factors such as the size of the bag, the quality of the soil, and the amount of sunlight and water the plants receive. With proper care and attention, you can expect to harvest a decent amount of corn from your bag-grown plants. The convenience and control offered by container gardening often outweigh any slight reduction in yield.
Leave a Comment