
Growing corn in a concrete yard might sound like an impossible dream, right? But what if I told you that with a little ingenuity and some DIY magic, you could actually harvest your own sweet corn, even without a traditional garden? Forget the sprawling fields of Iowa for a moment; we’re bringing the farm-fresh goodness to your urban oasis!
For centuries, corn has been a staple crop, deeply woven into the cultures of the Americas. From ancient civilizations to modern-day barbecues, corn represents sustenance, community, and the simple joy of homegrown food. But let’s face it, not everyone has access to acres of farmland. That’s where this DIY guide comes in.
This article is your passport to transforming your concrete jungle into a mini-cornfield. We’ll explore clever container gardening techniques, soil hacks, and even some secret tips to maximize your yield. Imagine the satisfaction of biting into a juicy, homegrown ear of corn, knowing you nurtured it from seed to table, all within the confines of your concrete yard. Growing corn in a concrete yard is not just possible; it’s a rewarding and sustainable way to connect with nature and enjoy the fruits (or rather, vegetables!) of your labor. So, grab your gardening gloves, and let’s get started!
DIY Concrete Corn Yard Art: From Bland to Grand!
Hey there, fellow DIY enthusiasts! Are you tired of your plain, boring yard? Do you crave a touch of whimsy and rustic charm? Well, buckle up because I’m about to show you how to create adorable concrete corn stalks that will transform your outdoor space from drab to fab! This project is surprisingly simple, incredibly rewarding, and guaranteed to be a conversation starter. Let’s get our hands dirty!
Materials You’ll Need:
* Concrete Mix: I recommend a high-strength concrete mix for durability. The amount you’ll need depends on the size and number of corn stalks you want to create. A 50-pound bag should be enough for a few smaller stalks.
* Rebar: This will provide internal support for your corn stalks, preventing them from cracking or breaking. 1/4-inch or 3/8-inch rebar works well.
* Chicken Wire: This is the key to shaping your corn stalks. You’ll need enough to create the desired size and shape.
* Wire Cutters: For cutting the chicken wire and rebar.
* Gloves: Protect your hands from the concrete.
* Safety Glasses: Always protect your eyes when working with concrete.
* Mixing Tub or Wheelbarrow: For mixing the concrete.
* Shovel or Hoe: For mixing the concrete.
* Water: For mixing the concrete.
* Measuring Tape: For measuring the rebar and chicken wire.
* Zip Ties: To secure the chicken wire to the rebar.
* Plastic Sheeting or Drop Cloth: To protect your work surface.
* Spray Paint (Optional): For adding color and detail to your finished corn stalks. I like to use shades of green, yellow, and brown.
* Concrete Sealer (Optional): To protect your corn stalks from the elements and prolong their lifespan.
* Old Paintbrushes (Optional): For applying the spray paint and sealer.
* Pliers (Optional): For bending the rebar.
* Sandpaper (Optional): For smoothing out any rough edges on the finished concrete.
Phase 1: Building the Corn Stalk Framework
This is where we create the skeleton of our corn stalks. Don’t worry, it’s easier than it sounds!
1. Cut the Rebar: Decide on the desired height of your corn stalks. I like to make mine varying heights for a more natural look. Use wire cutters to cut the rebar to the desired lengths. Remember to add a few extra inches to the bottom of each rebar piece so you can anchor it securely into the ground later. For example, if you want a 3-foot corn stalk, cut the rebar to 3 feet 4 inches.
2. Shape the Chicken Wire: This is where the magic happens! Roll out the chicken wire and cut a piece large enough to wrap around the rebar, forming a corn stalk shape. I like to create a slightly tapered shape, wider at the bottom and narrower at the top, to mimic the natural shape of a corn stalk. You can experiment with different shapes and sizes to create a variety of corn stalks.
3. Attach the Chicken Wire to the Rebar: Wrap the chicken wire around the rebar, overlapping the edges. Use zip ties to securely attach the chicken wire to the rebar at several points along the length of the stalk. Make sure the chicken wire is tightly secured to the rebar to prevent it from shifting during the concrete application. I usually use zip ties every 6-8 inches.
4. Fine-Tune the Shape: Once the chicken wire is attached, take a step back and assess the shape of your corn stalk. You can adjust the shape by bending the chicken wire and rebar as needed. I like to add a slight curve to the stalk to make it look more natural.
Phase 2: Applying the Concrete
Now for the fun part – covering our framework with concrete!
1. Prepare the Concrete Mix: Follow the instructions on the concrete mix bag to prepare the concrete. Add water gradually while mixing with a shovel or hoe until you achieve a thick, oatmeal-like consistency. Be careful not to add too much water, as this will weaken the concrete. I always err on the side of caution and add water slowly.
2. Apply the First Layer of Concrete: Using your gloved hands, carefully apply a layer of concrete to the chicken wire framework. Start at the bottom and work your way up, pressing the concrete firmly into the chicken wire. Make sure to completely cover the chicken wire with concrete. This first layer doesn’t need to be super thick, just enough to cover the wire.
3. Let the First Layer Set: Allow the first layer of concrete to set for a few hours, or until it is firm enough to support a second layer. This will prevent the concrete from sagging or sliding off the chicken wire. The setting time will depend on the temperature and humidity.
4. Apply the Second Layer of Concrete: Once the first layer has set, apply a second layer of concrete, building up the thickness of the corn stalk. This layer should be thicker than the first layer, but not so thick that it becomes too heavy for the framework. I usually aim for a total concrete thickness of about 1-2 inches.
5. Create Texture (Optional): While the concrete is still wet, you can create texture on the surface to make it look more realistic. You can use your fingers, a trowel, or even a sponge to create different textures. I like to use my fingers to create vertical lines that mimic the texture of a corn stalk.
6. Cure the Concrete: This is a crucial step! Cover the concrete corn stalks with plastic sheeting or damp burlap to keep them moist while they cure. This will prevent the concrete from drying out too quickly and cracking. Cure the concrete for at least 3-5 days, keeping the plastic sheeting or burlap damp. I usually spray them down with water once or twice a day.
Phase 3: Finishing Touches
Time to add some personality to our concrete corn stalks!
1. Remove the Plastic Sheeting: Once the concrete has cured, remove the plastic sheeting or burlap.
2. Sand (Optional): If there are any rough edges or imperfections on the concrete, you can sand them down with sandpaper.
3. Paint (Optional): This is where you can really get creative! Use spray paint to add color and detail to your corn stalks. I like to use shades of green for the stalk and yellow and brown for the corn kernels. You can also use stencils to create patterns or designs. I find that layering different shades of green gives a more realistic look.
4. Seal (Optional): To protect your corn stalks from the elements and prolong their lifespan, apply a concrete sealer. This will help to prevent the concrete from cracking or deteriorating over time. Follow the instructions on the sealer can for application.
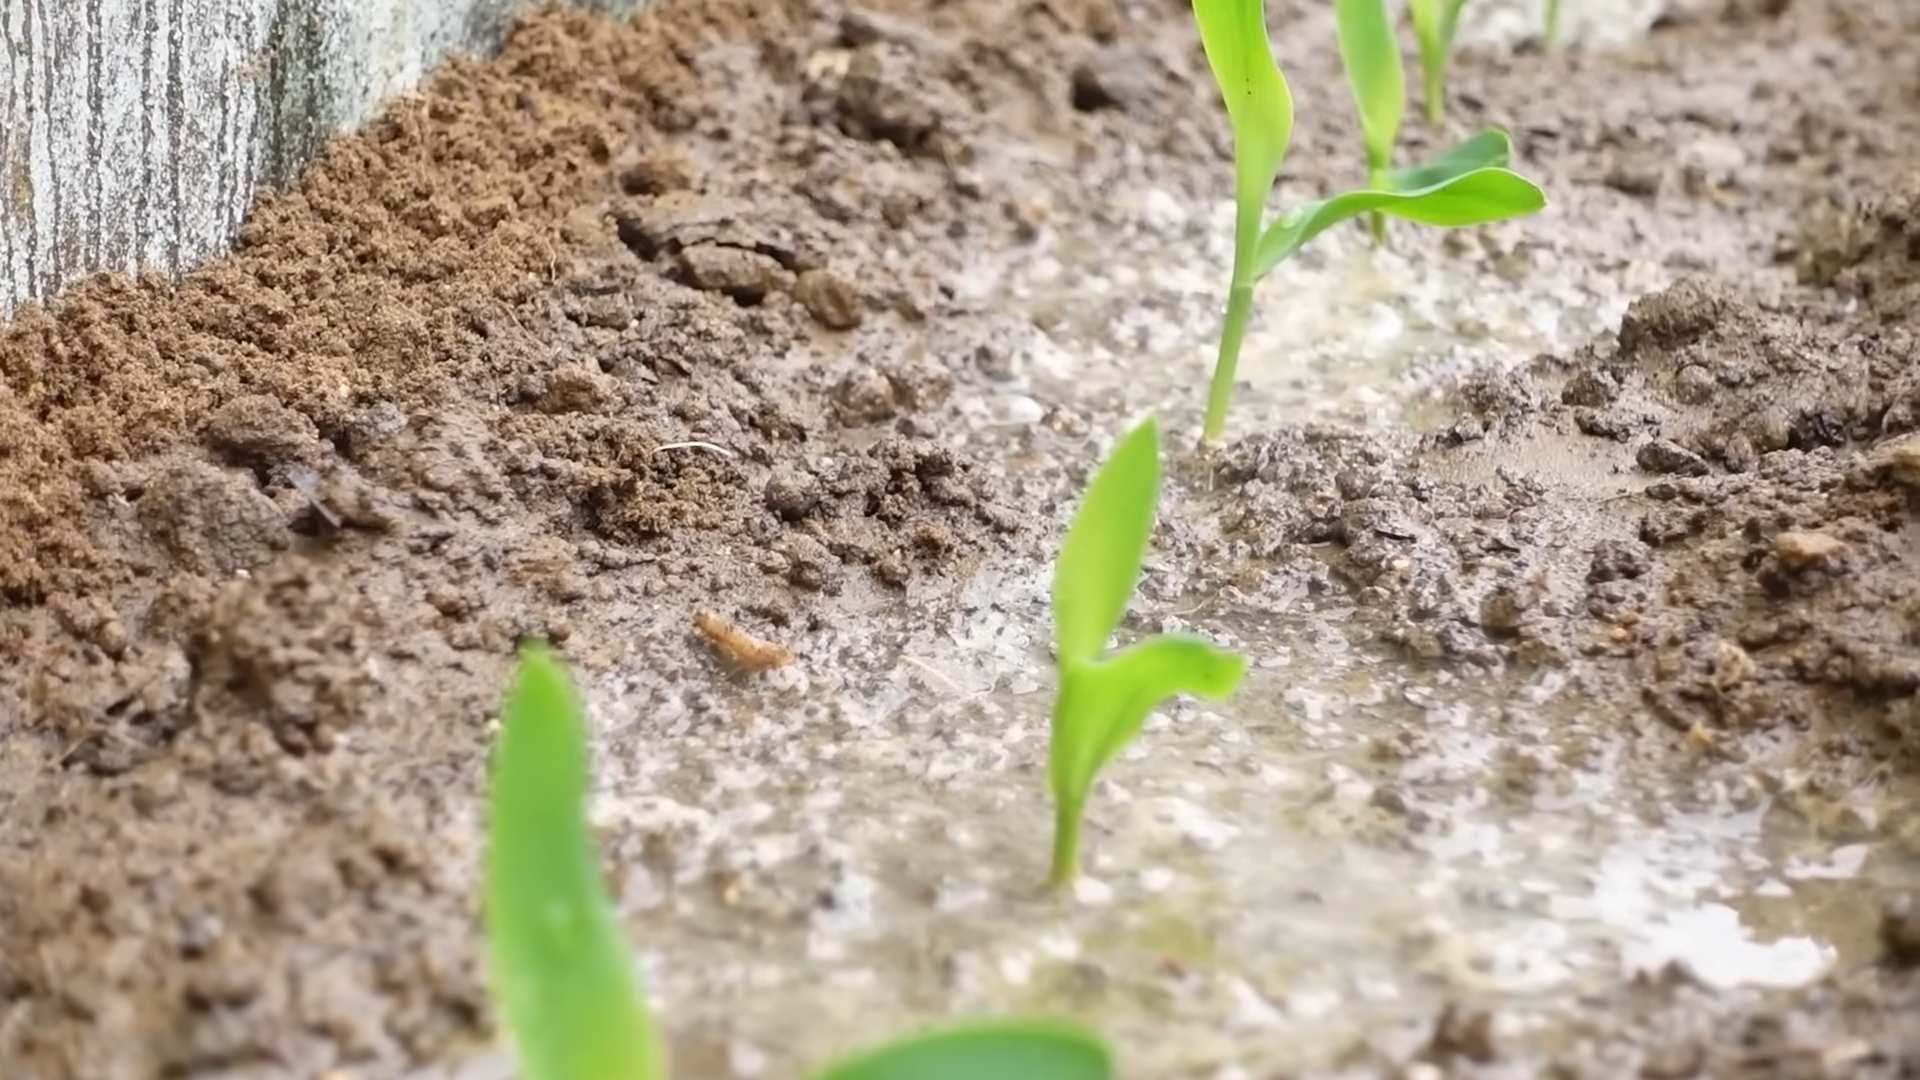
5. Planting Your Corn Stalks: Now for the final step! Choose a location in your yard where you want to display your concrete corn stalks. Dig a hole deep enough to accommodate the rebar at the bottom of the stalks. Insert the rebar into the hole and fill the hole with soil, packing it firmly around the rebar to secure the stalks in place.
Tips and Tricks:
* Experiment with different shapes and sizes: Don’t be afraid to get creative and experiment with different shapes and sizes for your corn stalks. You can make them tall and slender, short and stout, or anything in between.
* Add corn kernels: For a more realistic look, you can add corn kernels to your corn stalks. You can use small pebbles, beads, or even dried corn kernels. Simply press them into the wet concrete while it is still pliable.
* Use different colors of concrete: You can add color to your concrete mix by using concrete dyes or pigments. This will allow you to create corn stalks in a variety of colors.
* Get the kids involved: This is a great project to do with kids. They can help with mixing the concrete, shaping the chicken wire, and painting the finished corn stalks.
* Safety First: Always wear gloves and safety glasses when working with concrete.
* Clean Up: Clean your tools and work area thoroughly after you are finished.
And there you have it! Your very own concrete corn yard art! I hope you enjoyed this DIY project as much as I did. Now go forth and transform your yard into a whimsical wonderland! Happy crafting!
Conclusion
So, there you have it! Transforming your drab concrete yard into a vibrant, corn-filled oasis might sound unconventional, but the results speak for themselves. This DIY trick isn’t just about aesthetics; it’s about reclaiming unused space, embracing sustainable practices, and adding a touch of unexpected charm to your home. Imagine the delight of harvesting your own fresh corn right outside your back door, the conversations sparked by your unique landscaping, and the satisfaction of knowing you’ve created something truly special.
This method offers a fantastic alternative to traditional gardening, especially if you’re dealing with limited soil or a predominantly concrete environment. It’s a creative solution that allows you to enjoy the benefits of homegrown produce without the hassle of extensive digging and soil preparation. Plus, the visual impact of lush corn stalks against the stark backdrop of concrete is undeniably striking.
But don’t stop there! Feel free to experiment with different varieties of corn. Consider planting ornamental corn for a splash of color, or try a smaller variety if space is a concern. You can also incorporate companion plants like beans or squash to create a mini-Three Sisters garden right in your concrete yard. Think about adding some strategically placed lighting to highlight your corn patch at night, creating a magical ambiance.
Remember, the key to success with this DIY project is proper drainage and consistent watering. Monitor your corn plants closely and adjust your watering schedule as needed. And don’t be afraid to get creative with your container choices. While the instructions focus on using large containers, you can adapt the method to suit your specific space and preferences.
We truly believe that this method of growing corn in a concrete yard is a game-changer for urban gardeners and anyone looking to add a touch of the countryside to their city life. It’s a rewarding project that combines practicality, sustainability, and a whole lot of fun.
So, what are you waiting for? Grab your supplies, get your hands dirty, and embark on this exciting gardening adventure. We’re confident that you’ll be amazed by the results. And most importantly, we want to hear about your experience! Share your photos, tips, and stories with us in the comments below. Let’s create a community of concrete corn growers and inspire others to transform their spaces in unexpected and delightful ways. We can’t wait to see what you create!
Frequently Asked Questions (FAQ)
1. What type of corn is best suited for growing in containers on concrete?
The best type of corn for container gardening, especially on concrete, are shorter, bushier varieties. These varieties are less prone to toppling over in windy conditions and require less space. Consider varieties like ‘On Deck’ or ‘Trinity’, which are specifically bred for container growing. Sweet corn varieties like ‘Golden Bantam’ can also work well, but be sure to provide adequate support as they mature. Remember to check the days to maturity for each variety to ensure you have enough time in your growing season.
2. How much sunlight does corn need when grown on concrete?
Corn requires a significant amount of sunlight, ideally at least 6-8 hours per day. When growing corn on concrete, ensure that your containers are placed in a location that receives full sun. Concrete can radiate heat, which can be beneficial in cooler climates, but it’s crucial to monitor the soil temperature and water accordingly to prevent the roots from drying out. If you live in a particularly hot climate, consider providing some afternoon shade to prevent the plants from becoming stressed.
3. What type of soil is best for growing corn in containers on concrete?
A well-draining, nutrient-rich potting mix is essential for growing corn in containers. Avoid using garden soil, as it can become compacted and doesn’t provide adequate drainage. A mix of compost, peat moss (or coconut coir), and perlite or vermiculite is ideal. The compost provides essential nutrients, while the peat moss or coconut coir helps retain moisture, and the perlite or vermiculite improves drainage. You can also add a slow-release fertilizer to the potting mix to provide a steady supply of nutrients throughout the growing season.
4. How often should I water corn grown in containers on concrete?
Watering frequency depends on several factors, including the weather, the size of the container, and the type of potting mix. Generally, corn grown in containers on concrete will need to be watered more frequently than corn grown in the ground, especially during hot and dry periods. Check the soil moisture regularly by sticking your finger about an inch into the soil. If it feels dry, it’s time to water. Water deeply until water drains out of the bottom of the container. Avoid overwatering, as this can lead to root rot.
5. How do I pollinate corn grown in containers on concrete?
Corn is wind-pollinated, so if you’re growing multiple plants close together, natural pollination should occur. However, if you’re growing only a few plants or if there’s little wind, you may need to hand-pollinate. To do this, gently shake the tassels (the male flowers at the top of the plant) to release pollen. Then, brush the pollen onto the silks (the female flowers that emerge from the developing ears of corn). Repeat this process every day for several days to ensure adequate pollination.
6. What are some common pests and diseases that affect corn grown on concrete, and how can I prevent them?
Common pests that can affect corn include corn earworms, aphids, and spider mites. Diseases include corn smut and various fungal infections. To prevent these problems, inspect your plants regularly for signs of pests or diseases. Use organic pest control methods, such as insecticidal soap or neem oil, to control pests. Ensure good air circulation around the plants to prevent fungal diseases. Remove any infected leaves or plants promptly to prevent the spread of disease.
7. How do I know when my corn is ready to harvest when grown on concrete?
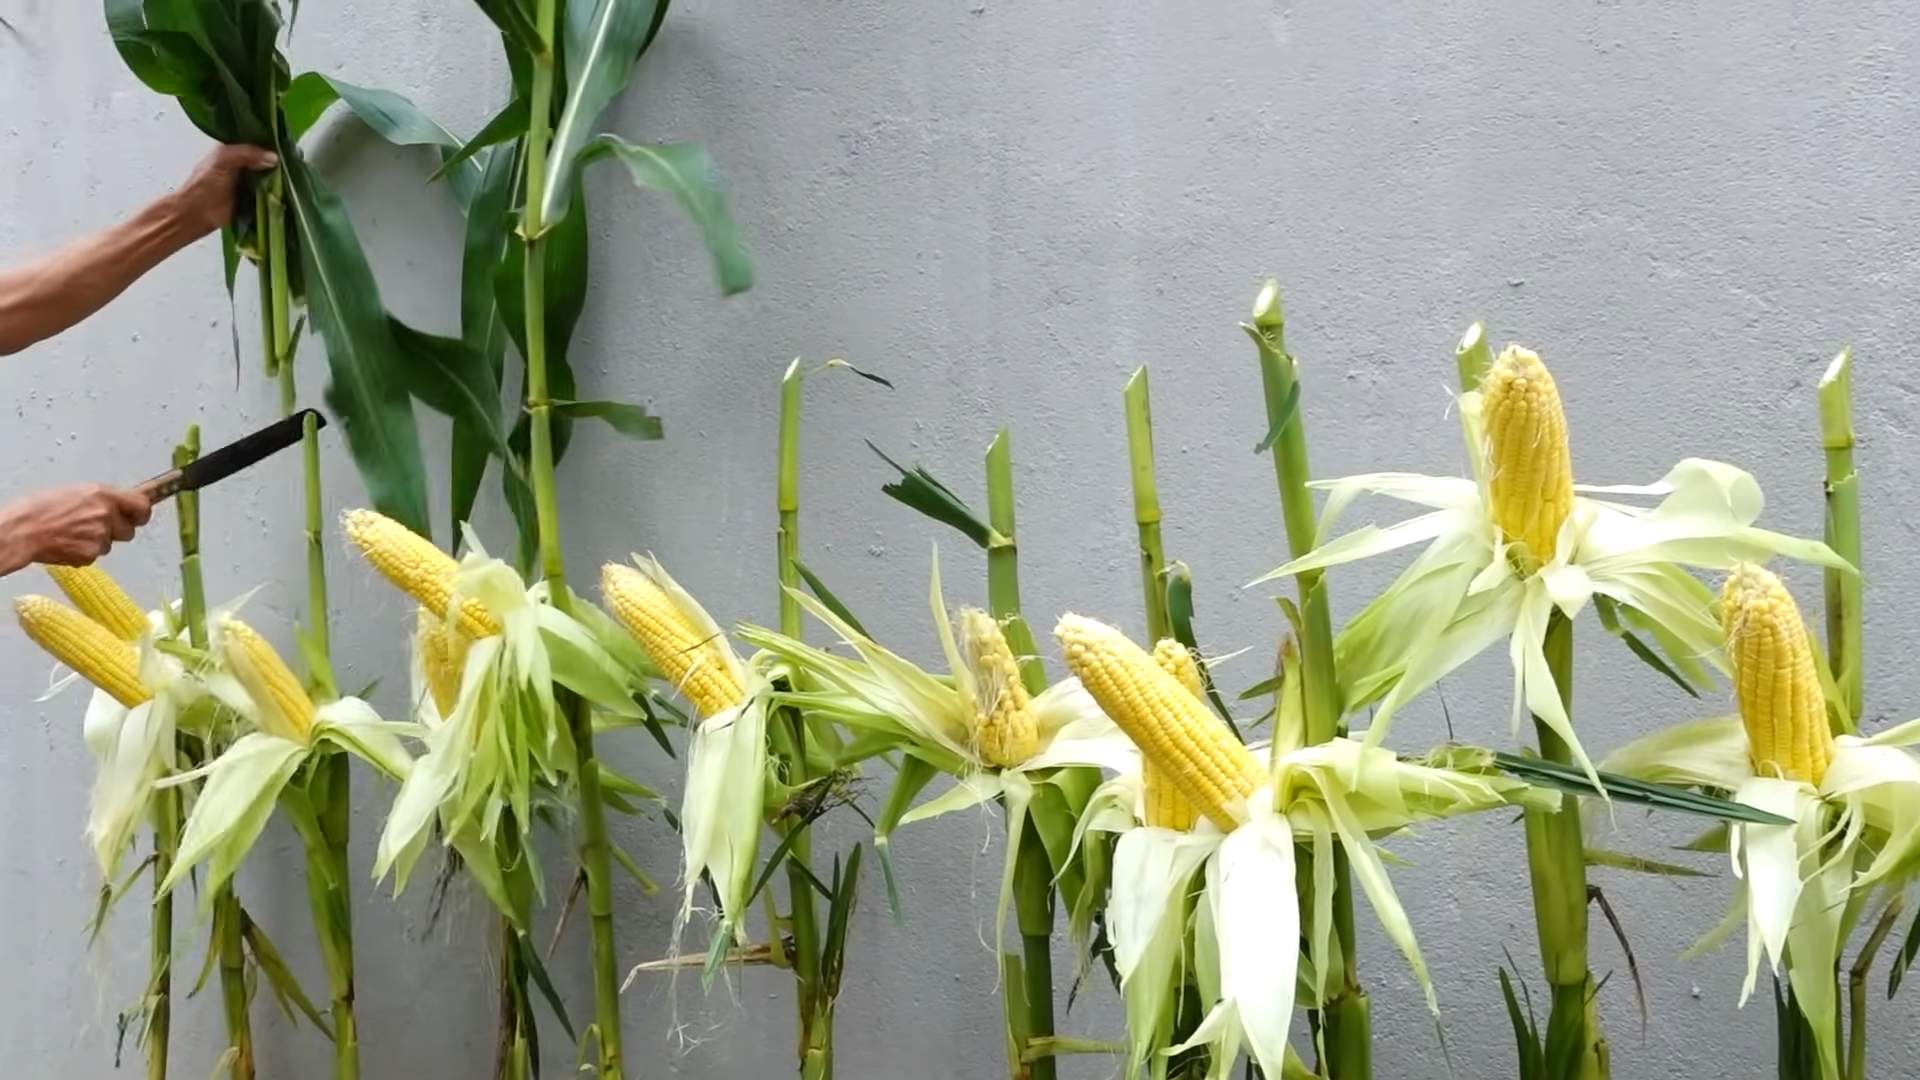
The best way to determine if your corn is ready to harvest is to check the silks. When the silks turn brown and dry, and the ear feels plump and full, it’s likely ready. You can also peel back a portion of the husk and puncture a kernel with your fingernail. If the liquid that comes out is milky, the corn is ripe. If it’s clear, it’s not quite ready. If it’s doughy, it’s overripe.
8. Can I grow other vegetables or herbs alongside corn in containers on concrete?
Yes, you can definitely grow companion plants alongside corn in containers. Good companion plants for corn include beans, squash, and cucumbers. These plants can help improve soil fertility, suppress weeds, and deter pests. Herbs like basil, oregano, and thyme can also be beneficial. Avoid planting plants that compete with corn for nutrients or sunlight, such as sunflowers or tomatoes.
9. What size containers are recommended for growing corn on concrete?
For growing corn on concrete, use large containers that are at least 12-18 inches in diameter and depth. This will provide enough space for the roots to grow and develop properly. Choose containers made of durable materials that can withstand the weight of the soil and plants, such as plastic, ceramic, or wood. Ensure that the containers have drainage holes to prevent waterlogging.
10. How can I support the corn stalks to prevent them from falling over, especially in windy conditions?
Corn stalks can be prone to falling over, especially in windy conditions. To provide support, you can use stakes or trellises. Insert stakes into the soil near the base of the plants and tie the stalks to the stakes with twine. You can also use a trellis to provide additional support. Another option is to plant the corn close together, which will help them support each other.

Leave a Comment