
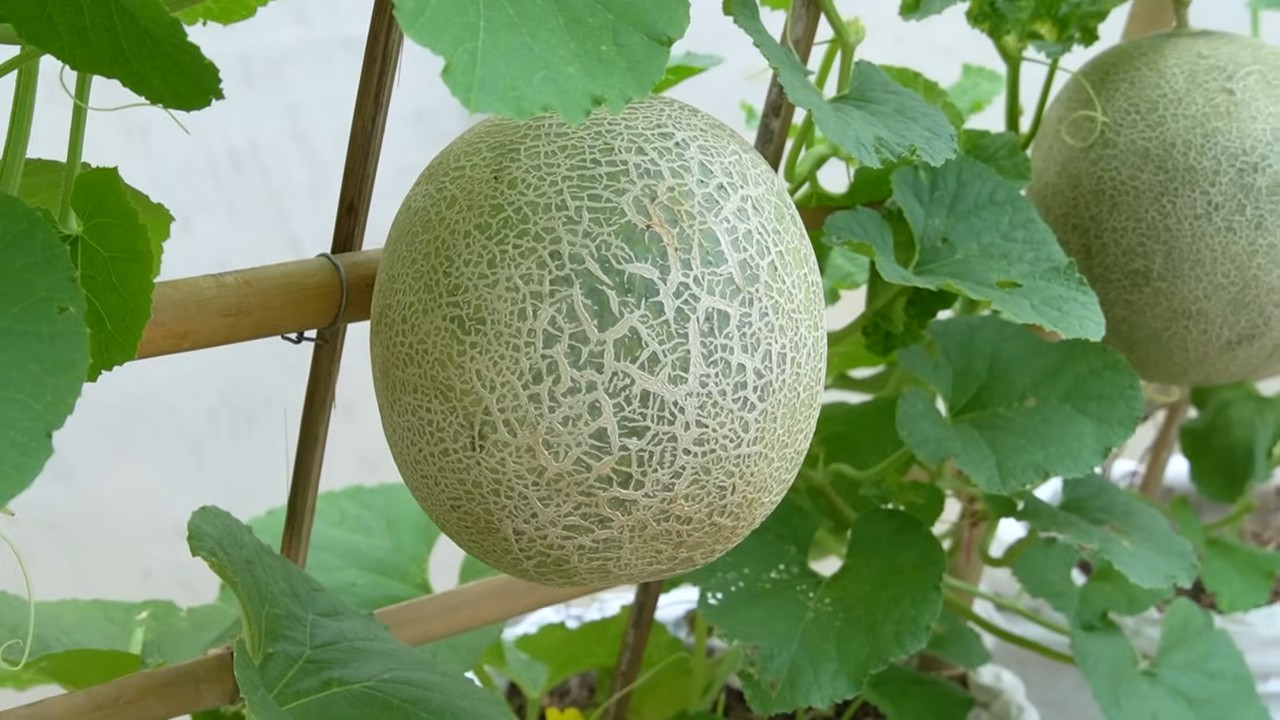
Growing cantaloupes in bags might sound unconventional, but trust me, it’s a game-changer for home gardeners like us! Are you dreaming of juicy, sweet cantaloupes bursting with flavor, but limited by space or less-than-ideal soil? Well, you’re in the right place. Forget sprawling vines taking over your garden; this DIY trick lets you enjoy homegrown cantaloupes even on a small balcony or patio.
The idea of container gardening, including using bags, has been around for centuries, with roots in ancient practices of cultivating plants in portable vessels. While not specifically for cantaloupes, the ingenuity of adapting growing methods to suit available resources is a timeless tradition. Today, with increasing urbanization and a desire for fresh, locally-sourced food, the need for innovative gardening solutions is greater than ever.
Let’s face it, growing cantaloupes can be tricky. They need warmth, plenty of sunshine, and well-drained soil. Many of us struggle with poor soil quality or limited space, making traditional in-ground gardening a challenge. That’s where this DIY hack comes in! Growing cantaloupes in bags offers a simple, effective way to overcome these obstacles. I’m excited to share my step-by-step guide to help you cultivate delicious cantaloupes right at home, no matter your gardening experience. Get ready to enjoy the sweet taste of success!
Growing Watermelons in Sacks: An Unconventional but Rewarding Method
I love watermelons! And I love trying out new growing methods. That’s why I was so excited when I heard about the idea of growing watermelons in sacks. It may sound strange, but it’s actually a great way to save space, maintain control over soil conditions, and even speed up the harvest. Here, I’ll show you how you can do it yourself!
What You Need
Before we get started, make sure you have everything you need. This will save time and frustration.
- Watermelon seeds or young plants: Choose a variety that is suitable for your climate. Smaller varieties like ‘Sugar Baby’ are particularly well-suited for growing in sacks.
- Large, sturdy sacks: I recommend jute sacks, fabric grow bags, or even large, sturdy trash bags (make sure they are UV-resistant if you use them outdoors). The sacks should have a capacity of at least 60 liters, or even better, 80-100 liters. The bigger, the better for the roots!
- High-quality potting soil: Use a well-draining potting soil that is rich in organic matter. I like to mix my own blend of potting soil, compost, and coco coir.
- Compost: Compost is worth its weight in gold! It provides your watermelon plants with essential nutrients and improves the soil structure.
- Slow-release fertilizer: A slow-release fertilizer ensures a continuous supply of nutrients throughout the growing season.
- Pruning shears: For pruning the vines.
- Watering can or garden hose: For watering your plants.
- Trellis (optional): Watermelon vines can get quite long. A trellis helps to support them and save space. You can use a simple bamboo stake, a trellis, or even a tomato cage.
- Mulch (optional): Mulch helps to retain moisture in the soil and suppress weeds. I like to use straw or wood chips.
Preparation: The Key to Success
Proper preparation is crucial for the success of your watermelon-in-a-sack project.
- Choose the right location: Watermelons need a lot of sun! Choose a location that receives at least 6-8 hours of direct sunlight per day. Also, make sure the location is protected from wind, as strong winds can damage the vines.
- Prepare the sacks: If you are using trash bags, make sure they are clean and free of holes. Cut several drainage holes in the bottom of the sacks so that excess water can drain out.
- Fill the sacks with soil: Mix the potting soil with compost and slow-release fertilizer. Fill the sacks to about 5-10 cm below the rim. Press the soil down lightly.
- Water the soil: Water the soil thoroughly until it is well moistened. Let the excess water drain out.
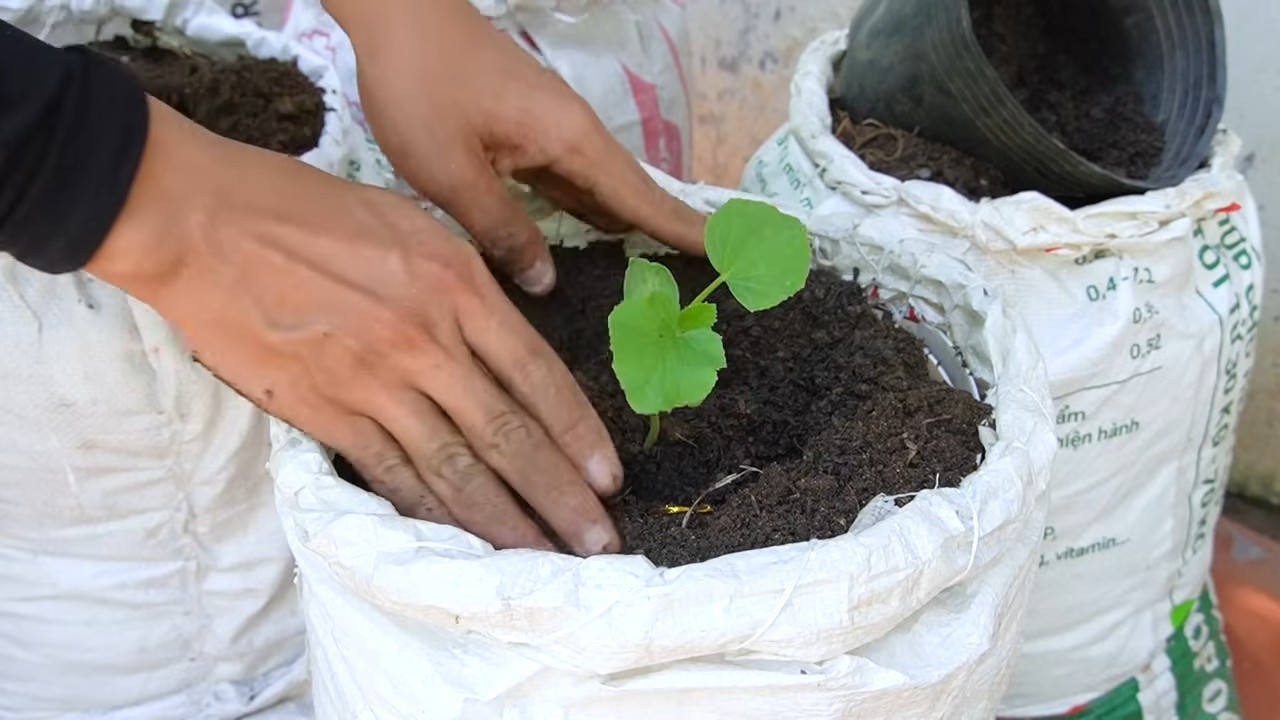
Planting: The Start of Watermelon Happiness
Now comes the exciting part: planting!
- Plant the seeds or young plants: If you are using seeds, sow 2-3 seeds per sack at a depth of about 2-3 cm. If you are using young plants, dig a hole in the soil large enough to accommodate the root ball. Carefully place the young plant in the hole and fill the hole with soil.
- Water the plants: Water the plants thoroughly after planting.
- Mulch the soil (optional): Apply a layer of mulch around the plants to retain moisture and suppress weeds.
- Install a trellis (optional): If you are using a trellis, place it near the plants. Guide the vines along the trellis as soon as they are long enough.
Care: Patience and Attention
Watermelons need regular care to grow well and produce delicious fruit.
- Watering: Watermelons need a lot of water, especially during fruit formation. Water the plants regularly, especially in hot weather. Make sure the soil is moist but not wet. Avoid watering the leaves, as this can promote fungal diseases. I check the soil’s moisture by sticking my finger about 5 cm deep into the soil. If it feels dry, it’s time to water.
- Fertilizing: Watermelons are heavy feeders. Fertilize the plants every 2-3 weeks with a liquid fertilizer rich in potassium and phosphorus. Potassium promotes fruit development, while phosphorus supports root growth.
- Pruning: Prune the vines to encourage fruit production. Remove all side shoots that do not have flowers or fruits. Also, remove any damaged or diseased leaves. I prune the side shoots once they are about 30 cm long.
- Protection from pests and diseases: Watermelons can be affected by various pests and diseases. Check the plants regularly for signs of infestation. If necessary, you can use organic pesticides or fungicides. Be especially watchful for aphids, spider mites, and powdery mildew.
- Pollination: Watermelons need bees or other pollinators to produce fruit. If you don’t have bees in your garden, you can hand-pollinate the flowers. To do this, use a small brush to transfer pollen from the male flowers to the female flowers. Male flowers have a thin stem, while female flowers have a small, undeveloped fruit directly below the blossom.
- Fruit support: As the watermelons get larger, it may be necessary to support them to prevent the vines from breaking. You can use old pantyhose, nets, or special fruit cradles for this.
The Harvest: The Reward for the Effort
Harvesting is the most exciting part of growing watermelons!
- Determine ripeness: There are several signs that indicate a watermelon is ripe. The underside of the watermelon that rests on the ground should be a yellowish-white color. When you tap the watermelon, it should sound hollow. The tendril connected to the watermelon should be dry and brown.
- Harvest the watermelon: Cut the watermelon from the vine with pruning shears. Leave a small piece of the stem on the watermelon.
- Enjoy your harvest: Cut open the watermelon and enjoy the sweet, juicy taste!
Additional Tips and Tricks
Be patient: Growing watermelons takes time and patience. Don’t be discouraged if it doesn’t work out right away. With a little practice, you will soon be growing your own.
Use dark sacks: Dark sacks absorb more heat and can accelerate plant growth.
Rotate the sacks regularly: Turn the sacks every few days to ensure that all sides of the plants receive enough sunlight.
Use drip irrigation: Drip irrigation is an efficient way to supply the plants with water and save water.
Experiment with different varieties: Try different watermelon varieties to find out which ones grow best in your climate and in sacks.
Conclusion
So, there you have it! Growing cantaloupes in bags might sound unconventional, but as we’ve explored, it’s a game-changer for gardeners facing space constraints, challenging soil conditions, or simply seeking a more controlled growing environment. This DIY trick isn’t just about convenience; it’s about unlocking the potential for a bountiful harvest of sweet, juicy cantaloupes, regardless of your garden’s limitations.
Why is this a must-try? Because it empowers you to cultivate these delicious melons even if you’re limited to a balcony, patio, or small yard. The bags provide excellent drainage, preventing root rot, a common problem with cantaloupes. They also allow you to customize the soil mix, ensuring your plants receive the precise nutrients they need to thrive. Plus, the portability of the bags means you can easily move your cantaloupes to chase the sun or shelter them from unexpected weather.
But don’t stop there! Experiment with different bag sizes to see what works best for your cantaloupe variety. Try adding slow-release fertilizer to the soil mix for sustained feeding. Consider using a trellis or support system to keep the vines off the ground and improve air circulation, further reducing the risk of disease. You can even explore different types of bags, such as grow bags made from breathable fabric, which can enhance root aeration. For those in cooler climates, dark-colored bags can help absorb heat and extend the growing season.
Ultimately, the key to success with growing cantaloupes in bags lies in careful observation and adaptation. Pay attention to your plants’ needs, adjust your watering and feeding schedule accordingly, and don’t be afraid to experiment. The rewards – the taste of homegrown, sun-ripened cantaloupe – are well worth the effort.
We wholeheartedly encourage you to give this DIY trick a try. It’s a fun, rewarding, and surprisingly effective way to enjoy fresh cantaloupes, no matter where you live. And once you’ve experienced the joy of harvesting your own melons, we’d love to hear about it! Share your experiences, tips, and photos with us in the comments below. Let’s build a community of bag-grown cantaloupe enthusiasts and learn from each other’s successes (and occasional setbacks!). Happy gardening!
Frequently Asked Questions (FAQ)
What size bag is best for growing cantaloupes?
The ideal bag size depends on the cantaloupe variety you’re growing. For smaller, personal-sized cantaloupes, a 10-gallon bag might suffice. However, for larger varieties, we recommend using at least a 15-gallon bag, and even a 20-gallon bag would be preferable. The larger the bag, the more room the roots have to grow, leading to a healthier and more productive plant. Ensure the bag is sturdy enough to support the weight of the soil and the mature plant.
What type of soil should I use in the bags?
Cantaloupes thrive in well-draining, nutrient-rich soil. A good mix would be equal parts of high-quality potting mix, compost, and perlite or vermiculite. The potting mix provides a good base, the compost adds essential nutrients, and the perlite or vermiculite improves drainage and aeration. Avoid using garden soil directly in the bags, as it can become compacted and hinder root growth. You can also amend the soil with slow-release fertilizer to provide a steady supply of nutrients throughout the growing season.
How often should I water cantaloupes grown in bags?
Watering frequency depends on the weather, the size of the bag, and the stage of plant growth. Generally, you should water deeply whenever the top inch of soil feels dry to the touch. During hot, sunny weather, you may need to water daily, especially if the bags are exposed to direct sunlight. Avoid overwatering, as this can lead to root rot. Ensure the bags have adequate drainage holes to prevent water from pooling at the bottom. A good rule of thumb is to water until you see water draining from the bottom of the bag.
Do cantaloupes grown in bags need support?
Yes, cantaloupes are vining plants and can become quite heavy as the fruits develop. Providing support, such as a trellis or cage, is highly recommended. This will help keep the vines off the ground, improve air circulation, and reduce the risk of disease. You can train the vines to grow up the trellis or use slings to support the developing melons. Without support, the fruits may rot if they come into contact with the soil.
How much sunlight do cantaloupes need when grown in bags?
Cantaloupes need at least 6-8 hours of direct sunlight per day to thrive. Choose a location for your bags that receives ample sunlight throughout the day. If you live in a particularly hot climate, you may need to provide some afternoon shade to prevent the plants from overheating. The portability of the bags allows you to easily move them to optimize sunlight exposure.
How do I fertilize cantaloupes grown in bags?
Cantaloupes are heavy feeders and require regular fertilization. Start with a slow-release fertilizer incorporated into the soil mix at planting time. Then, supplement with liquid fertilizer every 2-3 weeks throughout the growing season. Use a balanced fertilizer during the vegetative growth stage and switch to a fertilizer higher in phosphorus and potassium during flowering and fruiting. Avoid over-fertilizing, as this can lead to excessive foliage growth at the expense of fruit production.
How do I know when my cantaloupe is ripe?
Determining when a cantaloupe is ripe can be tricky, but there are a few key indicators to look for. The most reliable sign is the “slip.” A ripe cantaloupe will easily detach from the vine with a gentle tug. Other indicators include a change in color from green to tan or yellow, a sweet aroma near the stem end, and a slight softening of the blossom end. Avoid picking cantaloupes that are still hard or green, as they will not ripen properly off the vine.
Can I grow cantaloupes in bags indoors?
While it’s possible to grow cantaloupes in bags indoors, it’s challenging due to the high light requirements. You would need to provide supplemental lighting with powerful grow lights to mimic the intensity of sunlight. Additionally, you would need to hand-pollinate the flowers, as there would be no natural pollinators indoors. Growing cantaloupes in bags is generally more successful outdoors, where they can receive ample sunlight and natural pollination.
What are some common pests and diseases that affect cantaloupes grown in bags?
Common pests that can affect cantaloupes include aphids, squash bugs, and vine borers. Diseases include powdery mildew, downy mildew, and fusarium wilt. Regularly inspect your plants for signs of pests or diseases and take appropriate action. You can use organic pest control methods, such as insecticidal soap or neem oil, to control pests. To prevent diseases, ensure good air circulation, avoid overwatering, and use disease-resistant varieties.
Can I reuse the bags for growing cantaloupes next year?
Yes, you can reuse the bags for growing cantaloupes or other plants next year, provided they are still in good condition. Before reusing the bags, empty them and remove any remaining plant debris. Wash the bags thoroughly with soap and water to remove any soil or pathogens. Allow the bags to dry completely before storing them in a cool, dry place. If the bags are damaged or torn, it’s best to replace them with new ones.

Leave a Comment