
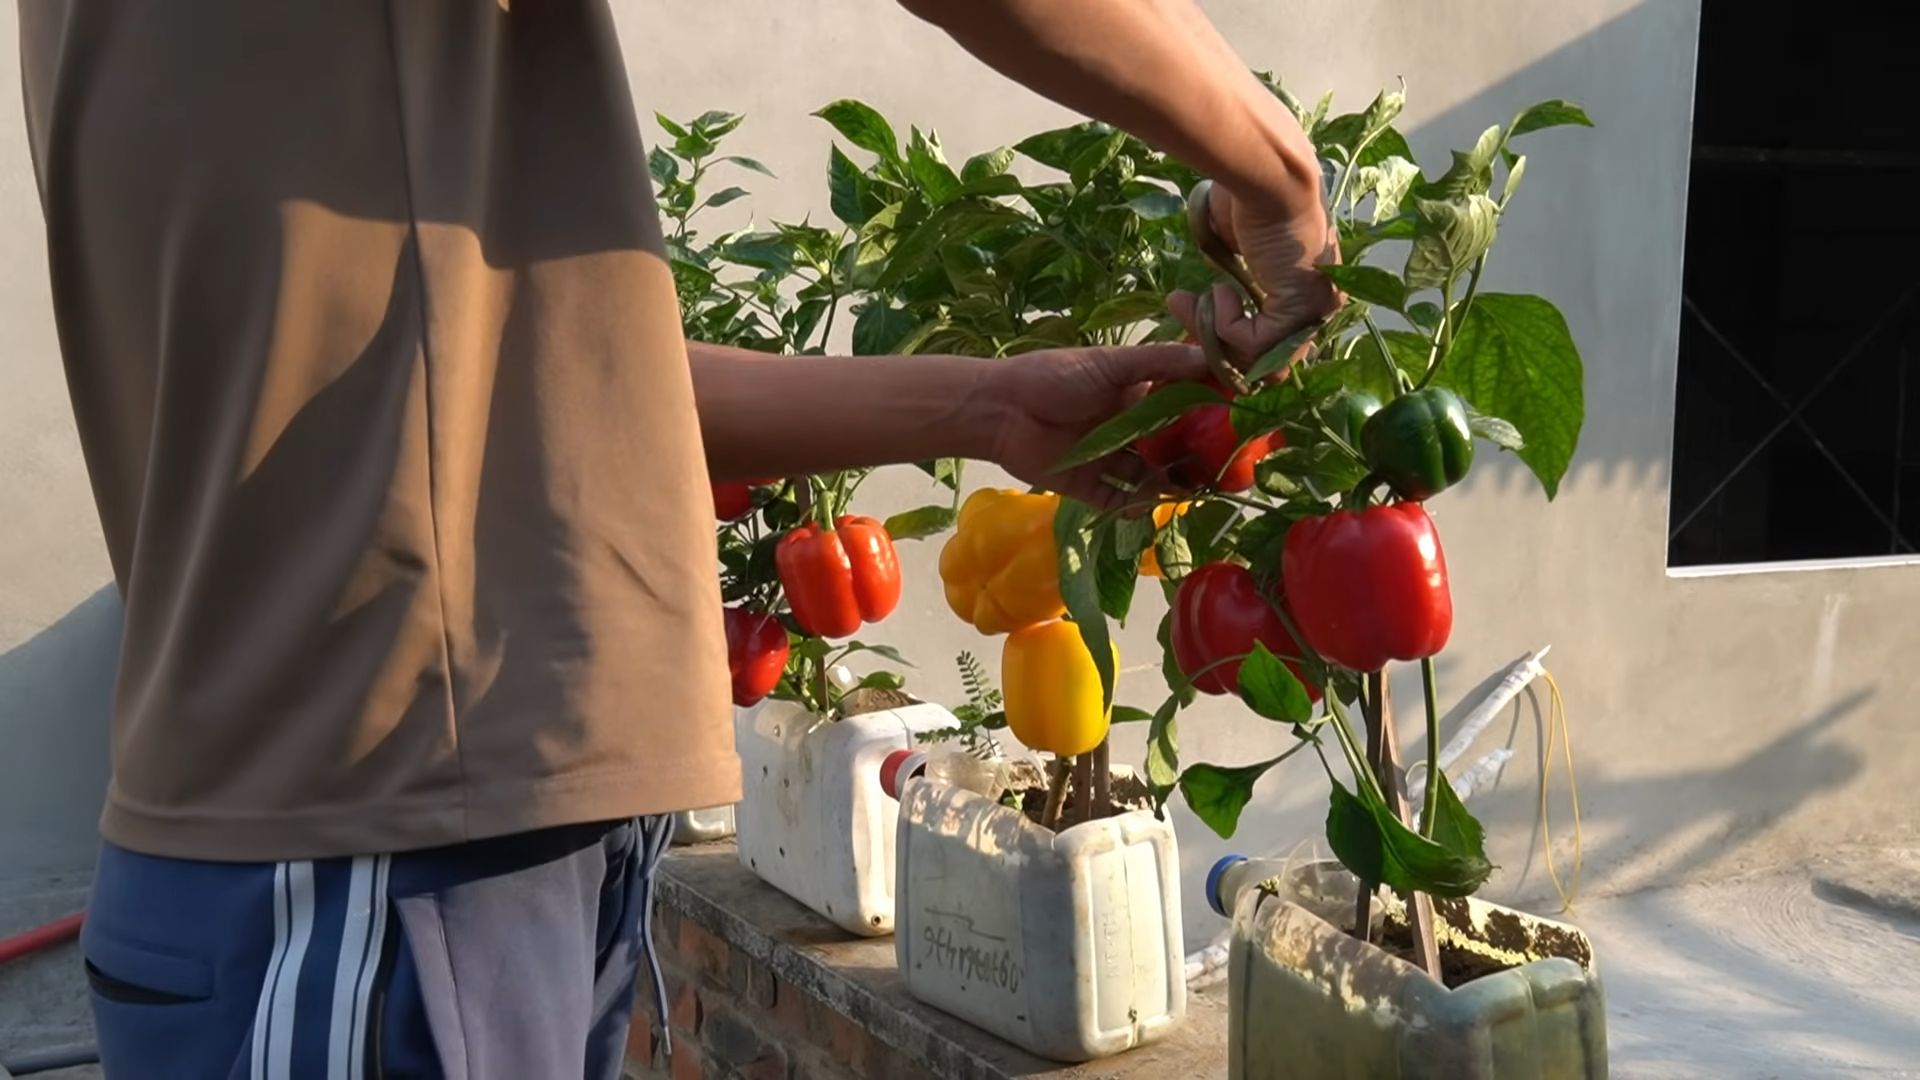
Growing Bell Peppers in Bottles: Sounds a little crazy, right? But trust me, this ingenious DIY trick is about to revolutionize your small-space gardening game! Forget sprawling gardens and endless weeding – we’re taking bell pepper cultivation vertical and compact.
For centuries, humans have sought innovative ways to cultivate food, adapting to diverse environments and limited resources. From ancient terraced farming to modern hydroponics, the drive to nurture life from the earth has always been a part of us. While I can’t pinpoint the exact origin of bottle gardening, the spirit of resourcefulness it embodies is timeless. It’s a testament to our ability to find creative solutions, even with the most humble materials.
Why should you try growing bell peppers in bottles? Well, imagine enjoying fresh, vibrant bell peppers straight from your balcony, patio, or even a sunny windowsill! This method is perfect for apartment dwellers, urban gardeners, or anyone looking to maximize their yield in a limited space. Plus, it’s an incredibly rewarding project that’s both eco-friendly and budget-friendly. We’ll show you how to repurpose plastic bottles, reduce waste, and cultivate delicious bell peppers, all while adding a touch of green to your surroundings. Get ready to unleash your inner gardener and discover the magic of bottle-grown bell peppers!
Growing Bell Peppers in Bottles: A Fun and Space-Saving DIY Project
Hey there, fellow gardening enthusiasts! I’m super excited to share a really cool and surprisingly effective way to grow bell peppers, especially if you’re short on space or just looking for a unique gardening project: growing them in bottles! Yes, you read that right. We’re turning those discarded plastic bottles into mini pepper paradises. This method is not only eco-friendly but also allows you to control the growing environment more easily. Let’s dive in!
What You’ll Need
Before we get our hands dirty, let’s gather all the necessary supplies. Trust me, having everything ready beforehand will make the whole process much smoother.
* Plastic Bottles: The star of the show! I recommend using 2-liter soda bottles or larger water bottles. The bigger, the better, as it gives the roots more room to grow. Make sure they’re clean and free of any sticky residue.
* Bell Pepper Seeds or Seedlings: You can start from seeds or buy young seedlings from a nursery. If you’re starting from seeds, you’ll need to start them indoors a few weeks before you plan to transplant them into the bottles.
* Potting Mix: Use a high-quality potting mix that’s well-draining. Avoid using garden soil, as it can become compacted in the bottles and hinder root growth.
* Scissors or a Utility Knife: For cutting the bottles. Be careful!
* Drill or Nail and Hammer: To create drainage holes.
* Watering Can or Spray Bottle: For watering your pepper plants.
* Fertilizer: A balanced liquid fertilizer to feed your plants.
* Small Rocks or Gravel: For drainage at the bottom of the bottles.
* Optional: Twine or string for supporting the plants as they grow.
Preparing the Bottles
This is where we transform those ordinary bottles into miniature greenhouses. It’s a simple process, but precision is key.
1. Clean the Bottles: Thoroughly wash the bottles with soap and water to remove any dirt or residue. Rinse them well and let them dry completely. This is crucial to prevent any mold or bacteria from affecting your plants.
2. Cut the Bottles: Using your scissors or utility knife, carefully cut the bottle in half horizontally. You’ll be using the bottom half as the main container and the top half as a sort of mini-greenhouse cover initially. I usually cut mine about two-thirds of the way down, leaving more of the bottle for the base.
3. Create Drainage Holes: This is super important! Bell peppers don’t like sitting in soggy soil. Use your drill or nail and hammer to create several drainage holes in the bottom of the bottle. I usually make about 5-6 holes, evenly spaced.
4. Optional: Prepare the Top Half: If you plan to use the top half of the bottle as a mini-greenhouse, you can poke a few small holes in the cap for ventilation. This will help regulate the humidity and prevent the plants from getting too hot.
Planting Your Bell Peppers
Now for the fun part – planting! This is where your pepper plants will start their journey to becoming delicious, colorful additions to your meals.
1. Add Drainage Layer: Place a layer of small rocks or gravel at the bottom of the bottle. This will help improve drainage and prevent the roots from sitting in water. I usually add about an inch or two of rocks.
2. Fill with Potting Mix: Fill the bottle with potting mix, leaving about an inch of space at the top. Gently pat down the soil to remove any air pockets.
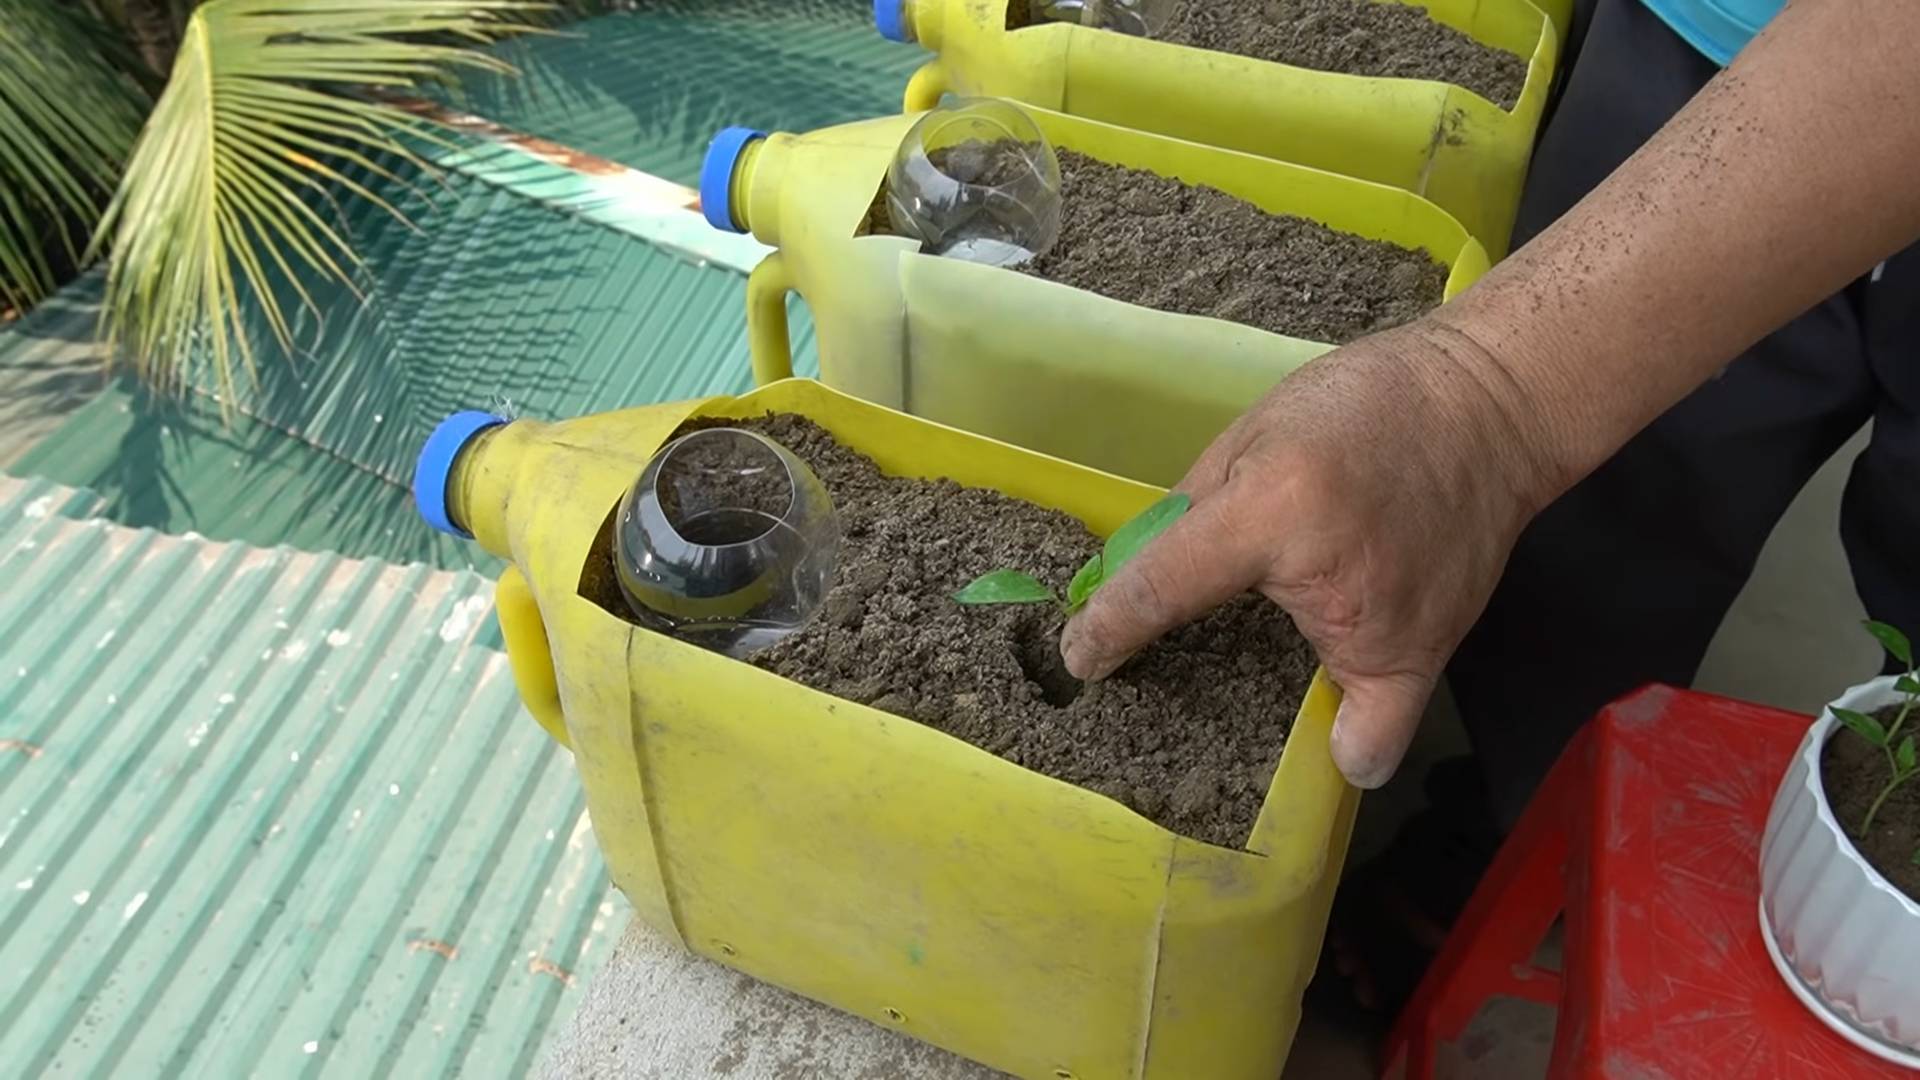
3. Plant Your Seeds or Seedlings:
* From Seeds: If you’re starting from seeds, make a small hole in the soil and plant 2-3 seeds per bottle. Cover them lightly with soil and water gently. You’ll need to thin them out later, keeping the strongest seedling.
* From Seedlings: If you’re using seedlings, carefully remove them from their containers and gently loosen the roots. Make a hole in the soil large enough to accommodate the root ball and place the seedling in the hole. Backfill with soil and gently pat it down.
4. Water Thoroughly: Water the soil thoroughly until water drains out of the drainage holes. This will help settle the soil and ensure that the roots are properly hydrated.
5. Optional: Cover with Top Half: If you’re using the top half of the bottle as a mini-greenhouse, place it over the bottom half. This will help create a warm, humid environment that’s ideal for germination and early growth.
Caring for Your Bell Pepper Plants
This is where the real work begins. Consistent care is essential for healthy, productive bell pepper plants.
1. Sunlight: Bell peppers need at least 6-8 hours of sunlight per day. Place your bottles in a sunny location, such as a windowsill, balcony, or patio. If you don’t have enough natural light, you can supplement with grow lights.
2. Watering: Water your plants regularly, especially during hot weather. Check the soil moisture by sticking your finger into the soil. If the top inch feels dry, it’s time to water. Avoid overwatering, as this can lead to root rot.
3. Fertilizing: Feed your plants with a balanced liquid fertilizer every 2-3 weeks. Follow the instructions on the fertilizer label. I like to use a fertilizer that’s specifically formulated for vegetables.
4. Ventilation: If you’re using the top half of the bottle as a mini-greenhouse, make sure to remove it occasionally to provide ventilation. This will help prevent the plants from getting too hot and humid. Once the plant outgrows the top half, remove it completely.
5. Support: As your bell pepper plants grow, they may need support to prevent them from falling over. You can use twine or string to tie the plants to a stake or trellis.
6. Pruning: Pruning can help improve air circulation and encourage fruit production. Remove any yellowing or dead leaves. You can also pinch off the suckers that grow between the main stem and the branches.
7. Pest Control: Keep an eye out for pests, such as aphids, spider mites, and whiteflies. If you notice any pests, you can try spraying the plants with insecticidal soap or neem oil.
Harvesting Your Bell Peppers
The moment we’ve all been waiting for! Harvesting your own homegrown bell peppers is incredibly rewarding.
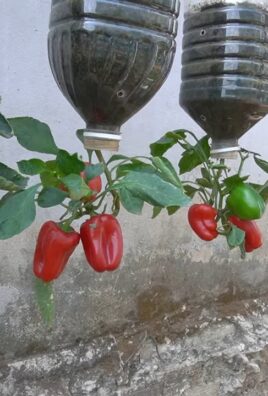
1. Timing: Bell peppers are typically ready to harvest 60-90 days after transplanting, depending on the variety. The peppers should be firm, glossy, and have reached their mature color (green, red, yellow, or orange).
2. Harvesting: Use a sharp knife or scissors to cut the peppers from the plant. Leave a small piece of stem attached to the pepper.
3. Enjoy! Now you can enjoy your delicious, homegrown bell peppers in salads, stir-fries, or any other dish you like.
Troubleshooting
Even with the best care, you might encounter some challenges along the way. Here are a few common problems and how to address them:
* Yellowing Leaves: This could be a sign of overwatering, underwatering, or nutrient deficiency. Check the soil moisture and adjust your watering schedule accordingly. Fertilize your plants with a balanced fertilizer.
* Lack of Fruit: This could be due to insufficient sunlight, poor pollination, or nutrient deficiency. Make sure your plants are getting enough sunlight. You can also try hand-pollinating the flowers by gently shaking the plants or using a small brush to transfer pollen from one flower to another. Fertilize your plants with a fertilizer that’s high in phosphorus.
* Pests: As mentioned earlier, keep an eye out for pests and treat them promptly with insecticidal soap or neem oil.
* Root Rot: This is caused by overwatering and poor drainage. Make sure your bottles have adequate drainage holes and avoid overwatering. If you suspect root rot, you can try transplanting the plant into fresh potting mix.
Tips and Tricks for Success
Here are a few extra tips to help you get the most out of your bottle gardening project:
* Choose the Right Variety: Some bell pepper varieties are better suited for container gardening than others. Look for compact or dwarf varieties.
* Rotate Your Plants: Rotate your bottles regularly to ensure that all sides of the plant receive equal sunlight.
* Mulch: Add a layer of mulch to the top of the soil to help retain moisture and suppress weeds.
* Recycle and Reuse: Don’t throw away your old potting mix! You can compost it and use it to enrich your garden soil.
* Experiment: Don’t be afraid to experiment with different varieties of bell peppers and different growing techniques. The more you experiment, the more you’ll learn.
Growing bell
Conclusion
So, there you have it! Growing bell peppers in bottles isn’t just a quirky gardening experiment; it’s a surprisingly effective and space-saving method that can bring the joy of fresh, homegrown produce to even the smallest of balconies or patios. We’ve explored the step-by-step process, from selecting the right bottle and preparing the soil to transplanting your seedlings and providing ongoing care.
But why is this DIY trick a must-try? Firstly, it’s incredibly accessible. Most of us have plastic bottles lying around, making this a budget-friendly and sustainable way to start gardening. Secondly, it’s a fantastic solution for urban dwellers or anyone with limited garden space. The vertical nature of bottle gardening allows you to maximize your yield without sacrificing precious square footage. Thirdly, it’s a fun and engaging project that can be enjoyed by gardeners of all ages and skill levels. Imagine the satisfaction of harvesting vibrant, juicy bell peppers from bottles you repurposed yourself!
Beyond the basic method, there are plenty of ways to personalize your bottle garden. Consider experimenting with different varieties of bell peppers. Perhaps you’d like to try growing colorful yellow, orange, or even purple peppers alongside the traditional green and red. You could also explore companion planting by adding herbs like basil or thyme to the same bottle. These herbs not only enhance the flavor of your peppers but also help to deter pests. Another variation is to create a tiered bottle garden by stacking multiple bottles on top of each other, creating a visually stunning and highly productive vertical garden. You can also paint the bottles to add a splash of color to your garden, just be sure to use non-toxic paint.
Remember to pay close attention to watering and fertilization. Bell peppers grown in bottles may dry out more quickly than those grown in the ground, so regular watering is essential. Use a balanced fertilizer to provide your plants with the nutrients they need to thrive. And don’t forget to protect your plants from extreme weather conditions, such as frost or excessive heat.
Ultimately, the success of your bottle garden depends on your dedication and attention to detail. But with a little bit of effort, you can enjoy a bountiful harvest of delicious bell peppers right at your doorstep.
We wholeheartedly encourage you to give this DIY trick a try. It’s a rewarding and sustainable way to grow your own food, and it’s a lot of fun! And most importantly, don’t forget to share your experiences with us. We’d love to see photos of your bottle gardens and hear about your successes and challenges. Share your tips and tricks with the community, and let’s inspire each other to grow more food in creative and sustainable ways. So, grab some bottles, get your hands dirty, and start growing your own bell peppers today! This method of growing bell peppers in bottles is a game changer for small space gardening.
Frequently Asked Questions (FAQ)
What type of plastic bottle is best for growing bell peppers?
The ideal plastic bottle for growing bell peppers is a sturdy, food-grade bottle with a capacity of at least 2 liters. Bottles that previously contained soda, juice, or water are generally suitable. Avoid using bottles that have held harsh chemicals or cleaning products, as these may contaminate the soil and harm your plants. Clear or translucent bottles are preferable, as they allow you to monitor the moisture level of the soil. Dark-colored bottles can absorb more heat, which may be beneficial in cooler climates but could overheat the soil in warmer regions. Before using any bottle, thoroughly wash it with soap and water to remove any residue.
How often should I water my bell peppers grown in bottles?
Watering frequency depends on several factors, including the size of the bottle, the type of soil, the weather conditions, and the size of the plant. As a general rule, check the soil moisture level daily by inserting your finger about an inch into the soil. If the soil feels dry to the touch, it’s time to water. Water thoroughly until excess water drains out of the bottom of the bottle. During hot and dry weather, you may need to water your plants more frequently, possibly even twice a day. Avoid overwatering, as this can lead to root rot. A good indicator of overwatering is yellowing leaves or a soggy soil surface.
What kind of soil should I use for growing bell peppers in bottles?
The best type of soil for growing bell peppers in bottles is a well-draining potting mix that is rich in organic matter. Avoid using garden soil, as it can be too heavy and compacted, which can hinder root growth and drainage. A good potting mix should contain a blend of peat moss, perlite, and vermiculite. You can also amend the potting mix with compost or other organic materials to improve its fertility and water-holding capacity. Make sure the soil is slightly acidic to neutral, with a pH between 6.0 and 7.0.
Do I need to fertilize my bell peppers grown in bottles?
Yes, fertilizing is essential for growing healthy and productive bell peppers in bottles. Because the plants are confined to a limited amount of soil, they will quickly deplete the available nutrients. Use a balanced fertilizer that is specifically formulated for vegetables. A fertilizer with an NPK ratio of 10-10-10 or 14-14-14 is a good choice. Apply the fertilizer according to the manufacturer’s instructions, typically every two to three weeks. You can also use organic fertilizers, such as compost tea or fish emulsion. Avoid over-fertilizing, as this can burn the roots and damage the plants.
How much sunlight do bell peppers need when grown in bottles?
Bell peppers require at least six to eight hours of direct sunlight per day to thrive. Choose a location for your bottle garden that receives plenty of sunlight throughout the day. If you live in a very hot climate, you may need to provide some afternoon shade to protect the plants from scorching. If you don’t have access to a sunny location, you can supplement with artificial grow lights.
How do I protect my bell peppers from pests and diseases when grown in bottles?
Regularly inspect your plants for signs of pests or diseases. Common pests that affect bell peppers include aphids, whiteflies, and spider mites. You can control these pests by spraying the plants with insecticidal soap or neem oil. Diseases that can affect bell peppers include blossom end rot, fungal leaf spot, and powdery mildew. To prevent these diseases, ensure good air circulation around the plants, avoid overwatering, and remove any infected leaves. You can also use fungicides to control fungal diseases.
What do I do if my bell pepper plant is not producing fruit?
There are several reasons why your bell pepper plant may not be producing fruit. One common reason is lack of pollination. Bell peppers are self-pollinating, but they may need some help from wind or insects to transfer pollen from the male to the female parts of the flower. You can hand-pollinate your plants by gently shaking the flowers or using a small brush to transfer pollen. Other reasons for lack of fruit production include insufficient sunlight, lack of nutrients, and extreme temperatures. Make sure your plants are getting enough sunlight and fertilizer, and protect them from extreme heat or cold.
Can I overwinter my bell pepper plants grown in bottles?
In some climates, you can overwinter your bell pepper plants grown in bottles. Before the first frost, bring the bottles indoors and place them in a sunny location. Reduce watering and fertilization during the winter months. The plants may not produce fruit during the winter, but they should survive and start producing again in the spring. You can also prune the plants back to encourage new growth.
How do I know when my bell peppers are ripe and ready to harvest?
Bell peppers are typically ready to harvest when they have reached their mature size and color. The color will depend on the variety of pepper you are growing. Green bell peppers are usually harvested when they are firm and glossy. Red, yellow, and orange bell peppers are harvested when they have fully ripened and turned their respective colors. To harvest, use a sharp knife or scissors to cut the pepper from the plant, leaving a small stem attached.
Leave a Comment