
Growing Bean Sprouts at Home is easier than you might think, and I’m here to show you how! Forget those pricey trips to the grocery store for a handful of sprouts. Imagine having a constant supply of fresh, crunchy bean sprouts right on your kitchen counter, ready to add a nutritious boost to your salads, stir-fries, and sandwiches.
Sprouting, in general, has a rich history, dating back thousands of years. Ancient cultures, particularly in Asia, recognized the incredible nutritional value and ease of cultivating sprouts. They were a staple during long voyages and harsh winters when fresh produce was scarce. Think of it as a tiny, edible time capsule of vitamins and minerals!
But why should *you* bother with growing bean sprouts at home? Well, besides the cost savings and the satisfaction of growing your own food, it’s incredibly convenient. You control the growing environment, ensuring they’re free from harmful pesticides and contaminants. Plus, store-bought sprouts can sometimes be a bit…lifeless. With this DIY trick, you’ll have vibrant, flavorful sprouts bursting with goodness. I’m excited to share my simple, step-by-step guide to growing bean sprouts at home, so you can enjoy this healthy and delicious addition to your diet!
Growing Bean Sprouts at Home: A Beginner’s Guide
Hey there, fellow DIY enthusiasts! Ever wanted to grow your own fresh, crunchy bean sprouts right in your kitchen? It’s surprisingly easy, super rewarding, and a fantastic way to add a healthy boost to your meals. Plus, it’s a fun project for kids! Let’s dive into how you can become a bean sprout pro.
What You’ll Need
Before we get started, let’s gather our supplies. The beauty of this project is that you probably already have most of these things lying around.
* **Beans:** Mung beans are the most common and easiest to sprout, but you can also use adzuki beans, lentils, chickpeas, or even radish seeds for a spicier sprout. Make sure they are whole, un-split, and intended for sprouting (not cooking). I usually buy mine from the bulk section of a health food store.
* **Sprouting Jar or Container:** A wide-mouth mason jar works perfectly. You can also use a plastic container with drainage holes. I’ve even seen people use repurposed yogurt containers!
* **Sprouting Lid or Cheesecloth:** You’ll need something to cover the jar while still allowing air circulation and drainage. Sprouting lids are specifically designed for this, but a piece of cheesecloth secured with a rubber band works just as well.
* **Water:** Clean, filtered water is best.
* **Dark Place:** A cupboard, pantry, or even a covered box will do the trick. Darkness is crucial for healthy sprout growth.
* **Colander or Strainer:** For rinsing the sprouts.
Step-by-Step Instructions: From Bean to Sprout!
Okay, let’s get sprouting! This process takes about 3-5 days, so get ready for some quick daily maintenance.
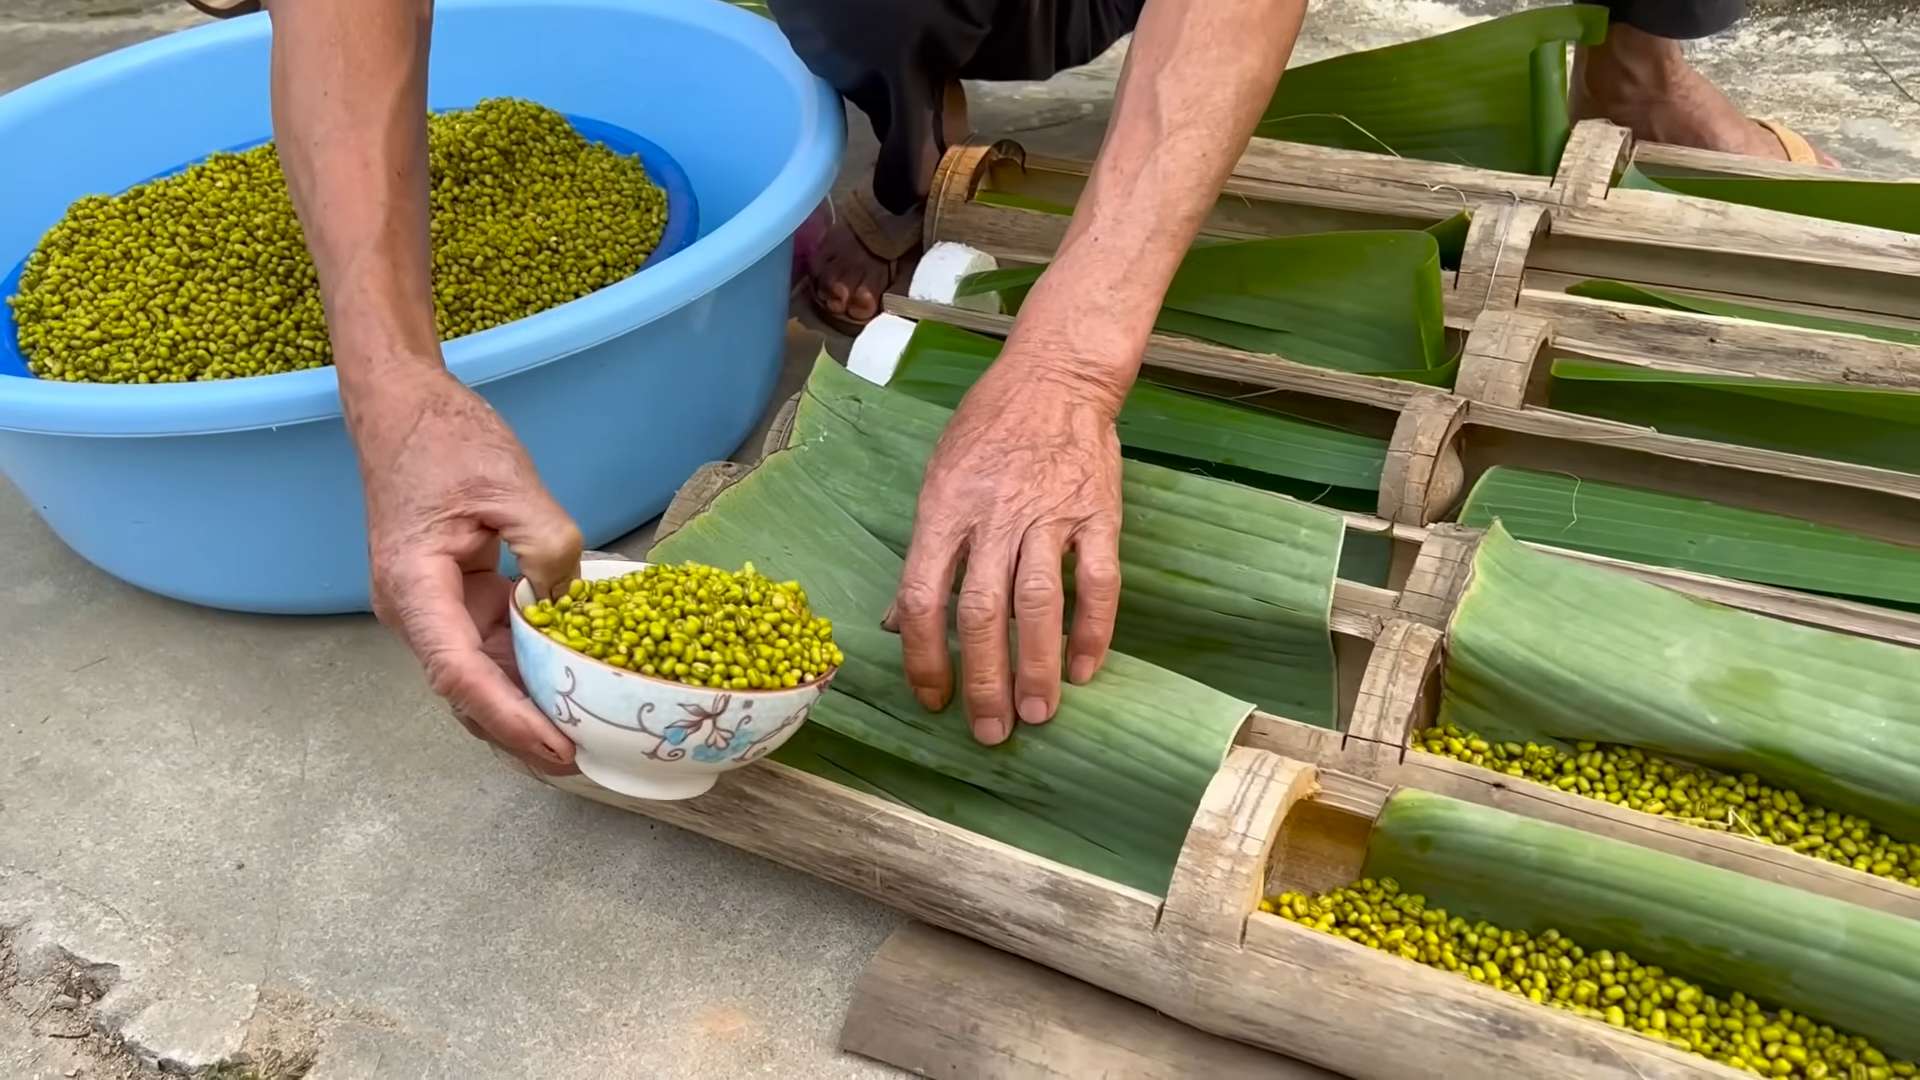
1. **Soaking the Beans:** This is the first and arguably most important step. Place about 1/4 to 1/2 cup of beans in your sprouting jar or container. Cover them with plenty of cool, filtered water – about 2-3 times the volume of the beans. The beans will absorb a lot of water and expand. I usually soak mine overnight, or for at least 8 hours. This kickstarts the germination process.
2. **Draining and Rinsing:** After soaking, drain the water completely. This is where your sprouting lid or cheesecloth comes in handy. Rinse the beans thoroughly with fresh, cool water. Make sure to get all the old water out. This helps prevent mold and keeps your sprouts healthy.
3. **Dark and Damp:** Now, place the jar in a dark, well-ventilated place. The key here is to keep the beans moist but not sitting in water. I usually angle the jar slightly upside down to allow for maximum drainage. This also helps with air circulation.
4. **Rinsing Routine:** This is where the daily maintenance comes in. Rinse the beans with fresh, cool water 2-3 times a day. This is crucial! It keeps them hydrated and prevents mold growth. After each rinse, drain the water thoroughly and return the jar to its dark location. I set a reminder on my phone so I don’t forget.
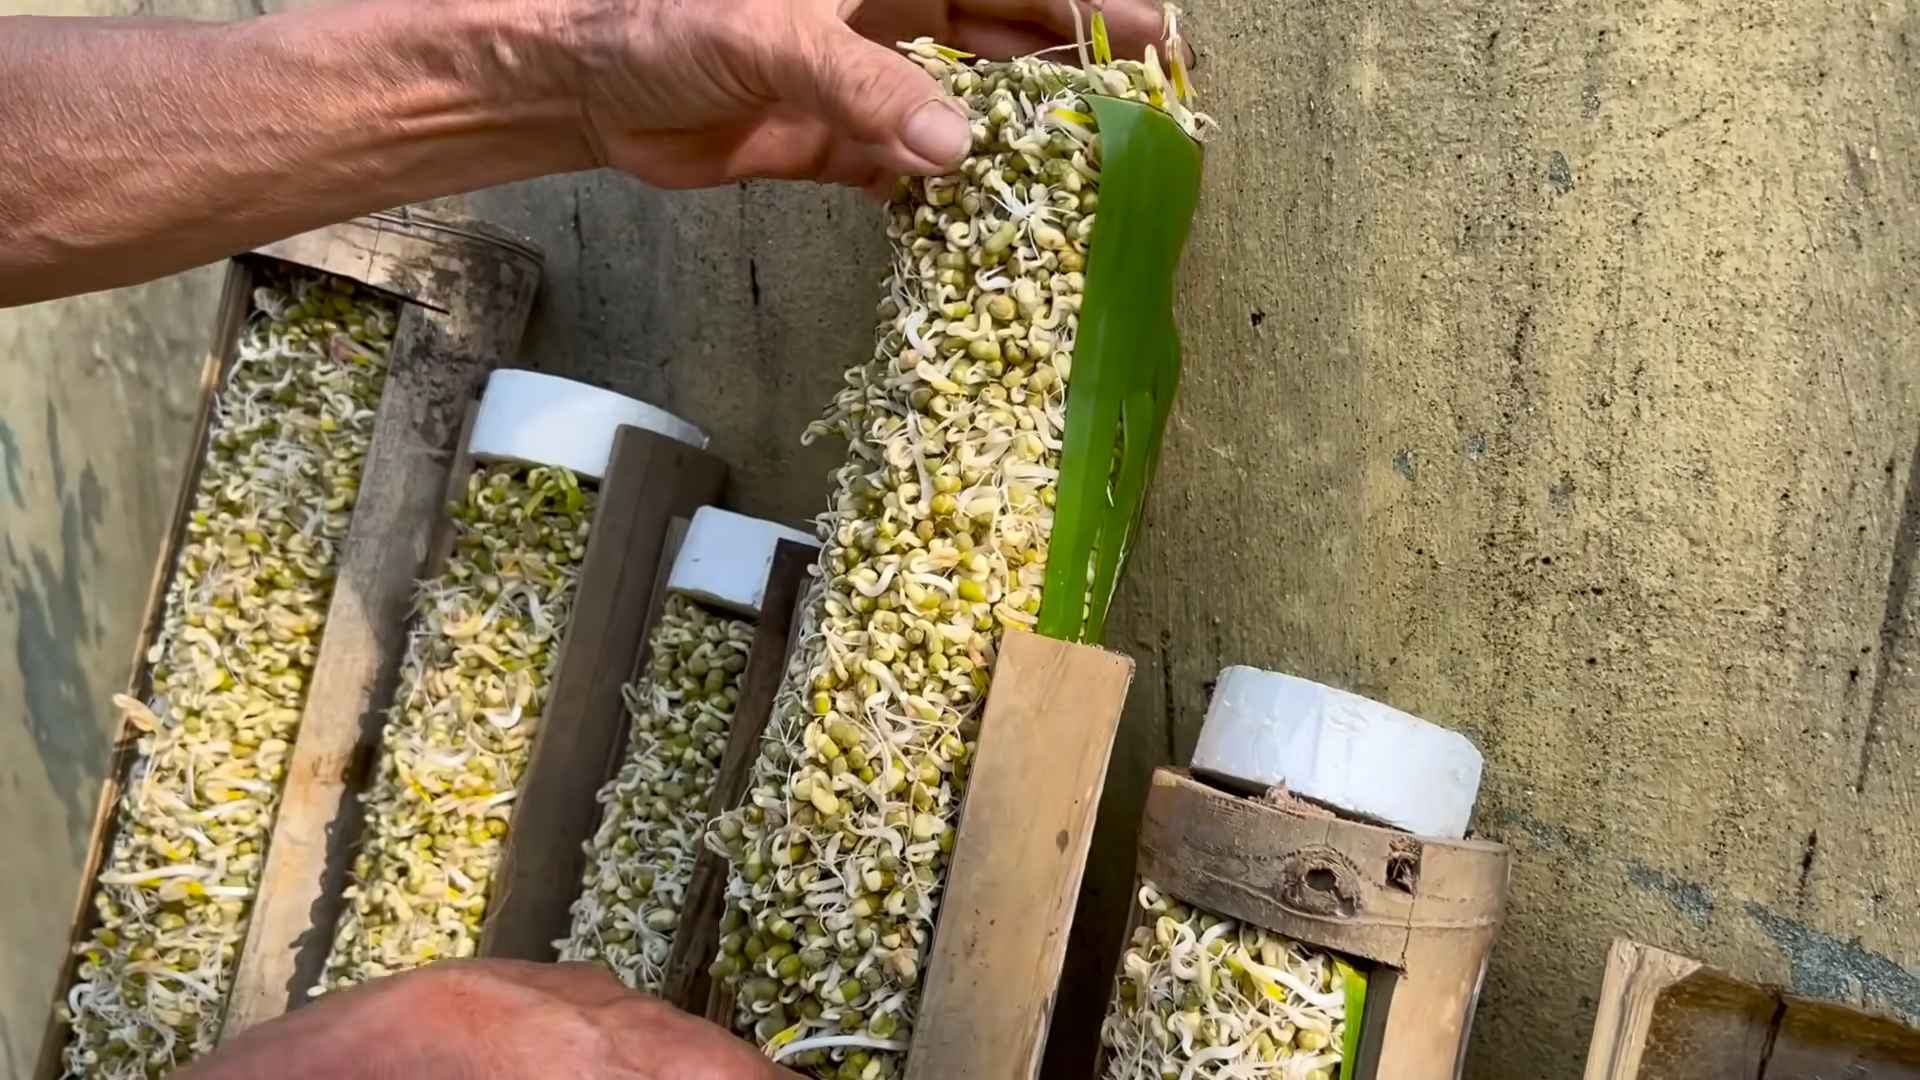
5. **Observe and Enjoy:** After a day or two, you’ll start to see tiny sprouts emerging from the beans. This is so exciting! Continue rinsing and draining as before. The sprouts will grow rapidly over the next few days.
6. **Harvest Time!** Once the sprouts are about 1-2 inches long (or to your liking), they’re ready to harvest. Give them one final rinse and drain.
7. **Greening (Optional):** If you want greener sprouts, you can expose them to indirect sunlight for a few hours before harvesting. This will boost their chlorophyll content and give them a slightly sweeter flavor. Be careful not to expose them to direct sunlight, as this can overheat them.
8. **Storage:** Store your harvested bean sprouts in the refrigerator in an airtight container. They should last for about a week. I usually line the container with a paper towel to absorb any excess moisture.
Troubleshooting: Common Issues and Solutions
Sometimes, things don’t go exactly as planned. Here are some common issues you might encounter and how to fix them:
* **Mold:** This is the biggest concern. Mold usually appears as fuzzy white or gray patches. If you see mold, unfortunately, you’ll need to discard the entire batch. To prevent mold, make sure you’re rinsing the sprouts thoroughly 2-3 times a day and ensuring good drainage. Also, make sure your sprouting container is clean. I wash mine with soap and hot water before each batch.
* **Unpleasant Smell:** A sour or musty smell is another sign of potential mold or bacterial growth. Again, discard the batch and start over, paying close attention to rinsing and drainage.
* **Slow Growth:** If your sprouts are growing slowly, it could be due to several factors. Make sure they’re in a dark place and that the temperature is consistent. Extremely hot or cold temperatures can inhibit growth. Also, ensure you’re using fresh, viable beans. Old beans may not sprout well.
* **Dry Sprouts:** If the sprouts look dry and shriveled, you’re not rinsing them often enough. Increase the frequency of rinsing to 3-4 times a day.
* **Bitter Taste:** Sometimes, bean sprouts can have a slightly bitter taste. This is usually due to the presence of certain compounds in the beans. Blanching the sprouts in boiling water for a few seconds before eating can help reduce the bitterness.
Tips and Tricks for Sprout Success
Here are a few extra tips to help you become a bean sprout master:
* Use high-quality beans. The fresher the beans, the better the germination rate.
* Don’t overcrowd the jar. Start with a small amount of beans (1/4 to 1/2 cup) to allow for adequate air circulation.
* Experiment with different beans and seeds. Once you’ve mastered mung beans, try sprouting other varieties like adzuki beans, lentils, or even radish seeds.
* Keep everything clean. A clean sprouting container and fresh water are essential for preventing mold and bacteria growth.
* Be patient. Sprouting takes time, so don’t get discouraged if your first batch isn’t perfect. Keep practicing, and you’ll get the hang of it.
* Enjoy your sprouts! Add them to salads, sandwiches, stir-fries, or soups for a healthy and delicious boost.
Beyond Mung Beans: Expanding Your Sprouting Horizons
While mung beans are a great starting point, the world of sprouting is vast and exciting! Here are a few other options to explore:
* **Adzuki Beans:** These have a slightly sweeter and nuttier flavor than mung beans. They sprout similarly but may take a little longer.
* **Lentils:** Lentil sprouts are a great source of protein and fiber. They’re also relatively easy to sprout.
* **Chickpeas:** Chickpea sprouts have a slightly earthy flavor and are a good source of nutrients. They require a bit more attention to prevent mold.
* **Radish Seeds:** For a spicy kick, try sprouting radish seeds. They sprout quickly and add a zesty flavor to salads and sandwiches.
* **Alfalfa Seeds:** Alfalfa sprouts are delicate and mild-flavored. They’re a good source of vitamins and minerals.
* **Broccoli Seeds:** Broccoli sprouts are packed with antioxidants and are said to have numerous health benefits.
When sprouting different types of seeds, it’s important to research their specific needs. Some seeds require different soaking times or rinsing frequencies.
Incorporating Bean Sprouts into Your Diet
Now that you’re growing your own bean sprouts, let’s talk about how to enjoy them! They’re incredibly versatile and can be added to a wide variety of dishes.
* **Salads:** Add a handful of bean sprouts to your favorite salad for a crunchy and refreshing boost.
* **Sandwiches:** Bean sprouts make a great addition to sandwiches and wraps.
* **Stir-fries:** Toss bean sprouts into stir-fries for added texture and flavor.
* **Soups:** Add bean sprouts to soups just before serving to retain their crunch.
* **Spring Rolls:** Bean sprouts are a classic ingredient in spring rolls.
* **Smoothies:** For a nutritional boost, add a small handful of bean sprouts to your smoothies.
Remember to always rinse your bean sprouts thoroughly before eating them. And if you’re concerned about food safety, you can blanch them in boiling water for a few seconds before consuming them.
Final Thoughts
Growing bean sprouts at home is a simple, rewarding, and healthy activity. With a little practice and patience, you’ll be enjoying fresh, crunchy sprouts in no time. So, grab some beans, a jar, and get sprouting! Happy growing!
Conclusion
So, there you have it! Growing bean sprouts at home is not only incredibly easy and cost-effective, but it also provides you with a constant supply of fresh, nutritious sprouts right at your fingertips. Forget those wilted, overpriced sprouts from the grocery store. With just a few simple supplies and a little patience, you can cultivate your own vibrant batch of crunchy goodness.
Why is this DIY trick a must-try? Because it empowers you to take control of your food source, ensuring freshness and quality. You know exactly what’s going into your sprouts – no hidden preservatives or questionable additives. Plus, the satisfaction of watching those tiny seeds transform into edible sprouts is surprisingly rewarding. It’s a mini-gardening project that yields delicious results in just a few days!
Beyond the basic mung bean sprouts, don’t be afraid to experiment! Try sprouting other types of beans and seeds like adzuki beans, lentils, alfalfa, or even radish seeds for a peppery kick. Each variety offers a unique flavor and texture profile, adding exciting dimensions to your salads, sandwiches, stir-fries, and more. Consider adding a touch of lemon juice to the rinsing water for a brighter flavor, or even a pinch of sea salt to enhance the natural sweetness of the sprouts.
For a spicier variation, try adding a few drops of hot sauce to the rinsing water during the last day or two of sprouting. This will infuse the sprouts with a subtle heat that’s perfect for adding a zing to your meals. You can also experiment with different sprouting containers. While a mason jar works perfectly well, you can also use a dedicated sprouting tray or even a colander lined with cheesecloth. The key is to ensure proper drainage and ventilation to prevent mold growth.
Growing bean sprouts at home is a fantastic way to boost your nutrient intake, reduce food waste, and connect with the natural world. It’s a simple yet powerful skill that can transform your kitchen into a mini-farm.
We wholeheartedly encourage you to give this DIY trick a try. It’s easier than you think, and the rewards are well worth the effort. Once you’ve mastered the basics, you’ll be amazed at how versatile and delicious homemade bean sprouts can be.
Don’t just take our word for it – experience the joy of growing your own bean sprouts firsthand! And when you do, we’d love to hear about your experience. Share your photos, tips, and variations in the comments below. Let’s build a community of sprout enthusiasts and inspire others to embrace the magic of home sprouting! What are you waiting for? Get sprouting!
Frequently Asked Questions (FAQ)
What types of beans can I sprout?
You can sprout a wide variety of beans and seeds, but some are more common and easier to sprout than others. Mung beans are the most popular and readily available option, known for their mild flavor and quick sprouting time. Other excellent choices include adzuki beans, lentils, chickpeas, alfalfa seeds, radish seeds, and broccoli seeds. Avoid sprouting kidney beans, navy beans, and other large beans without cooking them first, as they contain toxins that are neutralized by heat. Always research the specific sprouting requirements of each bean or seed before starting.
How long does it take to grow bean sprouts?
The sprouting time varies depending on the type of bean and the environmental conditions. Mung beans typically sprout in 3-5 days. Lentils and adzuki beans may take slightly longer, around 4-6 days. Alfalfa and radish seeds can sprout in as little as 2-3 days. The ideal temperature for sprouting is between 70-75°F (21-24°C). Cooler temperatures may slow down the sprouting process.
How do I prevent mold growth?
Mold growth is a common concern when sprouting, but it can be easily prevented with proper hygiene and ventilation. Always use clean sprouting containers and rinse the sprouts thoroughly at least twice a day with fresh, cool water. Ensure that the sprouts are well-drained after each rinse to prevent excess moisture buildup. Provide adequate ventilation by keeping the sprouting container in a well-ventilated area or using a sprouting lid with air holes. Avoid overcrowding the sprouts in the container, as this can restrict airflow and increase the risk of mold growth. If you notice any signs of mold, discard the entire batch of sprouts immediately.
How do I store bean sprouts?
Once the bean sprouts have reached your desired length, rinse them thoroughly and drain them well. Store them in an airtight container lined with a paper towel in the refrigerator. The paper towel will help absorb excess moisture and keep the sprouts fresh for longer. Bean sprouts can typically be stored in the refrigerator for up to a week. Check them regularly for any signs of spoilage and discard them if they become slimy or develop an off odor.
Are there any health benefits to eating bean sprouts?
Yes, bean sprouts are packed with nutrients and offer numerous health benefits. They are a good source of vitamins, minerals, and enzymes. They are low in calories and high in fiber, making them a healthy addition to any diet. Bean sprouts are also rich in antioxidants, which help protect the body against damage from free radicals. Some studies have suggested that bean sprouts may have anti-inflammatory and immune-boosting properties.
Can I eat bean sprouts raw?
Yes, bean sprouts can be eaten raw, but it’s important to rinse them thoroughly before consumption to remove any potential bacteria. Some people prefer to cook bean sprouts lightly to improve their digestibility and reduce the risk of foodborne illness. Lightly steaming, stir-frying, or blanching bean sprouts for a few minutes is sufficient to cook them without losing their nutritional value.
What if my bean sprouts don’t sprout?
If your bean sprouts aren’t sprouting, there could be several reasons. First, make sure that the beans are viable and haven’t expired. Old beans may have a lower germination rate. Second, ensure that the beans are being soaked for the correct amount of time. Over-soaking or under-soaking can inhibit sprouting. Third, check the temperature of the sprouting environment. If it’s too cold, the beans may not sprout. Finally, make sure that the beans are being rinsed regularly and that the sprouting container is providing adequate drainage and ventilation.
Can I use tap water for sprouting?
While tap water is generally safe to use for sprouting, it’s best to use filtered or purified water to avoid any potential contaminants. Tap water may contain chlorine or other chemicals that can inhibit sprouting or affect the flavor of the sprouts. If you’re concerned about the quality of your tap water, consider using bottled water or investing in a water filter.
How do I know when the bean sprouts are ready to eat?
Bean sprouts are ready to eat when they have reached your desired length and have a crisp, crunchy texture. The ideal length varies depending on the type of bean, but most bean sprouts are ready to eat when they are about 1-2 inches long. Taste a few sprouts to ensure that they have a fresh, clean flavor. Avoid eating sprouts that are slimy, discolored, or have an off odor.
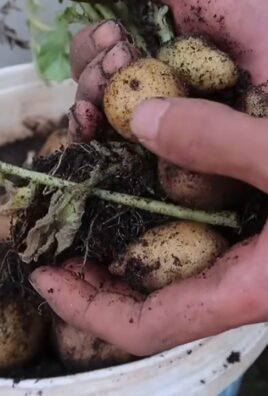
Can I grow bean sprouts without soil?
Yes, you can absolutely grow bean sprouts without soil. In fact, most home sprouting methods involve growing bean sprouts in water only. This is a simple and effective way to cultivate fresh sprouts without the mess and hassle of soil. The key is to provide the sprouts with adequate moisture, drainage, and ventilation.
Leave a Comment