
Grow Watermelon Backyard: Imagine biting into a juicy, sweet watermelon, bursting with flavor, knowing you nurtured it from seed to fruit, right in your own backyard! It’s not just a summer dream; it’s an achievable reality with the right know-how. For centuries, watermelons have been a symbol of summer abundance and a refreshing treat enjoyed across cultures. From ancient Egypt, where they were depicted in hieroglyphics, to modern-day picnics, watermelons hold a special place in our hearts (and stomachs!).
But let’s be honest, the thought of growing these hefty fruits can be intimidating. Many believe you need acres of land and a green thumb blessed by the gardening gods. That’s where these DIY tricks and hacks come in! I’m here to show you that you don’t need a sprawling farm to grow watermelon backyard successfully. Whether you have a small garden, a patio, or even just a sunny balcony, I’ll share simple, effective techniques to help you cultivate your own watermelon patch.
Why bother with the effort? Because nothing beats the taste of homegrown produce, and the satisfaction of nurturing a plant from seed to harvest is incredibly rewarding. Plus, you’ll avoid the pesticides and long-distance transportation associated with store-bought watermelons. So, are you ready to ditch the store-bought melons and embark on a fun, fruitful adventure? Let’s get started!
Growing Watermelons in Your Backyard: A Comprehensive DIY Guide
Hey there, fellow gardening enthusiasts! Ever dreamt of biting into a juicy, homegrown watermelon on a hot summer day? Well, dream no more! Growing watermelons in your backyard is totally achievable, even if you’re a beginner. It takes a little planning and effort, but trust me, the reward is absolutely worth it. I’m going to walk you through everything you need to know, from choosing the right variety to harvesting your prize-winning melon. Let’s get started!
Choosing the Right Watermelon Variety
Before you even think about digging, you need to pick the perfect watermelon variety for your climate and space. Here’s what to consider:
* Climate: Some varieties thrive in long, hot summers, while others are better suited for shorter growing seasons.
* Space: Watermelons need room to sprawl! Bush varieties are more compact, while vining types need plenty of space to run.
* Size: Do you want a giant melon or a personal-sized one?
* Days to Maturity: This tells you how long it takes from planting to harvest. Choose a variety that fits your growing season.
Some popular and reliable varieties include:
* Sugar Baby: A classic, small, and sweet watermelon that matures quickly. Great for smaller gardens.
* Crimson Sweet: A larger, oblong watermelon with a vibrant red flesh and excellent flavor.
* Jubilee: A large, oblong watermelon with a thick rind, making it good for shipping and storage.
* Bush Sugar Baby: A compact, bush-type watermelon, perfect for container gardening or small spaces.
* Yellow Doll: A unique watermelon with yellow flesh that is incredibly sweet and crisp.
I personally love Sugar Baby for its ease of growth and delicious flavor, but feel free to experiment and find your favorite!
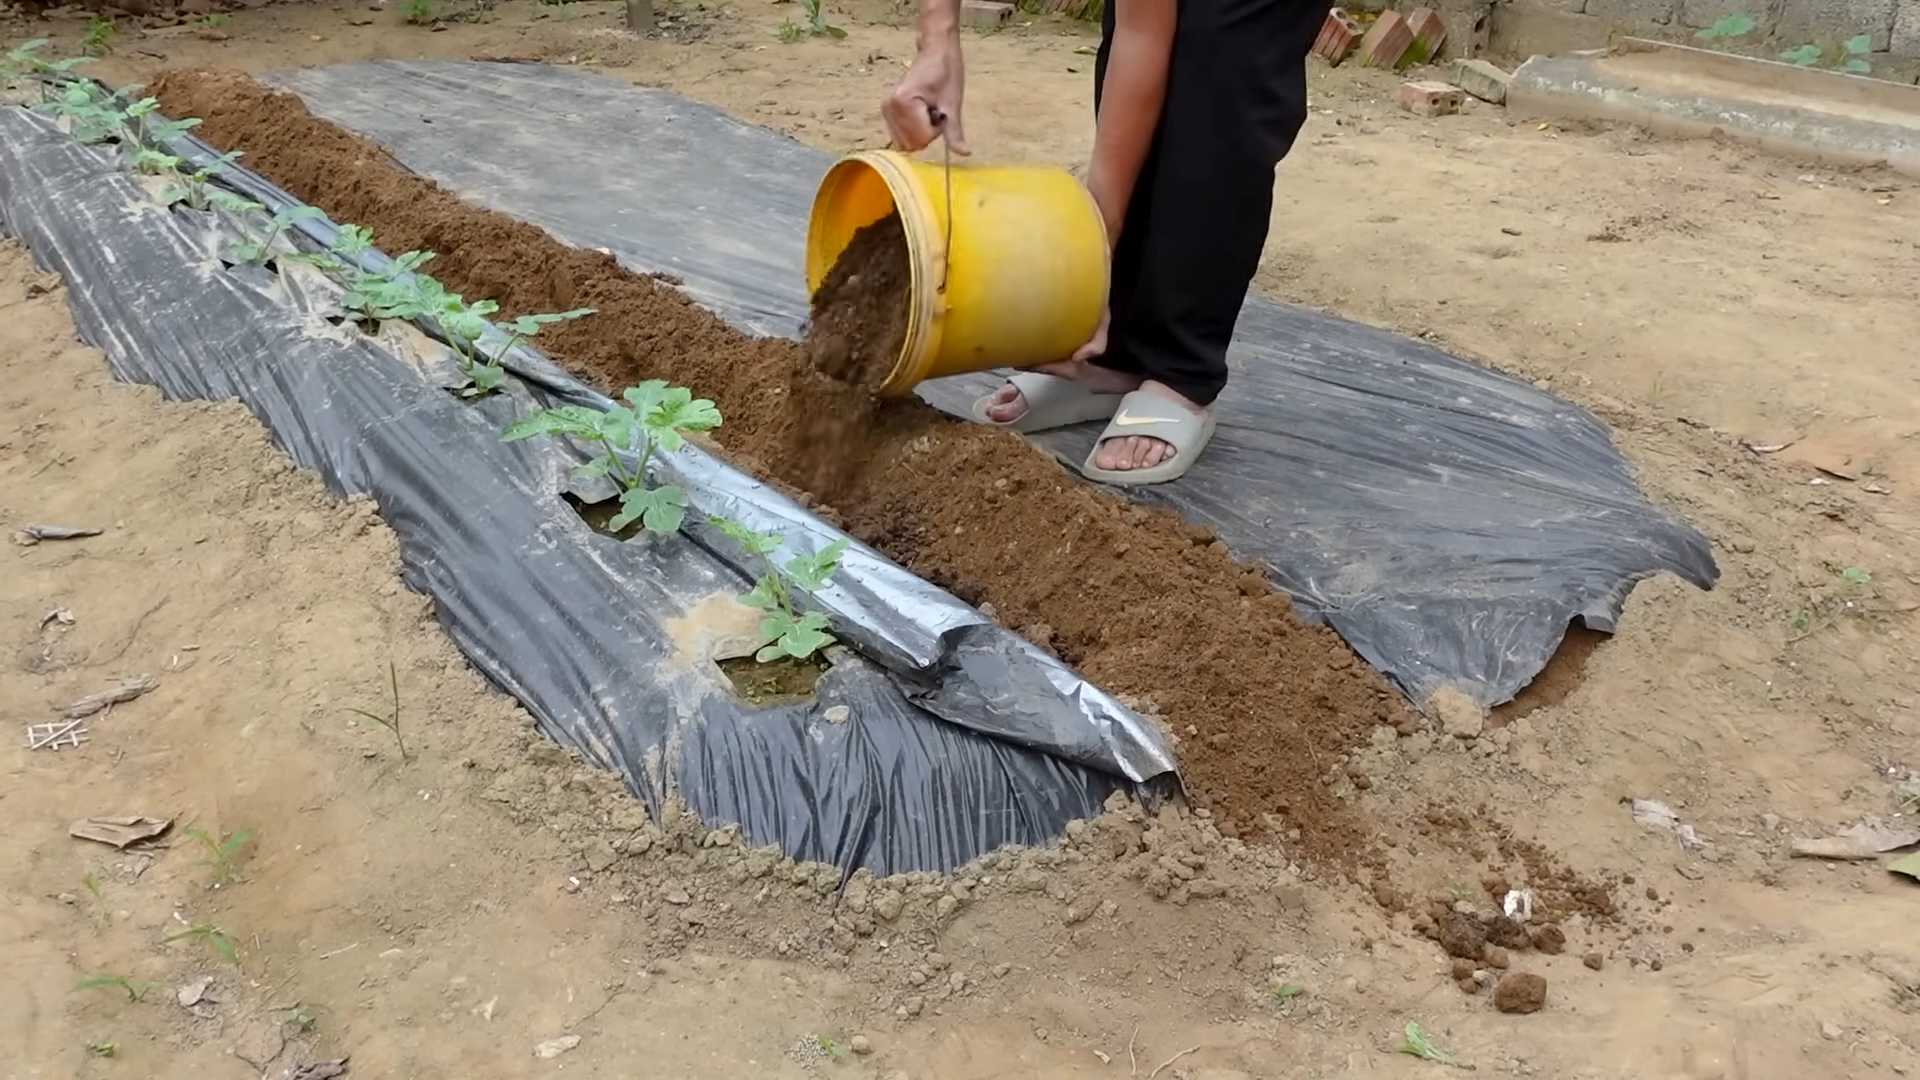
Preparing Your Garden Bed
Watermelons are heavy feeders, so preparing your garden bed is crucial for success.
* Sunlight: Watermelons need at least 6-8 hours of direct sunlight per day. Choose a sunny spot in your yard.
* Soil: Watermelons prefer well-drained, sandy loam soil with a pH between 6.0 and 6.8.
* Soil Testing: It’s a good idea to test your soil to determine its pH and nutrient levels. You can purchase a soil testing kit at most garden centers or send a sample to your local agricultural extension office.
* Amending the Soil: If your soil is heavy clay or sandy, amend it with plenty of organic matter, such as compost, aged manure, or peat moss. This will improve drainage, aeration, and nutrient content.
* Fertilizing: Incorporate a slow-release fertilizer into the soil before planting. Look for a fertilizer with a balanced NPK ratio (nitrogen, phosphorus, and potassium).
Planting Your Watermelon Seeds or Seedlings
You can start watermelon seeds indoors or direct sow them in your garden. I usually start mine indoors to get a head start on the season.
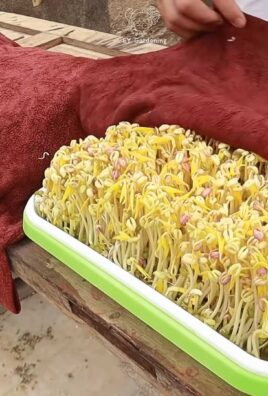
Starting Seeds Indoors (Optional)
1. Timing: Start your seeds indoors about 4-6 weeks before the last expected frost.
2. Containers: Use peat pots or biodegradable containers to avoid disturbing the roots when transplanting.
3. Soil: Fill the containers with a seed-starting mix.
4. Planting: Plant 2-3 seeds per container, about 1 inch deep.
5. Watering: Water gently to moisten the soil.
6. Warmth: Keep the containers in a warm place (70-80°F) until the seeds germinate. A heat mat can be helpful.
7. Light: Once the seedlings emerge, provide them with plenty of light. A grow light is ideal, but a sunny windowsill can also work.
8. Thinning: Once the seedlings have a few true leaves, thin them to one plant per container.
Direct Sowing Seeds Outdoors
1. Timing: Wait until the soil has warmed to at least 70°F before direct sowing. This is usually a few weeks after the last expected frost.
2. Spacing: Plant seeds 1 inch deep and space them according to the variety’s recommendations. Bush varieties can be planted closer together than vining types.
3. Hills or Rows: You can plant watermelons in hills or rows. Hills are slightly raised mounds of soil that provide good drainage.
4. Watering: Water gently after planting.
Transplanting Seedlings
1. Hardening Off: Before transplanting your seedlings outdoors, you need to harden them off. This means gradually exposing them to outdoor conditions over a period of 7-10 days. Start by placing them in a sheltered spot for a few hours each day, gradually increasing the amount of time they spend outdoors.
2. Timing: Transplant your seedlings after the last expected frost, when the soil has warmed to at least 70°F.
3. Spacing: Space the seedlings according to the variety’s recommendations.
4. Planting: Dig a hole slightly larger than the root ball. Gently remove the seedling from the container and place it in the hole. Backfill with soil and water thoroughly.
Caring for Your Watermelon Plants
Once your watermelon plants are in the ground, it’s time to provide them with the care they need to thrive.
* Watering: Watermelons need consistent moisture, especially during fruit development. Water deeply and regularly, but avoid overwatering, which can lead to root rot. Aim for about 1-2 inches of water per week.
* Fertilizing: Side-dress your watermelon plants with a fertilizer high in phosphorus and potassium when the fruits start to develop. This will help them grow larger and sweeter.
* Weeding: Keep the area around your watermelon plants free of weeds. Weeds compete with watermelons for nutrients and water.
* Mulching: Mulch around your watermelon plants with straw or black plastic. Mulch helps to retain moisture, suppress weeds, and warm the soil.
* Pest and Disease Control: Watermelons can be susceptible to pests and diseases, such as aphids, squash bugs, and powdery mildew. Monitor your plants regularly and take action if you see any problems. Insecticidal soap and neem oil can be effective for controlling pests. Fungicides can be used to treat diseases.
* Pollination: Watermelons need to be pollinated in order to produce fruit. If you’re not seeing any fruit set, you may need to hand-pollinate the flowers. To hand-pollinate, use a small paintbrush to transfer pollen from the male flowers to the female flowers. Female flowers have a small fruit behind the flower, while male flowers do not.
Training and Pruning (Optional)
While not strictly necessary, training and pruning your watermelon plants can help to improve air circulation and fruit production.
* Training: You can train your watermelon vines to grow in a specific direction by gently guiding them. This can be helpful if you have limited space.
* Pruning: You can prune your watermelon plants to remove excess foliage and encourage fruit development. Remove any suckers (small shoots that grow from the base of the plant) and any yellowing or diseased leaves.
Protecting Your Watermelons
As your watermelons grow, you may need to protect them from pests and diseases.
* Pest Control: Squash bugs and vine borers are common watermelon pests. Handpick them off the plants or use insecticidal soap.
* Disease Control: Powdery mildew is a common watermelon disease. Improve air circulation and apply a fungicide if necessary.
* Sunscald: Watermelons can be susceptible to sunscald, especially in hot climates. Protect the fruits by shading them with leaves or cloth.
* Ground Rot: To prevent ground rot, place a piece of cardboard or straw under each watermelon to keep it off the soil.
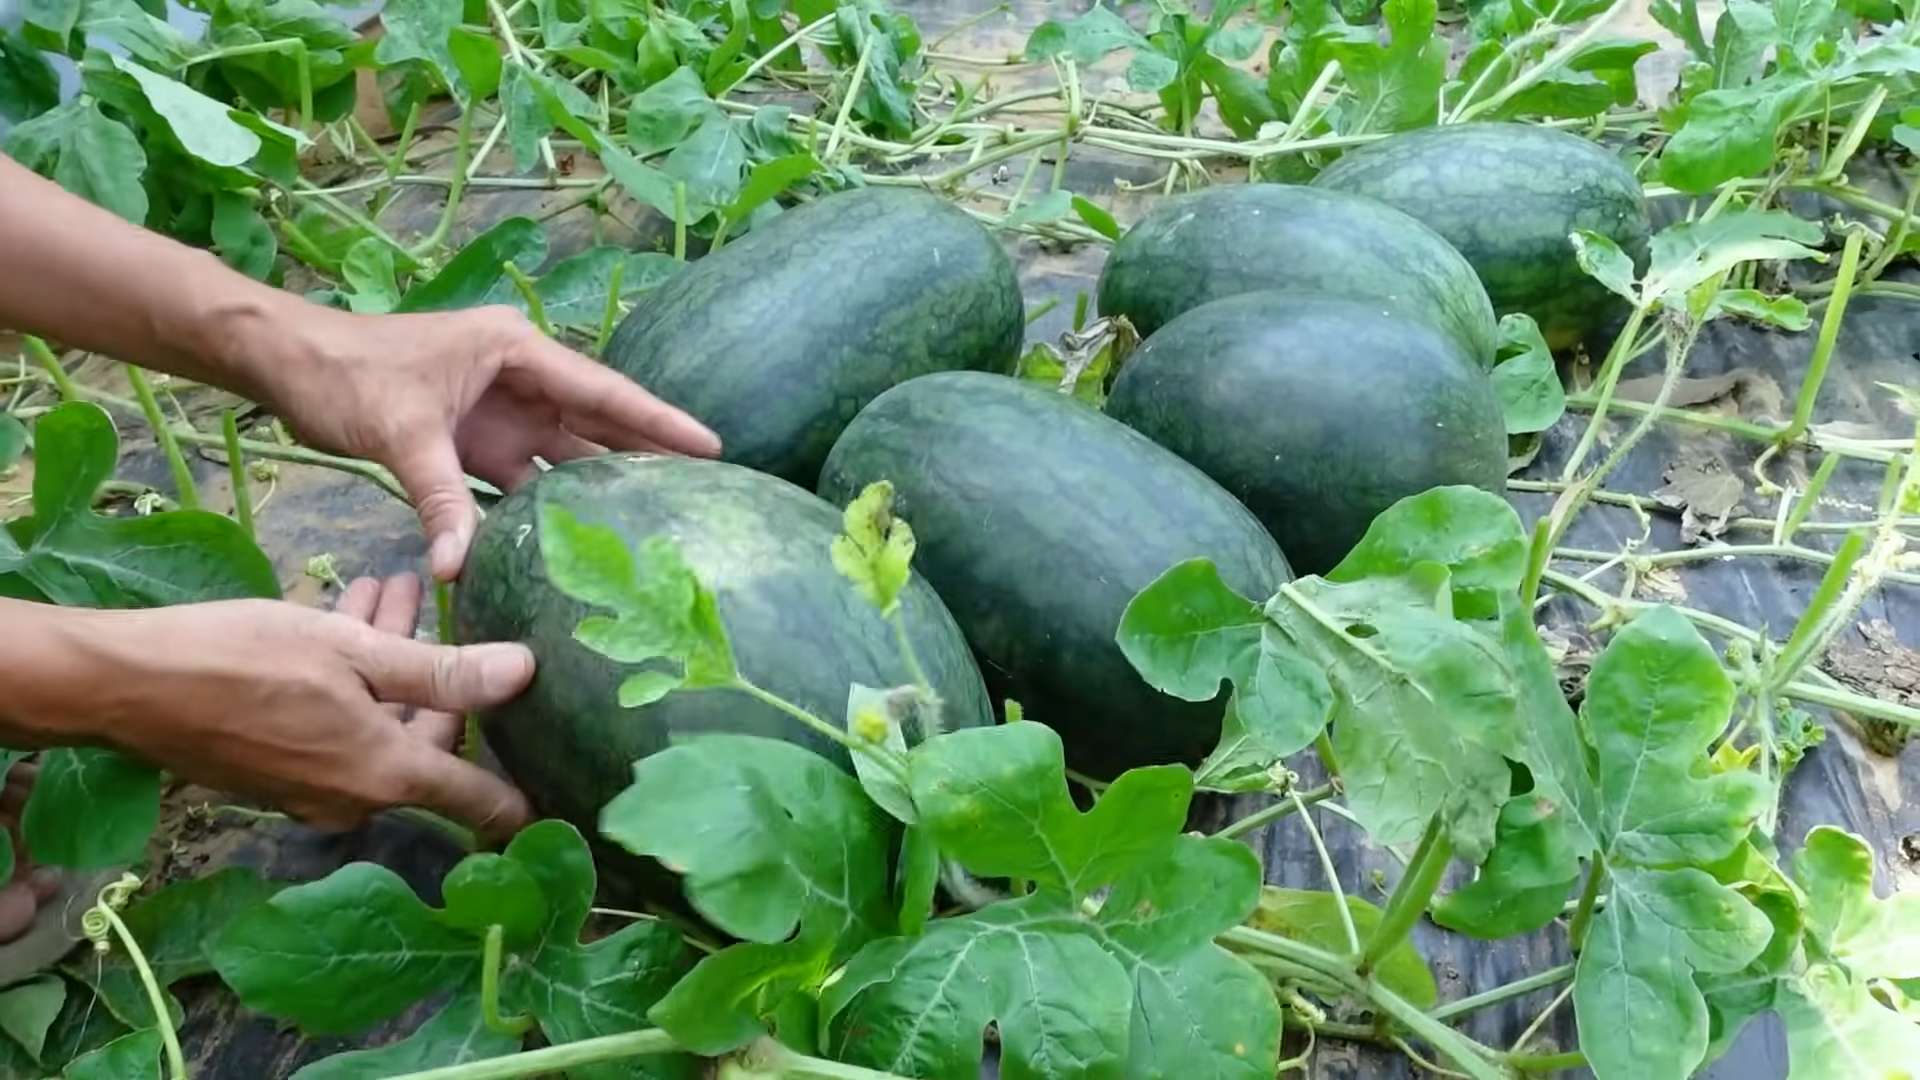
Harvesting Your Watermelons
Harvesting your watermelons at the right time is crucial for getting the best flavor. Here’s how to tell when a watermelon is ripe:
1. Days to Maturity: Check the seed packet or plant tag for the variety’s days to maturity. This will give you a general idea of when to expect your watermelons to be ripe.
2. Thump Test: Thump the watermelon with your knuckles. A ripe watermelon will sound hollow.
3. Tendril Test: The tendril closest to the watermelon stem will turn brown and dry.
4. Ground Spot: The spot where the watermelon rests on the ground (the ground spot) will turn from white to yellow.
5. Rind: The rind will become dull and waxy.
Once you’ve determined that your watermelon is ripe, use a sharp knife to cut it
Conclusion
So, there you have it! Growing watermelons in your backyard might seem daunting at first, but with a little planning, preparation, and the right DIY tricks, you can be harvesting your own juicy, sweet watermelons before you know it. This isn’t just about saving money; it’s about experiencing the satisfaction of nurturing something from seed to table, knowing exactly what went into your food, and enjoying a flavor that’s far superior to anything you can buy in a store.
This DIY approach to growing watermelons offers a unique opportunity to connect with nature and learn about the growing process. It’s a rewarding experience that extends beyond just the delicious fruit. Imagine the pride you’ll feel when you serve a slice of your homegrown watermelon to family and friends!
But the real magic lies in the details. Remember those DIY tricks we discussed? They’re not just suggestions; they’re game-changers. From creating your own nutrient-rich soil amendments using compost and aged manure to building a simple trellis system to support the vines and maximize space, these techniques are designed to give you the edge you need for a successful watermelon harvest.
Don’t be afraid to experiment! Try different watermelon varieties to see which ones thrive best in your local climate. Consider using companion planting techniques, such as planting basil or marigolds near your watermelons to deter pests and attract beneficial insects. You could even try growing watermelons in containers if you have limited space, just be sure to choose a large container and provide adequate support for the vines.
Variations to Consider:
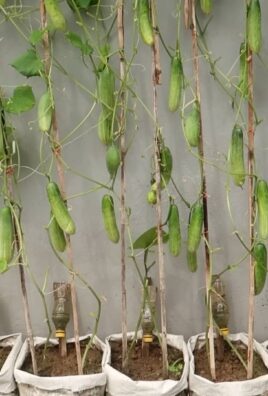
* Vertical Gardening: If space is a premium, explore vertical gardening techniques. A sturdy trellis can support the weight of the watermelons and keep them off the ground, preventing rot and maximizing sunlight exposure.
* DIY Watering System: Create a simple drip irrigation system using recycled plastic bottles to ensure consistent and efficient watering, especially during hot summer months.
* Seed Starting Indoors: For areas with shorter growing seasons, start your watermelon seeds indoors a few weeks before the last expected frost. This will give your plants a head start and increase your chances of a successful harvest.
* Grafting: For advanced gardeners, consider grafting your watermelon plants onto more vigorous rootstock, such as squash or pumpkin. This can improve disease resistance and increase yields.
Why is this DIY trick a must-try? Because it empowers you to take control of your food source, enjoy the freshest possible watermelons, and connect with nature in a meaningful way. It’s a sustainable and rewarding hobby that can bring joy to your life and deliciousness to your table.
So, what are you waiting for? Grab some seeds, gather your supplies, and get ready to embark on your watermelon-growing adventure! We’re confident that with a little effort and the right DIY tricks, you’ll be amazed at what you can achieve.
We encourage you to try these DIY tricks for growing watermelons in your backyard and share your experiences with us! Let us know what worked for you, what challenges you faced, and any tips you have to offer. Together, we can create a community of watermelon enthusiasts and help each other grow the best watermelons possible. Share your photos and stories on social media using #DIYWatermelon and let’s celebrate the joy of homegrown goodness! Remember, the sweetest watermelons are the ones you grow yourself!
Frequently Asked Questions (FAQ)
What is the best time to start growing watermelons?
The ideal time to start growing watermelons depends on your local climate and growing season. Generally, watermelons require a long, warm growing season of at least 70-90 days. In warmer climates, you can start seeds directly in the ground after the last frost. In cooler climates, it’s best to start seeds indoors 3-4 weeks before the last expected frost and transplant them outdoors once the soil has warmed up to at least 70°F (21°C). Check your local frost dates and adjust your planting schedule accordingly.
What kind of soil is best for growing watermelons?
Watermelons thrive in well-drained, sandy loam soil that is rich in organic matter. The soil should have a pH between 6.0 and 6.8. Before planting, amend the soil with compost, aged manure, or other organic materials to improve drainage, fertility, and water retention. Avoid heavy clay soils, as they can become waterlogged and inhibit root growth. If you have clay soil, consider growing watermelons in raised beds or containers.
How much sunlight do watermelons need?
Watermelons require at least 6-8 hours of direct sunlight per day to thrive. Choose a planting location that receives full sun throughout the day. Insufficient sunlight can result in smaller fruits, reduced sweetness, and increased susceptibility to diseases.
How often should I water my watermelon plants?
Watermelons need consistent watering, especially during hot, dry weather. Water deeply and regularly, aiming to keep the soil consistently moist but not waterlogged. Avoid overhead watering, as it can promote fungal diseases. A drip irrigation system or soaker hose is ideal for delivering water directly to the roots. As the fruits begin to ripen, you can reduce watering slightly to concentrate the sugars and improve flavor.
What are some common pests and diseases that affect watermelons?
Common pests that can affect watermelons include aphids, squash bugs, cucumber beetles, and vine borers. Diseases include powdery mildew, fusarium wilt, and anthracnose. To prevent pest and disease problems, practice good garden hygiene, such as removing plant debris and weeds. Use organic pest control methods, such as insecticidal soap or neem oil, to control pests. Choose disease-resistant watermelon varieties and provide adequate spacing between plants to improve air circulation.
How do I know when my watermelons are ripe?
Determining when a watermelon is ripe can be tricky, but there are several indicators to look for:
* The tendril closest to the fruit turns brown and dries up.
* The spot where the watermelon rests on the ground (the “ground spot”) turns from white to yellow.
* The watermelon sounds dull and hollow when you thump it.
* The rind becomes dull and loses its glossy appearance.
It may take some practice to learn how to accurately determine ripeness, but these indicators will help you get started.
Can I grow watermelons in containers?
Yes, you can grow watermelons in containers, but you’ll need to choose a large container (at least 20 gallons) and provide adequate support for the vines. Choose a compact or bush-type watermelon variety that is well-suited for container growing. Use a high-quality potting mix and fertilize regularly with a balanced fertilizer. Water container-grown watermelons more frequently than those grown in the ground, as the soil in containers tends to dry out more quickly.
What are some good companion plants for watermelons?
Companion planting can help improve watermelon growth and deter pests. Some good companion plants for watermelons include:
* Basil: Repels aphids and other pests.
* Marigolds: Repel nematodes and other soil pests.
* Nasturtiums: Attract beneficial insects and deter aphids.
* Radishes: Repel cucumber beetles.
* Oregano: Attracts beneficial insects.
Avoid planting watermelons near potatoes, as they can compete for nutrients.
How can I improve the sweetness of my watermelons?
Several factors can influence the sweetness of watermelons, including:
* Sunlight: Ensure your watermelons receive at least 6-8 hours of direct sunlight per day.
* Water: Water consistently during the growing season, but reduce watering slightly as the fruits begin to ripen.
* Fertilizer: Use a balanced fertilizer during the growing season, but avoid over-fertilizing with nitrogen, as it can promote leafy growth at the expense of fruit production.
* Variety: Choose watermelon varieties that are known for their sweetness.
How do I store harvested watermelons?
Store harvested watermelons in a cool, dry place, such as a basement or garage. Whole watermelons can be stored for up to 2-3 weeks. Once cut, wrap the watermelon tightly in plastic wrap and store it in the refrigerator for up to 3-5 days.

Leave a Comment