
Grow Turnips at Home? Absolutely! You might be thinking turnips are just those slightly bitter root vegetables your grandma used to make, but trust me, they’re so much more than that! And growing them yourself? It’s surprisingly easy and rewarding. Forget those bland, store-bought turnips; imagine enjoying sweet, crisp turnips fresh from your own garden.
For centuries, turnips have been a staple crop in many cultures, providing essential nutrients during the colder months. From hearty stews in Europe to pickled delicacies in Asia, the humble turnip has a rich history. But in recent years, they’ve been somewhat overlooked. That’s where we come in!
I’m here to show you how simple and satisfying it can be to grow turnips at home, even if you have limited space or gardening experience. This DIY guide is packed with easy-to-follow tricks and hacks that will have you harvesting your own delicious turnips in no time. Why spend money on produce when you can cultivate your own fresh, organic supply? Plus, knowing exactly where your food comes from is incredibly empowering. So, grab your gardening gloves, and let’s get started on this exciting journey of growing turnips at home!
Growing Turnips: A Beginner’s Guide to a Bountiful Harvest
Hey there, fellow gardening enthusiasts! I’m so excited to share my experience with growing turnips. These root vegetables are surprisingly easy to cultivate, even if you’re a complete newbie like I was when I started. They’re packed with nutrients, delicious in so many dishes, and offer both the root and the greens for culinary adventures. Let’s dive into how you can grow your own turnips at home!
Choosing the Right Turnip Variety
Before we get our hands dirty, let’s talk about turnip varieties. It’s important to pick one that suits your taste and growing conditions. Here are a few popular choices:
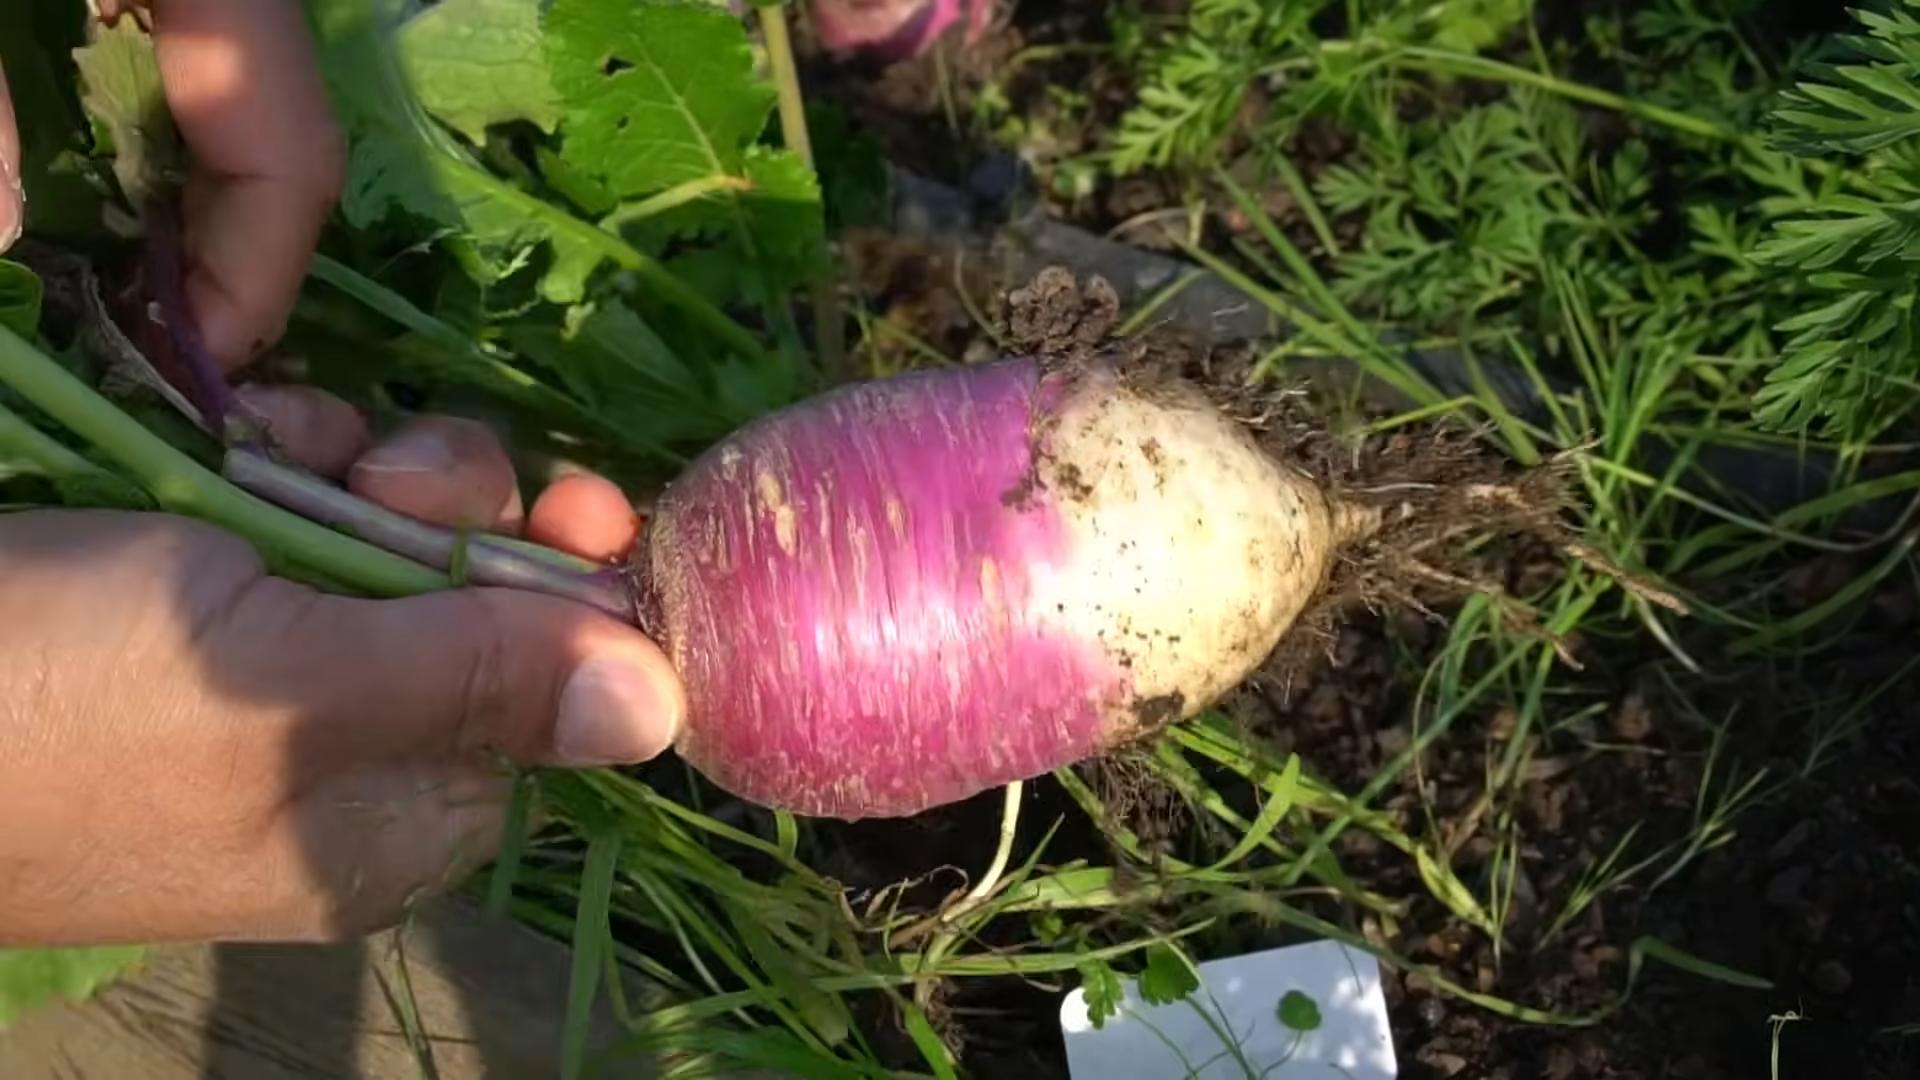
* Purple Top White Globe: This is a classic, all-purpose turnip. It’s known for its mild flavor and smooth texture. It’s also a great choice for beginners.
* Tokyo Cross: If you’re looking for a quick harvest, Tokyo Cross is your best bet. It matures in just 35 days and has a sweet, delicate flavor.
* Golden Ball: As the name suggests, this turnip has a beautiful golden flesh. It’s known for its sweet and nutty flavor.
* Hakurei: This Japanese turnip is incredibly versatile. You can eat it raw, roasted, or pickled. It has a mild, slightly sweet flavor.
* Seven Top: If you’re primarily interested in the greens, Seven Top is the way to go. It produces abundant, flavorful greens but smaller roots.
Consider your local climate and soil conditions when making your selection. Some varieties are more heat-tolerant than others.
Preparing Your Garden Bed
Turnips thrive in well-drained, fertile soil. Here’s how to prepare your garden bed for success:
* Sunlight: Turnips need at least 6 hours of sunlight per day. Choose a location in your garden that receives plenty of sunshine.
* Soil: Turnips prefer slightly acidic soil with a pH between 6.0 and 6.8. You can test your soil using a home testing kit or send a sample to your local agricultural extension office.
* Amendments: Amend your soil with compost or well-rotted manure to improve drainage and fertility. This will provide your turnips with the nutrients they need to grow strong and healthy.
* Tilling: Till the soil to a depth of at least 12 inches to loosen it up and remove any rocks or debris. This will allow the turnip roots to grow freely.
* Leveling: Rake the soil to create a smooth, level surface. This will make it easier to sow the seeds evenly.
Sowing the Turnip Seeds
Now for the fun part – planting the seeds!
1. Timing is Key: Turnips are a cool-season crop, so the best time to plant them is in early spring or late summer. For a spring crop, sow the seeds 2-4 weeks before the last expected frost. For a fall crop, sow the seeds 6-8 weeks before the first expected frost. I usually aim for late August for a fall harvest.
2. Direct Sowing: Turnips are best direct-sown into the garden. They don’t transplant well, so starting them indoors is generally not recommended.
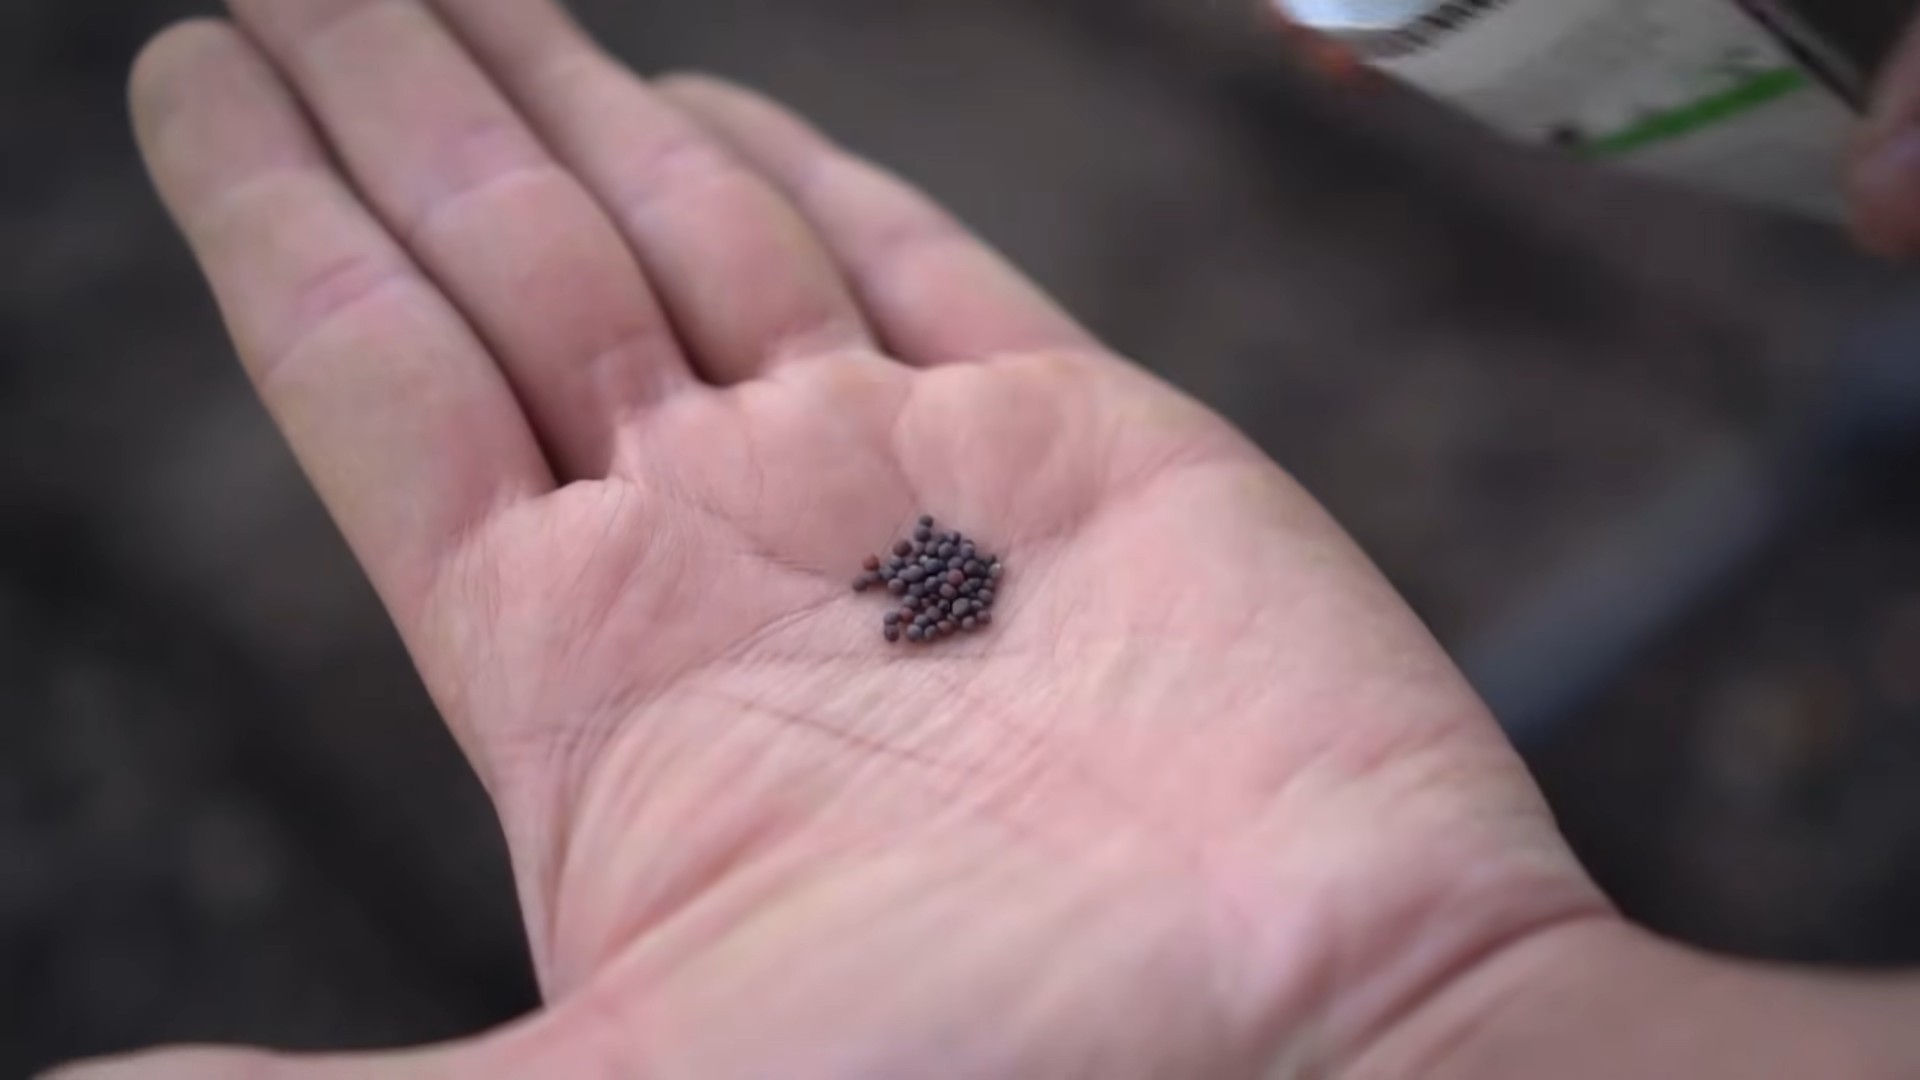
3. Spacing: Sow the seeds about ½ inch deep and 1 inch apart in rows that are 12-18 inches apart. You can use a seed drill or simply sprinkle the seeds into the rows.
4. Covering: Gently cover the seeds with soil and water them thoroughly. Keep the soil moist until the seeds germinate, which usually takes about 5-7 days.
5. Thinning: Once the seedlings emerge, thin them to about 3-4 inches apart. This will give the turnips enough room to grow to their full size. Don’t throw away the thinnings! You can eat them as microgreens.
Caring for Your Turnip Plants
Turnips are relatively low-maintenance, but here are a few things you can do to ensure a successful harvest:
* Watering: Water your turnip plants regularly, especially during dry periods. Aim for about 1 inch of water per week.
* Weeding: Keep the garden bed free of weeds. Weeds compete with turnips for nutrients and water. Hand-pull weeds carefully to avoid disturbing the turnip roots.
* Fertilizing: If your soil is poor, you may need to fertilize your turnip plants. Use a balanced fertilizer, such as 10-10-10, according to the package directions. I prefer using compost tea for a more organic approach.
* Pest Control: Turnips can be susceptible to pests such as aphids, flea beetles, and cabbage worms. Inspect your plants regularly for signs of infestation. You can control these pests with insecticidal soap or neem oil. Row covers are also a great preventative measure.
* Crop Rotation: Practice crop rotation to prevent soilborne diseases and pests. Avoid planting turnips in the same location year after year.
Harvesting Your Turnips
The moment we’ve all been waiting for – harvesting!
1. Timing: Turnips are typically ready to harvest in 50-60 days, depending on the variety. Check the seed packet for specific maturity dates.
2. Size: Harvest the turnips when they are about 2-3 inches in diameter. Larger turnips can become tough and bitter.
3. Pulling: Gently loosen the soil around the turnip with a garden fork. Then, grasp the turnip greens near the base and pull the turnip out of the ground.
4. Greens: You can harvest the turnip greens at any time. Simply cut off the outer leaves, leaving the inner leaves to continue growing.
5. Storage: Store turnips in a cool, dark place, such as a root cellar or refrigerator. Remove the greens before storing, as they can draw moisture from the roots. Turnips can last for several months when stored properly.
Troubleshooting Common Turnip Problems
Even with the best care, you might encounter a few problems along the way. Here are some common issues and how to address them:
* Bolting: Bolting occurs when turnips flower prematurely, usually due to hot weather or stress. To prevent bolting, plant turnips in early spring or late summer and provide them with consistent moisture.
* Root Maggots: Root maggots are small, white larvae that feed on turnip roots. They can cause stunted growth and even kill the plants. To prevent root maggots, use row covers and practice crop rotation.
* Clubroot: Clubroot is a soilborne disease that causes swollen, distorted roots. To prevent clubroot, improve soil drainage and avoid planting turnips in the same location year after year.
* Cracked Roots: Inconsistent watering can lead to cracked roots. Make sure to water your turnips regularly, especially during dry periods.
Enjoying Your Turnip Harvest
Now that you’ve harvested your turnips, it’s time to enjoy the fruits (or rather, roots) of your labor! Turnips are incredibly versatile and can be used in a variety of dishes.
* Roasted Turnips: Roasting turnips brings out their natural sweetness. Simply toss them with olive oil, salt, and pepper and roast them in the oven until tender.
* Mashed Turnips: Mashed turnips are a delicious and healthy alternative to mashed potatoes. You can mash them with butter, cream, and herbs.
* Turnip Greens: Turnip greens are packed with nutrients and can be cooked like spinach or kale. Sauté them with garlic and olive oil for a simple and flavorful side dish.
* Pickled Turnips: Pickled turnips are a tangy and refreshing treat. They’re a popular ingredient in Middle Eastern cuisine.
* Turnip Soup: Turnip soup is a hearty and comforting dish that’s perfect for cold weather.
Saving Turnip Seeds (Advanced)
If you’re feeling adventurous, you can even save your own turnip seeds! This is a great way to preserve your favorite varieties and become more self-sufficient.
1. Select Healthy Plants: Choose healthy, vigorous plants that exhibit the traits you want to preserve.
2. Allow Bolting: Allow a few plants to bolt and flower.
3. Pollination: Turnips are cross-pollinated, so you’ll need to isolate them from other brassicas (like cabbage and broccoli) to prevent cross-pollination.
4. Seed Pods: Once the flowers are pollinated, they will form seed pods.
5. Harvesting: Allow the seed pods to dry on the plant. Once they are dry and brittle, harvest them.
6. Threshing: Thresh the seed pods to release the seeds.
7. Cleaning: Clean the seeds by removing any debris.
8. Storage: Store the
Conclusion
So, there you have it! Growing turnips at home is not only achievable, but it’s also a deeply rewarding experience that connects you directly to the source of your food. We’ve walked through the simple steps, from selecting the right variety to harvesting your bounty, and hopefully, dispelled any myths about turnips being difficult to cultivate.
Why is this DIY trick a must-try? Because it offers a multitude of benefits. Firstly, you gain access to incredibly fresh, flavorful turnips that far surpass anything you’ll find in a grocery store. The subtle sweetness and peppery bite are intensified when the turnips are harvested just moments before being prepared. Secondly, you have complete control over the growing process, ensuring that your turnips are free from harmful pesticides and herbicides. This is especially important if you’re conscious about eating organic and supporting sustainable practices. Thirdly, it’s a fantastic way to reduce your carbon footprint by minimizing transportation and packaging. Finally, and perhaps most importantly, it’s incredibly satisfying to nurture a plant from seed to table.
But the fun doesn’t stop there! Feel free to experiment with different varieties of turnips. Consider growing purple top white globe turnips for their classic flavor and vibrant color, or try the smaller, sweeter Tokyo turnips for a quick and easy harvest. You can also explore different planting times to extend your harvest season. Succession planting, where you sow seeds every few weeks, will ensure a continuous supply of fresh turnips throughout the growing season.
Don’t be afraid to get creative with your turnip recipes too! While the roots are delicious roasted, mashed, or added to stews, don’t forget about the greens! Turnip greens are packed with nutrients and can be sautéed, steamed, or added to salads. They have a slightly bitter flavor that pairs well with garlic, lemon, and olive oil.
We wholeheartedly encourage you to give this DIY trick a try. Even if you’re a beginner gardener, you’ll find that growing turnips at home is surprisingly easy and incredibly rewarding. The taste of freshly harvested turnips is simply unmatched, and the satisfaction of growing your own food is truly priceless.
So, grab some seeds, prepare your soil, and get ready to experience the joy of growing your own turnips. We’re confident that you’ll be amazed by the results. And most importantly, we want to hear about your experience! Share your photos, tips, and recipes with us in the comments below. Let’s build a community of turnip-loving gardeners and inspire others to embrace the joys of homegrown produce. Let us know what challenges you faced and what worked best for you. Your insights will be invaluable to other aspiring turnip growers. Happy gardening!
Frequently Asked Questions (FAQ)
What is the best time of year to plant turnips?
The best time to plant turnips depends on your climate and the variety you’re growing. Generally, turnips are a cool-season crop, meaning they thrive in cooler temperatures. For a fall harvest, plant turnip seeds in late summer, about 6-8 weeks before the first expected frost. For a spring harvest, plant seeds in early spring, as soon as the soil can be worked. Avoid planting during the hottest months of summer, as high temperatures can cause the turnips to become bitter and woody.
How much sunlight do turnips need?
Turnips need at least 6 hours of sunlight per day to thrive. Choose a location in your garden that receives full sun for optimal growth. If you’re growing turnips in containers, make sure to place them in a sunny spot. While they can tolerate some partial shade, especially during the hottest part of the day, insufficient sunlight can result in smaller, less flavorful turnips.
What kind of soil is best for growing turnips?
Turnips prefer well-drained, fertile soil with a pH between 6.0 and 6.8. Before planting, amend the soil with compost or other organic matter to improve drainage and fertility. Avoid heavy clay soils, as they can become waterlogged and hinder root development. If your soil is compacted, till it to a depth of at least 8 inches to loosen it up. A soil test can help you determine the pH and nutrient levels of your soil and guide you in making necessary amendments.
How often should I water my turnips?
Turnips need consistent moisture to grow properly. Water them regularly, especially during dry periods. Aim to keep the soil consistently moist but not waterlogged. A good rule of thumb is to water deeply once or twice a week, depending on the weather conditions. Mulching around the plants can help retain moisture in the soil and reduce the need for frequent watering.
How do I know when my turnips are ready to harvest?
Turnips are typically ready to harvest 50-60 days after planting, depending on the variety. The roots should be about 2-3 inches in diameter. You can gently pull back the soil around the base of the plant to check the size of the roots. If they’re the desired size, you can harvest them. Don’t let the turnips get too large, as they can become tough and bitter. The greens can be harvested at any time, but they’re most tender when they’re young.
Are turnip greens edible?
Yes, turnip greens are absolutely edible and incredibly nutritious! They’re a great source of vitamins A, C, and K, as well as calcium and fiber. You can harvest the greens at any time, but they’re most tender when they’re young. Simply wash them thoroughly and cook them like you would spinach or kale. Sautéing, steaming, or adding them to soups and stews are all great ways to enjoy turnip greens.
What are some common pests and diseases that affect turnips?
Some common pests that can affect turnips include aphids, flea beetles, and root maggots. Diseases that can affect turnips include clubroot and downy mildew. To prevent pest and disease problems, practice good garden hygiene, such as removing weeds and debris from the garden. You can also use organic pest control methods, such as insecticidal soap or neem oil, to control pests. Crop rotation can also help prevent soilborne diseases.
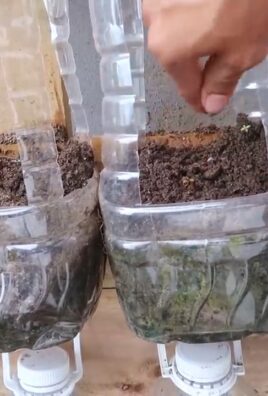
Can I grow turnips in containers?
Yes, you can definitely grow turnips in containers! Choose a container that is at least 12 inches deep and wide to allow enough room for the roots to develop. Use a well-draining potting mix and make sure the container has drainage holes. Place the container in a sunny location and water regularly. Container-grown turnips may need more frequent watering than those grown in the ground, as the soil in containers tends to dry out more quickly.
How do I store turnips after harvesting?
After harvesting, remove the greens from the turnips, leaving about an inch of stem attached. Wash the turnips thoroughly and dry them completely. Store them in a cool, dark, and humid place, such as a refrigerator or root cellar. Turnips can be stored for several months under the right conditions. The greens should be stored separately in the refrigerator and used within a few days.
What are some creative ways to use turnips in cooking?
Beyond the traditional roasting and mashing, turnips are incredibly versatile. Try grating them raw into salads for a peppery crunch, or thinly slicing them and pickling them for a tangy condiment. They can also be added to soups and stews for a subtle sweetness and depth of flavor. Don’t forget about the greens! Sauté them with garlic and olive oil, add them to frittatas, or use them as a substitute for spinach in your favorite recipes. Get creative and experiment with different flavors and textures to discover your own favorite ways to enjoy turnips.
Leave a Comment