
Grow Sweet Potatoes in Bags: Unlock the secrets to a bountiful harvest, even without a sprawling garden! Have you ever dreamed of harvesting your own sweet potatoes, but thought you didn’t have the space? Well, dream no more! This DIY guide will show you how to cultivate these delicious and nutritious root vegetables right in your own backyard, patio, or even balcony, using simple bags.
Sweet potatoes have a rich history, dating back thousands of years in Central and South America. They’ve since become a staple in cuisines worldwide, celebrated for their versatility and health benefits. From sweet potato pie to savory fries, the possibilities are endless! But beyond their culinary appeal, growing your own sweet potatoes connects you to a tradition of self-sufficiency and sustainable living.
Why should you try this DIY trick? Because everyone deserves access to fresh, homegrown produce! Growing sweet potatoes in bags is an incredibly accessible and rewarding project. It’s perfect for urban dwellers, beginner gardeners, or anyone looking for a space-saving solution. Plus, it’s a fantastic way to reduce your carbon footprint and enjoy the unparalleled flavor of freshly harvested sweet potatoes. I’m excited to share my tips and tricks to help you grow sweet potatoes in bags successfully. Let’s get started and transform your small space into a sweet potato paradise!
Growing Sweet Potatoes in a Sack: A Simple DIY Guide
I love sweet potatoes! They are so versatile and delicious, and the idea of growing them myself has tempted me for a long time. But I don’t have a huge garden, so I had to get creative. And what can I say? Growing sweet potatoes in a sack is not only super easy but also incredibly rewarding! Here I’ll show you how you can do it too.
What you need:
- Sacks: Large, sturdy sacks are ideal. I like to use jute sacks because they are breathable and look good. But you can also use sturdy plastic sacks or even old feed sacks. Just make sure they are large enough (at least 50 liters capacity) and have holes for drainage.
- Sweet potato slips: You can order these online, buy them at garden centers, or even grow them yourself (more on that later!).
- High-quality potting soil: A well-draining, nutrient-rich soil is crucial for success. I like to mix compost, garden soil, and a little sand.
- Compost: For an extra nutrient kick.
- Organic fertilizer: A slow-release fertilizer is ideal to support the sweet potatoes during their growth phase.
- Water: Regular watering is important, especially in the first few weeks.
- Sunny location: Sweet potatoes love the sun! Choose a spot that gets at least 6 hours of sunlight per day.
- Patience: Sweet potatoes take time to grow. But the reward is worth it!
Growing Sweet Potato Slips Yourself (optional):
If you want to grow your own slips, you’ll need:
- A healthy sweet potato (preferably organic).
- A glass or bowl.
- Toothpicks.
- Water.
Step-by-step guide to growing slips:
- Prepare the sweet potato: Gently clean the sweet potato.
- Insert toothpicks: Stick 3-4 toothpicks into the middle of the sweet potato to act as supports.
- Place in water: Fill the glass or bowl with water and place the sweet potato so that the lower half is in the water.
- Place in a warm spot: Put the glass in a warm, sunny place.
- Check the water level: Make sure the sweet potato always has enough water.
- Wait: After a few weeks, shoots (slips) should form on the sweet potato.
- Separate the slips: Once the slips are about 15-20 cm long, you can gently separate them from the sweet potato.
- Root in water: Place the slips in a glass of water until they form roots.
- Plant: Once the roots are well-developed, you can plant the slips in your sacks.
Preparing and Planting the Sacks:
- Prepare the sacks: If your sacks don’t have holes for drainage, you’ll need to drill or cut them now. It’s best to make several small holes at the bottom of the sack.
- Fill with soil: Fill the sack about one-third full with potting soil. Mix the soil with compost and organic fertilizer.
- Plant the slips: Plant the sweet potato slips in the soil. Make sure the roots are well covered. I usually plant 2-3 slips per sack, depending on the size of the sack.
- Top up with soil: Fill the sack with soil until about 5-10 cm below the rim.
- Water in: Water the slips thoroughly.
Caring for the Sweet Potatoes in the Sack:
- Watering: Water the sweet potatoes regularly, especially in the first few weeks after planting. The soil should always be slightly moist, but not wet. Avoid waterlogging, as this can lead to root rot.
- Fertilizing: Fertilize the sweet potatoes every few weeks with an organic fertilizer. I like to use liquid fertilizer because it works quickly.
- Sunlight: Make sure the sacks get enough sunlight. Sweet potatoes need at least 6 hours of sun per day.
- Weeding: Regularly remove weeds that grow in the sack.
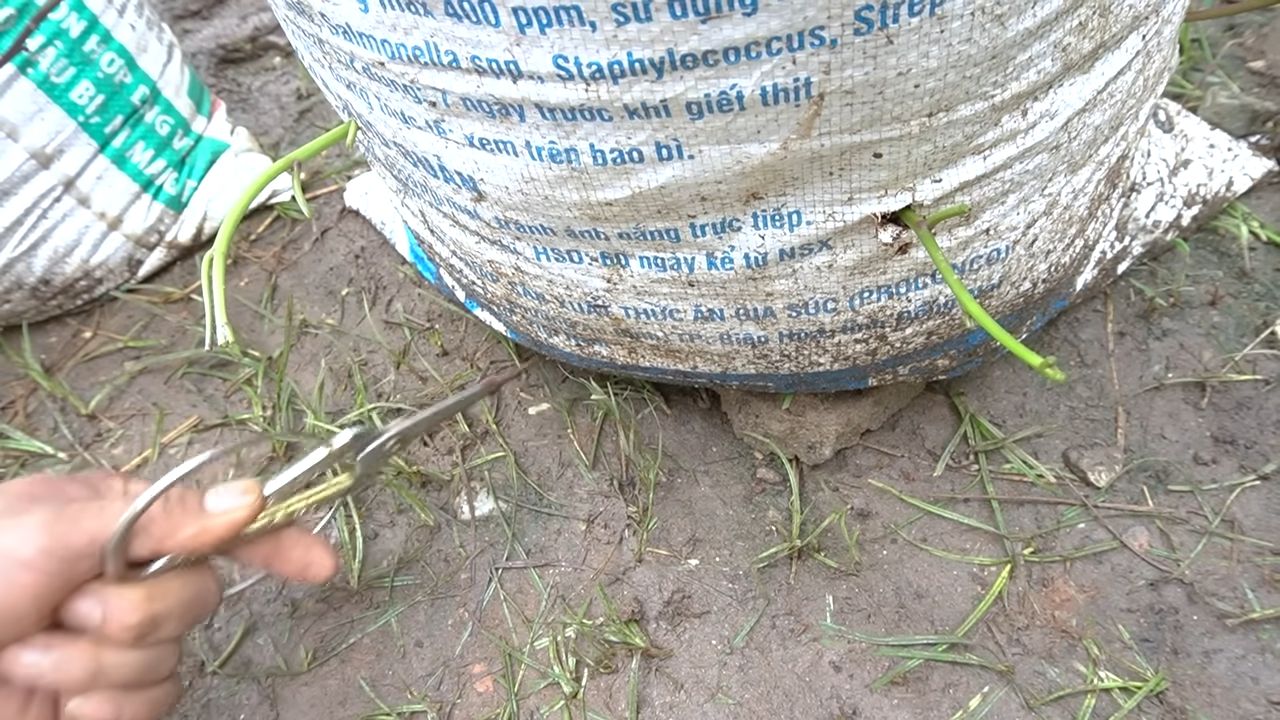
- Controlling vines: Sweet potatoes produce long vines. You can either let these vines lie on the ground or attach them to a trellis.
- Loosening the soil: Loosen the soil in the sack regularly to improve aeration.
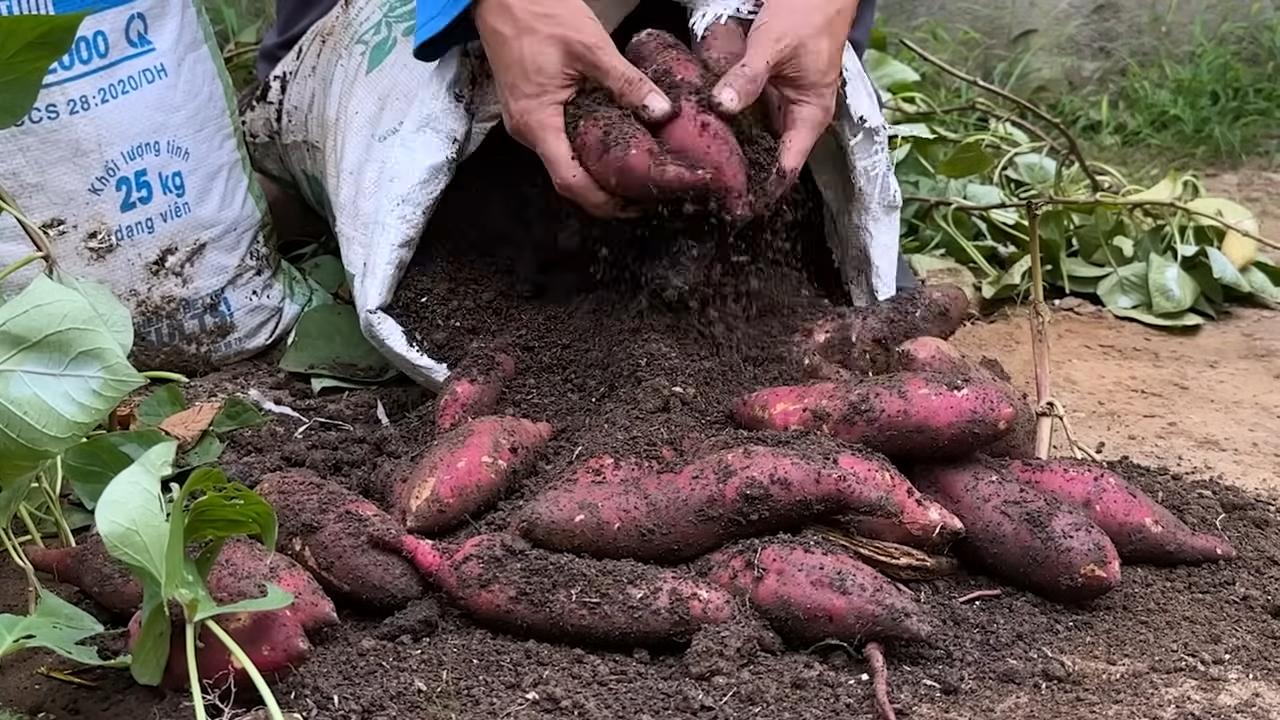
Harvest Time!
The harvest time for sweet potatoes is usually in the fall, about 90-120 days after planting. You can tell the sweet potatoes are ready when the leaves turn yellow and die back.
How to harvest your sweet potatoes in a sack:
- Stop watering: Stop watering a few days before the harvest.
- Cut open the sack: Carefully cut open the sack.
- Dig out the sweet potatoes: Carefully dig out the sweet potatoes. Be careful not to damage them.
- Remove the soil: Remove the soil from the sweet potatoes.
- Let them dry: Let the sweet potatoes dry for a few days in a dry, well-ventilated place. This helps to harden the skin and improve storage life.
Storing the Sweet Potatoes:
Sweet potatoes should be stored in a cool, dry, and dark place. A temperature of about 13-16 degrees Celsius is ideal. Under these conditions, they can be stored for several months.
Additional Tips and Tricks:
- Variety selection: There are many different sweet potato varieties. Find out which varieties grow well in your region.
- Soil improvement: If your soil is not ideal, you can improve it with compost, worm castings, or other organic materials.
- Pests and diseases: Sweet potatoes are relatively resistant to pests and diseases. If you do have problems, use organic pesticides.
- Vertical growing: You can also hang your sacks vertically to save space.
- Mulching: Mulch the soil in the sack with straw or hay to retain moisture and suppress weeds.
Avoiding Common Mistakes:
- Too little sun: Sweet potatoes need a lot of sun. Make sure your sacks are in a sunny spot.
- Overwatering: Avoid waterlogging, as this can lead to root rot.
- Wrong soil: Use a well-draining, nutrient-rich soil.
- Harvesting too late: Harvest the sweet potatoes in time, before the first frost.
Why Grow Sweet Potatoes in a Sack?
Controllable: You have full control over the soil and nutrients.
Space-saving: Ideal for balconies, patios, or small gardens.
Easy: Also suitable for beginners.
Mobile: You can easily move the sacks to find the best location.
Conclusion
So, there you have it! Growing sweet potatoes in bags is not just a gardening trend; it’s a game-changer for anyone looking to maximize their yield, regardless of space constraints. We’ve walked you through the simple steps, from preparing your slips to harvesting your bountiful crop. But why is this DIY trick a must-try?
Firstly, it’s incredibly accessible. You don’t need acres of land or specialized equipment. A few grow bags, some quality soil, and a sunny spot are all you need to embark on this rewarding journey. This makes it perfect for urban gardeners, apartment dwellers with balconies, or anyone with limited garden space.
Secondly, it offers superior control over the growing environment. You can easily move your bags to chase the sun, protect them from unexpected frosts, or amend the soil as needed. This level of control translates to healthier plants and a more abundant harvest.
Thirdly, and perhaps most importantly, growing sweet potatoes in bags is incredibly satisfying. There’s nothing quite like the feeling of digging into a bag and unearthing a treasure trove of homegrown sweet potatoes. The vibrant colors, the earthy aroma, and the knowledge that you nurtured these beauties from tiny slips to plump tubers – it’s an experience that connects you to the earth and provides a deep sense of accomplishment.
Ready to take your sweet potato game to the next level? Consider these variations:
* Vertical Gardening: Stack your grow bags to create a vertical sweet potato garden. This is a fantastic way to maximize space and add a visually stunning element to your outdoor area.
* Companion Planting: Plant companion herbs like basil or marigolds around your sweet potato bags to deter pests and attract beneficial insects.
* Different Varieties: Experiment with different varieties of sweet potatoes to discover your favorites. Beauregard, Covington, and Japanese sweet potatoes are all excellent choices for growing in bags.
* Fertilizer Boost: Supplement your soil with organic fertilizers like compost tea or fish emulsion to give your sweet potatoes an extra boost of nutrients.
Don’t be afraid to experiment and adapt the techniques to suit your specific needs and preferences. The beauty of DIY gardening is that it’s all about learning and growing (pun intended!).
We are confident that once you try growing sweet potatoes in bags, you’ll be hooked. It’s an easy, rewarding, and space-saving way to enjoy fresh, homegrown sweet potatoes all season long. So, grab your grow bags, prepare your slips, and get ready to experience the joy of harvesting your own delicious sweet potatoes.
We encourage you to try this DIY trick and share your experiences with us! Post photos of your sweet potato harvests on social media using #SweetPotatoBags and tag us. We can’t wait to see your amazing results and learn from your unique gardening journey. Happy growing!
Frequently Asked Questions (FAQ)
What size grow bag is best for sweet potatoes?
The ideal grow bag size for sweet potatoes is typically between 10 and 20 gallons. A 15-gallon bag offers a good balance between providing enough space for root development and being manageable to move around. Smaller bags (10 gallons) can work, especially for smaller varieties, but you might get a slightly reduced yield. Larger bags (20 gallons) provide even more room for growth, potentially leading to larger sweet potatoes, but they can be heavier and more difficult to handle. Consider the space you have available and the variety of sweet potato you’re growing when choosing your bag size.
How often should I water sweet potatoes in grow bags?
Watering frequency depends on several factors, including the weather, the size of your grow bag, and the type of soil you’re using. Generally, you should water your sweet potatoes when the top inch of soil feels dry to the touch. During hot, dry weather, this might mean watering every day or every other day. In cooler, wetter weather, you might only need to water once or twice a week. Ensure the water drains freely from the bottom of the bag to prevent waterlogging, which can lead to root rot. A good rule of thumb is to water deeply and less frequently, rather than shallowly and more often.
What type of soil is best for growing sweet potatoes in bags?
Sweet potatoes thrive in well-draining, sandy loam soil that is rich in organic matter. Avoid heavy clay soils, as they can become waterlogged and hinder root development. A good soil mix for grow bags would include a combination of potting mix, compost, and perlite or vermiculite. The potting mix provides a good base, the compost adds nutrients and improves drainage, and the perlite or vermiculite enhances aeration and prevents compaction. You can also amend the soil with a slow-release organic fertilizer to provide a steady supply of nutrients throughout the growing season.
How much sunlight do sweet potatoes need?
Sweet potatoes need at least 6-8 hours of direct sunlight per day to thrive. Choose a location for your grow bags that receives ample sunlight throughout the day. If you live in a particularly hot climate, you might consider providing some afternoon shade to prevent the plants from overheating. Insufficient sunlight can result in leggy growth, reduced yields, and smaller sweet potatoes.
When is the best time to plant sweet potato slips in grow bags?
The best time to plant sweet potato slips is after the last frost, when the soil has warmed up to at least 65°F (18°C). In most regions, this is typically in late spring or early summer. Planting too early, when the soil is still cold, can stunt the growth of the slips and increase their susceptibility to disease. You can start your slips indoors a few weeks before the last frost to get a head start on the growing season.
How do I know when my sweet potatoes are ready to harvest?
Sweet potatoes are typically ready to harvest about 90-120 days after planting. A good indicator is when the foliage starts to turn yellow and die back. You can also gently dig around the base of a plant to check the size of the tubers. If they are a good size and have a smooth skin, they are likely ready to harvest. Avoid harvesting after a heavy rain, as the soil will be too wet.
How do I cure sweet potatoes after harvesting?
Curing sweet potatoes is essential for improving their flavor and storage life. After harvesting, gently brush off any excess soil and allow the sweet potatoes to dry in a warm, humid place (80-85°F or 27-29°C) for about 7-10 days. This process allows the skins to harden and any minor cuts or bruises to heal. After curing, store the sweet potatoes in a cool, dry, and well-ventilated place (55-60°F or 13-16°C) for several months. Avoid storing them in the refrigerator, as this can cause them to develop a hard core and lose their flavor.
Can I reuse the soil from my grow bags for next year’s sweet potato crop?
While you can reuse the soil from your grow bags, it’s important to amend it with fresh compost and organic matter to replenish the nutrients that were used by the previous crop. You should also check the soil for any signs of disease or pests and treat it accordingly. Alternatively, you can use the old soil for other plants that have different nutrient requirements, such as leafy greens or herbs. Rotating your crops and amending the soil regularly will help to maintain soil health and prevent nutrient depletion.
What are some common pests and diseases that affect sweet potatoes, and how can I prevent them?
Some common pests that affect sweet potatoes include sweet potato weevils, flea beetles, and aphids. Diseases include fungal diseases like stem rot and black rot. To prevent these problems, start with healthy, disease-free slips. Practice crop rotation and avoid planting sweet potatoes in the same location year after year. Use organic pest control methods, such as neem oil or insecticidal soap, to control pests. Ensure good air circulation around the plants to prevent fungal diseases. Remove any infected plants promptly to prevent the spread of disease.
Can I grow sweet potatoes in bags indoors?
While it’s possible to grow sweet potatoes indoors, it can be challenging to provide them with the necessary sunlight and space. Sweet potatoes require at least 6-8 hours of direct sunlight per day, which can be difficult to achieve indoors without supplemental lighting. You’ll also need a large grow bag to accommodate the root development. If you do decide to grow sweet potatoes indoors, choose a sunny location and supplement with grow lights if necessary. Be prepared to provide extra care and attention to ensure they thrive.

Leave a Comment