
Grow Strawberries From Seed? Yes, you read that right! Forget those pricey starter plants from the garden center. I’m about to let you in on a little secret: cultivating your own sweet, juicy strawberries from the tiniest of seeds is totally achievable, and honestly, incredibly rewarding. For centuries, strawberries have been cherished across cultures, from ancient Roman gardens to the strawberry fields of modern-day farms. Their vibrant color and delightful taste have made them a symbol of summer and a favorite treat worldwide.
But why bother with seeds when you can just buy a plant? Well, for starters, it’s a budget-friendly way to expand your strawberry patch. Plus, you’ll have access to a wider variety of strawberry types, some of which you might not find readily available as starter plants. Imagine the satisfaction of nurturing a tiny seed into a bountiful plant, laden with delicious berries! This DIY guide will walk you through every step, from seed selection to transplanting, ensuring you grow strawberries from seed successfully and enjoy a harvest that’s bursting with flavor. So, grab your gardening gloves, and let’s get started on this exciting journey!
Growing Strawberries From Seed: A Comprehensive DIY Guide
Okay, so you want to grow strawberries from seed? Awesome! It’s a bit more challenging than buying starter plants, but the reward of nurturing those tiny seeds into juicy berries is totally worth it. Plus, you get access to varieties you might not find at your local garden center. Let’s dive in!
Choosing Your Strawberry Variety
Before we even think about soil, let’s talk strawberries. There are three main types:
* June-bearing: These produce one large crop, usually in June (hence the name!). They’re great if you want a big harvest for jam-making or freezing.
* Everbearing: These produce two or three smaller crops throughout the spring, summer, and fall. Perfect for a continuous supply of fresh berries.
* Day-neutral: Similar to everbearing, but they’re less affected by day length, meaning they’ll produce consistently as long as the temperature is right.
Consider your climate and how you plan to use your strawberries when making your choice. Some popular varieties include ‘Albion’ (day-neutral), ‘Seascape’ (day-neutral), ‘Chandler’ (June-bearing), and ‘Ozark Beauty’ (everbearing). I personally love ‘Albion’ for its delicious flavor and consistent production.
Getting Started: Seed Starting Supplies
Here’s what you’ll need to get your strawberry seeds off to a good start:
* Strawberry seeds: Obviously! Make sure you get them from a reputable source.
* Seed starting trays or small pots: I prefer trays with individual cells to minimize root disturbance when transplanting.
* Seed starting mix: This is a light, sterile mix that’s perfect for delicate seedlings. Don’t use regular potting soil – it’s too heavy.
* Spray bottle: For gently watering the seeds.
* Clear plastic dome or plastic wrap: To create a humid environment.
* Grow light (optional but recommended): Strawberries need plenty of light, especially when starting indoors.
* Heat mat (optional): Strawberry seeds germinate best with slightly warmer soil temperatures.
* Refrigerator: For stratification (more on that later).
* Small labels and a marker: To keep track of your varieties.
Stratification: The Cold Treatment
Strawberry seeds often need a period of cold stratification to break dormancy and improve germination rates. This mimics the natural winter conditions they would experience in the wild. Here’s how to do it:
1. Moisten the seed starting mix: Lightly dampen the mix, but don’t soak it.
2. Sow the seeds: Sprinkle the strawberry seeds thinly over the surface of the moistened seed starting mix in a small container. They are tiny, so don’t bury them too deep. A light dusting of seed starting mix over the top is sufficient.
3. Seal the container: Cover the container with a lid or plastic wrap to maintain humidity.
4. Refrigerate: Place the container in the refrigerator (not the freezer!) for 4-6 weeks. The ideal temperature is around 35-40°F (2-4°C).
5. Check for moisture: Periodically check the mix to make sure it’s still slightly moist. If it’s drying out, lightly mist it with water.
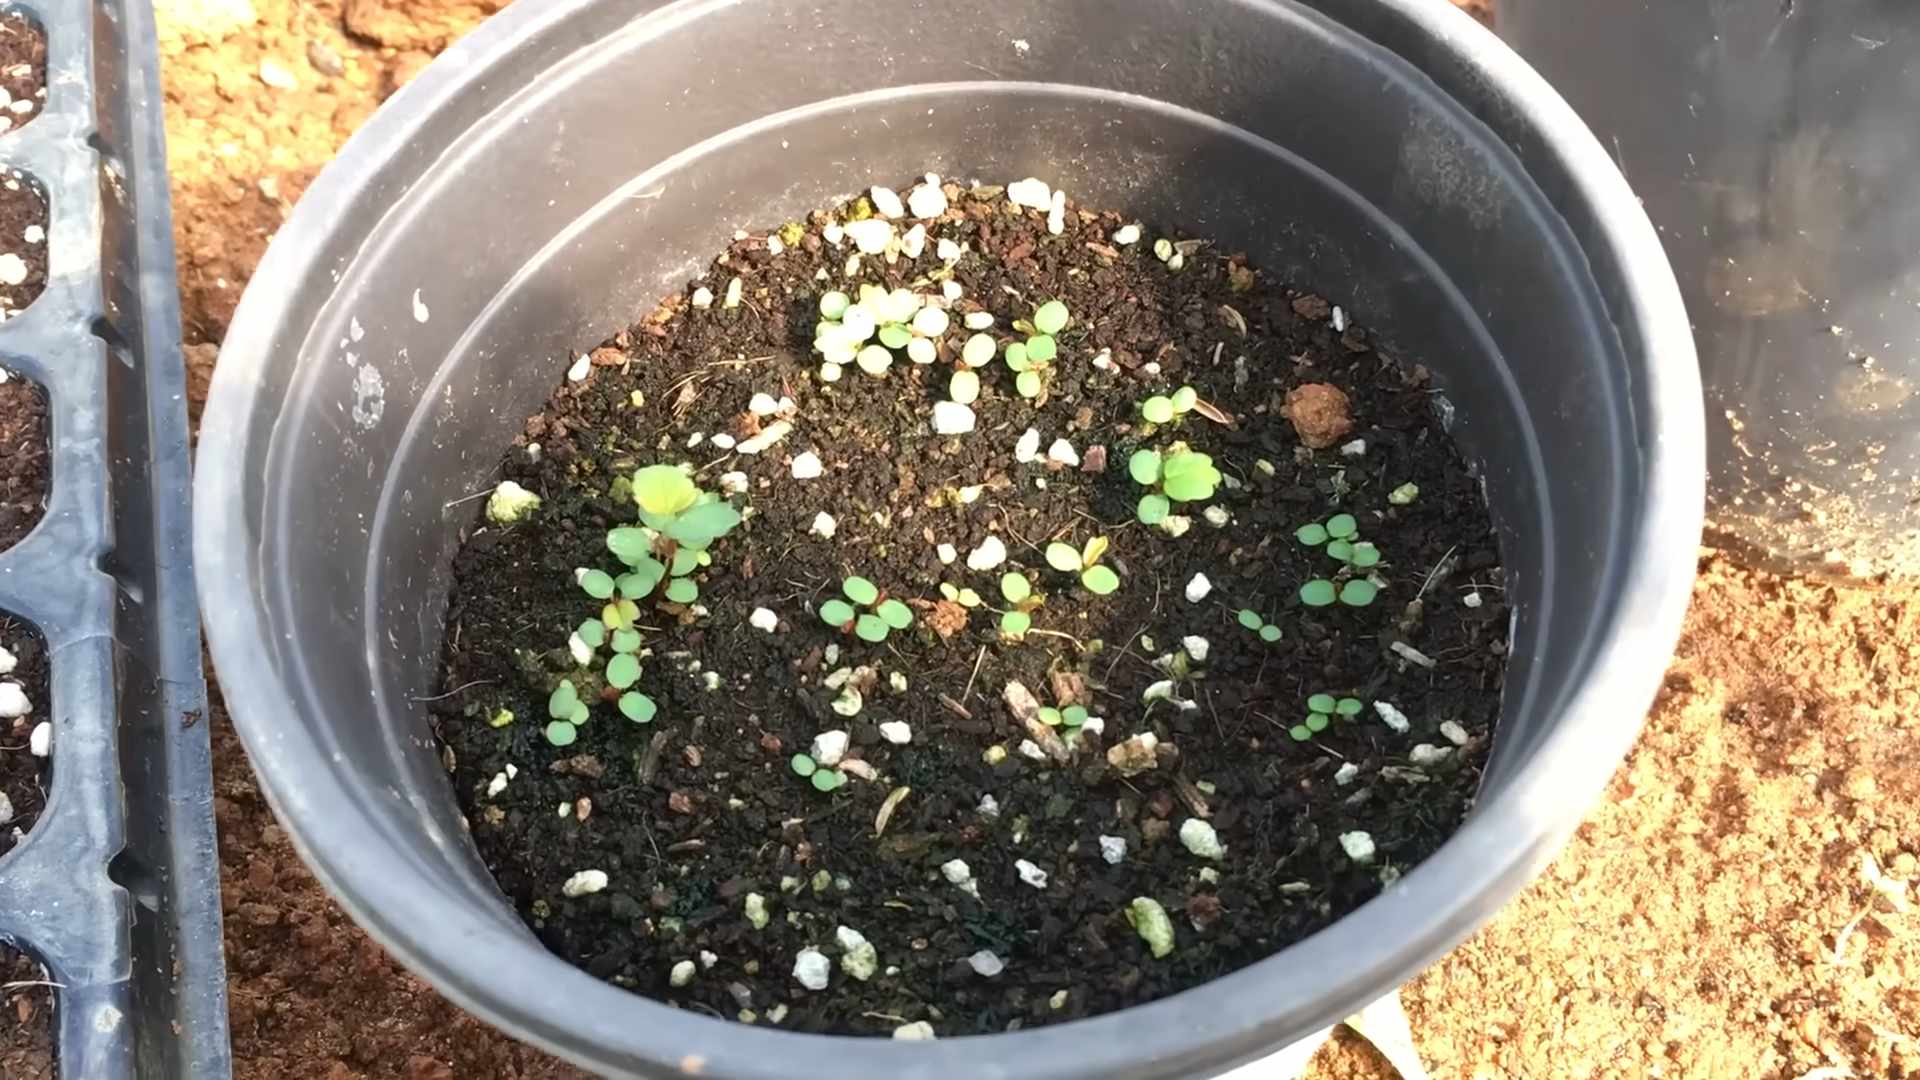
Sowing the Seeds: Bringing Them to Life
After the stratification period, it’s time to sow the seeds in your seed starting trays or pots.
1. Prepare the seed starting trays: Fill the trays or pots with moistened seed starting mix.
2. Sow the seeds: Gently transfer the stratified seeds from the refrigerator to the prepared seed starting trays. Again, sprinkle them thinly over the surface.
3. Lightly cover the seeds: Sprinkle a very thin layer of seed starting mix over the seeds. They need light to germinate, so don’t bury them too deeply.
4. Water gently: Use a spray bottle to mist the surface of the soil. Avoid overwatering, which can lead to fungal diseases.
5. Create a humid environment: Cover the trays with a clear plastic dome or plastic wrap to maintain humidity.
6. Provide warmth and light: Place the trays on a heat mat (if using) and under a grow light. If you don’t have a grow light, place them in a bright, sunny window.
7. Monitor germination: Strawberry seeds can take anywhere from 1 to 4 weeks to germinate, so be patient. Keep the soil consistently moist but not soggy.
Caring for the Seedlings: Nurturing the Tiny Plants
Once the seedlings emerge, it’s crucial to provide them with the right care to ensure they grow into strong, healthy plants.
1. Remove the dome or plastic wrap: Once the seedlings start to emerge, gradually remove the dome or plastic wrap to allow for better air circulation.
2. Provide adequate light: Strawberry seedlings need at least 6-8 hours of light per day. If you’re using a grow light, keep it a few inches above the seedlings.
3. Water carefully: Water the seedlings when the top inch of soil feels dry. Avoid overwatering, which can lead to damping off, a fungal disease that can kill young seedlings.
4. Fertilize lightly: Once the seedlings have their first true leaves (the leaves that appear after the initial seed leaves), you can start fertilizing them with a diluted liquid fertilizer. Use a balanced fertilizer (e.g., 10-10-10) and dilute it to half strength.
5. Thin the seedlings: If you have multiple seedlings growing in the same cell or pot, thin them out to leave only the strongest one. This will give the remaining seedling more room to grow.
Transplanting: Moving to Bigger Homes
Once the seedlings have developed several sets of true leaves and are large enough to handle, it’s time to transplant them into larger pots.
1. Prepare the pots: Fill small pots (e.g., 4-inch pots) with a good quality potting mix.
2. Gently remove the seedlings: Carefully remove the seedlings from the seed starting trays, being careful not to damage the roots. You can use a small spoon or fork to help loosen the soil around the roots.
3. Plant the seedlings: Make a hole in the potting mix in each pot and gently place the seedling in the hole. Make sure the crown of the plant (the point where the roots meet the stem) is level with the soil surface.
4. Water thoroughly: Water the transplanted seedlings thoroughly to help settle the soil around the roots.
5. Provide continued care: Continue to provide the seedlings with adequate light, water, and fertilizer.
Hardening Off: Preparing for the Outdoors
Before you can plant your strawberry plants outdoors, you need to harden them off. This process gradually acclimates them to the outdoor environment, reducing the risk of shock.
1. Start slowly: Begin by placing the plants outdoors in a sheltered location for a few hours each day.
2. Gradually increase exposure: Over the course of a week or two, gradually increase the amount of time the plants spend outdoors, and expose them to more sunlight and wind.
3. Monitor the plants: Watch the plants closely for signs of stress, such as wilting or sunburn. If you see any signs of stress, bring the plants back indoors and reduce their exposure to the elements.
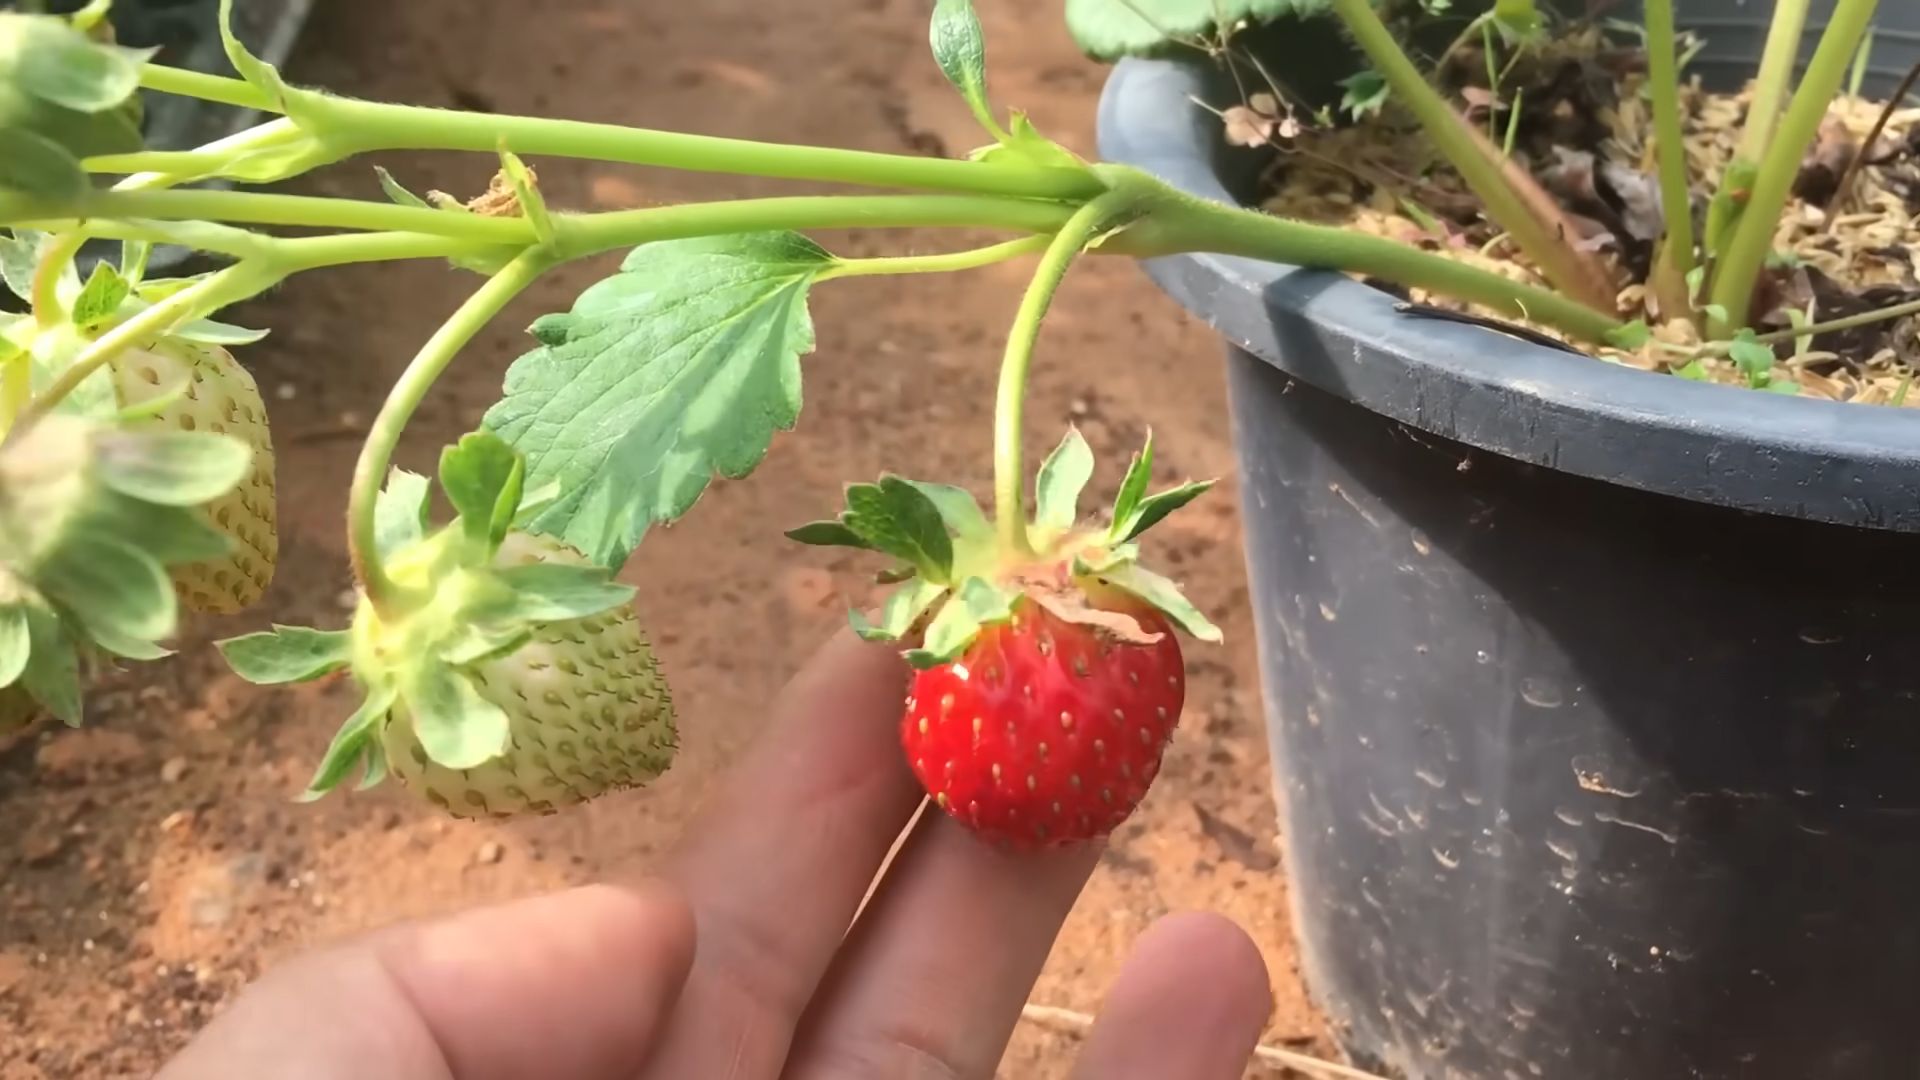
Planting Outdoors: Finding the Perfect Spot
Now for the exciting part – planting your strawberry plants in their permanent home!
1. Choose a sunny location: Strawberries need at least 6-8 hours of sunlight per day.
2. Prepare the soil: Strawberries prefer well-drained soil that is rich in organic matter. Amend the soil with compost or other organic matter before planting.
3. Plant the strawberries: Space the strawberry plants about 12-18 inches apart. Dig a hole that is large enough to accommodate the root ball, and gently place the plant in the hole. Make sure the crown of the plant is level with the soil surface.
4. Water thoroughly: Water the newly planted strawberries thoroughly to help settle the soil around the roots.
5. Mulch: Apply a layer of mulch around the strawberry plants to help retain moisture, suppress weeds, and keep the berries clean. Straw, pine needles, or wood chips are all good choices.
Ongoing Care: Keeping Your Strawberries Happy
Once your strawberry plants are established, it’s important to provide them with ongoing care to ensure a bountiful harvest.
1. Water regularly: Water the strawberry plants regularly, especially during dry periods. Aim to keep the soil consistently moist but not soggy.
2. Fertilize: Fertilize the strawberry plants in the spring with a balanced fertilizer. Avoid over-fertilizing, which can lead to excessive foliage growth and reduced fruit production.
3
Conclusion
So, there you have it! Growing strawberries from seed might seem a little daunting at first, but the rewards are absolutely worth the effort. Imagine biting into a perfectly ripe, sun-warmed strawberry that you nurtured from a tiny seed. The flavor is simply unmatched, and the satisfaction of knowing you created something so delicious from scratch is incredibly fulfilling. This DIY trick isn’t just about saving money (though that’s a definite perk!), it’s about connecting with nature, learning a new skill, and enjoying the freshest, most flavorful strawberries imaginable.
Why is this a must-try? Because you gain complete control over the variety of strawberries you grow. Forget being limited to what’s available at the local nursery. With seeds, you can explore heirloom varieties, alpine strawberries, or even day-neutral types that produce fruit all season long. You can tailor your strawberry patch to your specific taste preferences and growing conditions. Plus, starting from seed allows you to ensure your plants are disease-free from the very beginning, giving them the best possible start in life.
Looking for variations? Consider experimenting with different seed starting methods. Some gardeners prefer using peat pellets, while others swear by seed starting trays with a humidity dome. You can also try cold stratification, which mimics the natural winter conditions that strawberry seeds need to germinate. Simply place your seeds in a damp paper towel inside a sealed bag in the refrigerator for a few weeks before planting. This can significantly improve germination rates.
Another fun variation is to grow your strawberries in containers. This is a great option if you have limited space or want to protect your plants from pests and diseases. Choose a well-draining potting mix and a container that’s at least 12 inches in diameter. You can even create a strawberry tower for a visually stunning and space-saving display.
Don’t be afraid to experiment with different fertilizers and soil amendments. Strawberries are heavy feeders, so they need plenty of nutrients to thrive. Consider adding compost, bone meal, or a balanced fertilizer to your soil. Monitor your plants closely and adjust your feeding schedule as needed.
Ultimately, the best way to learn is by doing. So, gather your supplies, follow the steps outlined in this guide, and get ready to embark on your strawberry-growing adventure. We are confident that you will be successful in your endeavor to grow strawberries from seed.
We encourage you to try this DIY trick and share your experience with us! Post photos of your seedlings, tell us about your favorite strawberry varieties, and let us know what challenges you encountered along the way. Your feedback will help other gardeners learn and grow, and together, we can create a community of strawberry enthusiasts. Happy growing!
Frequently Asked Questions (FAQ)
Q: How long does it take for strawberry seeds to germinate?
A: Germination time can vary depending on several factors, including the variety of strawberry, the temperature, and the moisture level. Generally, you can expect to see seedlings emerge within 2-4 weeks. However, some varieties may take longer, so be patient. Maintaining consistent moisture and warmth is crucial for successful germination. If you’ve cold stratified your seeds, they may germinate a bit faster. Don’t give up if you don’t see anything after a couple of weeks – sometimes they just need a little extra time.
Q: What is cold stratification and why is it necessary?
A: Cold stratification is the process of exposing seeds to a period of cold, moist conditions to break their dormancy. Many strawberry varieties require cold stratification to germinate successfully. This mimics the natural winter conditions that the seeds would experience in the wild. To cold stratify your strawberry seeds, place them in a damp paper towel inside a sealed plastic bag and store them in the refrigerator for 2-4 weeks. Make sure the paper towel stays moist but not soaking wet.
Q: What kind of soil is best for growing strawberries from seed?
A: Strawberries prefer well-draining, slightly acidic soil with a pH between 5.5 and 6.5. A good potting mix for starting seeds should be light and airy, allowing for good drainage and root development. You can also amend your soil with compost or other organic matter to improve its fertility and drainage. Avoid using heavy clay soils, as they can become waterlogged and suffocate the roots.
Q: How often should I water my strawberry seedlings?
A: Strawberry seedlings need consistent moisture to thrive, but they don’t like to be waterlogged. Water them gently whenever the top inch of soil feels dry to the touch. Avoid overwatering, as this can lead to root rot. Use a spray bottle or watering can with a gentle nozzle to avoid disturbing the delicate seedlings. As the plants grow larger, you can gradually reduce the frequency of watering, but make sure the soil stays consistently moist.
Q: When should I transplant my strawberry seedlings?
A: You can transplant your strawberry seedlings once they have developed several sets of true leaves and are large enough to handle. This usually takes about 6-8 weeks after germination. Before transplanting, harden off the seedlings by gradually exposing them to outdoor conditions for a few hours each day. This will help them acclimate to the sun, wind, and temperature changes. When transplanting, choose a sunny location with well-draining soil. Space the plants about 12-18 inches apart.
Q: What are some common pests and diseases that affect strawberry plants?
A: Strawberry plants can be susceptible to a variety of pests and diseases, including aphids, spider mites, slugs, snails, and fungal diseases like powdery mildew and gray mold. Regularly inspect your plants for signs of infestation or disease. You can control pests with insecticidal soap or neem oil. To prevent fungal diseases, ensure good air circulation around your plants and avoid overwatering. Remove any infected leaves or fruit promptly.
Q: How much sunlight do strawberry plants need?
A: Strawberry plants need at least 6-8 hours of direct sunlight per day to produce abundant fruit. Choose a sunny location for your strawberry patch or containers. If you live in a hot climate, you may need to provide some afternoon shade to protect the plants from scorching.
Q: Can I grow strawberries indoors?
A: Yes, you can grow strawberries indoors, but you’ll need to provide them with adequate light and warmth. Place your plants near a sunny window or use grow lights to supplement the natural light. You’ll also need to pollinate the flowers manually, as there won’t be any bees or other pollinators indoors. Use a small paintbrush to transfer pollen from one flower to another.
Q: What are some good companion plants for strawberries?
A: Several plants can benefit strawberries when grown nearby. These include borage, which attracts beneficial insects; garlic and onions, which deter pests; and thyme, which helps to prevent fungal diseases. Avoid planting strawberries near brassicas (like cabbage and broccoli), as they can compete for nutrients.
Q: How long does it take for strawberry plants to produce fruit?
A: The time it takes for strawberry plants to produce fruit depends on the variety and the growing conditions. Some varieties, like everbearing strawberries, can produce fruit in their first year. Others, like June-bearing strawberries, typically produce fruit in their second year. With proper care and attention, you can enjoy a bountiful harvest of delicious strawberries for many years to come.
Leave a Comment