
Grow Radishes Indoors Year Round? Absolutely! Imagine fresh, peppery radishes gracing your salads and snacks, even when the snow is piling up outside. Forget those bland, store-bought radishes – with a few simple tricks, you can cultivate a vibrant, delicious harvest right on your windowsill.
For centuries, cultures around the globe have valued radishes for their quick growth and nutritional benefits. From ancient Egypt, where they were a staple food for pyramid builders, to modern-day Japan, where they’re pickled and enjoyed in countless dishes, radishes have a rich and diverse history. But what if you don’t have a sprawling garden or even a balcony? That’s where the magic of indoor gardening comes in!
Let’s face it, we all crave fresh, healthy food, but sometimes life gets in the way. Maybe you live in an apartment, or perhaps the weather just isn’t cooperating. That’s why learning how to grow radishes indoors year round is such a game-changer. It’s a simple, rewarding project that brings a touch of nature into your home and provides you with a continuous supply of crisp, flavorful radishes. I’m excited to share some easy DIY tricks and hacks that will have you harvesting your own homegrown radishes in no time. Get ready to unleash your inner gardener!
Grow Radishes Indoors Year-Round: A Beginner’s Guide
Hey there, fellow gardening enthusiasts! Ever crave that peppery crunch of a fresh radish in the dead of winter? Well, you’re in luck! Growing radishes indoors is surprisingly easy and rewarding. I’m going to walk you through everything you need to know to enjoy a year-round radish harvest, right from the comfort of your own home. Let’s get started!
Choosing the Right Radish Variety
Not all radishes are created equal, especially when it comes to indoor growing. Some varieties are better suited for containers and shorter daylight hours. Here are a few of my favorites:
* Cherry Belle: These are classic, round, red radishes that mature quickly (around 22 days). They’re reliable and perfect for beginners.
* French Breakfast: These elongated radishes have a mild flavor and mature in about 25 days. They’re great in salads.
* Easter Egg: This mix of colorful radishes (red, pink, purple, white) adds a fun touch to your indoor garden. They mature in about 28 days.
* Sparkler: Similar to Cherry Belle, but with a white tip. They are quick to mature and easy to grow.
Gathering Your Supplies
Before we dive into planting, let’s make sure you have everything you need. Here’s a checklist:
* Containers: Choose containers that are at least 6 inches deep. Radishes need room to grow downwards. I prefer using plastic pots with drainage holes, but you can also use repurposed containers like yogurt tubs or milk cartons (just make sure to poke some holes in the bottom!).
* Potting Mix: Use a high-quality, well-draining potting mix. Avoid using garden soil, as it can compact and hinder root growth. I like to use a mix specifically formulated for vegetables.
* Radish Seeds: Select your desired radish variety from the list above. Make sure the seeds are fresh for the best germination rate.
* Watering Can or Spray Bottle: You’ll need a gentle way to water your radishes without disturbing the soil.
* Grow Lights (Optional but Recommended): While radishes can grow indoors with natural light, grow lights will significantly improve your harvest, especially during the darker months. I use LED grow lights, as they are energy-efficient and provide the right spectrum of light for plant growth.
* Fertilizer (Optional): A balanced liquid fertilizer can help boost growth, but it’s not essential.
* Small Trowel or Spoon: For planting the seeds.
* Labels: To keep track of which variety you planted in each container.
Planting Your Radish Seeds
Now for the fun part! Let’s get those radish seeds in the soil.
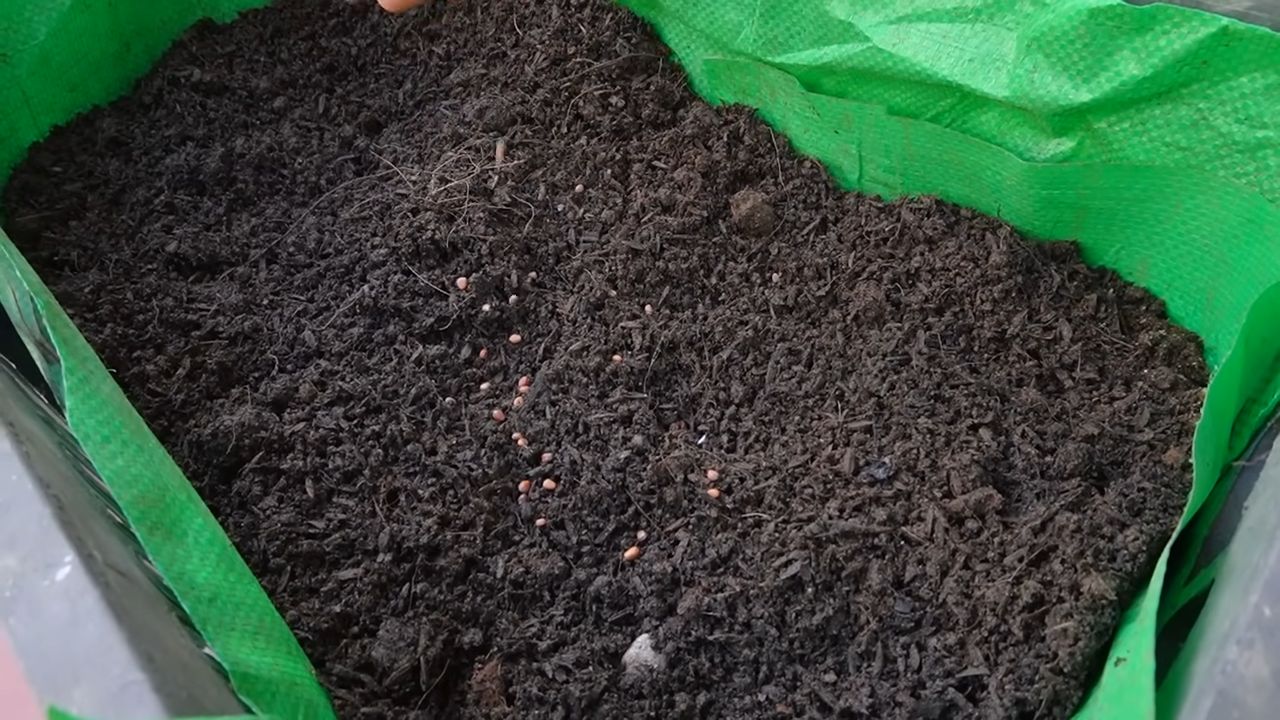
1. Prepare the Containers: Fill your containers with potting mix, leaving about an inch of space at the top. Gently pat down the soil to remove any air pockets.
2. Sow the Seeds: Sow the radish seeds about ½ inch deep and 1 inch apart. You can plant multiple seeds in each container, but be sure to thin them out later if they become overcrowded.
3. Cover the Seeds: Gently cover the seeds with potting mix.
4. Water Thoroughly: Water the soil gently until it is evenly moist. Avoid overwatering, as this can lead to rot.
5. Label Your Containers: Use labels to identify the radish variety you planted in each container. This will help you keep track of your progress.
Caring for Your Indoor Radishes
Once your radish seeds are planted, it’s important to provide them with the right care to ensure a successful harvest.
1. Light: Radishes need at least 6 hours of direct sunlight per day. If you don’t have enough natural light, use grow lights. I keep my grow lights on for 12-14 hours a day.
2. Watering: Keep the soil consistently moist, but not soggy. Water when the top inch of soil feels dry to the touch. Avoid overwatering, as this can lead to root rot.
3. Temperature: Radishes prefer cool temperatures, between 50°F and 65°F (10°C and 18°C). Avoid placing them near heat sources, such as radiators or vents.
4. Fertilizing (Optional): If you choose to fertilize, use a balanced liquid fertilizer diluted to half strength. Apply the fertilizer every 2-3 weeks.
5. Thinning: Once the seedlings emerge, thin them out so that they are about 1 inch apart. This will give them enough room to grow.
6. Air Circulation: Good air circulation is important to prevent fungal diseases. You can use a small fan to circulate the air around your plants.
Harvesting Your Radishes
The best part of growing radishes is, of course, harvesting them! Radishes are typically ready to harvest in 20-30 days, depending on the variety.
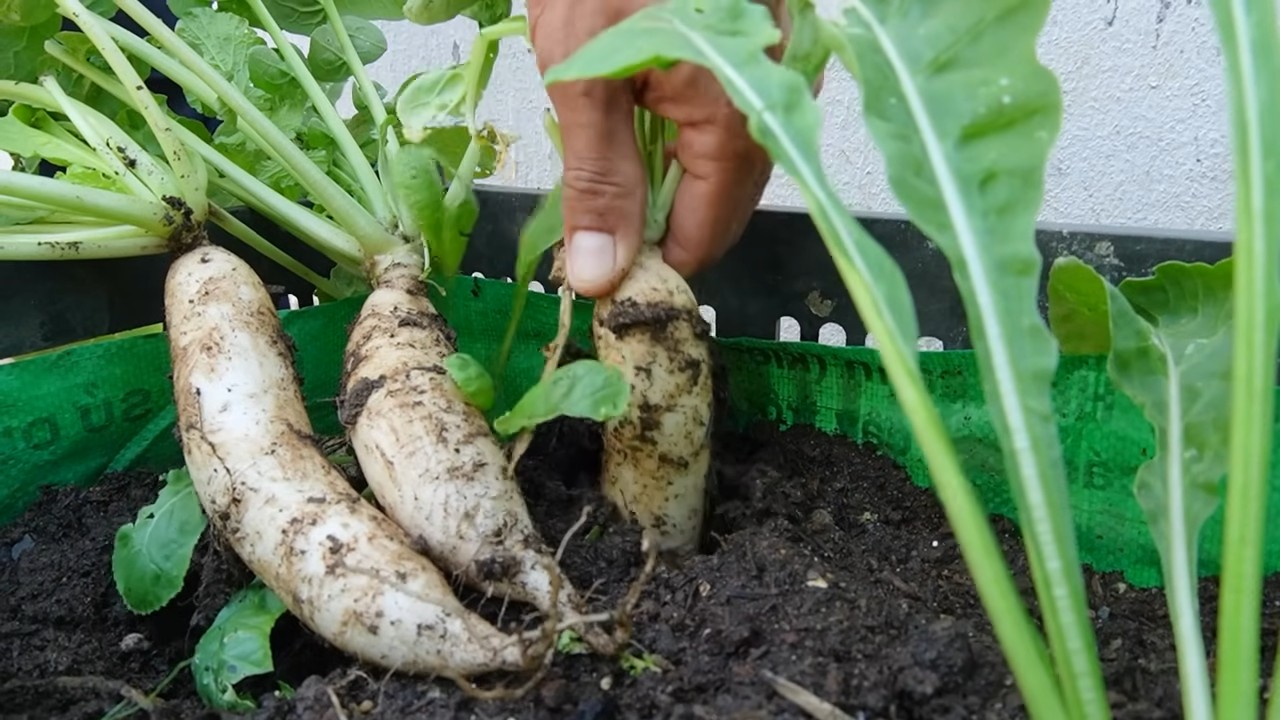
1. Check for Maturity: Gently brush away the soil around the base of the radish to check its size. Radishes are typically ready to harvest when they are about 1 inch in diameter.
2. Harvest Carefully: Gently pull the radishes from the soil. If they are difficult to pull, you can loosen the soil around them with a small trowel.
3. Wash and Enjoy: Wash the radishes thoroughly and enjoy them fresh in salads, sandwiches, or as a snack. You can also roast or sauté them.
Troubleshooting Common Problems
Even with the best care, you may encounter some problems when growing radishes indoors. Here are a few common issues and how to address them:
* Leggy Seedlings: This is usually caused by insufficient light. Make sure your radishes are getting enough sunlight or grow light.
* Root Rot: This is caused by overwatering. Allow the soil to dry out slightly between waterings.
* Pests: Radishes are generally pest-resistant, but you may occasionally encounter aphids or flea beetles. You can control these pests with insecticidal soap or neem oil.
* Splitting Radishes: This can be caused by inconsistent watering. Try to keep the soil consistently moist.
* Bitter Taste: This can be caused by growing radishes in hot weather or letting them get too large before harvesting. Harvest your radishes when they are young and tender.
Succession Planting for Continuous Harvest
To enjoy a continuous harvest of radishes, practice succession planting. This means planting a new batch of seeds every 1-2 weeks. This way, you’ll always have radishes ready to harvest. I usually plant a small container every other week to keep a steady supply coming.
Tips for Maximizing Your Harvest
Here are a few extra tips to help you maximize your indoor radish harvest:
* Use a light-colored container: Light-colored containers reflect more light, which can help your radishes grow faster.
* Rotate your containers: Rotate your containers regularly to ensure that all sides of the plants receive equal light.
* Keep the soil loose: Compacted soil can hinder root growth. Use a well-draining potting mix and avoid overwatering.
* Harvest promptly: Radishes can become bitter if they are left in the ground too long. Harvest them when they are young and tender.
* Experiment with different varieties: Try growing different radish varieties to find your favorites.
Storing Your Radishes
If you have more radishes than you can eat right away, you can store them in the refrigerator.
1. Remove the Greens: Cut off the radish greens, leaving about an inch of stem attached.
2. Wash and Dry: Wash the radishes thoroughly and dry them with a paper towel.
3. Store in a Plastic Bag: Place the radishes in a plastic bag and store them in the refrigerator. They should last for about 1-2 weeks.
Enjoying Your Homegrown Radishes
Now that you’ve successfully grown your own radishes indoors, it’s time to enjoy the fruits (or rather, roots!) of your labor. Here are a few ideas:
* Salads: Add sliced radishes to your favorite salads for a peppery crunch.
* Sandwiches: Use radishes as a topping for sandwiches or wraps.
* Snacks: Enjoy radishes as a healthy and refreshing snack.
* Roasted Radishes: Roast radishes with olive oil and herbs for a delicious side dish.
* Radish Greens: Don’t throw away the radish greens! They are edible and can be used in salads, soups, or stir-fries.
Growing radishes indoors is a fun and rewarding experience. With a little bit of care and attention, you can enjoy a year-round harvest of these delicious and nutritious vegetables. Happy gardening!
Conclusion
So, there you have it! Growing radishes indoors year-round isn’t just a whimsical dream; it’s a deliciously achievable reality. We’ve walked through the simple steps, from selecting the right radish varieties to ensuring optimal lighting and watering. But why should you dedicate a little corner of your home to these peppery delights?
The answer is multifaceted. Firstly, the unparalleled freshness. Imagine plucking crisp, vibrant radishes straight from your indoor garden, moments before adding them to your salad or enjoying them as a crunchy snack. The taste difference compared to store-bought radishes is remarkable. Secondly, the convenience. No more last-minute trips to the grocery store when you need that extra zing for your dish. Your supply is right there, readily available. Thirdly, the sheer joy of nurturing life. There’s something incredibly rewarding about watching tiny seeds sprout and transform into edible treasures.
But beyond the practical benefits, growing radishes indoors offers a unique opportunity to connect with nature, even in the heart of the city or during the coldest winter months. It’s a small act of self-sufficiency, a reminder that we can cultivate our own food, regardless of external conditions. And let’s not forget the educational aspect. Growing radishes indoors is a fantastic project for children, teaching them about plant life cycles, responsibility, and the origins of their food.
Don’t be afraid to experiment with different radish varieties. ‘Cherry Belle’ is a classic choice for its quick growth and mild flavor, but why not try ‘French Breakfast’ for its elongated shape and delicate taste, or ‘Black Spanish’ for a bolder, more pungent experience? You can also play around with different growing mediums. While soil is the most common option, hydroponics can offer even faster growth rates and require less maintenance. Consider adding companion plants like carrots or lettuce to your indoor garden to maximize space and create a more diverse ecosystem.
Remember, the key to success lies in providing your radishes with ample light, consistent moisture, and well-draining soil. Don’t overwater them, as this can lead to root rot. And be sure to harvest them promptly once they reach maturity, as they can become pithy and lose their flavor if left in the ground for too long.
We wholeheartedly encourage you to embark on this rewarding journey of growing radishes indoors. It’s a simple, satisfying, and delicious way to bring a touch of nature into your home. Once you’ve experienced the joy of harvesting your own homegrown radishes, we’re confident you’ll be hooked.
So, grab some seeds, prepare your containers, and get ready to enjoy a year-round supply of fresh, peppery radishes. And most importantly, don’t forget to share your experiences with us! We’d love to hear about your successes, your challenges, and any tips or tricks you discover along the way. Share your photos and stories on social media using [Your Hashtag Here] and let’s create a community of indoor radish growers! Let us know what you think about this **DIY radish** growing guide.
Frequently Asked Questions (FAQ)
1. What are the best radish varieties to grow indoors?
The best radish varieties for indoor growing are typically those that mature quickly and don’t require a lot of space. Some excellent choices include:
* **Cherry Belle:** A classic, round, red radish that matures in about 22 days. It’s known for its mild flavor and reliable growth.
* **French Breakfast:** An elongated, red and white radish with a delicate, slightly sweet flavor. It matures in about 25 days.
* **Sparkler:** A round, red radish with a white tip. It has a crisp texture and a mild, peppery flavor. It matures in about 24 days.
* **Easter Egg:** A mix of radish varieties that come in a range of colors, including red, pink, purple, and white. This adds visual appeal to your indoor garden. They mature in about 28 days.
* **Champion:** A larger, round, red radish with a slightly more pungent flavor than Cherry Belle. It matures in about 30 days.
When selecting radish varieties, consider your personal taste preferences and the amount of space you have available. Smaller varieties like Cherry Belle are ideal for smaller containers, while larger varieties like Champion may require more room.
2. How much light do radishes need when grown indoors?
Radishes require at least 6 hours of direct sunlight per day to thrive. If you don’t have a sunny windowsill, you’ll need to supplement with artificial lighting. LED grow lights are an excellent option, as they are energy-efficient and provide the full spectrum of light that plants need. Position the grow lights about 6-12 inches above the radish seedlings and keep them on for 12-16 hours per day. Rotate your radish containers regularly to ensure that all sides of the plants receive adequate light. Insufficient light can result in leggy growth and poor radish development.
3. What type of soil is best for growing radishes indoors?
Radishes prefer well-draining soil that is rich in organic matter. A good potting mix for radishes should be light and airy, allowing for good root development. You can use a commercially available potting mix or create your own by combining equal parts of:
* **Potting soil:** Provides nutrients and structure.
* **Peat moss or coconut coir:** Helps retain moisture.
* **Perlite or vermiculite:** Improves drainage and aeration.
Avoid using garden soil, as it can be too heavy and may contain pests or diseases. Before planting, amend the soil with compost or other organic matter to improve its fertility.
4. How often should I water my indoor radishes?
Radishes need consistent moisture to grow properly, but they don’t like to be waterlogged. Water your radishes when the top inch of soil feels dry to the touch. Water deeply, until water drains out of the bottom of the container. Avoid overwatering, as this can lead to root rot. Check the soil moisture regularly and adjust your watering schedule as needed, depending on the temperature and humidity in your home.
5. How long does it take for radishes to mature when grown indoors?
The time it takes for radishes to mature depends on the variety and growing conditions. Most radish varieties mature in 22-30 days. You can start harvesting radishes when they reach the desired size. To check if they are ready, gently brush away some of the soil around the base of the plant. If the radish is the size you want, you can harvest it.
6. Can I grow radishes in containers? What size container is needed?
Yes, radishes are well-suited for container gardening. Choose containers that are at least 6 inches deep to allow for proper root development. The width of the container will depend on how many radishes you want to grow. A 6-inch container can typically accommodate 3-4 radish plants. Make sure the containers have drainage holes to prevent waterlogging.
7. What are some common problems when growing radishes indoors and how can I prevent them?
Some common problems when growing radishes indoors include:
* **Leggy growth:** Caused by insufficient light. Provide more light by moving the plants to a sunnier location or using grow lights.
* **Root rot:** Caused by overwatering. Water less frequently and ensure that the soil is well-draining.
* **Pests:** Aphids and flea beetles can sometimes infest radishes. Inspect your plants regularly and treat any infestations with insecticidal soap or neem oil.
* **Bolting:** Caused by high temperatures or stress. Keep the plants cool and well-watered.
By providing your radishes with the right growing conditions and monitoring them regularly, you can prevent most of these problems.
8. Can I eat the radish greens?
Yes, radish greens are edible and nutritious! They have a peppery flavor similar to the radishes themselves. You can add them to salads, soups, or stir-fries. Harvest the greens when they are young and tender for the best flavor.
9. How do I harvest radishes?
To harvest radishes, gently pull them from the soil. If the soil is dry, you may need to loosen it first. Wash the radishes thoroughly and trim off the greens, leaving about an inch of stem. Store the radishes in the refrigerator for up to a week.
10. Can I grow radishes indoors year-round?
Yes, you can grow radishes indoors year-round as long as you provide them with the right growing conditions, including adequate light, water, and well-draining soil. This is one of the biggest advantages of growing radishes indoors!
Leave a Comment