
Grow Mustard Greens at Home
Have you ever dreamed of enjoying fresh, vibrant mustard greens straight from your own backyard, bursting with flavor and free from pesticides? Well, dream no more! This article is your ultimate guide to Grow Mustard Greens at Home, packed with simple, effective DIY tricks and hacks that will transform your gardening experience. I’ll share my own personal journey and the lessons I’ve learned along the way, turning a simple desire for fresh greens into a rewarding hobby.
Growing your own food has a rich history, connecting us to ancient agricultural practices and fostering a deeper appreciation for the land. From the earliest civilizations cultivating crops to the modern-day resurgence of home gardening, there’s a profound satisfaction in nurturing life from seed to plate. And let me tell you, there’s nothing quite like the taste of homegrown mustard greens!
Why bother with Grow Mustard Greens at Home when you can buy them at the store? Because homegrown greens are superior! They’re fresher, tastier, and you control exactly what goes into them – no harmful pesticides or questionable growing practices. Plus, it’s incredibly rewarding to watch tiny seeds sprout and grow into a bountiful harvest. This DIY approach is perfect for beginners and seasoned gardeners alike, offering a fantastic opportunity to connect with nature and enjoy the fruits (or rather, leaves!) of your labor.
Ready to get your hands dirty?
Let’s dive into the practical tips and tricks that will help you successfully grow your own delicious mustard greens. I’ll cover everything from seed selection and soil preparation to harvesting and storage, ensuring you have a plentiful supply of these nutritious greens throughout the growing season. Get ready to experience the joy of Grow Mustard Greens at Home!
Growing Your Own Mustard Greens: A Step-by-Step Guide
I love the peppery bite of fresh mustard greens, and nothing beats the satisfaction of growing your own. This guide will walk you through the entire process, from seed to harvest. Let’s get started!
Phase 1: Planning and Preparation
- Choose your location: Mustard greens need at least six hours of sunlight daily. Select a sunny spot in your garden, on a balcony, or even a sunny windowsill. Consider the space you have available – mustard greens don’t need a huge area, but they do need enough room to spread out.
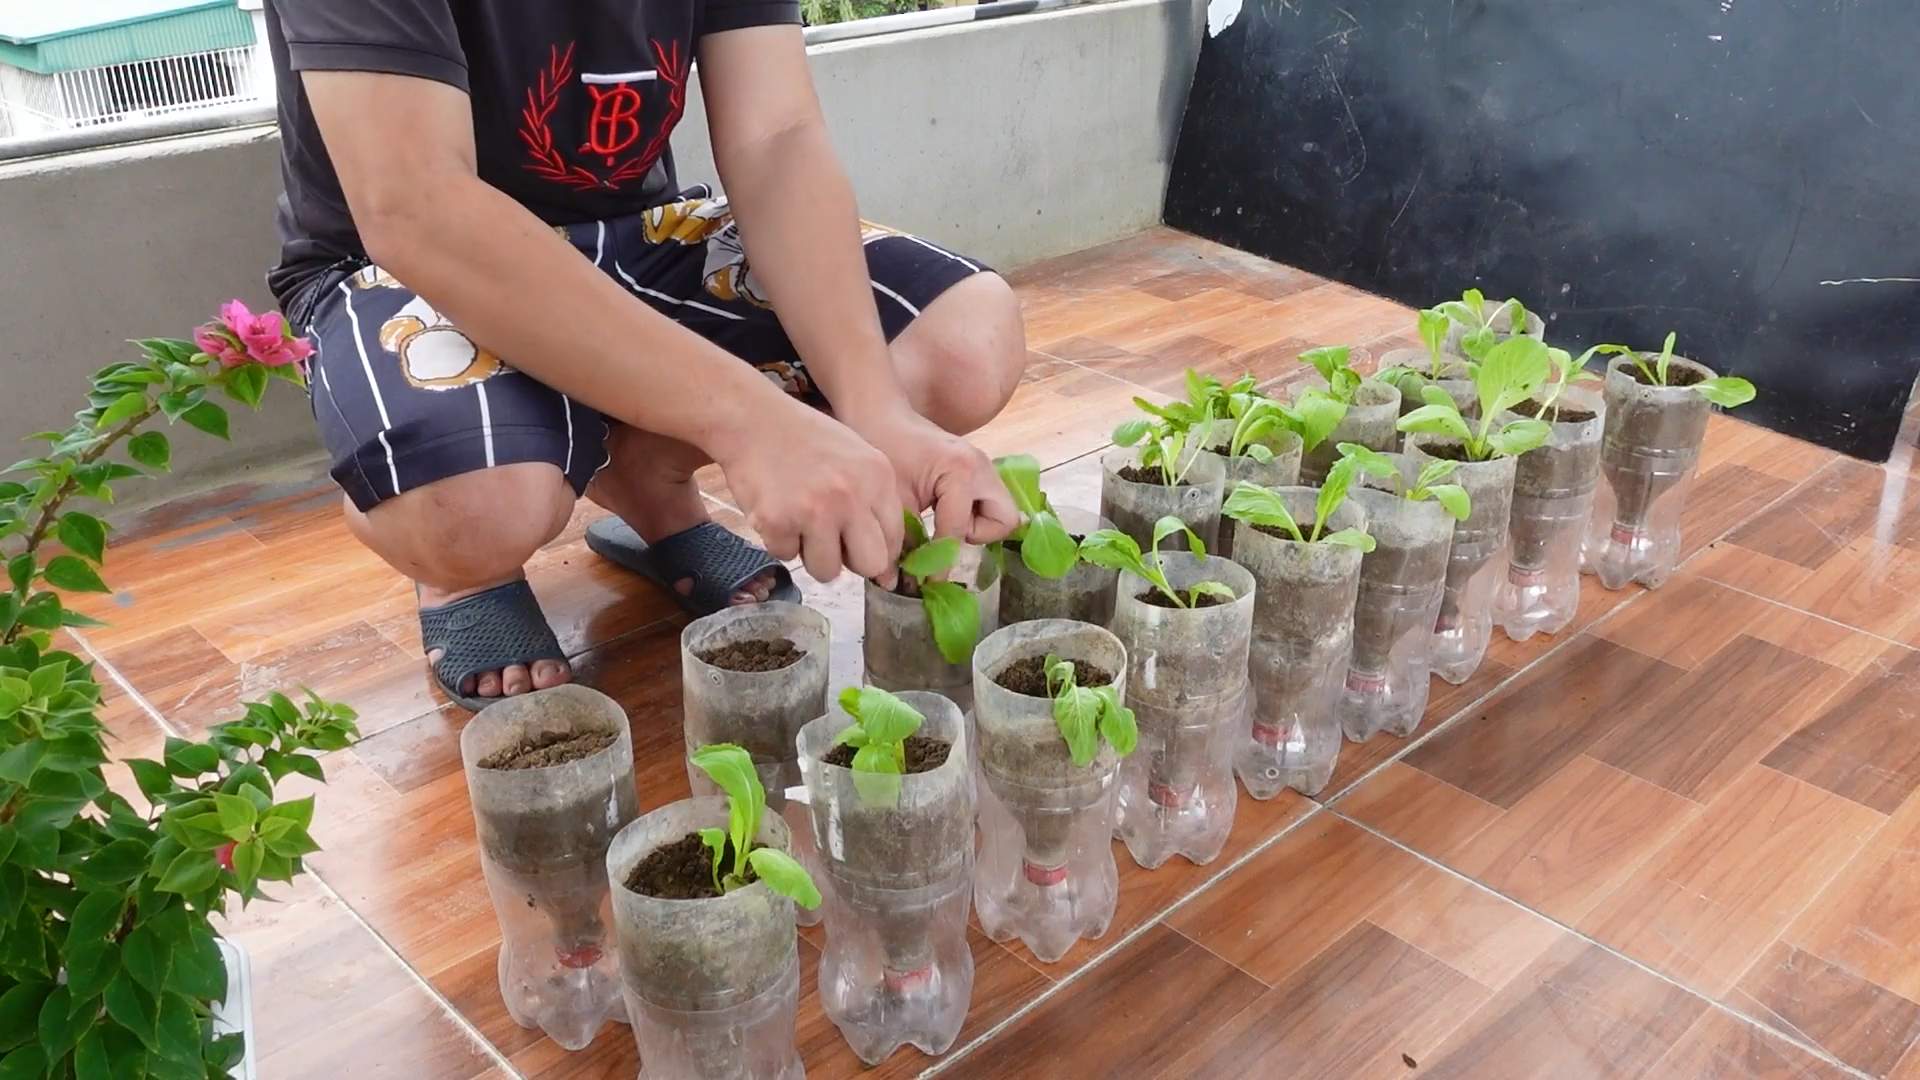
- Select your containers (if applicable): If you’re growing in containers, choose pots at least 6 inches deep with drainage holes. Larger containers are better for larger harvests. Make sure the containers are clean and free of any debris.
- Prepare your soil: Mustard greens prefer well-drained, fertile soil. If you’re using garden soil, amend it with compost to improve drainage and nutrient content. For container gardening, use a high-quality potting mix. The soil should be loose and easy to work with.
- Gather your supplies: You’ll need mustard seeds (choose a variety you like!), a small trowel or hand rake, a watering can, and optionally, a seed starting tray or individual small pots for starting seeds indoors.
Phase 2: Sowing the Seeds
- Start seeds indoors (optional): For an earlier harvest, start seeds indoors 2-4 weeks before the last expected frost. Sow seeds about ¼ inch deep in seed starting trays or small pots filled with moist seed-starting mix. Keep the soil consistently moist but not soggy. Place the tray in a warm, sunny location.
- Direct sowing: If you’re sowing directly into the garden or containers, wait until the soil has warmed up and the danger of frost has passed. Sow seeds about ¼ inch deep and 1-2 inches apart. You can sow seeds in rows or scatter them randomly. Gently cover the seeds with soil.
- Water gently: After sowing, water the seeds gently using a fine rose watering can. Avoid disturbing the seeds. Keep the soil consistently moist until germination.
- Thinning (if necessary): Once seedlings have emerged and have a few true leaves, thin them out to about 4-6 inches apart. This gives each plant enough space to grow. You can transplant the thinned seedlings to another location if you wish.
Phase 3: Caring for Your Mustard Greens
- Watering: Water regularly, keeping the soil consistently moist but not waterlogged. The frequency of watering will depend on your climate and the type of container you are using. Check the soil moisture regularly by sticking your finger a couple of inches into the soil. If it feels dry, it’s time to water.
- Weeding: Regularly remove weeds to prevent competition for nutrients and water. This is especially important in the early stages of growth.
- Fertilizing (optional): Mustard greens are relatively low-maintenance and don’t require heavy fertilization. However, you can give them a boost with a balanced liquid fertilizer every few weeks, especially if you’re growing them in containers. Follow the instructions on the fertilizer packaging.
- Pest and disease control: Monitor your plants for pests and diseases. Common pests include aphids and flea beetles. If you notice any pests, treat them with an appropriate insecticide or organic pest control method. Good air circulation can help prevent fungal diseases.
Phase 4: Harvesting Your Mustard Greens
- Harvest time: Mustard greens are ready for harvest when they reach a height of 4-6 inches, usually about 4-6 weeks after sowing. The leaves should be tender and flavorful.
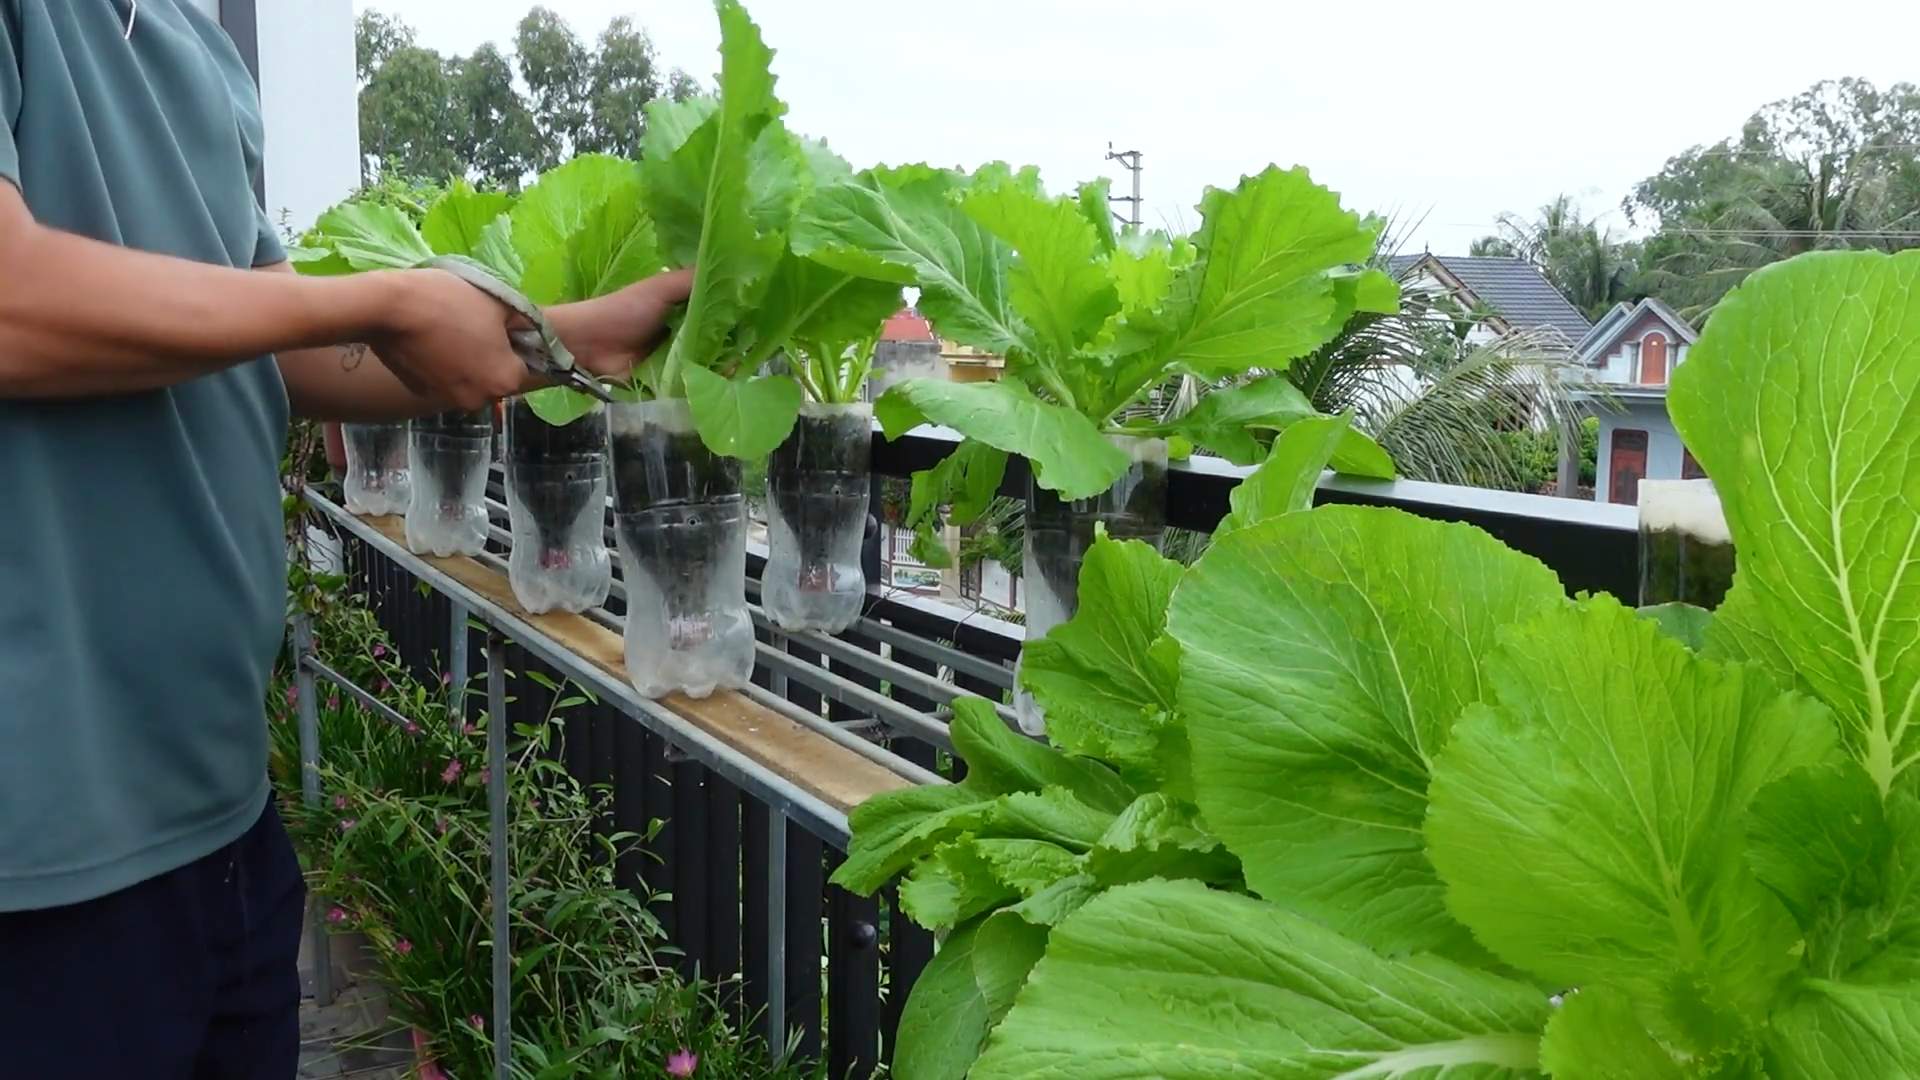
- Harvesting methods: You can harvest the entire plant by pulling it up from the roots, or you can harvest individual leaves by cutting them off at the base with scissors or a knife. Harvesting individual leaves allows for a continuous harvest over a longer period.
- Storage: Store harvested mustard greens in a plastic bag in the refrigerator. They will last for several days. You can also blanch and freeze them for longer storage.
Troubleshooting
Problem: Seedlings are not germinating
Possible causes:
- Soil too dry
- Seeds too deep
- Soil temperature too cold
Solutions:
- Water thoroughly and consistently
- Sow seeds at the correct depth
- Use a heat mat to warm the soil
Problem: Yellowing leaves
Possible causes:
- Nutrient deficiency
- Overwatering or underwatering
- Disease
Solutions:
- Fertilize with a balanced liquid fertilizer
- Adjust watering schedule
- Treat any disease with an appropriate fungicide
Problem: Pests
Possible causes:
- Aphids
- Flea beetles
Solutions:
- Use insecticidal soap or neem oil
- Handpick pests
- Use row covers to protect plants
Conclusion
Growing your own mustard greens at home is a surprisingly rewarding experience, offering a fresh, flavorful harvest far superior to anything you’ll find in the supermarket. This simple DIY trick unlocks the potential for a continuous supply of nutrient-rich greens, tailored to your taste and free from pesticides. The ease of cultivation, coupled with the incredible health benefits and the sheer satisfaction of nurturing your own food, makes this a must-try for any home gardener, regardless of experience level. You’ll be amazed at how quickly these vibrant greens sprout and thrive, providing a delicious addition to salads, sandwiches, or as a side dish. The initial investment is minimal, and the returns – both in terms of delicious food and personal accomplishment – are immeasurable.
Beyond the basic method outlined, there are numerous exciting variations you can explore. Experiment with different mustard green varieties – each boasts a unique flavor profile, ranging from spicy to mild. Consider starting your seeds indoors under grow lights for an earlier harvest, especially in colder climates. Alternatively, direct sowing outdoors in well-prepared soil is equally effective during warmer months. For those with limited space, vertical gardening techniques, such as using hanging planters or stacked containers, can maximize your yield. Don’t be afraid to get creative! Try incorporating companion planting – growing other vegetables alongside your mustard greens can enhance their growth and deter pests. For example, planting marigolds nearby can help repel certain insects.
We encourage you to embark on this rewarding journey of growing your own mustard greens. Share your experiences with us! Post pictures of your thriving plants and delicious recipes on social media using #GrowMustardGreensAtHome. Let’s build a community of home gardeners, sharing tips, tricks, and the joy of harvesting fresh, homegrown produce. The satisfaction of biting into a tender, peppery leaf you nurtured from seed is an unparalleled culinary experience. So, grab some seeds, prepare your soil, and get ready to experience the magic of growing your own mustard greens. You won’t regret it!
Frequently Asked Questions
Q: What type of soil is best for growing mustard greens?
Mustard greens thrive in loose, well-draining soil rich in organic matter. A slightly acidic to neutral pH (6.0-7.0) is ideal. You can amend your soil with compost or other organic materials to improve its texture and nutrient content. Avoid heavy clay soils, which can retain too much water and lead to root rot.
Q: How much sunlight do mustard greens need?
Mustard greens prefer at least six hours of sunlight per day. However, they can tolerate some shade, especially during the hottest part of the day. In hot climates, providing some afternoon shade can prevent the leaves from wilting. Observe your plants – if they appear leggy or pale, they may need more sunlight.
Q: How often should I water my mustard greens?
Keep the soil consistently moist but not waterlogged. Water deeply and regularly, especially during dry periods. The frequency of watering will depend on your climate and soil type. Check the soil moisture before watering – if the top inch feels dry, it’s time to water. Avoid overhead watering, which can promote fungal diseases. Instead, water at the base of the plants.
Q: How long does it take to harvest mustard greens?
The time to harvest depends on the variety and growing conditions, but generally, you can harvest baby mustard greens in about 4-6 weeks. For mature leaves, allow 6-8 weeks. You can harvest leaves continuously by picking the outer leaves, allowing the inner leaves to continue growing. This method ensures a continuous supply of fresh greens.
Q: Can I grow mustard greens in containers?
Absolutely! Mustard greens grow well in containers, making them perfect for balconies, patios, or even windowsills. Choose containers at least 6 inches deep with drainage holes to prevent waterlogging. Use a high-quality potting mix that retains moisture but drains well.
Q: What are some common pests or diseases that affect mustard greens?
Mustard greens are relatively pest-resistant, but they can be susceptible to aphids, flea beetles, and fungal diseases like downy mildew. Regularly inspect your plants for signs of pests or diseases. If you find pests, you can try handpicking them or using insecticidal soap. For fungal diseases, ensure good air circulation and avoid overhead watering.
Q: What are the benefits of growing my own mustard greens compared to buying them from the store?
Growing your own mustard greens offers numerous advantages. You’ll have access to fresh, flavorful greens whenever you want, free from pesticides and other chemicals. You’ll also save money in the long run, and the experience of nurturing your own food is incredibly rewarding. Plus, homegrown mustard greens are packed with nutrients, offering a healthy and delicious addition to your diet. This DIY approach to growing your own food is a sustainable and fulfilling way to connect with nature and enjoy the fruits (or leaves!) of your labor.
Leave a Comment