
Grow More Melons than you ever thought possible! Imagine biting into a juicy, homegrown watermelon, cantaloupe, or honeydew, bursting with flavor that store-bought melons simply can’t match. Sounds dreamy, right? Well, it doesn’t have to be just a dream! This article is packed with simple, yet effective, DIY tricks and hacks to help you maximize your melon harvest, even if you’re a beginner gardener.
Melons have a rich history, dating back thousands of years to Africa and Asia. They were prized by ancient civilizations for their sweetness and refreshing qualities. Today, the joy of cultivating your own food, including delicious melons, is experiencing a resurgence. But let’s face it, growing melons can sometimes feel like a gamble. You put in the effort, but the yield can be disappointing. That’s where these DIY tricks come in!
I’ve personally struggled with getting a bountiful melon crop in the past. I’ve learned that with a few clever adjustments and simple techniques, you can significantly increase your chances of success. This article will reveal those secrets, helping you grow more melons and enjoy the sweet rewards of your labor. We’ll cover everything from soil preparation and pollination tips to pest control and watering strategies. Get ready to transform your garden into a melon paradise!
Grow More Melons: My Foolproof DIY Guide to a Bountiful Harvest
Hey fellow gardeners! Are you dreaming of juicy, sweet melons bursting from your vines? I know I am! Growing melons can seem tricky, but with a few clever DIY hacks and a little TLC, you can significantly increase your yield. I’m going to share my tried-and-true methods for maximizing your melon harvest, from seed to table. Let’s get started!
Choosing the Right Melon Variety
Before we dive into the DIY magic, it’s crucial to pick the right melon variety for your climate and space. Consider these factors:
* Climate: Some melons thrive in hot, arid conditions, while others prefer milder temperatures. Check your local growing zone and choose varieties accordingly.
* Space: Watermelons need a lot of room to sprawl, while smaller melons like cantaloupe and honeydew can be grown in containers or trained on trellises.
* Days to Maturity: This is the number of days from planting to harvest. Choose varieties that will mature within your growing season.
* Personal Preference: Ultimately, you want to grow melons you enjoy eating! Experiment with different varieties to find your favorites.
Some of my go-to melon varieties include:
* Sugar Baby Watermelon: A compact watermelon perfect for smaller gardens.
* Cantaloupe: A classic choice with a sweet, musky flavor.
* Honeydew: A refreshing and subtly sweet melon.
* Minnesota Midget Muskmelon: Early maturing and great for cooler climates.
Preparing Your Melon Patch: The Foundation for Success
Melons are heavy feeders, so preparing your soil is essential for a successful harvest. Here’s how I get my melon patch ready:
* Sunlight: Melons need at least 6-8 hours of direct sunlight per day. Choose a location that receives plenty of sunshine.
* Soil: Melons prefer well-drained, sandy loam soil with a pH of 6.0-6.8.
* Compost: Amend your soil with plenty of compost to improve drainage, fertility, and water retention. I usually add a 3-4 inch layer of compost and work it into the top 6-8 inches of soil.
* Fertilizer: Melons benefit from a balanced fertilizer with a higher phosphorus content to promote root development and flowering. I like to use a slow-release fertilizer at planting time.
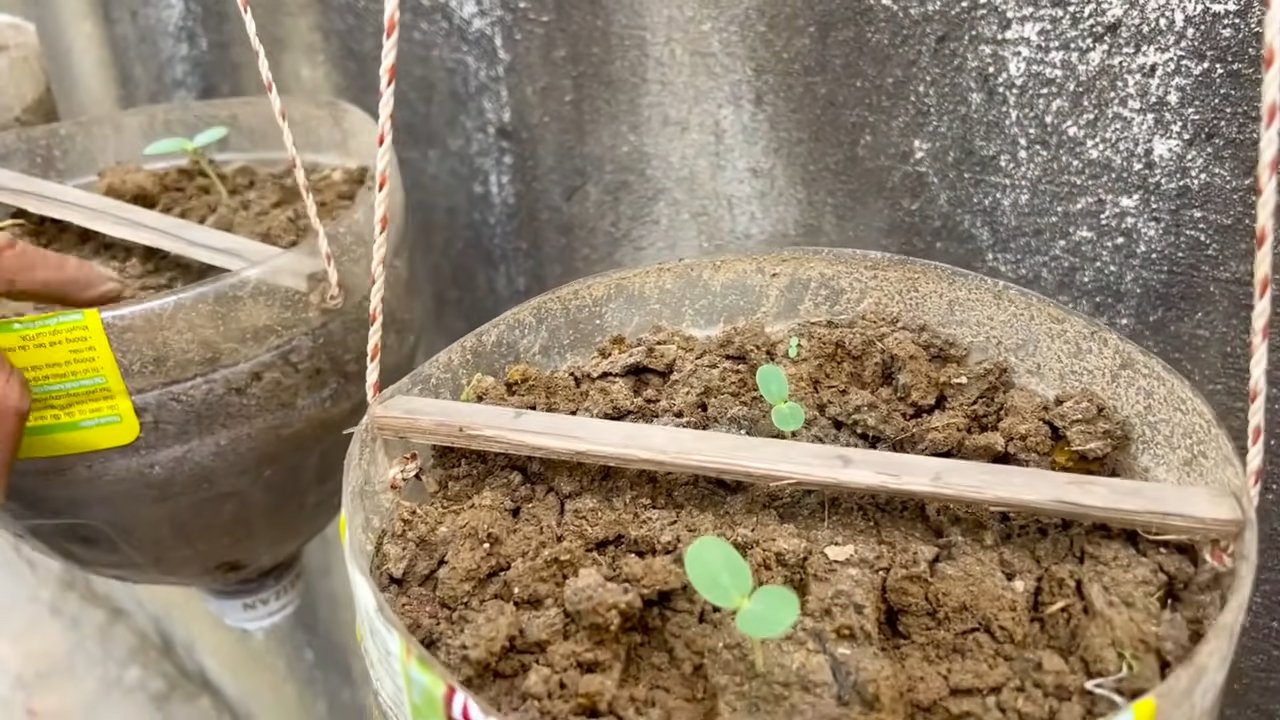
DIY Hack #1: Seed Starting for a Head Start
Starting your melon seeds indoors gives them a head start and allows you to extend your growing season, especially in cooler climates.
Materials You’ll Need:
* Melon seeds
* Seed starting trays or pots
* Seed starting mix
* Heat mat (optional)
* Grow light (optional)
Step-by-Step Instructions:
1. Soak the Seeds: Soak your melon seeds in warm water for 24 hours before planting. This helps to soften the seed coat and improve germination rates.
2. Prepare the Seed Starting Trays: Fill your seed starting trays or pots with seed starting mix. Moisten the mix thoroughly.
3. Plant the Seeds: Plant the seeds about 1/2 inch deep in the seed starting mix. Gently cover the seeds with soil.
4. Provide Warmth: Place the seed starting trays on a heat mat to maintain a soil temperature of 70-80°F (21-27°C). This will speed up germination.
5. Provide Light: Once the seeds germinate, place the seedlings under a grow light or in a sunny window.
6. Water Regularly: Keep the seed starting mix moist but not soggy. Water from the bottom to avoid damping off.
7. Harden Off: Before transplanting your seedlings outdoors, you’ll need to harden them off. This means gradually exposing them to outdoor conditions over a period of 7-10 days. Start by placing them in a sheltered location for a few hours each day, gradually increasing the amount of time they spend outdoors.
DIY Hack #2: The Epsom Salt Boost
Epsom salt is a natural mineral compound (magnesium sulfate) that can benefit melon plants in several ways. Magnesium is essential for chlorophyll production, which is necessary for photosynthesis. It also helps plants absorb nutrients like nitrogen and phosphorus.
How to Use Epsom Salt:
* At Planting Time: Sprinkle 1 tablespoon of Epsom salt into the planting hole before transplanting your melon seedlings.
* Foliar Spray: Mix 1 tablespoon of Epsom salt per gallon of water and spray the foliage of your melon plants every 2-3 weeks.
* Soil Drench: Mix 1 tablespoon of Epsom salt per gallon of water and pour it around the base of your melon plants every 2-3 weeks.
Important Note: Don’t overdo it with the Epsom salt! Too much magnesium can interfere with calcium uptake.
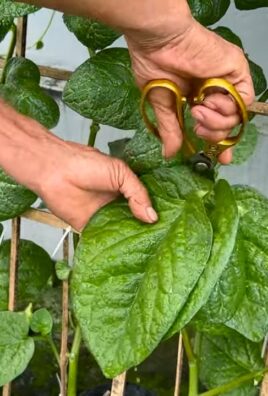
DIY Hack #3: The Trellis Trick for Space Saving and Air Circulation
If you’re short on space or want to improve air circulation around your melon plants, consider training them on a trellis. This is especially effective for smaller melon varieties like cantaloupe and honeydew.
Materials You’ll Need:
* Trellis (wooden, metal, or bamboo)
* Soft plant ties or twine
Step-by-Step Instructions:
1. Choose a Sturdy Trellis: Select a trellis that is strong enough to support the weight of the melons.
2. Install the Trellis: Place the trellis near your melon plants, making sure it is securely anchored in the ground.
3. Train the Vines: As the melon vines grow, gently guide them up the trellis and secure them with soft plant ties or twine.
4. Support the Melons: As the melons develop, you may need to provide additional support to prevent them from falling off the trellis. You can use slings made from pantyhose, netting, or fabric scraps to support the melons.
DIY Hack #4: The Sugar Boost for Sweetness
This is a bit controversial, but I’ve found that adding a little sugar to the soil can help increase the sweetness of your melons. The theory is that the sugar provides a readily available source of energy for the plant, which can be used to produce sweeter fruits.
How to Use Sugar:
* Dissolve Sugar in Water: Dissolve 1/4 cup of sugar in 1 gallon of water.
* Water the Plants: Water your melon plants with the sugar solution every 2-3 weeks, starting when the fruits begin to develop.
Important Note: Don’t overdo it with the sugar! Too much sugar can attract pests and harm beneficial soil microbes. This is more of an anecdotal trick, so experiment with caution.
DIY Hack #5: Hand Pollination for Guaranteed Fruit Set
Melons rely on pollinators like bees to transfer pollen from the male flowers to the female flowers. If you’re not seeing a lot of bee activity in your garden, you can hand-pollinate your melon flowers to ensure fruit set.
How to Hand-Pollinate:
1. Identify Male and Female Flowers: Male flowers have a long, thin stem, while female flowers have a small, immature melon at the base of the flower.
2. Collect Pollen: Use a small paintbrush or cotton swab to collect pollen from the male flower.
3. Transfer Pollen: Gently transfer the pollen to the stigma (the sticky part) of the female flower.
4. Repeat: Repeat this process for several female flowers each day.
Hey fellow gardeners! Are you dreaming of juicy, sweet melons bursting from your vines? I know I am! Growing melons can seem tricky, but with a few clever DIY hacks and a little TLC, you can significantly increase your yield. I’m going to share my tried-and-true methods for maximizing your melon harvest, from seed to table. Let’s get started!
Choosing the Right Melon Variety
Before we dive into the DIY magic, it’s crucial to pick the right melon variety for your climate and space. Consider these factors:
* Climate: Some melons thrive in hot, arid conditions, while others prefer milder temperatures. Check your local growing zone and choose varieties accordingly.
* Space: Watermelons need a lot of room to sprawl, while smaller melons like cantaloupe and honeydew can be grown in containers or trained on trellises.
* Days to Maturity: This is the number of days from planting to harvest. Choose varieties that will mature within your growing season.
* Personal Preference: Ultimately, you want to grow melons you enjoy eating! Experiment with different varieties to find your favorites.
Some of my go-to melon varieties include:
* Sugar Baby Watermelon: A compact watermelon perfect for smaller gardens.
* Cantaloupe: A classic choice with a sweet, musky flavor.
* Honeydew: A refreshing and subtly sweet melon.
* Minnesota Midget Muskmelon: Early maturing and great for cooler climates.
Preparing Your Melon Patch: The Foundation for Success
Melons are heavy feeders, so preparing your soil is essential for a successful harvest. Here’s how I get my melon patch ready:
* Sunlight: Melons need at least 6-8 hours of direct sunlight per day. Choose a location that receives plenty of sunshine.
* Soil: Melons prefer well-drained, sandy loam soil with a pH of 6.0-6.8.
* Compost: Amend your soil with plenty of compost to improve drainage, fertility, and water retention. I usually add a 3-4 inch layer of compost and work it into the top 6-8 inches of soil.
* Fertilizer: Melons benefit from a balanced fertilizer with a higher phosphorus content to promote root development and flowering. I like to use a slow-release fertilizer at planting time.
DIY Hack #1: Seed Starting for a Head Start
Starting your melon seeds indoors gives them a head start and allows you to extend your growing season, especially in cooler climates.
Materials You’ll Need:
* Melon seeds
* Seed starting trays or pots
* Seed starting mix
* Heat mat (optional)
* Grow light (optional)
Step-by-Step Instructions:
1. Soak the Seeds: Soak your melon seeds in warm water for 24 hours before planting. This helps to soften the seed coat and improve germination rates.
2. Prepare the Seed Starting Trays: Fill your seed starting trays or pots with seed starting mix. Moisten the mix thoroughly.
3. Plant the Seeds: Plant the seeds about 1/2 inch deep in the seed starting mix. Gently cover the seeds with soil.
4. Provide Warmth: Place the seed starting trays on a heat mat to maintain a soil temperature of 70-80°F (21-27°C). This will speed up germination.
5. Provide Light: Once the seeds germinate, place the seedlings under a grow light or in a sunny window.
6. Water Regularly: Keep the seed starting mix moist but not soggy. Water from the bottom to avoid damping off.
7. Harden Off: Before transplanting your seedlings outdoors, you’ll need to harden them off. This means gradually exposing them to outdoor conditions over a period of 7-10 days. Start by placing them in a sheltered location for a few hours each day, gradually increasing the amount of time they spend outdoors.
DIY Hack #2: The Epsom Salt Boost
Epsom salt is a natural mineral compound (magnesium sulfate) that can benefit melon plants in several ways. Magnesium is essential for chlorophyll production, which is necessary for photosynthesis. It also helps plants absorb nutrients like nitrogen and phosphorus.
How to Use Epsom Salt:
* At Planting Time: Sprinkle 1 tablespoon of Epsom salt into the planting hole before transplanting your melon seedlings.
* Foliar Spray: Mix 1 tablespoon of Epsom salt per gallon of water and spray the foliage of your melon plants every 2-3 weeks.
* Soil Drench: Mix 1 tablespoon of Epsom salt per gallon of water and pour it around the base of your melon plants every 2-3 weeks.
Important Note: Don’t overdo it with the Epsom salt! Too much magnesium can interfere with calcium uptake.
DIY Hack #3: The Trellis Trick for Space Saving and Air Circulation
If you’re short on space or want to improve air circulation around your melon plants, consider training them on a trellis. This is especially effective for smaller melon varieties like cantaloupe and honeydew.
Materials You’ll Need:
* Trellis (wooden, metal, or bamboo)
* Soft plant ties or twine
Step-by-Step Instructions:
1. Choose a Sturdy Trellis: Select a trellis that is strong enough to support the weight of the melons.
2. Install the Trellis: Place the trellis near your melon plants, making sure it is securely anchored in the ground.
3. Train the Vines: As the melon vines grow, gently guide them up the trellis and secure them with soft plant ties or twine.
4. Support the Melons: As the melons develop, you may need to provide additional support to prevent them from falling off the trellis. You can use slings made from pantyhose, netting, or fabric scraps to support the melons.
DIY Hack #4: The Sugar Boost for Sweetness
This is a bit controversial, but I’ve found that adding a little sugar to the soil can help increase the sweetness of your melons. The theory is that the sugar provides a readily available source of energy for the plant, which can be used to produce sweeter fruits.
How to Use Sugar:
* Dissolve Sugar in Water: Dissolve 1/4 cup of sugar in 1 gallon of water.
* Water the Plants: Water your melon plants with the sugar solution every 2-3 weeks, starting when the fruits begin to develop.
Important Note: Don’t overdo it with the sugar! Too much sugar can attract pests and harm beneficial soil microbes. This is more of an anecdotal trick, so experiment with caution.
DIY Hack #5: Hand Pollination for Guaranteed Fruit Set
Melons rely on pollinators like bees to transfer pollen from the male flowers to the female flowers. If you’re not seeing a lot of bee activity in your garden, you can hand-pollinate your melon flowers to ensure fruit set.
How to Hand-Pollinate:
1. Identify Male and Female Flowers: Male flowers have a long, thin stem, while female flowers have a small, immature melon at the base of the flower.
2. Collect Pollen: Use a small paintbrush or cotton swab to collect pollen from the male flower.
3. Transfer Pollen: Gently transfer the pollen to the stigma (the sticky part) of the female flower.
4. Repeat: Repeat this process for several female flowers each day.
The best time to hand-pollinate is in the morning, when the flowers are open and the pollen is fresh.
DIY Hack #6: The Water Management Secret
Proper watering is crucial for melon production. Melons need consistent moisture, especially during fruit development.
* Water Deeply: Water your melon plants deeply and infrequently, rather than shallowly and frequently. This encourages deep root growth.
* Avoid Overhead Watering: Avoid watering the foliage of your melon plants, as this can promote fungal diseases. Use a soaker hose or drip irrigation to water at the base of the plants.
* Mulch: Apply a layer of mulch around your melon plants to help retain moisture and suppress weeds. Straw, wood chips, or shredded leaves are all good options.
* Reduce Watering Before Harvest: Reduce watering a week or two before harvest to concentrate the sugars in the fruit.
DIY Hack #7: Pest and Disease Control the Natural Way
Melons can be susceptible to pests and diseases, but you can minimize problems by using natural control methods.
* Companion Planting: Plant companion plants like marigolds, nasturtiums, and basil near your melon plants to repel pests.
* Neem Oil: Spray your melon plants with neem oil to control aphids, spider mites, and other pests.
Conclusion
So, there you have it! This simple yet effective DIY trick to grow more melons is a game-changer for any gardener, whether you’re a seasoned pro or just starting out. We’ve walked you through the process, highlighting the benefits of increased yield, healthier plants, and ultimately, more delicious melons for you to enjoy.
Why is this a must-try? Because it addresses a fundamental challenge in melon cultivation: maximizing pollination and fruit set. By giving your melon plants a little boost, you’re essentially ensuring that more of those beautiful blossoms turn into juicy, flavorful fruits. Imagine biting into a perfectly ripe watermelon, cantaloupe, or honeydew, knowing that you played a direct role in its abundance. That’s the satisfaction this DIY trick offers.
But don’t stop there! Feel free to experiment with variations. For example, if you’re growing a smaller variety of melon, you might need to adjust the amount of support you provide. Consider using pantyhose or netting for individual melons as they grow larger, providing gentle support without restricting their development. You could also try different types of fertilizer to see which one works best for your soil and melon variety. Some gardeners swear by bone meal for its phosphorus content, which promotes strong root growth and fruit development. Others prefer a balanced organic fertilizer. The key is to observe your plants and adjust your approach accordingly.
Another variation to consider is the timing of your DIY intervention. While we’ve outlined a general timeframe, the specific needs of your melon plants will depend on your climate and growing conditions. Keep a close eye on your plants and be prepared to adapt your strategy as needed. Remember, gardening is a learning process, and every season brings new opportunities to refine your techniques.
We are confident that this DIY trick will significantly improve your melon harvest. It’s a small investment of time and effort that yields a substantial return in terms of both quantity and quality. Don’t be intimidated by the idea of DIY – this is a straightforward process that anyone can master.
Now, it’s your turn! We encourage you to try this DIY trick in your own garden and see the results for yourself. We’re eager to hear about your experiences, so please share your photos, tips, and stories in the comments section below. Let’s build a community of melon-growing enthusiasts and learn from each other’s successes and challenges. Together, we can unlock the secrets to abundant melon harvests and enjoy the sweet rewards of our labor. Happy gardening!
Frequently Asked Questions (FAQ)
What types of melons does this DIY trick work best for?
This DIY trick is generally effective for all types of melons, including watermelons, cantaloupes, honeydews, and muskmelons. However, the specific needs of each variety may vary slightly. For example, larger watermelon varieties may require more robust support than smaller cantaloupe varieties. Pay attention to the specific growth habits of your chosen melon and adjust your approach accordingly. Also, consider the climate you are in. Some melons thrive in hotter climates, while others prefer more temperate conditions. Researching the specific needs of your melon variety will help you maximize your success.
How often should I apply this DIY trick to my melon plants?
The frequency of application depends on the specific aspect of the trick. For example, if you’re focusing on hand-pollination, you may need to do this daily or every other day during the flowering period. For support structures, you’ll only need to set them up once. For fertilizer applications, follow the instructions on the fertilizer packaging, but generally, fertilizing every 2-3 weeks is sufficient. Monitor your plants closely and adjust the frequency as needed based on their growth and development. If you notice signs of nutrient deficiency, such as yellowing leaves, you may need to fertilize more frequently.
What if I don’t have access to the materials listed in the instructions?
Don’t worry! There are often substitutes you can use. For example, if you don’t have twine, you can use strips of cloth or old pantyhose to support the melons. If you don’t have a specific type of fertilizer, you can use a general-purpose organic fertilizer. The key is to be resourceful and adapt the DIY trick to the materials you have available. You can also explore online forums and gardening communities for alternative suggestions and creative solutions.
My melon plants are already producing fruit. Is it too late to try this DIY trick?
No, it’s not too late! While the best time to implement this trick is during the flowering and early fruit development stages, you can still benefit from it even if your plants are already producing fruit. Providing support for the melons will help prevent them from breaking off the vine, and fertilizing will provide the plants with the nutrients they need to continue producing healthy, flavorful fruit. Hand-pollination may not be necessary at this stage, but you can still focus on providing optimal growing conditions to maximize the size and quality of your existing melons.
How do I know if my melon plants are getting enough sunlight?
Melon plants need at least 6-8 hours of direct sunlight per day to thrive. If your plants are not getting enough sunlight, they may produce fewer flowers and fruits, and the fruits that do develop may be smaller and less flavorful. Signs of insufficient sunlight include leggy growth (long, spindly stems), pale green leaves, and a lack of flowering. If you suspect your plants are not getting enough sunlight, try moving them to a sunnier location or providing supplemental lighting.
What are some common pests and diseases that affect melon plants, and how can I prevent them?
Common pests that affect melon plants include aphids, squash bugs, and vine borers. Common diseases include powdery mildew and fusarium wilt. To prevent these problems, practice good garden hygiene by removing dead leaves and debris, rotate your crops each year, and choose disease-resistant varieties. You can also use organic pest control methods, such as insecticidal soap or neem oil, to control pests. For diseases, ensure good air circulation around your plants and avoid overwatering. If you notice signs of pests or diseases, take action immediately to prevent them from spreading.
Can I use this DIY trick in a container garden?
Yes, you can! This DIY trick is adaptable to container gardening. Choose a large container with good drainage and use a high-quality potting mix. You may need to adjust the amount of support you provide based on the size of the container and the variety of melon you’re growing. Also, be sure to water and fertilize your container-grown melons regularly, as they will dry out and deplete nutrients more quickly than melons grown in the ground.
What if my melons are not ripening properly?
Several factors can contribute to melons not ripening properly, including insufficient sunlight, lack of water, and nutrient deficiencies. Ensure your plants are getting enough sunlight and water, and fertilize them regularly with a balanced fertilizer. You can also try reducing the amount of water you give your plants as the melons approach maturity, as this can help concentrate the sugars and improve their flavor. Another trick is to place a piece of cardboard or straw under the melon to reflect sunlight and heat, which can help it ripen more quickly.
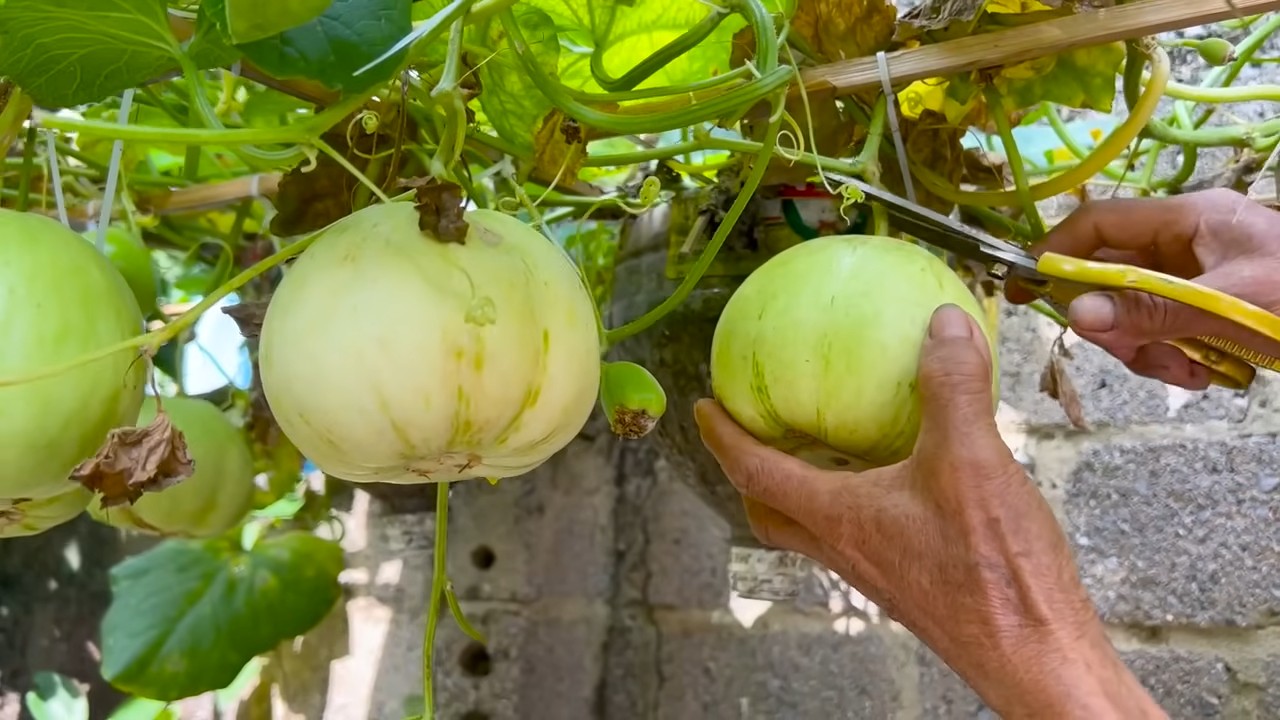
How do I know when my melons are ripe and ready to harvest?
The signs of ripeness vary depending on the type of melon. For watermelons, look for a dull, thumping sound when you tap the melon, a yellow or cream-colored spot on the underside where it rested on the ground, and a dried-up tendril near the stem. For cantaloupes, look for a fragrant aroma, a stem that slips easily from the vine, and a change in color from green to tan or yellow. For honeydews, look for a creamy white or yellow color and a slightly waxy feel. The best way to determine ripeness is to taste a small piece of the melon. If it’s sweet and flavorful, it’s ready to harvest!
Is there a way to improve the sweetness of my melons?
Yes! Several factors can influence the sweetness of your melons. First, choose a variety that is known for its sweetness. Second, ensure your plants are getting enough sunlight and water. Third, fertilize them regularly with a fertilizer that is high in potassium, which promotes sugar production. Finally, reduce the amount of water you give your plants as the melons approach maturity, as this can help concentrate the sugars. Some gardeners also swear by adding Epsom salts to the soil, as magnesium can also enhance sweetness.
Leave a Comment