
Grow Kale in Grow Bags: Unlock the secrets to a thriving, space-saving garden! Have you ever dreamed of harvesting your own fresh, vibrant kale but thought you didn’t have the room? Well, dream no more! This DIY guide is your passport to a bountiful kale harvest, even if you only have a small balcony or patio.
Kale, a nutritional powerhouse, has been cultivated for over 2,000 years, with roots tracing back to ancient Greece and Rome. It was a staple food for peasants and a symbol of resilience. Today, it’s a trendy superfood, but its accessibility can be limited, especially if you live in an urban environment. That’s where grow bags come in!
I’ve found that using grow bags is a game-changer for urban gardeners. They’re lightweight, portable, and provide excellent drainage, which is crucial for healthy kale growth. Plus, they’re incredibly affordable and easy to set up. In this article, I’ll walk you through every step of the process, from choosing the right grow bag and soil to planting, watering, and harvesting your delicious, homegrown kale. You’ll learn simple yet effective techniques to grow kale in grow bags successfully, ensuring a continuous supply of this leafy green for your salads, smoothies, and more. Say goodbye to expensive grocery store kale and hello to fresh, organic goodness right at your fingertips!
Grow Kale Like a Pro: A DIY Guide to Kale-tastic Grow Bags
Hey there, fellow gardening enthusiasts! I’m so excited to share my tried-and-true method for growing lush, vibrant kale right in grow bags. Forget those sprawling garden beds – grow bags are the perfect solution for small spaces, balconies, or even just adding a touch of green to your patio. Plus, they’re super easy to manage! Let’s dive into how you can create your own kale oasis.
Why Grow Kale in Grow Bags?
Before we get our hands dirty, let’s talk about why grow bags are a fantastic choice for kale:
* Excellent Drainage: Grow bags are made of breathable fabric, which allows excess water to drain away easily. Kale hates soggy roots, so this is a huge plus!
* Air Pruning: The fabric also allows air to reach the roots, which encourages them to branch out and become stronger. This leads to healthier, more productive plants.
* Portability: Need to move your kale to a sunnier spot? No problem! Grow bags are lightweight and easy to relocate.
* Space-Saving: Perfect for balconies, patios, or small gardens.
* Cost-Effective: Grow bags are relatively inexpensive compared to raised beds or other gardening structures.
What You’ll Need: The Kale-Growing Arsenal
Alright, let’s gather our supplies. Here’s what you’ll need to get started:
* Grow Bags: I recommend 10-gallon grow bags for kale. This gives the plants plenty of room to grow. You can find these online or at your local garden center.
* Potting Mix: Don’t skimp on the potting mix! Use a high-quality, well-draining mix specifically formulated for containers. Avoid using garden soil, as it can compact and hinder drainage.
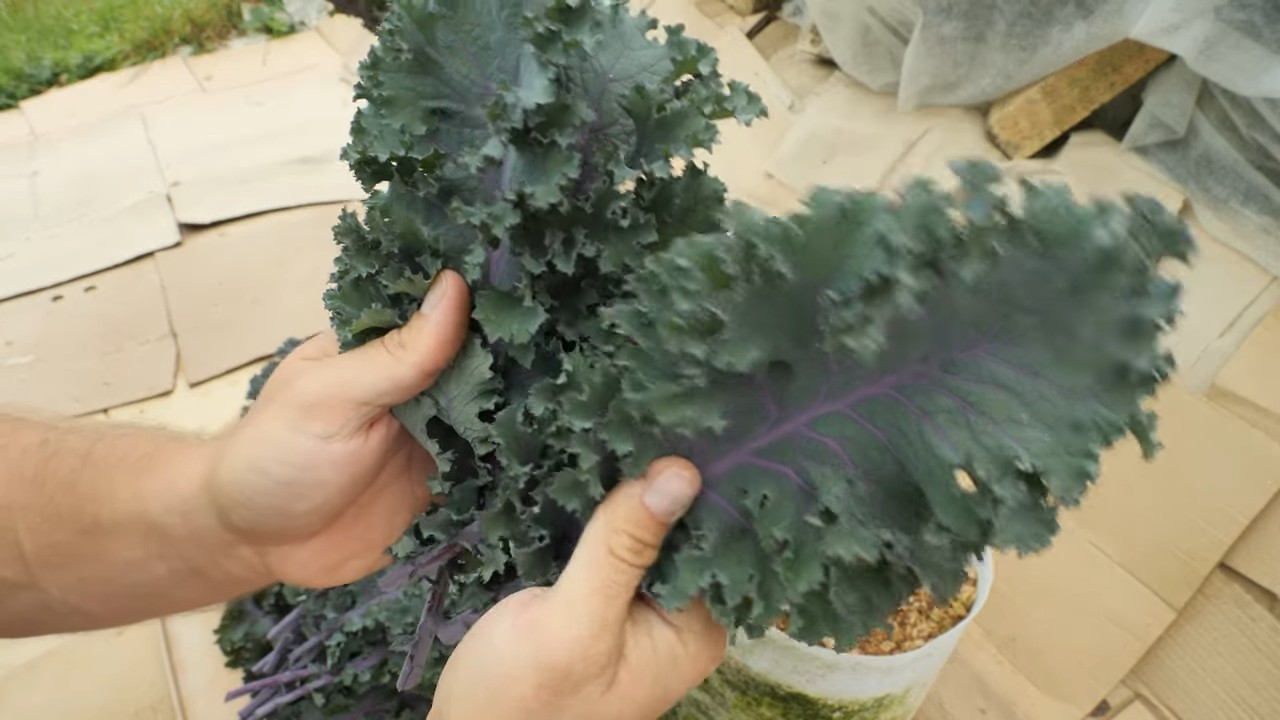
* Kale Seeds or Seedlings: Choose your favorite kale variety! I personally love ‘Lacinato’ (dinosaur kale) and ‘Red Russian’ for their flavor and visual appeal. You can start from seeds or buy seedlings from a nursery.
* Slow-Release Fertilizer: Kale is a heavy feeder, so a slow-release fertilizer will provide a steady supply of nutrients throughout the growing season. Look for one that’s balanced, like a 10-10-10 or 14-14-14.
* Watering Can or Hose: For, well, watering!
* Trowel or Small Shovel: For filling the grow bags and planting.
* Gardening Gloves: To keep your hands clean and protected.
* Optional:
* pH Meter: To test the soil pH (kale prefers a pH of 6.0-7.5).
* Organic Pest Control: Such as insecticidal soap or neem oil, to combat any potential pests.
* Mulch: To help retain moisture and suppress weeds.
Step-by-Step: Planting Your Kale in Grow Bags
Okay, let’s get planting! Here’s a detailed guide to walk you through the process:
Phase 1: Preparing the Grow Bags
1. Choose Your Location: Kale needs at least 6 hours of sunlight per day, so choose a sunny spot for your grow bags. Make sure the location is also easily accessible for watering.
2. Position the Grow Bags: Place the empty grow bags in their final location before filling them. Once they’re full, they’ll be heavy and difficult to move.
3. Fill the Grow Bags: Gradually fill the grow bags with your potting mix, leaving about 2-3 inches of space at the top. This will prevent water from overflowing when you water.
4. Mix in Fertilizer: Follow the instructions on your slow-release fertilizer package and mix the recommended amount into the top few inches of the potting mix. This will give your kale plants a good start.
5. Water Thoroughly: Water the potting mix until it’s evenly moist but not soggy. This will help settle the soil and prepare it for planting.
Phase 2: Planting Kale Seeds or Seedlings
1. Starting from Seeds:
* Sow the Seeds: Make small indentations in the soil, about ½ inch deep and a few inches apart. Place 2-3 kale seeds in each indentation.
* Cover the Seeds: Gently cover the seeds with potting mix and water lightly.
* Keep Moist: Keep the soil consistently moist until the seeds germinate, which usually takes about 5-10 days.
* Thin Seedlings: Once the seedlings have a few true leaves, thin them out, leaving only the strongest seedling in each spot.
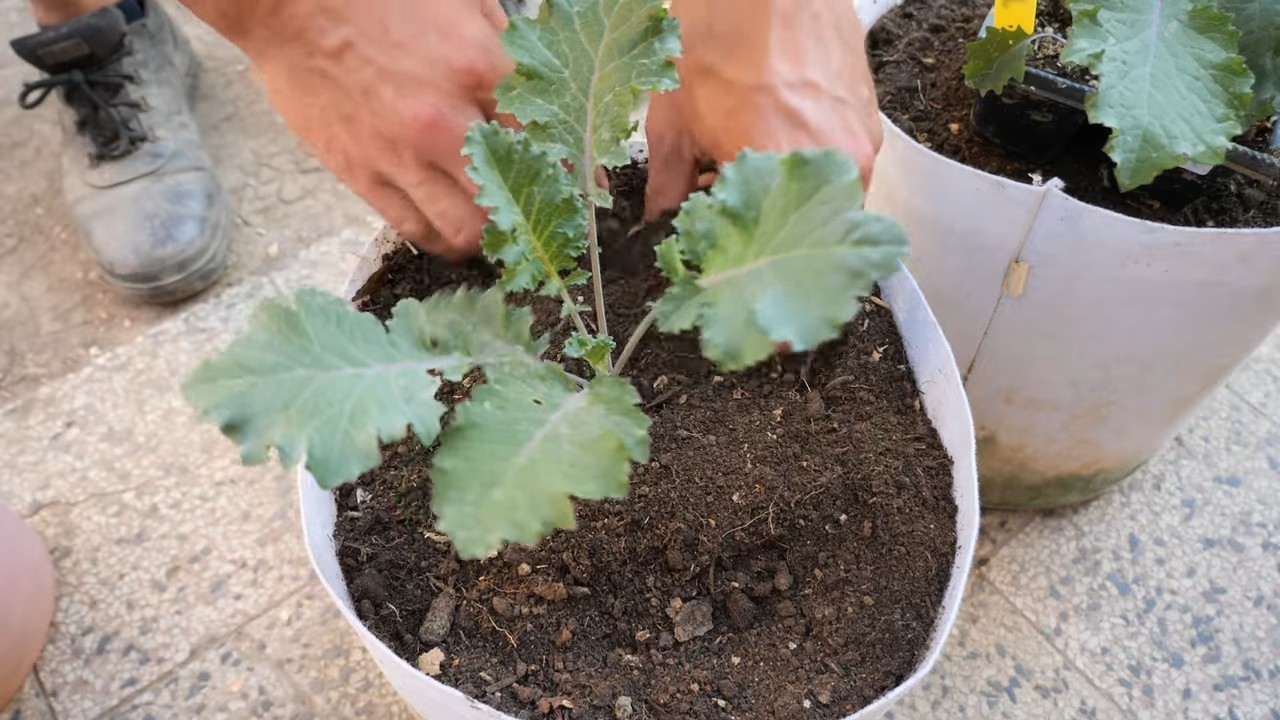
2. Planting Seedlings:
* Dig a Hole: Dig a hole in the potting mix that’s slightly larger than the root ball of the seedling.
* Remove the Seedling: Gently remove the seedling from its container, being careful not to damage the roots.
* Loosen the Roots: If the roots are tightly bound, gently loosen them with your fingers.
* Place the Seedling: Place the seedling in the hole, making sure the top of the root ball is level with the surrounding soil.
* Fill the Hole: Fill the hole with potting mix and gently firm the soil around the seedling.
* Water Thoroughly: Water the seedling thoroughly to help it settle in.
3. Spacing: Whether you’re starting from seeds or seedlings, space your kale plants about 12-18 inches apart. This will give them enough room to grow and prevent overcrowding.
Phase 3: Caring for Your Kale
1. Watering: Kale needs consistent moisture, especially during hot weather. Water deeply whenever the top inch of soil feels dry to the touch. Avoid overwatering, as this can lead to root rot. Grow bags dry out faster than traditional pots, so check them regularly.
2. Fertilizing: Kale is a heavy feeder and will benefit from regular fertilization. In addition to the slow-release fertilizer you added at planting, you can supplement with a liquid fertilizer every 2-3 weeks. Use a balanced fertilizer or one that’s slightly higher in nitrogen to promote leafy growth. Follow the instructions on the fertilizer package.
3. Sunlight: Ensure your kale plants receive at least 6 hours of sunlight per day. If you live in a very hot climate, some afternoon shade can be beneficial.
4. Pest Control: Keep an eye out for common kale pests, such as aphids, cabbage worms, and flea beetles. If you spot any pests, treat them promptly with an organic pest control method, such as insecticidal soap or neem oil. You can also handpick pests off the plants.
5. Weed Control: Keep the grow bags free of weeds, as they can compete with the kale plants for nutrients and water. Hand-pull any weeds that appear. Mulching around the plants can also help suppress weed growth.
6. Harvesting: You can start harvesting kale leaves once they’re about 6-8 inches long. Harvest the outer leaves first, leaving the inner leaves to continue growing. This will encourage the plant to produce more leaves. Simply cut the leaves off with a sharp knife or scissors.
7. Bolting: In hot weather, kale may bolt (go to seed). This will make the leaves bitter. To prevent bolting, try to provide some afternoon shade and keep the soil consistently moist. If your kale does bolt, you can still harvest the leaves, but they may not taste as good.
8. Overwintering: Kale is a cold-hardy plant and can often survive the winter in mild climates. If you live in a colder climate, you can protect your kale plants by covering them with a layer of mulch or a cold frame.
Troubleshooting: Common Kale Problems and Solutions
Even with the best care, you might encounter some problems while growing kale. Here are a few common issues and how to address them:
* Yellowing Leaves: This can be a sign of nutrient deficiency, overwatering, or underwatering. Check the soil moisture and fertilize if necessary.
* Holes in Leaves: This is usually caused by pests, such as cabbage worms or flea beetles. Inspect the plants for pests and treat them accordingly.
* Stunted Growth: This can be caused by poor soil, lack of sunlight, or pest infestation. Make sure your kale plants are getting enough sunlight and nutrients, and address any pest problems.
* Root Rot: This is caused by overwatering. Make sure your grow bags have good drainage and avoid watering too frequently.
Harvesting and Enjoying Your Kale
The best part about growing your own kale is, of course, enjoying the delicious and nutritious harvest! Here are a few tips for harvesting and using your kale:
* Harvest Regularly: Harvesting the
Conclusion
So, there you have it! Growing kale in grow bags isn’t just a trend; it’s a game-changer for gardeners of all levels. From beginners intimidated by sprawling garden beds to seasoned pros looking for a more controlled and efficient growing environment, grow bags offer a multitude of advantages. We’ve walked you through the simple steps, highlighting the ease of setup, the benefits of improved drainage and aeration, and the sheer portability that allows you to chase the sun or protect your precious kale from unexpected weather.
But why is this DIY trick a must-try? Because it empowers you to cultivate fresh, nutritious kale even if you’re short on space, time, or experience. Imagine stepping outside your door and harvesting vibrant, leafy greens for your salads, smoothies, or stir-fries, knowing exactly where they came from and how they were grown. That’s the power of growing your own food, and grow bags make it more accessible than ever before.
Beyond the basic method we’ve outlined, there’s plenty of room for experimentation and personalization. Consider these variations to tailor the process to your specific needs and preferences:
* Companion Planting: Maximize your grow bag space by planting compatible herbs like rosemary or thyme alongside your kale. These herbs can help deter pests and enhance the flavor of your kale.
* Succession Planting: Extend your harvest season by planting new kale seedlings every few weeks. This ensures a continuous supply of fresh greens throughout the growing season.
* Different Kale Varieties: Don’t limit yourself to just one type of kale! Experiment with different varieties like Lacinato (dinosaur kale), Red Russian, or Curly kale to discover your favorites. Each variety offers a unique flavor and texture profile.
* Fertilizer Adjustments: Monitor your kale plants closely and adjust your fertilizer regimen as needed. If you notice yellowing leaves, it could indicate a nitrogen deficiency. Supplement with a nitrogen-rich fertilizer or compost tea.
* Vertical Gardening: If you’re truly limited on space, consider using a vertical grow bag system. These systems allow you to grow multiple kale plants in a small footprint.
Growing kale in grow bags is more than just a gardening technique; it’s an invitation to connect with nature, nourish your body, and experience the satisfaction of growing your own food. It’s a sustainable and rewarding practice that can bring joy and abundance to your life.
We wholeheartedly encourage you to give this DIY trick a try. Start small, experiment with different varieties, and don’t be afraid to make mistakes. Gardening is a learning process, and every experience, whether successful or not, will teach you something valuable.
And most importantly, we want to hear about your experiences! Share your photos, tips, and challenges with us in the comments below. Let’s create a community of kale-growing enthusiasts and inspire others to embrace the joys of homegrown goodness. Let us know what kind of soil you used, what kind of fertilizer you used, and any other tips you have for growing kale in grow bags. Your insights could be invaluable to other gardeners. Happy growing!
Frequently Asked Questions (FAQ)
What size grow bag is best for kale?
The ideal size grow bag for kale is typically between 10 and 20 gallons. A 10-gallon bag is suitable for one or two kale plants, while a 20-gallon bag can accommodate three or four. The larger the bag, the more room the roots have to grow, resulting in healthier and more productive plants. However, consider the weight of the bag when filled with soil and water, especially if you plan to move it frequently.
What type of soil should I use in my grow bag for kale?
Kale thrives in well-draining, nutrient-rich soil. A good mix consists of equal parts compost, potting soil, and perlite or vermiculite. Compost provides essential nutrients, potting soil offers a good base for root growth, and perlite or vermiculite improves drainage and aeration. Avoid using garden soil directly in grow bags, as it can become compacted and hinder root development. You can also amend your soil with slow-release organic fertilizer to provide a steady supply of nutrients throughout the growing season.
How often should I water kale in grow bags?
The watering frequency depends on several factors, including the weather, the size of the grow bag, and the maturity of the kale plants. Generally, you should water your kale when the top inch of soil feels dry to the touch. During hot, dry weather, you may need to water daily, while during cooler, wetter periods, you can water less frequently. Grow bags tend to dry out faster than traditional garden beds, so it’s important to monitor the moisture level regularly. Water deeply until water drains out of the bottom of the bag.
What kind of fertilizer does kale need in grow bags?
Kale is a heavy feeder and benefits from regular fertilization. A balanced organic fertilizer with an NPK ratio of around 10-10-10 is a good starting point. You can also use compost tea or fish emulsion to provide a boost of nutrients. Apply fertilizer according to the package instructions, typically every 2-4 weeks. Avoid over-fertilizing, as this can lead to excessive foliage growth at the expense of root development.
How much sunlight does kale need in grow bags?
Kale needs at least 6 hours of sunlight per day to thrive. Choose a location for your grow bags that receives full sun, especially during the morning hours. If you live in a hot climate, some afternoon shade can be beneficial to prevent the leaves from scorching. The portability of grow bags allows you to easily move your kale plants to follow the sun or provide protection from extreme weather.
How do I protect kale in grow bags from pests and diseases?
Regularly inspect your kale plants for signs of pests and diseases. Common pests include aphids, cabbage worms, and flea beetles. You can control these pests with organic methods such as handpicking, insecticidal soap, or neem oil. To prevent diseases, ensure good air circulation around your plants and avoid overwatering. If you notice any signs of disease, remove the affected leaves immediately. Companion planting with herbs like rosemary or thyme can also help deter pests.
Can I grow kale in grow bags during the winter?
Yes, you can grow kale in grow bags during the winter, especially in milder climates. Kale is a cold-hardy vegetable and can tolerate temperatures down to 20°F (-6°C). In colder climates, you may need to provide some protection, such as covering the grow bags with a frost blanket or moving them to a sheltered location. Choose a winter-hardy kale variety like Winterbor or Red Russian for best results.
How long does it take for kale to grow in grow bags?
Kale typically takes 55-75 days to mature from seed, but you can start harvesting leaves as soon as they are large enough to eat. The time it takes to grow kale in grow bags depends on several factors, including the variety, the growing conditions, and the size of the seedlings. Starting with transplants instead of seeds can shorten the growing time by a few weeks.
Can I reuse grow bags for kale?
Yes, you can reuse grow bags for kale, but it’s important to clean them thoroughly before replanting. Remove any remaining soil and debris, and wash the bags with soap and water. You can also disinfect them with a solution of bleach and water (1 part bleach to 9 parts water). Allow the bags to dry completely before storing them or replanting. Over time, grow bags may degrade, so it’s important to inspect them for tears or damage before reusing them.
What are the benefits of growing kale in grow bags compared to traditional gardening?
Growing kale in grow bags offers several advantages over traditional gardening, including:
* Improved Drainage and Aeration: Grow bags allow for better drainage and aeration, which promotes healthy root growth and prevents root rot.
* Portability: Grow bags are lightweight and easy to move, allowing you to chase the sun or protect your plants from extreme weather.
* Space Efficiency: Grow bags are ideal for small spaces, such as balconies, patios, or decks.
* Soil Control: You have complete control over the soil composition in grow bags, ensuring that your kale plants receive the nutrients they need.
* Pest and Disease Control: Grow bags can help reduce the risk of soilborne pests and diseases.
* Extended Growing Season: Grow bags can be easily moved indoors or to a greenhouse to extend the growing season.
Leave a Comment