
Grow Dragon Beans Indoors? Absolutely! Imagine harvesting vibrant, exotic Dragon Beans right from your own home, even if you don’t have a sprawling garden. It’s easier than you think, and I’m here to show you how with some simple DIY tricks that will transform your windowsill into a mini-beanstalk haven.
Dragon Beans, also known as Winged Beans, have a fascinating history, deeply rooted in Southeast Asian and Papuan cultures. For centuries, they’ve been a vital food source, prized for their nutritional value and versatility. Now, you can bring a piece of that heritage into your own home!
But why bother growing them indoors? Well, for starters, it’s incredibly rewarding to nurture a plant from seed to harvest. Plus, having fresh, organic Dragon Beans at your fingertips is a game-changer for healthy eating. Forget those bland supermarket veggies! And let’s be honest, who wouldn’t want to impress their friends with such a unique and visually stunning crop? This DIY guide will provide you with the knowledge and simple hacks to successfully grow Dragon Beans indoors, regardless of your experience level. So, grab your gardening gloves, and let’s get started!
Growing Dragon Beans Indoors: Your DIY Guide for an Exotic Harvest
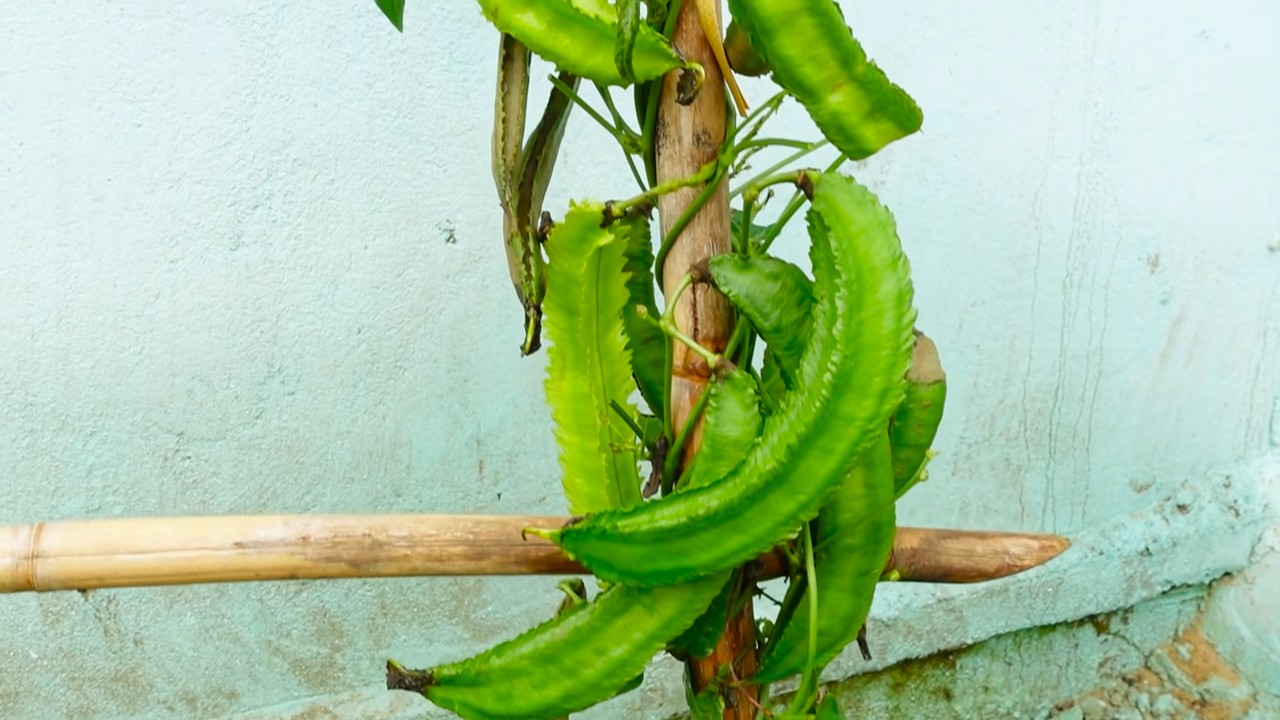
Hey plant friends! Have you ever heard of dragon beans? These fascinating climbing plants with their bright red, spiral-shaped pods are not only a real eye-catcher, but also edible! And the best part: you can easily grow them at home. I’ll show you how!
What You Need: The Materials List
Before we get started, here is a list of everything you need for your dragon bean project:
- Dragon bean seeds: Preferably from a trusted supplier or from a ripe pod.
- Seedling pots: Small pots (approx. 8-10 cm diameter) for starting seeds.
- Seed starting mix: Special soil for starting seedlings that is low in nutrients and loose.
- Larger pots: At least 20 liters in volume per plant, as dragon beans grow vigorously.
- Potting soil: High-quality potting soil with good drainage.
- Climbing support: A sturdy trellis, a fence, or another climbing frame for the beans to grow up. Dragon beans can grow up to 3 meters high!
- Watering can: For watering.
- Spray bottle: To moisten the seedlings.
- Plant stakes: Optional, to support the young plants.
- Garden shears: For pruning the plants.
- Gloves: To protect your hands.
- Labels: For labeling the pots.
- Bright windowsill or plant lamp: Dragon beans need a lot of light!
Phase 1: Starting the Seeds – How to Get Your Dragon Beans to Germinate
Starting the seeds is the first and most important step. Here we lay the foundation for a successful harvest.
- Prepare the seeds: To speed up germination, you can soak the seeds in lukewarm water for 24 hours. This softens the seed coat.
- Fill the pots: Fill the seedling pots with seed starting mix. Press the soil down lightly.
- Sow the seeds: Place 2-3 seeds in each pot, about 2 cm deep.
- Cover with soil: Cover the seeds with a thin layer of soil.
- Water: Water the soil gently so that it is moist but not wet. It’s best to use a spray bottle for this.
- Place in a warm and bright spot: Place the pots in a warm and bright location. A south-facing windowsill is ideal. The germination temperature should be between 20 and 25 degrees Celsius.
- Keep moist: Keep the soil evenly moist, but avoid waterlogging. Spray the soil regularly with water.
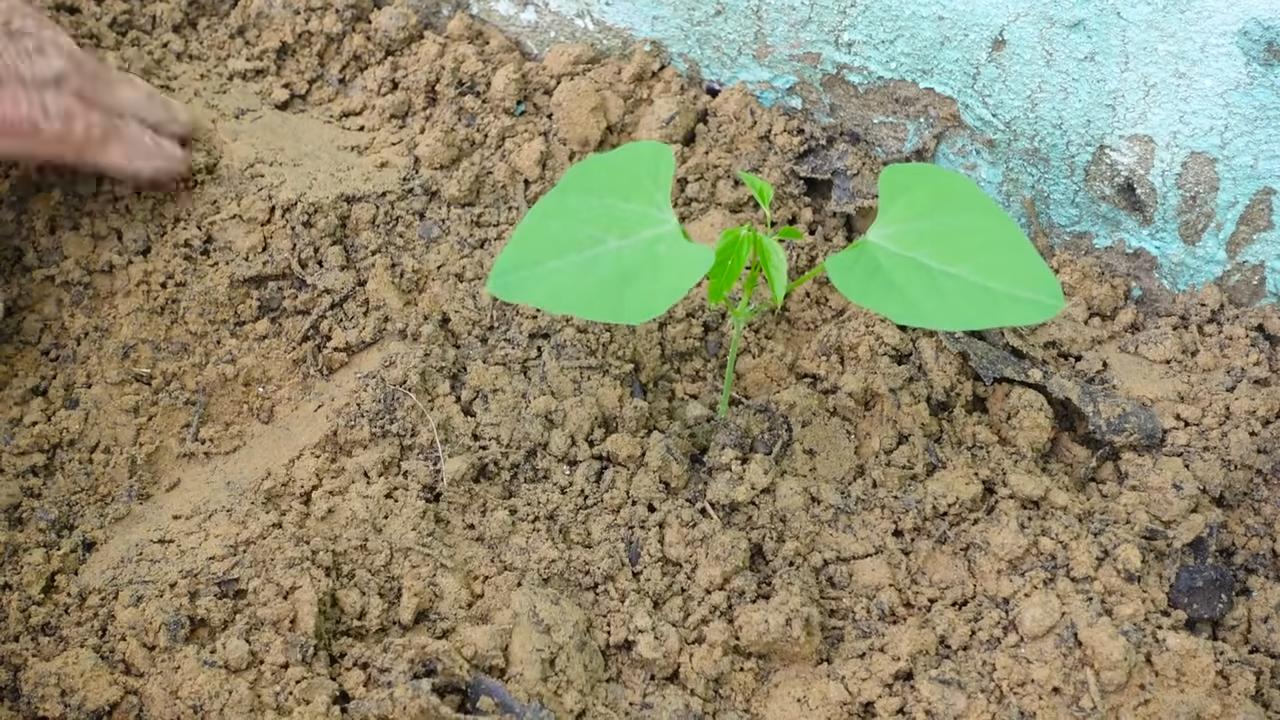
- Be patient: Germination can take 1-3 weeks. Once the first seedlings appear, you can remove the weakest ones, leaving only the strongest seedling per pot.
Phase 2: Transplanting – Giving the Dragon Beans More Space
Once the seedlings are strong enough, it’s time to transplant them into larger pots.
- Wait until the seedlings are strong enough: The seedlings should be at least 10-15 cm high and have several leaves before you transplant them.
- Prepare larger pots: Fill the larger pots with potting soil. Make sure the soil has good drainage. You can mix in some sand or perlite to improve drainage.
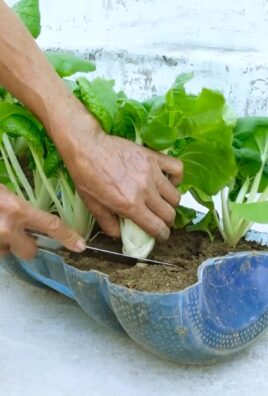
- Carefully remove seedlings from the seedling pots: Gently loosen the soil from the edge of the pot with a spoon or a small spatula. Carefully lift the seedling out, being careful not to damage the roots.
- Plant: Place the seedlings in the larger pots. The top of the root ball should be level with the soil surface.
- Water: Water the plants thoroughly after transplanting.
- Attach climbing support: Stick the climbing support into the pot or place it right next to it. The dragon beans need something to hold onto and climb. You can gently attach the young plants to the climbing support.
Phase 3: Care – Keeping Your Dragon Beans Happy and Healthy
Proper care is crucial for a bountiful harvest.
- Location: Dragon beans love the sun! Place the pots in a sunny location. If you are growing them indoors, a bright, south-facing windowsill is ideal. In the summer, you can also place them on the balcony or terrace, but be sure to acclimate them to the sun slowly to avoid sunburn.
- Watering: Water the plants regularly, especially during the growing and flowering period. The soil should always be slightly moist, but avoid waterlogging. Check the soil’s moisture by sticking your finger about 2 cm deep into the soil. If the soil feels dry, it’s time to water.
- Fertilizing: Dragon beans are heavy feeders and need regular fertilizer. Fertilize the plants every 2-3 weeks with a liquid fertilizer for vegetables or legumes. Be sure to follow the dosage instructions on the packaging.
- Pruning: To stimulate growth and improve the harvest, you can prune the plants regularly. Remove dead or yellow leaves and trim long shoots.
- Pests and diseases: Dragon beans are relatively robust, but they can be infested by aphids or spider mites. Check the plants regularly and combat pests with natural remedies, such as a soap solution, if necessary.
- Pollination: Dragon beans are self-pollinating, but you can assist pollination by gently shaking the flowers or pollinating them with a brush.
Phase 4: The Harvest – Finally Enjoying Dragon Beans!
After about 2-3 months, you can harvest the first dragon beans.
- Harvest time: The pods are ripe when they have a bright red color and are easily detached from the stem.
- Harvesting: Cut the pods with garden shears.
- Use: Dragon beans can be eaten raw, cooked, fried, or steamed. They have a slightly sweet taste and are rich in vitamins and minerals. You can use them in salads, soups, curries, or as a side dish. The leaves and flowers are also edible.
- Saving seeds: If you want to save seeds for the next season, let some pods ripen on the plant until they are dry and brown. Remove the seeds and let them dry thoroughly before storing them in an airtight container.
Additional Tips for a Successful Dragon Bean Harvest
Climbing support: Provide the plants with a sturdy climbing support to grow on.
Good drainage: Make sure the pots have good drainage to avoid waterlogging.
Regular watering: Dragon beans need regular water, especially during the growing and flowering period.
Sufficient light: Place the plants in a sunny location or use a plant lamp.
Conclusion
So, there you have it! Growing dragon beans indoors is not only possible, but it’s also a deeply rewarding experience that brings a touch of the exotic right into your home. We’ve walked you through the entire process, from selecting the right seeds and preparing the perfect potting mix to providing the necessary support and ensuring optimal growing conditions. But why should you actually take the plunge and try this DIY project?
First and foremost, growing dragon beans indoors allows you to enjoy fresh, delicious beans regardless of the season or your outdoor space limitations. Imagine the satisfaction of harvesting your own vibrant, flavorful dragon beans in the middle of winter, adding a burst of freshness to your meals when you need it most. This is a significant advantage for urban dwellers or anyone with limited gardening space.
Beyond the practical benefits, growing dragon beans indoors is a fantastic way to connect with nature and learn more about the plant life cycle. It’s a hands-on educational experience for both adults and children, fostering a sense of wonder and appreciation for the natural world. Watching your dragon bean plants sprout, climb, and produce beautiful, edible pods is an incredibly fulfilling process.
Furthermore, this DIY project is surprisingly budget-friendly. You likely already have many of the necessary supplies on hand, and dragon bean seeds are readily available and relatively inexpensive. Compared to buying fresh dragon beans at the grocery store, growing your own is a cost-effective way to enjoy this unique vegetable.
Ready to take your dragon bean growing to the next level? Consider these variations:
* Vertical Gardening: Experiment with different trellises or support structures to create a stunning vertical garden display. Dragon beans are natural climbers, and they can add a touch of elegance to any indoor space.
* Companion Planting: Plant basil or marigolds near your dragon beans to deter pests and attract beneficial insects. This is a natural and effective way to protect your plants and promote healthy growth.
* Seed Saving: Once your dragon bean plants have matured, save some of the seeds for future planting. This is a great way to ensure a continuous supply of dragon beans and to preserve your favorite varieties.
* Different Varieties: Explore different varieties of dragon beans. Some have longer pods, others have different color variations. Experiment and find your favorite!
We are confident that you’ll find growing dragon beans indoors to be a fun, rewarding, and ultimately delicious experience. Don’t be afraid to experiment, adapt the techniques to your specific environment, and most importantly, have fun!
Now, we want to hear from you! Have you tried growing dragon beans indoors before? What tips and tricks have you learned along the way? Share your experiences, photos, and questions in the comments below. Let’s create a community of dragon bean enthusiasts and learn from each other. We are excited to see your indoor dragon bean gardens flourish!
Frequently Asked Questions (FAQ)
1. What are dragon beans, and why should I grow them?
Dragon beans, also known as yardlong beans or asparagus beans, are a type of legume characterized by their exceptionally long, slender pods. They are a popular ingredient in Asian cuisine and are known for their crisp texture and slightly sweet flavor. Growing them indoors allows you to enjoy fresh, organic beans regardless of the season or your outdoor space. They are also visually appealing plants that can add a touch of greenery to your home.
2. What kind of pot and soil do I need for growing dragon beans indoors?
Choose a pot that is at least 12 inches in diameter and 12 inches deep to accommodate the plant’s root system. The pot should also have drainage holes to prevent waterlogging. Use a well-draining potting mix that is rich in organic matter. A mixture of potting soil, compost, and perlite or vermiculite is ideal. Avoid using garden soil, as it can be too heavy and may contain pests or diseases.
3. How much sunlight do dragon beans need when grown indoors?
Dragon beans require at least 6-8 hours of direct sunlight per day to thrive. Place your plants near a sunny window, preferably one that faces south or west. If you don’t have enough natural light, you can supplement with grow lights. LED grow lights are a good option, as they are energy-efficient and provide the full spectrum of light that plants need.
4. How often should I water my dragon bean plants?
Water your dragon bean plants regularly, keeping the soil consistently moist but not waterlogged. Check the soil moisture by sticking your finger into the soil. If the top inch of soil feels dry, it’s time to water. Water deeply, allowing the water to drain out of the drainage holes. Avoid overwatering, as this can lead to root rot.
5. Do dragon beans need a trellis or support structure?
Yes, dragon beans are climbing plants and require a trellis or other support structure to grow properly. You can use a bamboo stake, a tomato cage, or a commercially available trellis. Provide the support structure when the plants are young, so they can start climbing early.
6. How long does it take for dragon beans to mature and produce beans?
Dragon beans typically take 60-80 days to mature and produce beans. The exact time will depend on the variety, growing conditions, and climate. You can start harvesting the beans when they are about 12-18 inches long and still tender.
7. What are some common pests and diseases that affect dragon beans?
Common pests that can affect dragon beans include aphids, spider mites, and whiteflies. You can control these pests by spraying the plants with insecticidal soap or neem oil. Common diseases include powdery mildew and fungal leaf spots. Prevent these diseases by providing good air circulation and avoiding overwatering.
8. Can I grow dragon beans from seeds saved from store-bought beans?
While it’s possible to grow dragon beans from seeds saved from store-bought beans, the results may not be consistent. The beans may not be true to type, meaning they may not have the same characteristics as the parent plant. It’s best to purchase seeds from a reputable source to ensure you are getting the variety you want.
9. How do I know when to harvest my dragon beans?
Harvest your dragon beans when they are about 12-18 inches long and still tender. The pods should be firm and snap easily when bent. Avoid harvesting beans that are too mature, as they can become tough and stringy.
10. Can I eat the leaves of dragon bean plants?
While the pods of dragon beans are the primary edible part of the plant, the young leaves are also edible and can be used in salads or stir-fries. However, it’s important to only eat the young leaves, as the older leaves can be bitter.
11. How do I fertilize my indoor dragon bean plants?
Fertilize your dragon bean plants every 2-3 weeks with a balanced liquid fertilizer. Follow the instructions on the fertilizer label. Avoid over-fertilizing, as this can burn the plants. You can also add compost or other organic matter to the soil to provide additional nutrients.
12. My dragon bean plant is flowering, but not producing beans. What could be the problem?
There are several reasons why your dragon bean plant may be flowering but not producing beans. One possibility is that the plant is not getting enough sunlight. Another possibility is that the plant is not being pollinated properly. You can try hand-pollinating the flowers by using a small brush to transfer pollen from one flower to another. Also, ensure the temperature is within the optimal range for bean production.
13. Can I grow dragon beans in a hydroponic system?
Yes, dragon beans can be grown in a hydroponic system. However, you will need to provide a support structure for the plants to climb on. You will also need to use a nutrient solution that is specifically formulated for beans.
14. How do I store harvested dragon beans?
Store harvested dragon beans in the refrigerator in a plastic bag. They will keep for about a week. You can also freeze dragon beans for longer storage. To freeze them, blanch them in boiling water for 2-3 minutes, then cool them in ice water. Drain the beans and store them in freezer bags.
15. Is growing dragon beans indoors a good project for beginners?
Yes, growing dragon beans indoors is a relatively easy and rewarding project for beginners. With a little care and attention, you can enjoy fresh, delicious beans right from your own home. The key is to provide adequate sunlight, water, and support.
Leave a Comment