
Grow Chives Indoors? Absolutely! Imagine snipping fresh, flavorful chives right from your kitchen windowsill, adding a burst of oniony goodness to your meals year-round. No more sad, wilted bunches from the grocery store – just vibrant, homegrown chives whenever you need them. For centuries, chives have been a staple in gardens and kitchens worldwide, dating back to ancient Rome where they were believed to ward off evil spirits and even soothe sunburns!
Today, we might not be battling evil spirits with chives, but their culinary versatility and ease of cultivation make them a must-have for any home cook. But what if you don’t have a sprawling garden? That’s where this DIY guide comes in! I’m going to show you how incredibly simple it is to grow chives indoors, even if you have limited space or a less-than-green thumb.
This DIY trick is essential because it empowers you to enjoy fresh, organic herbs regardless of the season or your living situation. Plus, it’s a fantastic way to add a touch of green to your home and experience the satisfaction of growing your own food. Ready to ditch the store-bought chives and embark on your indoor gardening adventure? Let’s get started!
Grow Your Own Chives Indoors: A Beginner’s Guide
Hey there, fellow plant enthusiasts! Ever dreamt of snipping fresh chives right from your kitchen windowsill? Well, dream no more! Growing chives indoors is surprisingly easy, even if you don’t have a green thumb. I’m going to walk you through everything you need to know to have a thriving chive garden right inside your home. Let’s get started!
What You’ll Need
Before we dive into the nitty-gritty, let’s gather our supplies. Here’s a checklist of everything you’ll need to successfully grow chives indoors:
* **Chive Seeds or a Chive Plant:** You can start from seeds, which is more economical, or purchase a small chive plant from a garden center for faster results. I personally prefer starting from seeds, it’s so rewarding to watch them sprout!
* **Potting Mix:** Use a well-draining potting mix specifically formulated for herbs or vegetables. Avoid using garden soil, as it can compact and hinder drainage.
* **Pot with Drainage Holes:** Choose a pot that’s at least 6 inches in diameter and has drainage holes at the bottom. Good drainage is crucial to prevent root rot.
* **Watering Can or Spray Bottle:** For gentle watering.
* **Grow Light (Optional but Recommended):** Especially if you don’t have a sunny windowsill. Chives need plenty of light to thrive.
* **Small Shovel or Trowel:** For planting.
* **Scissors or Kitchen Shears:** For harvesting your chives.
* **Seed Starting Tray (If starting from seeds):** This is optional, but it can help with germination.
Starting from Seeds: A Step-by-Step Guide
Okay, let’s get those seeds planted! This is my favorite part.
1. **Prepare Your Seed Starting Tray (Optional):** If you’re using a seed starting tray, fill each cell with moistened potting mix. Gently press down to remove any air pockets. If you’re planting directly into your pot, skip to step 3.
2. **Sow the Seeds (If using a seed starting tray):** Sprinkle 2-3 chive seeds into each cell of the seed starting tray. Cover the seeds with a thin layer of potting mix (about 1/4 inch). Gently water the tray using a spray bottle to avoid disturbing the seeds.
3. **Prepare Your Pot (If planting directly into your pot):** Fill your pot with moistened potting mix, leaving about an inch of space at the top. Gently press down to remove any air pockets.
4. **Sow the Seeds (If planting directly into your pot):** Sprinkle chive seeds evenly over the surface of the potting mix. You don’t need to be too precise, but try to avoid clumping them together. Cover the seeds with a thin layer of potting mix (about 1/4 inch).
5. **Water Gently:** Water the soil gently using a watering can or spray bottle. The goal is to moisten the soil without washing away the seeds.
6. **Provide Light and Warmth:** Place the seed starting tray or pot in a warm location with plenty of light. A sunny windowsill is ideal, but if you don’t have one, use a grow light. Chives germinate best at temperatures between 60-70°F (15-21°C).
7. **Keep the Soil Moist:** Keep the soil consistently moist, but not soggy. Check the soil moisture daily and water as needed.
8. **Wait for Germination:** Chive seeds typically germinate in 7-14 days. Be patient! Once the seedlings emerge, make sure they have plenty of light to prevent them from becoming leggy.
9. **Thin the Seedlings (If necessary):** If you have multiple seedlings growing in the same cell or area, thin them out to allow the strongest seedlings to thrive. Snip off the weaker seedlings at the base with scissors.
10. **Transplant (If using a seed starting tray):** Once the seedlings have developed a few sets of true leaves (the leaves that look like miniature chives), you can transplant them into your pot. Gently remove the seedlings from the seed starting tray and plant them in the pot, spacing them about 2-3 inches apart.
Starting with a Chive Plant: A Quick Start
If you’re starting with a chive plant, the process is even simpler!
1. **Choose a Healthy Plant:** Select a chive plant that looks healthy and vibrant, with no signs of pests or disease.
2. **Prepare Your Pot:** Fill your pot with moistened potting mix, leaving about an inch of space at the top.
3. **Remove the Plant from its Container:** Gently remove the chive plant from its original container. If the roots are tightly bound, gently loosen them with your fingers.
4. **Plant the Chives:** Place the chive plant in the pot, making sure the top of the root ball is level with the soil surface.
5. **Fill in with Potting Mix:** Fill in the remaining space around the plant with potting mix.
6. **Water Thoroughly:** Water the plant thoroughly until water drains out of the drainage holes.
7. **Place in a Sunny Location:** Place the pot in a sunny location or under a grow light.
Caring for Your Indoor Chives
Now that your chives are planted, it’s time to provide them with the care they need to thrive.
* **Light:** Chives need at least 6-8 hours of sunlight per day. If you don’t have a sunny windowsill, use a grow light. I’ve found that using a grow light really makes a difference, especially during the winter months.
* **Watering:** Water your chives regularly, keeping the soil consistently moist but not soggy. Allow the top inch of soil to dry out between waterings. Overwatering can lead to root rot, so be careful!
* **Fertilizing:** Feed your chives with a balanced liquid fertilizer every 2-4 weeks during the growing season (spring and summer). Follow the instructions on the fertilizer label.
* **Temperature:** Chives prefer temperatures between 60-70°F (15-21°C). Avoid placing them near drafts or extreme temperatures.
* **Humidity:** Chives prefer moderate humidity. If your home is very dry, you can increase the humidity around your plants by placing a tray of water near them or using a humidifier.
* **Pruning:** Regular pruning is essential for keeping your chives healthy and productive. Snip off any yellowing or dead leaves.
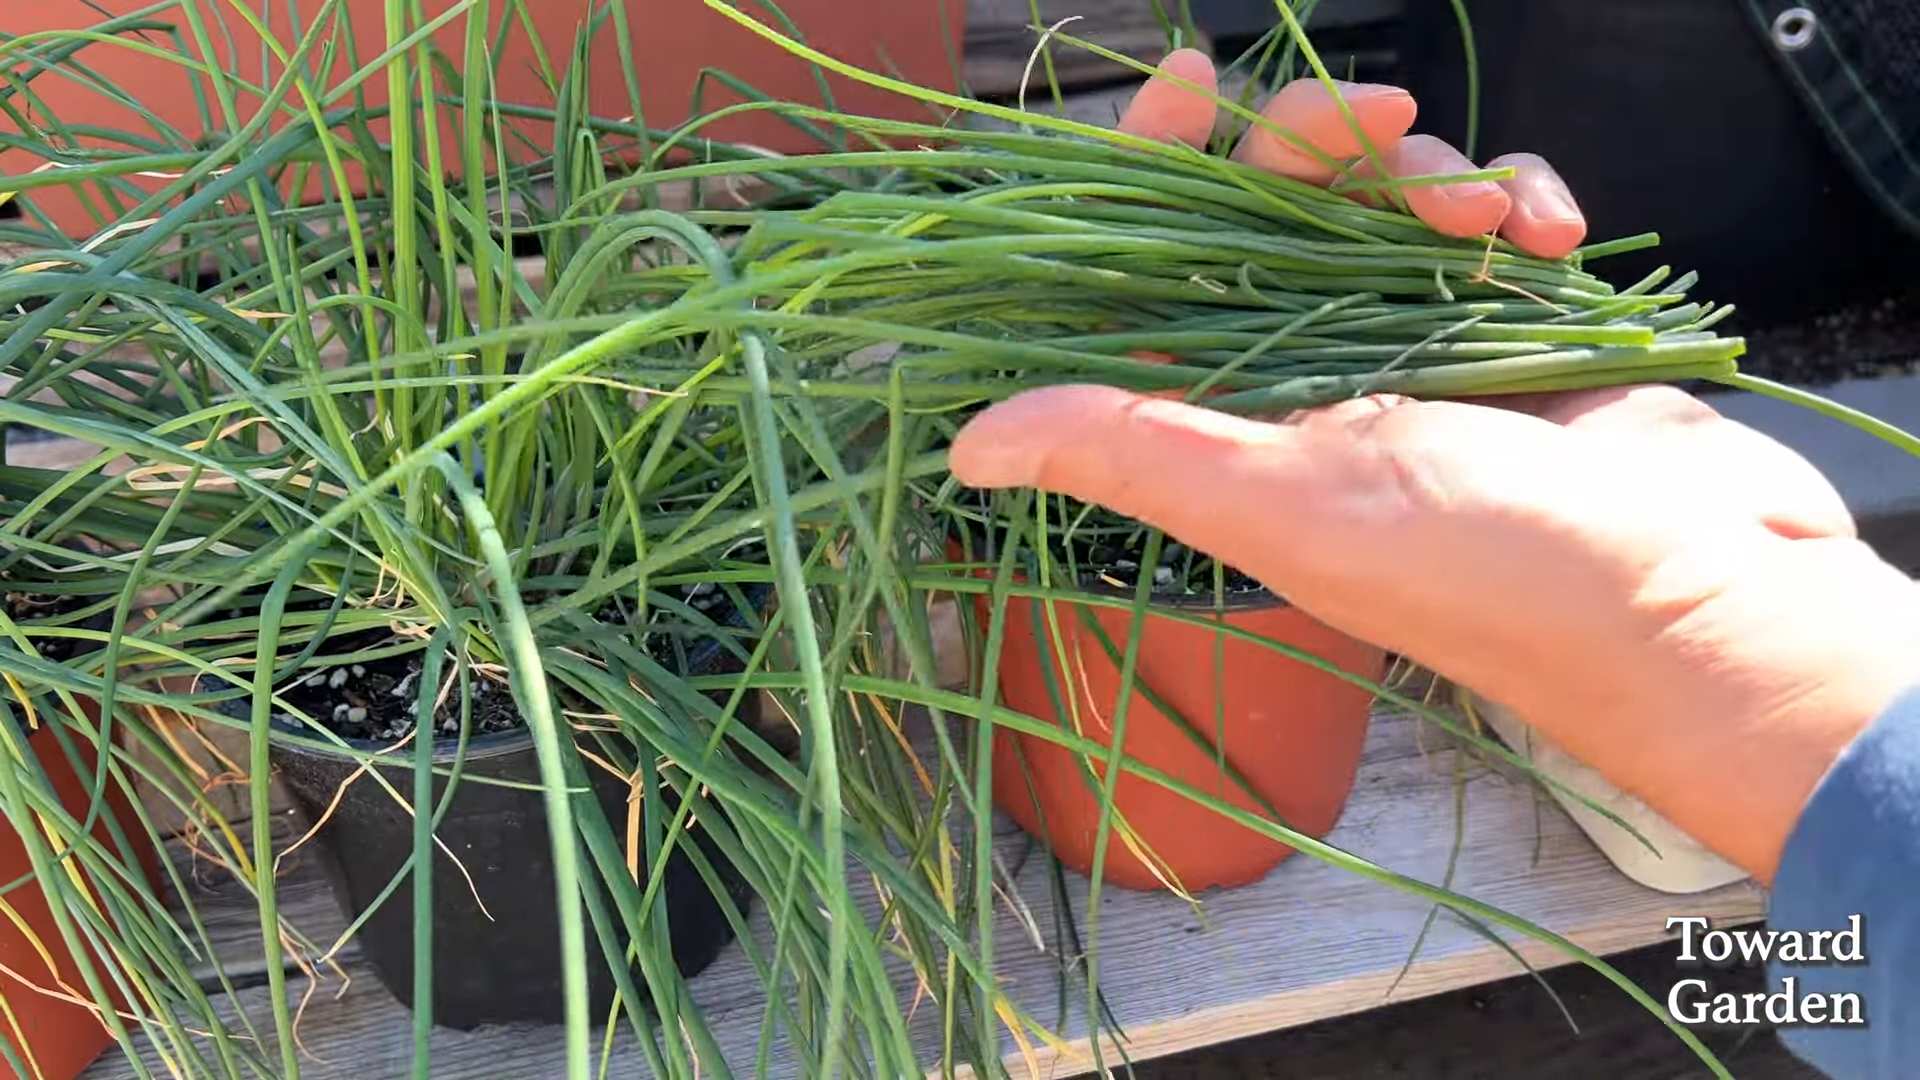
Harvesting Your Chives
The best part! You can start harvesting your chives once they are about 6 inches tall.
1. **Use Sharp Scissors:** Use sharp scissors or kitchen shears to snip off the chives about 1-2 inches above the soil surface.
2. **Harvest from the Outside:** Harvest the outer leaves first, allowing the inner leaves to continue growing.
3. **Don’t Harvest Too Much:** Avoid harvesting more than one-third of the plant at a time, as this can weaken it.
4. **Regular Harvesting Encourages Growth:** Regular harvesting actually encourages the plant to produce more chives!
Dealing with Pests and Diseases
Fortunately, chives are relatively pest and disease-resistant. However, here are a few things to watch out for:
* **Aphids:** Aphids are small, sap-sucking insects that can infest chives. If you see aphids, spray them off with a strong stream of water or use an insecticidal soap.
* **Spider Mites:** Spider mites are tiny pests that can cause yellowing and stippling on the leaves. Increase humidity around your plants and spray them with insecticidal soap.
* **Root Rot:** Root rot is a fungal disease that can occur if the soil is consistently soggy. Prevent root rot by using well-draining potting mix and avoiding overwatering.
Propagating Your Chives
If you want to expand your chive collection, you can easily propagate them by division.
1. **Divide the Plant:** Carefully remove the chive plant from its pot.
2. **Separate the Clumps:** Gently separate the plant into smaller clumps, each with its own roots.
3. **Replant the Clumps:** Replant the clumps in separate pots filled with fresh potting mix.
4. **Water Thoroughly:** Water the newly planted clumps thoroughly.
Enjoy Your Fresh Chives!
And there you have it! You’re now equipped with the knowledge to grow your own delicious chives indoors. Enjoy adding them to your favorite dishes, from omelets and salads to soups and dips. Happy gardening! I hope you found this guide helpful. Let me know if you have any questions!

Conclusion
So, there you have it! Growing chives indoors is not only achievable, but it’s also incredibly rewarding. Imagine having fresh, flavorful chives at your fingertips, ready to elevate your culinary creations any time of year. No more last-minute trips to the grocery store or settling for dried herbs that lack that vibrant, fresh taste. This simple DIY project brings the garden to your kitchen, offering a sustainable and cost-effective way to enjoy this versatile herb.
Why is this a must-try? Because it’s easy, economical, and adds a touch of green to your indoor space. Plus, the flavor of homegrown chives is simply unmatched. They’re more potent and aromatic than anything you can buy pre-cut. Think of the possibilities: sprinkling them on baked potatoes, adding them to omelets, garnishing soups, or blending them into creamy dips. The possibilities are endless!
But the benefits extend beyond just flavor. Growing your own chives connects you to the natural world, even in the heart of your home. It’s a therapeutic activity that can reduce stress and boost your mood. And let’s not forget the satisfaction of nurturing a plant from seed (or transplant) to harvest.
Looking for variations? Consider planting different varieties of chives for a wider range of flavors. Garlic chives, with their subtle garlic notes, are a fantastic addition to stir-fries and Asian-inspired dishes. You can also experiment with different containers, from repurposed yogurt cups to stylish ceramic pots. Just ensure they have adequate drainage. Another fun variation is to create a small herb garden indoors, combining chives with other easy-to-grow herbs like parsley, mint, and basil. This will give you a constant supply of fresh herbs for all your cooking needs.
Ready to take the plunge? We wholeheartedly encourage you to try growing chives indoors. It’s a project that’s suitable for beginners and experienced gardeners alike. Don’t be intimidated if you’ve never grown anything before. Chives are remarkably resilient and forgiving plants. Follow our simple steps, provide them with the right conditions, and you’ll be rewarded with a bountiful harvest in no time.
We’re confident that you’ll love the experience and the delicious results. But don’t just take our word for it. Give it a try and see for yourself! And most importantly, we want to hear about your experience. Share your photos, tips, and challenges in the comments below. Let’s create a community of indoor chive growers and learn from each other. What are you waiting for? Get planting and enjoy the fresh, vibrant flavor of homegrown chives!
FAQ: Growing Chives Indoors
Q: What kind of soil is best for growing chives indoors?
A: Chives thrive in well-draining soil that is rich in organic matter. A good quality potting mix specifically formulated for herbs or vegetables is ideal. You can also amend a general-purpose potting mix with compost or aged manure to improve its fertility and drainage. Avoid using garden soil, as it can be too heavy and may contain pests or diseases. The ideal pH for chives is between 6.0 and 7.0.
Q: How much sunlight do indoor chives need?
A: Chives need at least 6-8 hours of direct sunlight per day to thrive. A south-facing window is usually the best option. If you don’t have a sunny window, you can supplement with artificial light. A grow light or even a fluorescent shop light can provide the necessary illumination. Position the light a few inches above the plants and keep it on for 12-14 hours per day. Rotate the pot regularly to ensure even growth on all sides.
Q: How often should I water my indoor chives?
A: Water your chives when the top inch of soil feels dry to the touch. Avoid overwatering, as this can lead to root rot. Water thoroughly until excess water drains out of the bottom of the pot. Be sure to empty the saucer underneath the pot to prevent the roots from sitting in water. During the winter months, when growth slows down, you may need to water less frequently.
Q: How do I harvest chives without killing the plant?
A: The key to harvesting chives successfully is to cut them properly. Use sharp scissors or pruning shears to snip the leaves about an inch above the soil line. Avoid cutting the entire plant down to the ground, as this can weaken it. Harvest from the outer leaves first, allowing the inner leaves to continue growing. Regular harvesting encourages new growth and keeps the plant productive.
Q: Can I grow chives from seed indoors?
A: Yes, you can absolutely grow chives from seed indoors. Start seeds indoors 6-8 weeks before the last expected frost. Sow the seeds about ¼ inch deep in a seed-starting mix. Keep the soil moist and warm (around 70-75°F). Germination typically takes 7-14 days. Once the seedlings have developed a few sets of true leaves, transplant them into individual pots. You can also purchase chive seedlings from a garden center and transplant them into your chosen container.
Q: How do I fertilize my indoor chives?
A: Chives are not heavy feeders, but they will benefit from occasional fertilization. Use a balanced liquid fertilizer diluted to half strength every 2-3 weeks during the growing season (spring and summer). Avoid over-fertilizing, as this can lead to leggy growth and a less intense flavor. You can also amend the soil with compost or worm castings to provide a slow-release source of nutrients.
Q: My chives are turning yellow. What’s wrong?
A: Yellowing leaves can be caused by several factors, including overwatering, underwatering, nutrient deficiencies, or pests. Check the soil moisture and adjust your watering accordingly. If the soil is consistently dry, water more frequently. If the soil is soggy, allow it to dry out before watering again. If you suspect a nutrient deficiency, try fertilizing with a balanced liquid fertilizer. Inspect the plants for pests, such as aphids or spider mites, and treat them accordingly.
Q: How do I deal with pests on my indoor chives?
A: Indoor chives are generally pest-resistant, but they can occasionally be affected by aphids, spider mites, or other common houseplant pests. Inspect your plants regularly for signs of infestation. If you find pests, try washing them off with a strong stream of water. You can also use insecticidal soap or neem oil to control pests. Be sure to follow the instructions on the product label carefully.
Q: Can I move my indoor chives outdoors in the summer?
A: Yes, you can move your indoor chives outdoors in the summer, but you need to acclimate them gradually to avoid shocking the plants. Start by placing them in a shady spot for a few hours each day, gradually increasing the amount of sunlight they receive over a week or two. Be sure to protect them from strong winds and heavy rain. Bring them back indoors before the first frost in the fall.
Q: How long will my indoor chives last?
A: With proper care, your indoor chives can last for several years. They are perennial plants, which means they will continue to grow and produce new leaves year after year. Repot them every year or two to refresh the soil and provide them with more space to grow. You can also divide the plants to create new plants.
Leave a Comment