
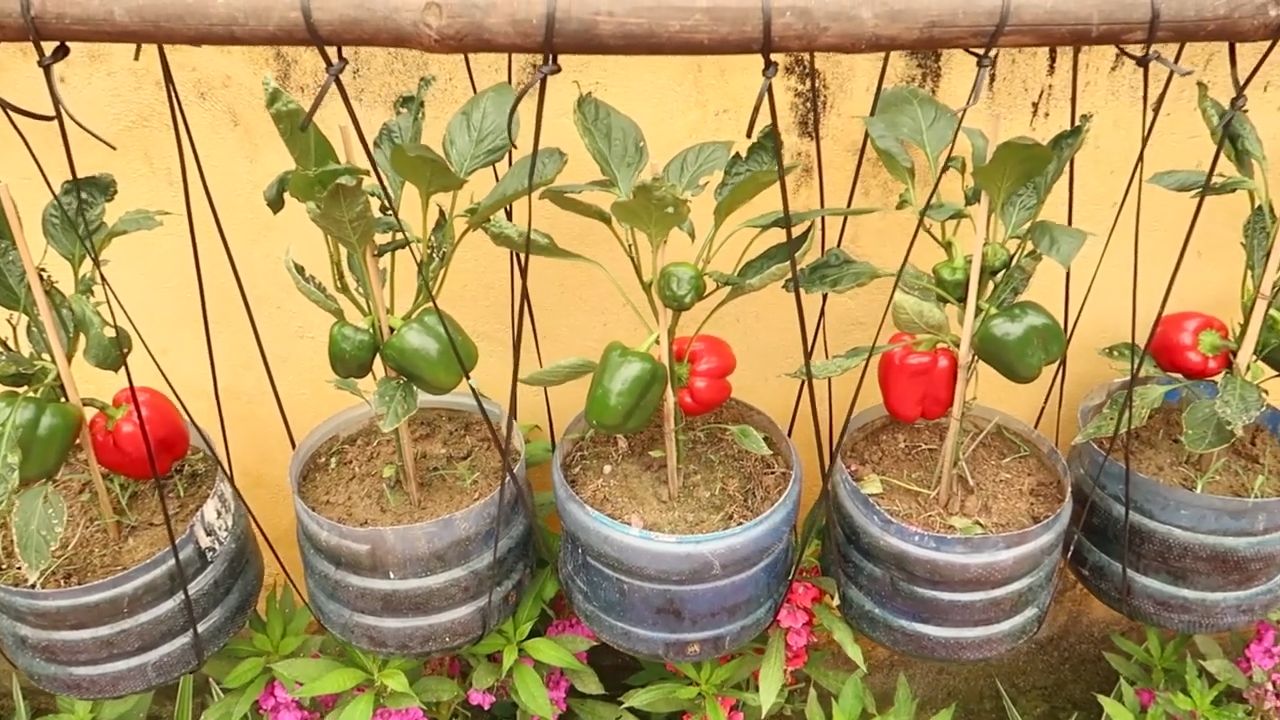
Grow Chili Peppers Yield like a pro, even if you think you have a “brown thumb”! Have you ever dreamt of harvesting baskets overflowing with fiery chili peppers, ready to spice up your meals and impress your friends? I know I have! But the reality of meager harvests can be incredibly frustrating. That’s why I’m so excited to share these simple yet incredibly effective DIY tricks and hacks that will dramatically boost your chili pepper production.
Chili peppers have a rich history, dating back thousands of years in the Americas, where they were not only a culinary staple but also held significant cultural and medicinal value. From ancient Aztec rituals to modern-day hot sauce competitions, the chili pepper’s fiery allure has captivated people across the globe. But you don’t need to be an expert to enjoy a bountiful harvest.
Let’s face it, store-bought chili peppers can be expensive, and often lack the intense flavor and freshness of homegrown varieties. Plus, there’s something incredibly satisfying about nurturing a plant from seed to harvest, knowing you’ve created something delicious and vibrant with your own hands. These DIY tricks are designed to help you grow chili peppers yield that will make your neighbors envious and your taste buds sing. So, ditch the disappointment of sparse harvests and get ready to unlock the secrets to chili pepper success!
Maximize Your Chili Harvest: Your Ultimate DIY Guide for a Bountiful Chili Harvest
Hello, dear chili enthusiasts! I am so excited to share my proven DIY tricks with you today to multiply your chili harvest. I’ve experimented for years and can assure you that these tips really work. So, let’s roll up our sleeves and get started!
The Basics: What Chilis Need to Grow
Before we dive into the advanced techniques, let’s make sure we cover the basics. Chilis are sun-worshippers and need a lot of warmth to grow optimally. Here are the most important factors:
- Sun: At least 6-8 hours of direct sunlight per day.
- Warmth: Ideal temperatures are between 20°C and 30°C.
- Soil: Well-draining, nutrient-rich soil with a pH between 6.0 and 7.0.
- Water: Regular watering, but avoid waterlogging.
- Nutrients: Balanced fertilization during the growing and flowering period.
Starting Chili Plants Correctly
The foundation for a rich harvest is laid right from the start. I always begin my chili season by starting the plants indoors.
- Prepare Seeds: To speed up germination, I soak the chili seeds for 24 hours in lukewarm chamomile tea. This helps to soften the hard seed coat.
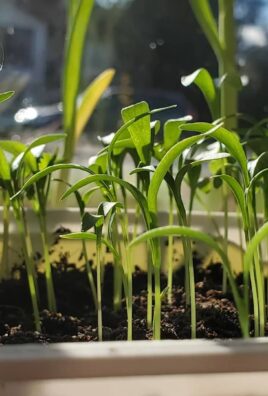
- Sowing: Fill small seed pots or a seed tray with seed-starting mix. Place the seeds about 0.5 cm deep in the soil and cover them lightly.
- Moisture: Gently moisten the soil with a spray bottle. Make sure the soil is not too wet.
- Warmth: Place the seed pots in a warm place (22-25°C). A heating mat can be very helpful here.
- Light: As soon as the first seedlings appear, they need a lot of light. Place them by a bright window or use a plant lamp.
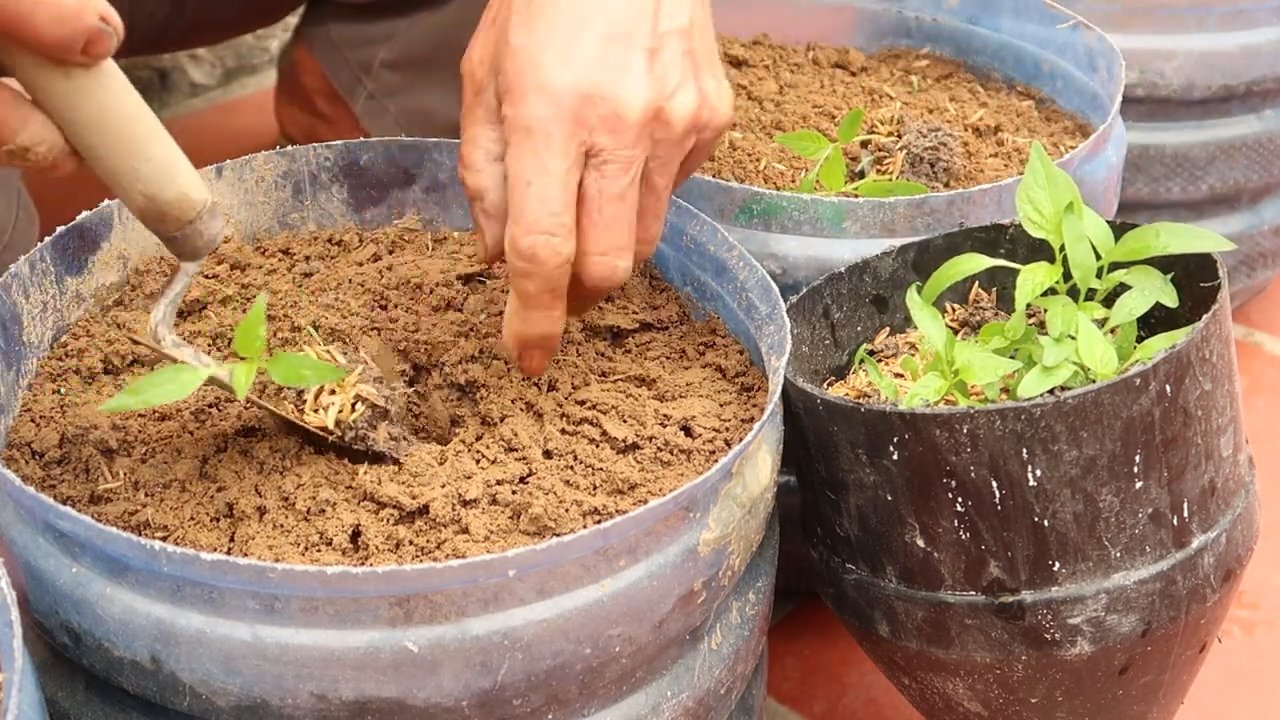
- Pricking Out: When the plants have 2-4 true leaves, I prick them out into larger pots. Use a high-quality vegetable soil for this.
The Right Location and Transplanting
As soon as the temperatures rise and there is no more risk of frost, the chili plants can move outdoors.
- Hardening Off: Before you permanently move the plants outdoors, you should slowly acclimate them to the new conditions. Place them outside for a few hours during the day and bring them back in at night.
- Choosing a Location: Choose a sunny and wind-protected location.
- Prepare the Soil: Loosen the soil well and mix in compost or organic fertilizer.
- Planting: Plant the chili plants at a sufficient distance from each other (approx. 40-50 cm).
- Watering In: Water the plants thoroughly after planting.
Fertilization: The Key to a Bountiful Harvest
Chilis are heavy feeders and need regular fertilization to grow optimally and produce many fruits.
- Base Fertilization: When planting, I like to use an organic slow-release fertilizer.
- Liquid Fertilizer: During the growing and flowering season, I fertilize the plants every 1-2 weeks with a special chili fertilizer or a tomato fertilizer. Make sure the fertilizer contains enough potassium, as this promotes fruit formation.
- Nettle Tea: A natural and very effective fertilizer is nettle tea. It is rich in nitrogen and other important nutrients.
- Epsom Salt: Once a month, I give the plants a small dose of Epsom salt (magnesium sulfate). The magnesium in it promotes photosynthesis and strengthens the plants.
Pruning Techniques for More Yield
Through targeted pruning, you can encourage the chili plants to form more side shoots and thus more flowers and fruits.
- Topping: When the plant is about 20-30 cm high, I cut off the tip of the main shoot. This encourages the side shoots.
- Removing Suckers: Regularly remove the suckers that grow in the leaf axils. This directs the plant’s energy into fruit production.
- Thinning Out: Remove excess leaves to improve the plant’s ventilation and to give the fruits better exposure to light.
Watering: Watering Correctly for Healthy Plants
Proper watering is crucial for the growth and fruit production of chili plants.
- Water Regularly: Water the plants regularly, especially on hot days.
- Avoid Waterlogging: Make sure that the water can drain well and that no waterlogging occurs.
- Water in the Morning: It’s best to water the plants in the morning so that the leaves can dry off during the day. This reduces the risk of fungal diseases.
- Watering Can with a Rose: Use a watering can with a rose to water the plants gently.
Protection from Pests and Diseases
Chili plants can be affected by various pests and diseases. Here are some tips on how to protect them:
- Regular Checks: Regularly inspect the plants for pests and diseases.
- Encourage Beneficial Insects: Encourage beneficial insects like ladybugs and lacewings, which eat aphids and other pests.
- Neem Oil: In case of infestation with aphids, spider mites, or other pests, you can treat the plants with neem oil.
- Copper Spray: For fungal diseases like late blight, you can use a copper spray.
- Good Ventilation: Ensure good ventilation for the plants to prevent fungal diseases.
Special Techniques for Even More Yield
Here are a few more special techniques that I have tried and that really make a difference:
- Epsom Salt Spray: I spray my plants every two weeks during the flowering period with a solution of Epsom salt (1 teaspoon per liter of water). The magnesium helps the plants produce more flowers.
- Coffee Grounds: Coffee grounds are a great organic fertilizer. I regularly spread them around the plants. They contain nitrogen and other important nutrients.
- Mulching: Mulching helps to retain moisture in the soil and suppress weeds. I like to use straw or wood chips.
- Pollination Aid: Especially with indoor plants, it can be helpful to pollinate the flowers manually. I use a small brush for this or shake the plants gently.
- Increase Stress Resistance: I occasionally give my plants a small dose of algae extract. This strengthens them and makes them more resistant to stress factors like heat or drought.
The Harvest: When is the Right Time?
The time of harvest depends on the chili variety and your personal taste.
Stem: The stem should easily detach from the plant.
4. Geschmack: Probiere eine Chili, um den Schär
Color: Most chilis change color when they are ripe.
Firmness: The chilis should feel firm.
Conclusion
So, there you have it! Unlocking a bountiful harvest of fiery chili peppers is more attainable than you might think. This DIY trick, focusing on strategic pruning and nutrient management, is a game-changer for anyone looking to maximize their chili pepper yield. It’s not just about getting more peppers; it’s about getting healthier, more flavorful peppers that will elevate your culinary creations.
Why is this a must-try? Because it addresses the core issues that often limit chili pepper production: insufficient sunlight penetration, inadequate nutrient uptake, and the plant’s natural tendency to prioritize vegetative growth over fruit production. By implementing these simple yet effective techniques, you’re essentially giving your chili pepper plants the tools they need to thrive and produce an abundance of those delicious, spicy fruits.
But don’t just take our word for it! The beauty of this DIY approach is its adaptability. Feel free to experiment with different pruning methods to see what works best for your specific chili pepper variety and growing conditions. For instance, if you’re growing a compact variety like Thai chili peppers, you might focus more on removing lower leaves to improve airflow and prevent fungal diseases. On the other hand, for larger, bushier varieties like jalapenos, a more aggressive pruning strategy might be necessary to encourage branching and fruit set.
Consider also experimenting with different nutrient solutions. While a balanced fertilizer is a good starting point, you can tailor your feeding schedule to the specific needs of your chili pepper plants. For example, during the flowering and fruiting stages, increase the phosphorus and potassium levels to promote fruit development. You can also supplement with micronutrients like magnesium and calcium to prevent deficiencies and ensure healthy growth.
Furthermore, think about the environment in which you are growing your chili peppers. Are they in containers or in the ground? Are they getting enough sunlight? Are they protected from strong winds and extreme temperatures? Adjusting your growing conditions to optimize your chili pepper yield is just as important as implementing these DIY tricks.
This isn’t a one-size-fits-all solution, but rather a framework for you to adapt and refine based on your own observations and experiences. The key is to be observant, patient, and willing to experiment.
We are confident that by incorporating this DIY trick into your chili pepper growing routine, you’ll see a significant improvement in your harvest. Imagine the satisfaction of picking basket after basket of vibrant, flavorful chili peppers, knowing that you played a direct role in their abundance. Think of all the delicious salsas, sauces, and spicy dishes you can create with your homegrown bounty!
So, what are you waiting for? Give this DIY trick a try and witness the difference it can make in your chili pepper yield. We encourage you to share your experiences with us and the wider gardening community. Let us know what worked for you, what challenges you faced, and any variations you discovered along the way. Together, we can unlock the secrets to growing the most amazing chili peppers imaginable! Share your photos, tips, and stories on social media using relevant hashtags like #ChiliPepperYield, #DIYGardening, and #GrowYourOwn. Let’s inspire others to embark on their own chili pepper growing adventures! We can’t wait to hear about your success stories!
FAQ
Q: What exactly does “pruning” mean in this context, and how much should I cut off?
A: Pruning, in the context of boosting chili pepper yield, refers to the selective removal of leaves and stems to improve airflow, sunlight penetration, and nutrient distribution. The amount you cut off depends on the variety of chili pepper and its growth habit. Generally, focus on removing lower leaves that are yellowing or touching the soil, as these are more susceptible to disease. Also, prune away any suckers (small shoots that grow from the base of the plant) as they divert energy away from fruit production. For bushier varieties, you can also selectively prune some of the inner branches to improve airflow and sunlight penetration. Don’t be afraid to experiment, but avoid removing more than one-third of the plant’s foliage at any one time. It’s better to prune gradually over several weeks than to do it all at once.
Q: What kind of fertilizer should I use, and how often should I fertilize my chili pepper plants?
A: A balanced fertilizer with an NPK ratio (nitrogen, phosphorus, potassium) of 10-10-10 or 14-14-14 is a good starting point for chili pepper plants. However, during the flowering and fruiting stages, you’ll want to switch to a fertilizer with a higher phosphorus and potassium content, such as 5-10-10 or 5-15-15. Phosphorus promotes flower development, while potassium enhances fruit production and overall plant health. As for frequency, fertilize your chili pepper plants every 2-3 weeks during the growing season. Be sure to follow the instructions on the fertilizer package, as over-fertilizing can be just as harmful as under-fertilizing. You can also supplement with organic fertilizers like compost tea or fish emulsion, which provide a slow-release source of nutrients.
Q: My chili pepper plants are flowering, but the flowers are falling off. What’s going on?
A: Flower drop is a common problem in chili pepper plants, and it can be caused by a variety of factors, including temperature stress (too hot or too cold), inconsistent watering, lack of pollination, and nutrient deficiencies. To prevent flower drop, ensure that your chili pepper plants are getting consistent watering, especially during hot weather. Avoid letting the soil dry out completely between waterings. Also, provide adequate ventilation to prevent overheating. If you suspect a lack of pollination, you can hand-pollinate the flowers by gently shaking the plant or using a small brush to transfer pollen from one flower to another. Finally, make sure your plants are getting the nutrients they need, especially phosphorus and potassium.
Q: How do I know when my chili peppers are ripe and ready to harvest?
A: The ripeness of chili peppers depends on the variety. Most chili peppers will change color as they ripen, typically from green to red, yellow, orange, or brown. However, some varieties, like jalapenos, can be harvested while still green. The best way to determine ripeness is to check the color, size, and firmness of the peppers. Ripe chili peppers will be fully colored, plump, and slightly firm to the touch. You can also taste a small piece of the pepper to check for spiciness. Use pruning shears or scissors to harvest the peppers, cutting the stem close to the plant.
Q: Can I use this DIY trick for other types of peppers, like bell peppers or sweet peppers?
A: Yes, while this DIY trick is specifically tailored for chili peppers, the principles of pruning and nutrient management can also be applied to other types of peppers, including bell peppers and sweet peppers. However, the specific pruning techniques and nutrient requirements may vary slightly depending on the variety. For example, bell peppers typically require less pruning than chili peppers, as they tend to be less bushy. Also, bell peppers may benefit from a slightly higher nitrogen content in the fertilizer, as they are primarily grown for their vegetative growth rather than their spiciness. Experiment and adjust the techniques to suit the specific needs of your pepper plants.
Q: My chili pepper plants are being attacked by pests. What can I do?
A: Pests can be a major problem for chili pepper plants, but there are several things you can do to control them. Start by inspecting your plants regularly for signs of pests, such as aphids, spider mites, or whiteflies. If you find any pests, you can try spraying them with a strong stream of water to dislodge them. You can also use insecticidal soap or neem oil, which are both effective against a wide range of pests. For more severe infestations, you may need to use a stronger insecticide. Be sure to follow the instructions on the insecticide package carefully, and avoid spraying during the hottest part of the day. You can also attract beneficial insects, such as ladybugs and lacewings, to your garden to help control pests naturally.

Leave a Comment