
Growing Bok Choy at Home can seem daunting, especially if you’re new to gardening. But trust me, it’s easier than you think! I’m here to share some simple DIY tricks and hacks that will have you harvesting fresh, crisp bok choy from your own backyard in no time. Forget those wilted, overpriced heads at the grocery store – imagine the satisfaction of serving up a stir-fry with bok choy you nurtured yourself!
Bok choy, also known as pak choi, has a rich history rooted in Chinese cuisine, dating back over 5,000 years. It’s not just delicious; it’s packed with vitamins and nutrients, making it a healthy addition to any diet. For centuries, it has been a staple in Asian gardens, and now, you can easily bring that tradition to your own home.
Why should you bother with these DIY tricks? Well, for starters, growing bok choy at home allows you to control the quality of your food. You’ll know exactly what’s going into your plants, avoiding harmful pesticides and chemicals. Plus, it’s incredibly rewarding to watch something you planted grow and thrive. These hacks will help you overcome common challenges like pest control, soil preparation, and even extending your growing season. So, let’s dive in and unlock the secrets to a bountiful bok choy harvest!
Growing Chili Peppers on Your Balcony: A Spicy DIY Adventure!
Hey there, fellow spice enthusiasts! Ever dreamt of plucking fresh, fiery chilies right from your own balcony? Well, dream no more! I’m going to walk you through everything you need to know to cultivate a thriving chili pepper garden, even if you’re short on space. Get ready to add some serious zest to your life (and your meals!).
Choosing the Right Chili Variety
First things first, let’s talk chilies! The sheer variety can be overwhelming, but don’t worry, I’ll help you narrow it down. Consider these factors:
* Heat Level: This is crucial! Do you crave scorching habaneros or prefer the milder kick of jalapeños? Look at the Scoville Heat Units (SHU) rating to gauge the pepper’s intensity.
* Plant Size: Balcony space is precious. Opt for compact varieties like Thai chilies, habaneros (though they can get bushy), or even ornamental peppers. These tend to stay smaller and more manageable in pots.
* Growing Conditions: Think about the amount of sunlight your balcony receives. Some chilies thrive in full sun, while others prefer partial shade. Research the specific needs of your chosen variety.
* Personal Preference: Ultimately, grow what you love to eat! If you’re a fan of serrano peppers, go for it!
Here are a few popular choices for balcony gardens:
* Jalapeño: A classic, versatile chili with a moderate heat level.
* Serrano: Slightly hotter than jalapeños, great for salsas and sauces.
* Thai Chili: Small, fiery peppers perfect for Asian cuisine.
* Habanero: Proceed with caution! These pack a serious punch.
* Bird’s Eye Chili: Another small but mighty pepper, often used in Southeast Asian dishes.
Gathering Your Supplies
Okay, now that we’ve picked our chili champions, let’s gather the necessary gear. Here’s what you’ll need:
* Chili Pepper Seeds or Seedlings: You can start from seeds (more rewarding, but takes longer) or buy seedlings from a nursery (faster, but less control over the variety).
* Pots: Choose pots that are at least 12 inches in diameter. Good drainage is essential! Terracotta or plastic pots work well.
* Potting Mix: Don’t use garden soil! It’s too heavy and doesn’t drain well. Opt for a high-quality potting mix specifically formulated for containers.
* Fertilizer: Chili peppers are heavy feeders. Use a balanced fertilizer (e.g., 10-10-10) or one specifically formulated for tomatoes and peppers.
* Watering Can or Hose: For regular watering.
* Trowel: For planting and transplanting.
* Gardening Gloves: To protect your hands.
* Optional:
* Plant Markers: To label your different chili varieties.
* Support Stakes: For taller or bushier plants.
* Pest Control: Insecticidal soap or neem oil for dealing with pests.
Planting Your Chili Peppers
Alright, let’s get our hands dirty! Here’s how to plant your chili peppers:
Starting from Seeds:
1. Sow Seeds Indoors (6-8 weeks before the last frost): Fill small pots or seed trays with seed-starting mix. Moisten the soil.
2. Plant Seeds: Sow the seeds about ¼ inch deep. Gently cover with soil.
3. Water Gently: Keep the soil consistently moist, but not soggy.
4. Provide Warmth: Chili seeds need warmth to germinate. Use a heat mat or place the seed trays in a warm location.
5. Provide Light: Once the seedlings emerge, provide them with plenty of light. A sunny windowsill or grow lights will work.
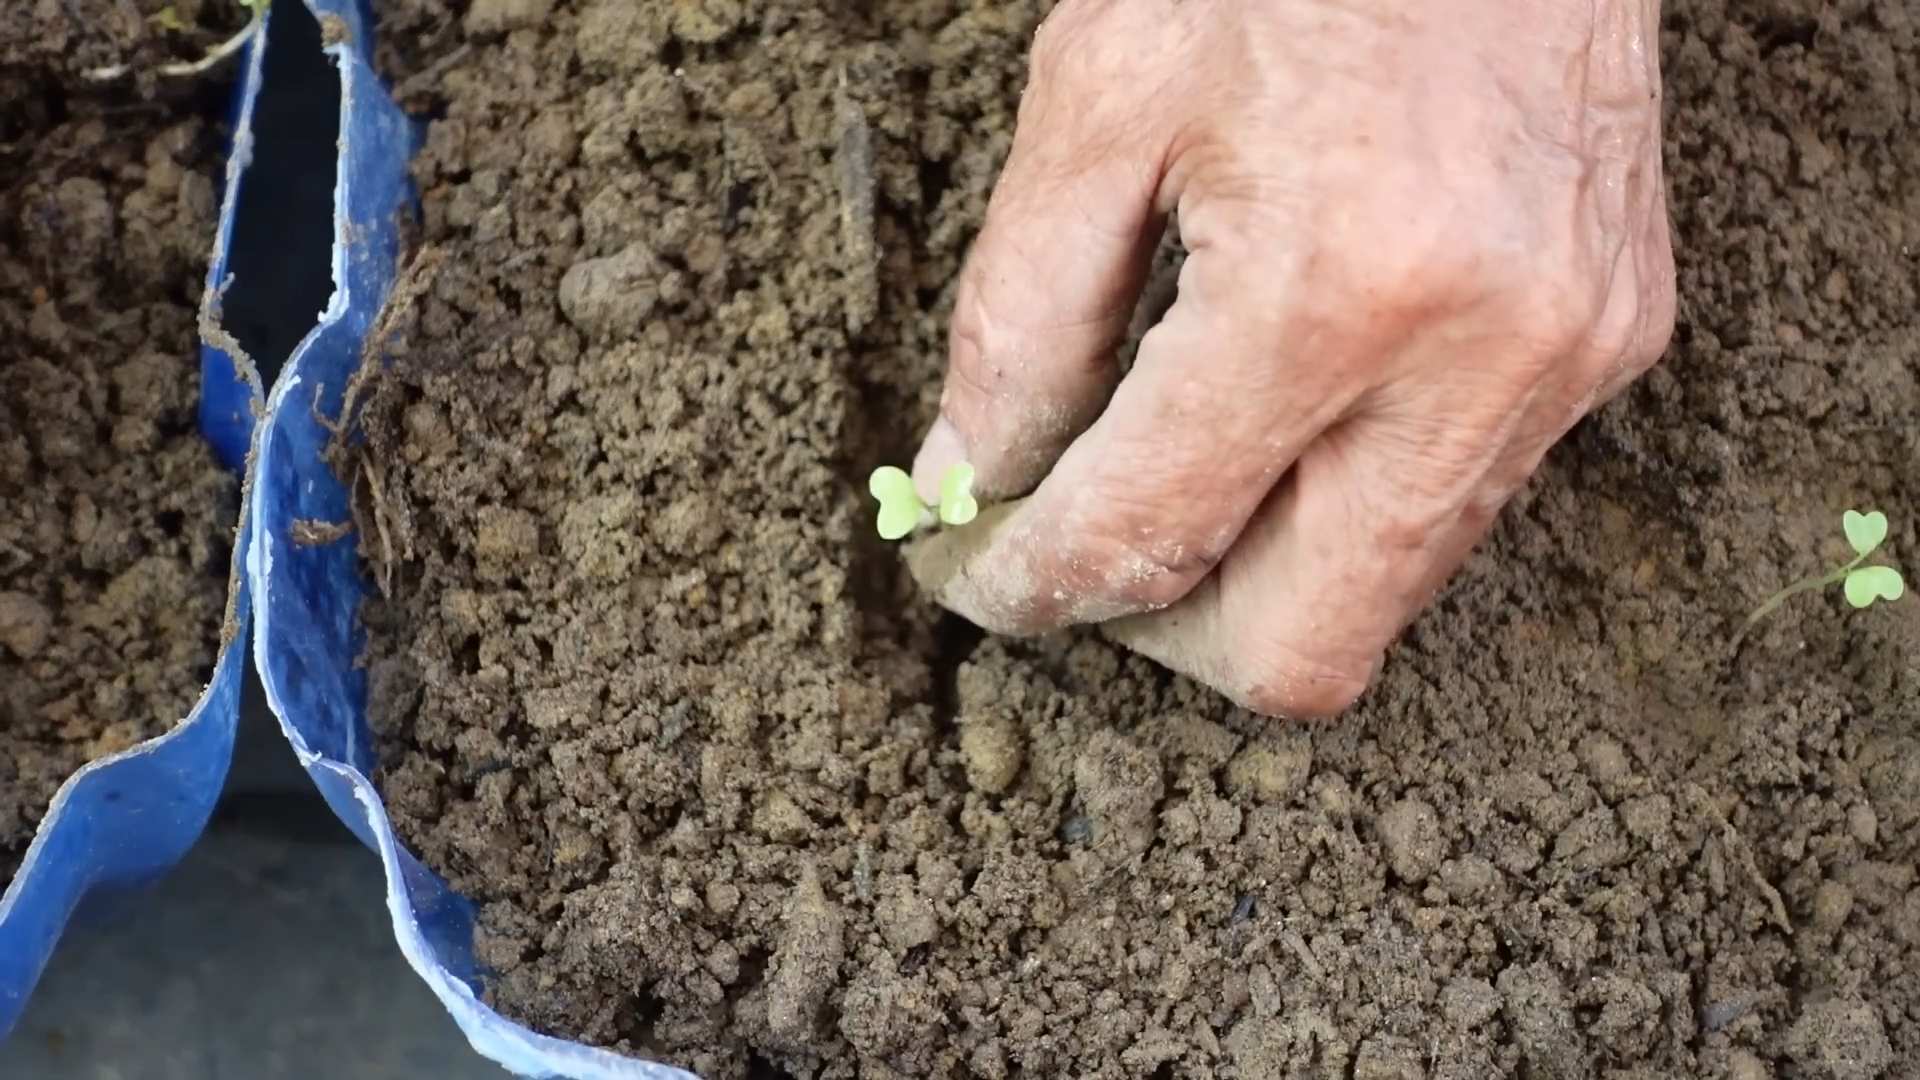
6. Transplant Seedlings: Once the seedlings have developed a few sets of true leaves (the leaves that look like miniature versions of the adult leaves), they’re ready to be transplanted into larger pots.
Planting Seedlings:
1. Prepare the Pot: Fill the pot with potting mix, leaving a few inches of space at the top.
2. Remove Seedling from Container: Gently squeeze the sides of the container to loosen the seedling. Carefully remove the seedling, being careful not to damage the roots.
3. Plant the Seedling: Dig a hole in the potting mix large enough to accommodate the root ball. Place the seedling in the hole and gently backfill with potting mix.
4. Water Thoroughly: Water the seedling thoroughly after planting.
5. Add Support (If Needed): If your chili variety tends to get tall or bushy, insert a support stake near the plant.
Caring for Your Chili Peppers
Now that your chili peppers are planted, it’s time to nurture them and watch them grow!
1. Watering: Water your chili peppers regularly, especially during hot weather. The soil should be consistently moist, but not waterlogged. Check the soil moisture by sticking your finger into the soil. If the top inch feels dry, it’s time to water.
2. Fertilizing: Feed your chili peppers every 2-3 weeks with a balanced fertilizer or one specifically formulated for tomatoes and peppers. Follow the instructions on the fertilizer package.
3. Sunlight: Chili peppers need at least 6-8 hours of sunlight per day. Place your pots in a sunny location on your balcony.
4. Pruning: Pruning isn’t always necessary, but it can help to encourage bushier growth and more fruit production. You can pinch off the tips of the branches to encourage side growth. Remove any yellowing or dead leaves.
5. Pest Control: Keep an eye out for pests like aphids, spider mites, and whiteflies. If you spot any pests, treat them with insecticidal soap or neem oil. Follow the instructions on the product label.
6. Pollination: Chili peppers are self-pollinating, but sometimes they need a little help, especially if you’re growing them indoors or on a balcony with limited airflow. You can hand-pollinate your chili peppers by gently shaking the plant or using a small paintbrush to transfer pollen from one flower to another.
Harvesting Your Chili Peppers
The moment we’ve all been waiting for! Harvesting your spicy bounty!
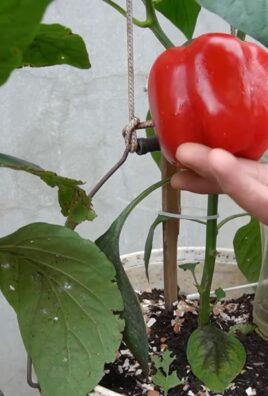
1. Timing: The time it takes for chili peppers to mature depends on the variety. Generally, they’re ready to harvest when they’ve reached their mature color and size.
2. Harvesting: Use scissors or pruning shears to cut the chili peppers from the plant. Be careful not to damage the plant.
3. Enjoy! Use your fresh chili peppers in your favorite recipes. You can also dry them, freeze them, or pickle them for later use.
Troubleshooting Common Problems
Even with the best care, you might encounter a few challenges along the way. Here are some common problems and how to address them:
* Yellowing Leaves: This could be a sign of overwatering, underwatering, nutrient deficiency, or pest infestation. Check the soil moisture, fertilize your plants, and inspect them for pests.
* Blossom Drop: This is when the flowers fall off the plant without producing fruit. It can be caused by temperature stress (too hot or too cold), lack of pollination, or nutrient deficiency. Ensure your plants are getting enough sunlight and water, and hand-pollinate them if necessary.
* Pest Infestation: As mentioned earlier, aphids, spider mites, and whiteflies are common pests of chili peppers. Treat them with insecticidal soap or neem oil.
* Lack of Fruit Production: This could be due to a variety of factors, including lack of sunlight, nutrient deficiency, or poor pollination. Make sure your plants are getting enough sunlight and fertilizer, and hand-pollinate them if necessary.
Extra Tips for Balcony Chili Success
* Choose the Right Location: Pick a spot on your balcony that gets plenty of sunlight (at least 6-8 hours per day).
* Use High-Quality Potting Mix: Don’t skimp on the potting mix! It’s the foundation of your chili pepper garden.
* Water Regularly: Chili peppers need consistent moisture, especially during hot weather.
* Fertilize Regularly: Chili peppers are heavy feeders and need regular fertilization to thrive.
* Protect from Wind: If your balcony is windy, provide some protection for your chili peppers. You can use a screen or place them in a sheltered location.
* Monitor for Pests: Keep an eye out for pests and treat them promptly.
* Have Fun! Growing chili peppers should be a fun and rewarding experience. Don’
Conclusion
So, there you have it! Growing your own bok choy at home is not only surprisingly simple, but it’s also incredibly rewarding. Imagine stepping out into your garden or onto your balcony and harvesting fresh, crisp bok choy whenever you need it. No more last-minute trips to the grocery store or settling for wilted, pre-packaged greens. You’ll have vibrant, healthy bok choy right at your fingertips.
This DIY trick is a must-try for several reasons. First, it gives you complete control over the growing process. You know exactly what goes into your bok choy, avoiding harmful pesticides and ensuring the freshest possible flavor. Second, it’s a fantastic way to connect with nature and experience the satisfaction of nurturing something from seed to harvest. Third, it’s incredibly cost-effective. Once you have your initial supplies, you can grow multiple batches of bok choy for a fraction of the price you’d pay at the store.
But the best part? The possibilities are endless! Feel free to experiment with different varieties of bok choy. Try growing baby bok choy for a more delicate flavor and texture, or opt for a more mature variety for stir-fries and soups. You can also adjust the growing conditions to suit your preferences. If you live in a warmer climate, provide some shade during the hottest part of the day to prevent bolting. If you’re growing indoors, experiment with different types of grow lights to find what works best for your setup.
Consider companion planting your bok choy with other vegetables and herbs. Marigolds can help deter pests, while dill and chamomile can attract beneficial insects. This not only enhances the flavor of your bok choy but also creates a more vibrant and healthy garden ecosystem.
Don’t be afraid to get creative and personalize your growing experience.
We’re confident that you’ll be amazed at how easy and enjoyable it is to grow your own bok choy. So, grab some seeds, prepare your soil, and get ready to embark on a delicious and rewarding gardening adventure.
We encourage you to try this DIY trick and share your experience with us! Let us know what varieties you’ve grown, what challenges you’ve faced, and what tips you’ve discovered along the way. Share your photos and stories in the comments below. We can’t wait to hear about your success! Happy growing!
Frequently Asked Questions (FAQ)
What is the best time of year to plant bok choy?
Bok choy is a cool-season crop, meaning it thrives in cooler temperatures. The best time to plant bok choy is in early spring or late summer/early fall. Avoid planting during the hottest months of summer, as high temperatures can cause the plants to bolt (go to seed prematurely), resulting in a bitter taste. For a spring crop, start seeds indoors 4-6 weeks before the last expected frost or direct sow outdoors as soon as the soil can be worked. For a fall crop, sow seeds directly into the garden in late summer or early fall, about 6-8 weeks before the first expected frost.
How much sunlight does bok choy need?
Bok choy needs at least 4-6 hours of sunlight per day to grow well. However, in hotter climates, providing some afternoon shade can help prevent bolting. If you’re growing bok choy indoors, use grow lights to supplement natural sunlight and ensure the plants receive adequate light. LED grow lights are a great option as they are energy-efficient and provide the full spectrum of light that plants need.
What kind of soil is best for growing bok choy?
Bok choy prefers well-draining soil that is rich in organic matter. Amend your garden soil with compost or well-rotted manure before planting to improve drainage and fertility. A slightly acidic to neutral soil pH of 6.0 to 7.5 is ideal. You can test your soil pH using a soil testing kit and amend it accordingly with lime to raise the pH or sulfur to lower it.
How often should I water bok choy?
Bok choy needs consistent moisture to thrive. Water deeply and regularly, especially during dry periods. Aim to keep the soil consistently moist but not waterlogged. Overwatering can lead to root rot, so ensure your soil has good drainage. Mulching around the plants can help retain moisture and suppress weeds.
What are some common pests and diseases that affect bok choy?
Common pests that affect bok choy include aphids, cabbage worms, flea beetles, and slugs. You can control these pests by handpicking them off the plants, using insecticidal soap, or applying Bacillus thuringiensis (Bt) for cabbage worms. Row covers can also help protect your plants from pests. Common diseases that affect bok choy include downy mildew and clubroot. To prevent these diseases, ensure good air circulation, avoid overhead watering, and practice crop rotation.
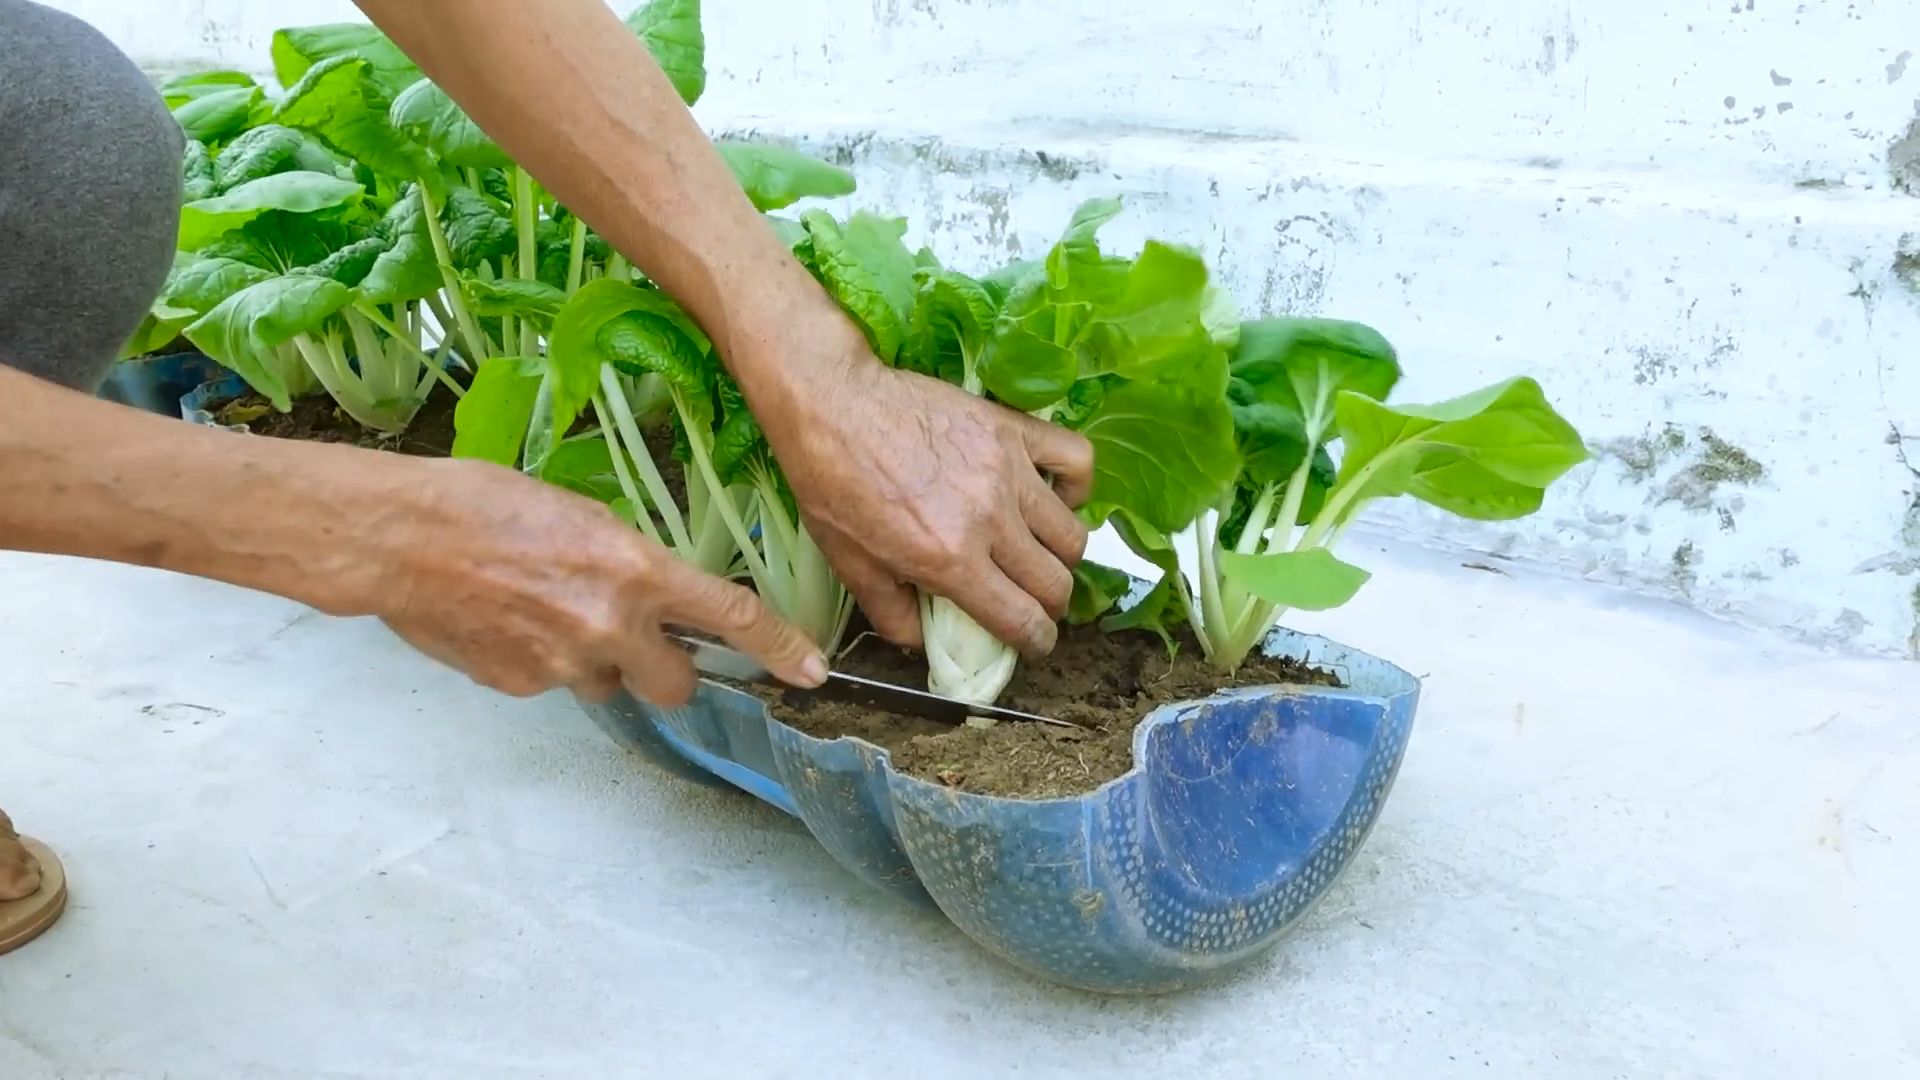
How do I harvest bok choy?
You can harvest bok choy at any stage of growth, depending on your preference. Baby bok choy can be harvested when the leaves are about 4-6 inches long. Mature bok choy can be harvested when the heads are about 12 inches tall. To harvest, simply cut the entire head of bok choy at the base of the plant with a sharp knife. You can also harvest individual leaves as needed, starting with the outer leaves.
Can I grow bok choy in containers?
Yes, bok choy grows well in containers. Choose a container that is at least 12 inches deep and wide to allow enough room for the roots to grow. Use a well-draining potting mix and water regularly. Container-grown bok choy may need more frequent watering than plants grown in the ground, especially during hot weather.
How do I prevent bok choy from bolting?
Bolting is when bok choy prematurely goes to seed, which can make the leaves bitter. To prevent bolting, plant bok choy at the right time of year (early spring or late summer/early fall), provide some shade during the hottest part of the day, and ensure consistent moisture. Choose bolt-resistant varieties of bok choy if you live in an area with hot summers.
Can I eat the entire bok choy plant?
Yes, the entire bok choy plant is edible, including the leaves, stems, and flowers. The leaves are tender and mild-flavored, while the stems are crisp and slightly sweet. The flowers are also edible and have a slightly peppery taste.
How do I store bok choy after harvesting?
To store bok choy after harvesting, wrap it loosely in a damp paper towel and place it in a plastic bag in the refrigerator. It will keep for about a week. Avoid washing the bok choy before storing it, as this can promote spoilage. Wash it just before using it.
Leave a Comment