
Grow Carrots at Home? Absolutely! Imagine plucking vibrant, sweet carrots straight from your backyard, bursting with flavor and freshness that store-bought carrots simply can’t match. Forget those bland, pre-packaged veggies – we’re talking about a homegrown harvest that will elevate your meals and impress your friends.
For centuries, cultivating carrots has been a rewarding practice, dating back to ancient times when they were prized for their medicinal properties and vibrant colors. From the purple and yellow varieties of the past to the familiar orange carrots we know today, their journey through history is as rich as the soil they thrive in.
But why should *you* learn to grow carrots at home? Well, beyond the incredible taste, it’s about control. You know exactly what goes into your food – no harmful pesticides or mysterious additives. Plus, it’s incredibly satisfying to nurture a tiny seed into a delicious, crunchy carrot. In this article, I’m going to share some simple yet effective DIY tricks and hacks that will help you achieve a bountiful carrot harvest, even if you’re a complete beginner. Get ready to dig in and discover the joy of homegrown goodness!

Growing Carrots at Home: A Beginner’s Guide
Hey there, fellow gardening enthusiasts! I’m so excited to share my experience with growing carrots at home. It’s surprisingly easy and incredibly rewarding to harvest your own sweet, crunchy carrots. Forget those bland, store-bought ones – homegrown carrots are a game-changer! This guide will walk you through everything you need to know, from choosing the right variety to troubleshooting common problems. Let’s get digging!
Choosing the Right Carrot Variety
Before we even think about soil, let’s talk carrots! Not all carrots are created equal. Different varieties thrive in different conditions and mature at different rates. Here’s a breakdown to help you choose:
* Nantes: These are my personal favorites! They’re cylindrical, sweet, and mature relatively quickly (around 60-70 days). They’re also less prone to forking, which is a bonus.
* Danvers: These are classic, tapered carrots that are great for heavier soils. They take a bit longer to mature (around 70-80 days) but are very reliable.
* Chantenay: These are short, stout carrots that are perfect for shallow or rocky soils. They mature in about 65-75 days and have a strong, earthy flavor.
* Baby Carrots: If you’re impatient (like me!), consider growing baby carrot varieties. They mature in as little as 50 days and are perfect for snacking.
* Heirloom Varieties: For a bit of fun, try growing heirloom varieties like ‘Purple Haze’ or ‘Yellowstone’. They add a splash of color to your garden and have unique flavors.
Tip: Consider your growing season length when choosing a variety. If you have a short summer, opt for faster-maturing types.
Preparing the Soil: The Key to Success
Carrots need loose, well-drained soil to grow long and straight. Rocky or compacted soil will result in forked, stunted carrots. Here’s how to prepare your soil:
* Choose the Right Location: Carrots need at least 6 hours of sunlight per day. Pick a spot in your garden that gets plenty of sun.
* Loosen the Soil: This is the most important step! Use a garden fork or tiller to loosen the soil to a depth of at least 12 inches. Remove any rocks, stones, or debris.
* Amend the Soil: Carrots prefer slightly acidic soil (pH 6.0-6.8). Amend the soil with compost or well-rotted manure to improve drainage and fertility. Avoid using fresh manure, as it can cause forking.
* Create Raised Beds (Optional): If your soil is heavy clay, consider creating raised beds. This will improve drainage and make it easier for carrots to grow.
* Avoid Nitrogen-Rich Fertilizers: Too much nitrogen can lead to leafy tops but small roots. Use a balanced fertilizer or one that’s lower in nitrogen.
Planting Carrot Seeds: Getting Started
Carrot seeds are tiny and can be tricky to handle. But don’t worry, I’ll guide you through it!
1. Timing is Everything: Carrots are a cool-season crop, so plant them in early spring or late summer. In my zone, I usually plant my first batch in March and another in August. Check your local planting calendar for the best dates in your area.
2. Sowing the Seeds: Sow the seeds directly into the prepared soil. Carrot seedlings don’t transplant well, so it’s best to avoid starting them indoors.
3. Creating Furrows: Make shallow furrows (about 1/4 inch deep) in the soil, spacing them about 2-3 inches apart.
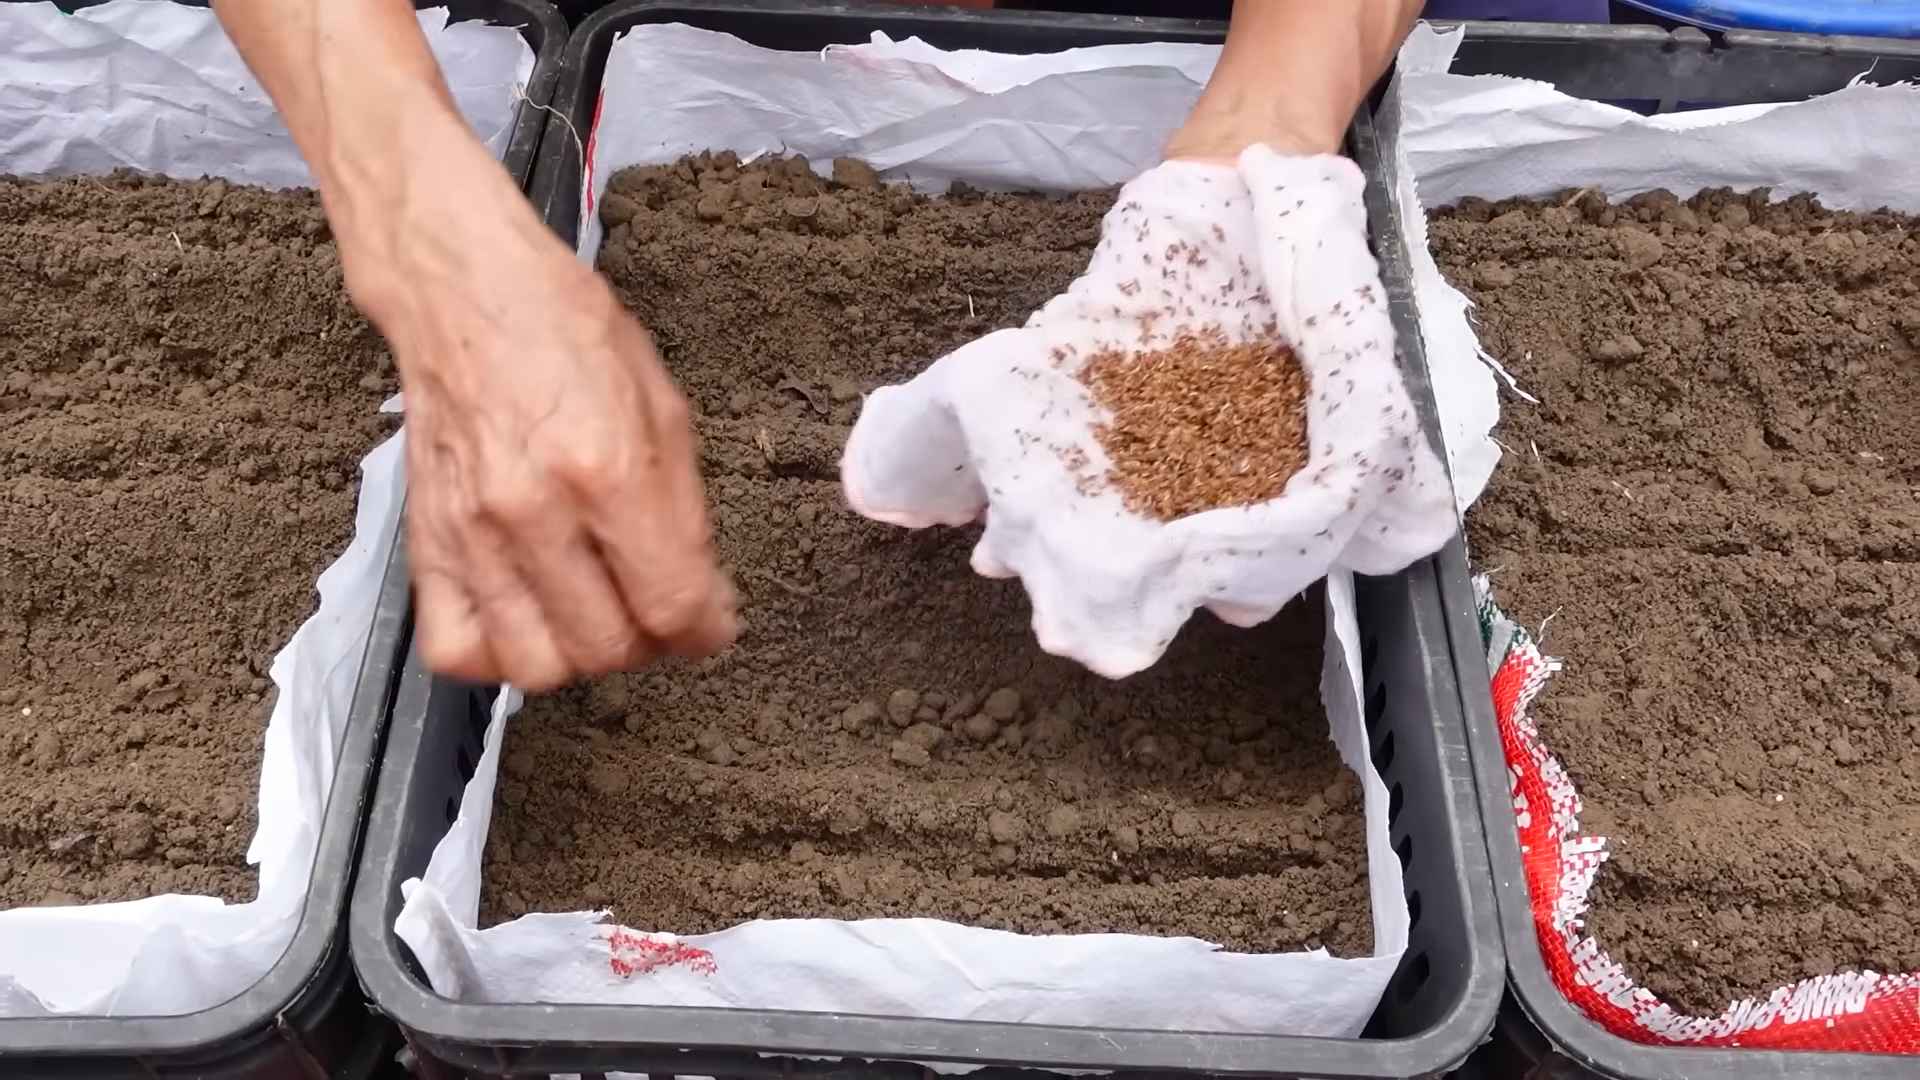
4. Sowing Sparsely: Sprinkle the seeds into the furrows as thinly as possible. This will reduce the need for thinning later on. I find it helpful to mix the seeds with sand to make them easier to handle.
5. Covering the Seeds: Gently cover the seeds with a thin layer of soil or vermiculite.
6. Watering Gently: Water the soil gently with a watering can or hose with a gentle spray nozzle. Keep the soil consistently moist until the seeds germinate.
7. Marking the Rows: Label your rows so you know what you’ve planted!
Thinning Carrot Seedlings: Giving Them Space to Grow
Thinning is crucial for growing healthy carrots. If the seedlings are too crowded, they’ll compete for resources and won’t develop properly.
1. When to Thin: Once the seedlings are about 1-2 inches tall, it’s time to thin them.
2. How to Thin: Gently pull out the weaker seedlings, leaving the strongest ones spaced about 1-2 inches apart.
3. Second Thinning (Optional): When the carrots are about 4-5 inches tall, you can thin them again, leaving about 3-4 inches between plants.
4. Water After Thinning: Water the soil after thinning to help the remaining seedlings settle in.
Tip: Don’t compost the thinned seedlings! You can eat them as microgreens or add them to salads.
Watering and Weeding: Maintaining Your Carrot Patch
Consistent watering and weeding are essential for healthy carrot growth.
* Watering: Carrots need consistent moisture, especially during germination and early growth. Water deeply and regularly, especially during dry spells. Avoid overhead watering, as it can promote fungal diseases.
* Weeding: Weeds compete with carrots for nutrients and water. Keep your carrot patch weed-free by hand-pulling weeds regularly. Be careful not to disturb the carrot roots when weeding.
* Mulching: Apply a layer of mulch (such as straw or wood chips) around the carrots to help retain moisture, suppress weeds, and regulate soil temperature.
Fertilizing Carrots: Giving Them a Boost
While carrots don’t need a lot of fertilizer, a little boost can help them grow bigger and sweeter.
* Side-Dressing: About halfway through the growing season, side-dress your carrots with a balanced fertilizer or one that’s lower in nitrogen.
* Compost Tea: You can also feed your carrots with compost tea. This is a gentle and effective way to provide them with nutrients.
* Avoid Over-Fertilizing: Too much fertilizer can lead to leafy tops and small roots.
Pest and Disease Control: Protecting Your Crop
Carrots are generally pest-resistant, but there are a few common problems to watch out for.
* Carrot Rust Flies: These pests lay their eggs near the base of the plants, and the larvae tunnel into the roots, causing damage. Cover your carrots with row covers to prevent carrot rust flies from laying their eggs.
* Nematodes: These microscopic worms can damage carrot roots. Rotate your crops regularly and amend the soil with organic matter to prevent nematode infestations.
* Leaf Spot Diseases: These fungal diseases can cause spots on the leaves. Improve air circulation and avoid overhead watering to prevent leaf spot diseases.
* Aphids: These tiny insects can suck the sap from carrot leaves. Spray them with insecticidal soap or neem oil to control them.
Harvesting Carrots: The Sweet Reward
Harvesting your own carrots is the most rewarding part of the process!
1. When to Harvest: Carrots are typically ready to harvest when they reach the desired size. Check the seed packet for the expected maturity date.
2. Loosening the Soil: Before pulling the carrots, loosen the soil around them with a garden fork.
3. Pulling the Carrots: Gently grasp the carrot tops near the base and pull straight up. If the carrots are difficult to pull, use the garden fork to loosen the soil further.
4. Cleaning the Carrots: Brush off any excess soil from the carrots.
5. Storing the Carrots: Store the carrots in the refrigerator in a plastic bag or container. They should last for several weeks.
Tip: You can also leave carrots in the ground over winter in mild climates. Just cover them with a thick layer of mulch to protect them from freezing.
Troubleshooting Common Problems
Even with the best care, you might encounter some problems when growing carrots. Here are a few common issues and how to fix them:
* Forked Carrots: This is usually caused by rocky or compacted soil. Make sure to loosen the soil thoroughly and remove any rocks before planting.
* Stunted Growth: This can be caused by poor soil, lack of sunlight, or overcrowding. Make sure your carrots are getting enough sunlight, water, and nutrients. Thin them properly to prevent overcrowding.
* Bitter Taste: This can be caused by hot weather or inconsistent watering. Water your carrots regularly and provide them with some shade during the hottest part of the day.
* Cracked Carrots: This is usually caused by inconsistent watering
Conclusion
So, there you have it! Growing carrots at home isn’t just a whimsical gardening dream; it’s a tangible reality accessible to anyone, regardless of space or experience. We’ve demystified the process, breaking it down into manageable steps that empower you to cultivate your own sweet, crunchy harvest. Forget those bland, store-bought carrots that lack character. Imagine the vibrant color and unparalleled flavor of freshly dug, homegrown carrots gracing your table.
This isn’t just about saving a few dollars at the grocery store; it’s about connecting with nature, understanding where your food comes from, and experiencing the profound satisfaction of nurturing life from seed to table. It’s about teaching children the wonders of the natural world and fostering a lifelong appreciation for healthy eating. It’s about reducing your carbon footprint by minimizing transportation and supporting sustainable practices.
But the real magic lies in the taste. Homegrown carrots possess an unparalleled sweetness and crispness that simply cannot be replicated in commercially grown varieties. The difference is truly remarkable, and once you’ve tasted it, you’ll never want to go back.
Don’t be afraid to experiment! Try different varieties of carrots to discover your favorites. Nantes carrots are known for their cylindrical shape and sweet flavor, while Chantenay carrots are shorter and sturdier, making them ideal for heavier soils. Rainbow carrots offer a stunning array of colors, adding visual appeal to your garden and your plate.
Consider companion planting to enhance your carrot-growing experience. Planting onions or garlic near your carrots can help deter carrot root flies, while marigolds can repel nematodes. Basil is said to improve the flavor of carrots, and rosemary can help protect them from pests.
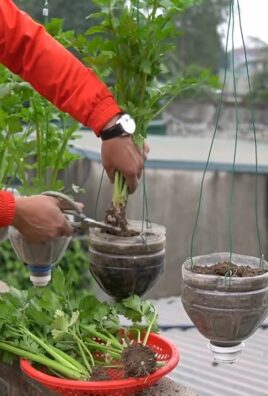
For those with limited space, container gardening is an excellent option. Choose a deep container (at least 12 inches) and fill it with well-draining potting mix. Dwarf carrot varieties are particularly well-suited for containers. Remember to water regularly and fertilize as needed.
And if you’re feeling adventurous, why not try growing carrots indoors during the winter months? With the right lighting and temperature, you can enjoy a continuous supply of fresh carrots year-round.
Growing carrots at home is a rewarding experience that offers numerous benefits, from improved flavor and nutrition to increased self-sufficiency and environmental awareness. It’s a simple yet profound way to connect with nature and enjoy the fruits (or rather, vegetables) of your labor.
We urge you to take the plunge and embark on your own carrot-growing journey. Don’t be discouraged by initial setbacks; gardening is a learning process, and every mistake is an opportunity to grow (pun intended!).
Once you’ve harvested your first batch of homegrown carrots, we’d love to hear about your experience. Share your tips, tricks, and triumphs in the comments below. Let’s create a community of carrot enthusiasts and inspire others to discover the joys of growing their own food. Share photos of your carrot harvest on social media using #HomegrownCarrots and let’s spread the word about the deliciousness and satisfaction of growing your own! Happy gardening!
Frequently Asked Questions (FAQ)
What is the best time of year to plant carrots?
The best time to plant carrots depends on your climate. In general, carrots are a cool-season crop, meaning they thrive in temperatures between 60°F and 70°F. For most regions, this means planting in early spring or late summer/early fall. Spring plantings should occur as soon as the soil can be worked, typically a few weeks before the last expected frost. Fall plantings should be timed so that the carrots have enough time to mature before the first hard frost. In warmer climates, you may be able to grow carrots throughout the winter. Check your local extension office for specific planting recommendations for your area.
How much sunlight do carrots need?
Carrots require at least six hours of direct sunlight per day to thrive. While they can tolerate some shade, insufficient sunlight will result in smaller, less flavorful carrots. Choose a planting location that receives full sun for optimal growth. If you are growing carrots indoors, you will need to supplement with artificial lighting, such as grow lights.
What kind of soil is best for growing carrots?
Carrots prefer loose, well-drained soil that is rich in organic matter. Heavy clay soils can hinder root development, resulting in misshapen or stunted carrots. Amend heavy soils with compost, aged manure, or other organic materials to improve drainage and aeration. Avoid soils that are rocky or contain large clumps, as these can also interfere with root growth. A slightly acidic soil pH of 6.0 to 6.8 is ideal for growing carrots.
How often should I water my carrots?
Carrots need consistent moisture to develop properly. Water deeply and regularly, especially during dry periods. Aim to keep the soil consistently moist but not waterlogged. Overwatering can lead to root rot, while underwatering can cause the carrots to become tough and bitter. A good rule of thumb is to water when the top inch of soil feels dry to the touch. Mulching around your carrot plants can help retain moisture and suppress weeds.
How do I prevent carrot root flies?
Carrot root flies are a common pest that can damage carrot roots. The larvae of these flies burrow into the roots, causing them to become riddled with tunnels and making them unmarketable. To prevent carrot root flies, consider the following:
* Companion planting: Plant onions or garlic near your carrots, as these plants can help deter carrot root flies.
* Row covers: Use row covers to physically exclude the flies from laying eggs near your carrots.
* Crop rotation: Avoid planting carrots in the same location year after year, as this can allow the flies to build up in the soil.
* Beneficial nematodes: Apply beneficial nematodes to the soil to control carrot root fly larvae.
* Remove infested carrots: If you notice any carrots that are infested with carrot root flies, remove them immediately to prevent the infestation from spreading.
When and how should I thin my carrot seedlings?
Thinning is essential for allowing carrots to develop properly. When seedlings are about 2 inches tall, thin them to about 1-2 inches apart. When they are about 4 inches tall, thin them again to about 3-4 inches apart. Gently pull out the unwanted seedlings, being careful not to disturb the roots of the remaining plants. You can eat the thinned seedlings as microgreens.
How do I know when my carrots are ready to harvest?
Carrots are typically ready to harvest 60-80 days after planting, depending on the variety. Check the seed packet for specific maturity dates. You can harvest carrots at any size, but they are generally sweetest and most flavorful when they have reached their mature size. To harvest, gently loosen the soil around the carrot and pull it straight up. If the soil is dry, water it beforehand to make harvesting easier.
Can I grow carrots in containers?
Yes, carrots can be successfully grown in containers, especially shorter varieties like ‘Thumbelina’ or ‘Parisian’. Choose a container that is at least 12 inches deep and has drainage holes. Fill the container with a well-draining potting mix. Sow the seeds directly into the container and thin as needed. Water regularly and fertilize every few weeks. Place the container in a location that receives at least six hours of direct sunlight per day.
How do I store my harvested carrots?
To store carrots, remove the green tops and gently brush off any excess soil. Do not wash the carrots until you are ready to use them. Store the carrots in a cool, dark, and humid place, such as the refrigerator or a root cellar. You can wrap them in a damp paper towel or store them in a plastic bag with a few holes for ventilation. Carrots can typically be stored for several weeks or even months under the right conditions.


Leave a Comment