
Grow Butternut Squash Indoors? Absolutely! Imagine harvesting your own delicious, creamy butternut squash right from the comfort of your home, even when the frosty winds are howling outside. Forget those pricey supermarket squashes – with a little know-how, you can cultivate your own personal butternut bounty.
For centuries, squash has been a staple in diets across the globe, particularly in the Americas, where it was a vital food source for indigenous populations. Today, we’re taking this ancient tradition and adapting it for the modern home gardener. Butternut squash, with its sweet, nutty flavor, is a favorite for soups, roasts, and pies, making it a versatile addition to any kitchen.
Why should you learn this DIY trick? Well, for starters, growing your own food is incredibly rewarding! Plus, starting your butternut squash indoors gives you a head start on the growing season, especially if you live in a region with shorter summers. It also allows you to control the growing environment, protecting your precious plants from pests and unpredictable weather. I’m excited to share these simple, effective techniques that will empower you to grow butternut squash indoors successfully, regardless of your gardening experience. Let’s get started and transform your home into a thriving indoor garden!
Growing Butternut Squash Indoors: A Comprehensive Guide
Hey there, fellow gardening enthusiasts! Ever dreamt of harvesting your own butternut squash, even when the weather outside is frightful? Well, dream no more! I’m going to walk you through the process of growing butternut squash indoors, from seed to (hopefully!) delicious harvest. It might seem daunting, but trust me, with a little patience and these tips, you can absolutely do it.
Choosing the Right Butternut Squash Variety
Not all butternut squash varieties are created equal, especially when it comes to indoor growing. We need to think about space and maturity time.
* Consider Bush Varieties: Look for “bush” or “compact” varieties. These are bred to be smaller and more manageable than the sprawling vine types. They’ll take up less room under your grow lights.
* Short Maturity Time: Opt for varieties with a shorter “days to maturity.” This means they’ll be ready to harvest sooner, which is crucial when you’re working with a limited growing season indoors.
* My Recommendations: Some good options include ‘Butterbush’ (a classic compact variety) and ‘Early Butternut’ (known for its shorter maturity). Do a little research and see what’s available in your area!
Getting Started: Seed Starting
This is where the magic begins! We’ll start by germinating our butternut squash seeds indoors.
1. Gather Your Supplies: You’ll need:
* Butternut squash seeds (of course!)
* Seed starting trays or small pots (at least 3-4 inches in diameter)
* Seed starting mix (this is lighter and better draining than regular potting soil)
* A spray bottle filled with water
* A heat mat (optional, but helpful for germination)
* A grow light (essential for healthy seedlings)
2. Sow the Seeds: Fill your seed starting trays or pots with the seed starting mix. Make a small indentation (about 1 inch deep) in the center of each pot. Place one or two seeds in each indentation and cover them gently with more seed starting mix.
3. Water Carefully: Gently water the soil using your spray bottle. You want to moisten the soil without overwatering it. The soil should be damp, not soggy.
4. Provide Warmth: Place your seed starting trays on a heat mat (if using) and under your grow light. Butternut squash seeds germinate best in warm temperatures (around 70-80°F).
5. Maintain Moisture: Keep the soil consistently moist by misting it with water as needed. Don’t let it dry out completely.
6. Wait Patiently: Germination usually takes about 5-10 days. Once the seedlings emerge, remove the heat mat (if you were using one) and make sure they’re getting plenty of light.
Transplanting Your Seedlings
Once your seedlings have developed a few sets of true leaves (the leaves that look like miniature versions of the adult plant’s leaves), it’s time to transplant them into larger containers.
1. Choose the Right Containers: You’ll need pots that are at least 5 gallons in size. Butternut squash plants need plenty of room for their roots to grow. Fabric pots are a great option because they allow for good drainage and air circulation.
2. Prepare the Potting Mix: Use a high-quality potting mix that’s well-draining and rich in nutrients. You can amend it with compost or other organic matter to boost its fertility.
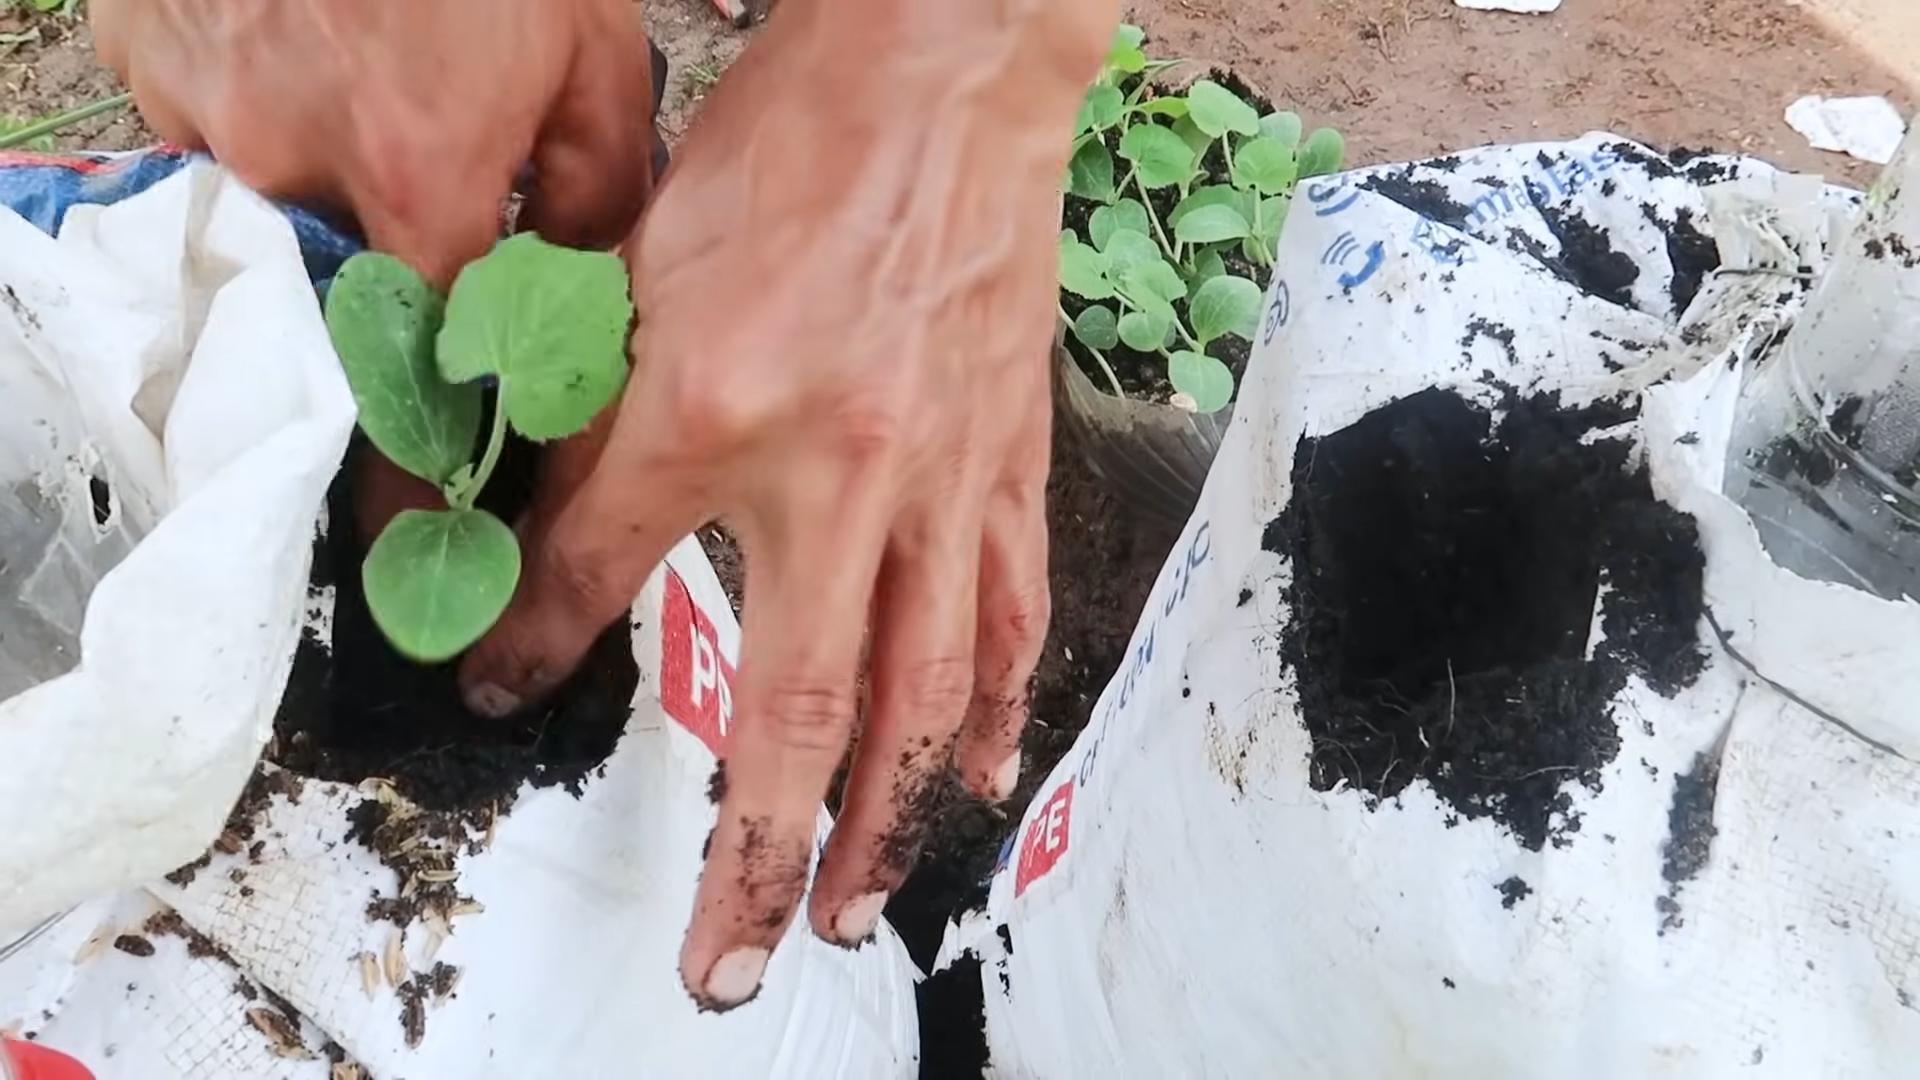
3. Gently Remove the Seedlings: Carefully remove the seedlings from their seed starting trays or pots. Be gentle to avoid damaging the roots. If the roots are tightly bound, you can gently tease them apart.
4. Plant the Seedlings: Dig a hole in the center of each pot that’s large enough to accommodate the seedling’s root ball. Place the seedling in the hole and backfill with potting mix. Gently firm the soil around the base of the plant.
5. Water Thoroughly: Water the newly transplanted seedlings thoroughly. Make sure the water drains out of the bottom of the pot.
Providing the Right Environment
Butternut squash plants need specific conditions to thrive indoors. Here’s what you need to keep in mind:
* Light: Butternut squash plants need at least 6-8 hours of direct light per day. If you don’t have a sunny window, you’ll need to use grow lights. LED grow lights are a good option because they’re energy-efficient and don’t produce too much heat. Position the lights a few inches above the plants and adjust them as the plants grow.
* Temperature: Butternut squash plants prefer warm temperatures (around 70-80°F during the day and 60-70°F at night). Avoid exposing them to drafts or sudden temperature changes.
* Humidity: Butternut squash plants like moderate humidity. You can increase the humidity around your plants by using a humidifier or by placing a tray of water near them.
* Air Circulation: Good air circulation is important to prevent fungal diseases. You can improve air circulation by using a fan to gently circulate the air around your plants.
Watering and Fertilizing
Proper watering and fertilizing are essential for healthy butternut squash plants.
1. Watering: Water your butternut squash plants deeply whenever the top inch of soil feels dry to the touch. Avoid overwatering, as this can lead to root rot. Make sure the water drains out of the bottom of the pot.
2. Fertilizing: Butternut squash plants are heavy feeders, so you’ll need to fertilize them regularly. Use a balanced fertilizer (such as 10-10-10) every 2-3 weeks. You can also supplement with a liquid fertilizer (such as fish emulsion) every week. Follow the instructions on the fertilizer label carefully.
Pollination: A Crucial Step
Butternut squash plants are monoecious, meaning they have separate male and female flowers on the same plant. To get fruit, you’ll need to pollinate the female flowers. Indoors, we have to play the role of the bees!
1. Identify Male and Female Flowers: Male flowers have a long, thin stem, while female flowers have a small, immature fruit (a tiny squash) at the base of the flower.
2. Hand-Pollination: Use a small paintbrush or cotton swab to collect pollen from the male flower. Gently brush the pollen onto the stigma (the sticky part) of the female flower.
3. Timing is Key: Pollinate the female flowers in the morning, when the pollen is most viable.
4. Repeat as Needed: You may need to pollinate several female flowers to get a good fruit set.
Dealing with Pests and Diseases
Even indoors, your butternut squash plants can be susceptible to pests and diseases.
* Common Pests: Aphids, spider mites, and whiteflies are common pests that can infest butternut squash plants. Inspect your plants regularly for signs of infestation. If you find pests, you can try spraying them with insecticidal soap or neem oil.
* Common Diseases: Powdery mildew and fungal diseases can also affect butternut squash plants. To prevent these diseases, make sure your plants have good air circulation and avoid overwatering. If you see signs of disease, you can try spraying them with a fungicide.
Harvesting Your Butternut Squash
The moment we’ve all been waiting for! Knowing when to harvest is key to getting the best flavor and storage life.
1. Maturity Time: Check the seed packet for the “days to maturity” for your specific variety. This will give you a general idea of when to expect your squash to be ready.
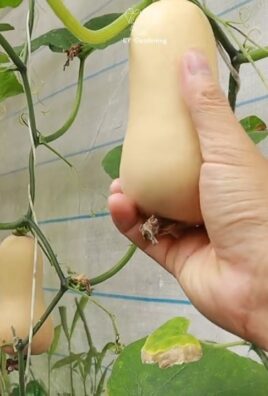
2. Visual Cues: The skin of the butternut squash should be hard and tough. It should be difficult to pierce with your fingernail. The color should be a deep tan or beige.
3. The Stem: The stem connecting the squash to the vine should be dry and brown.
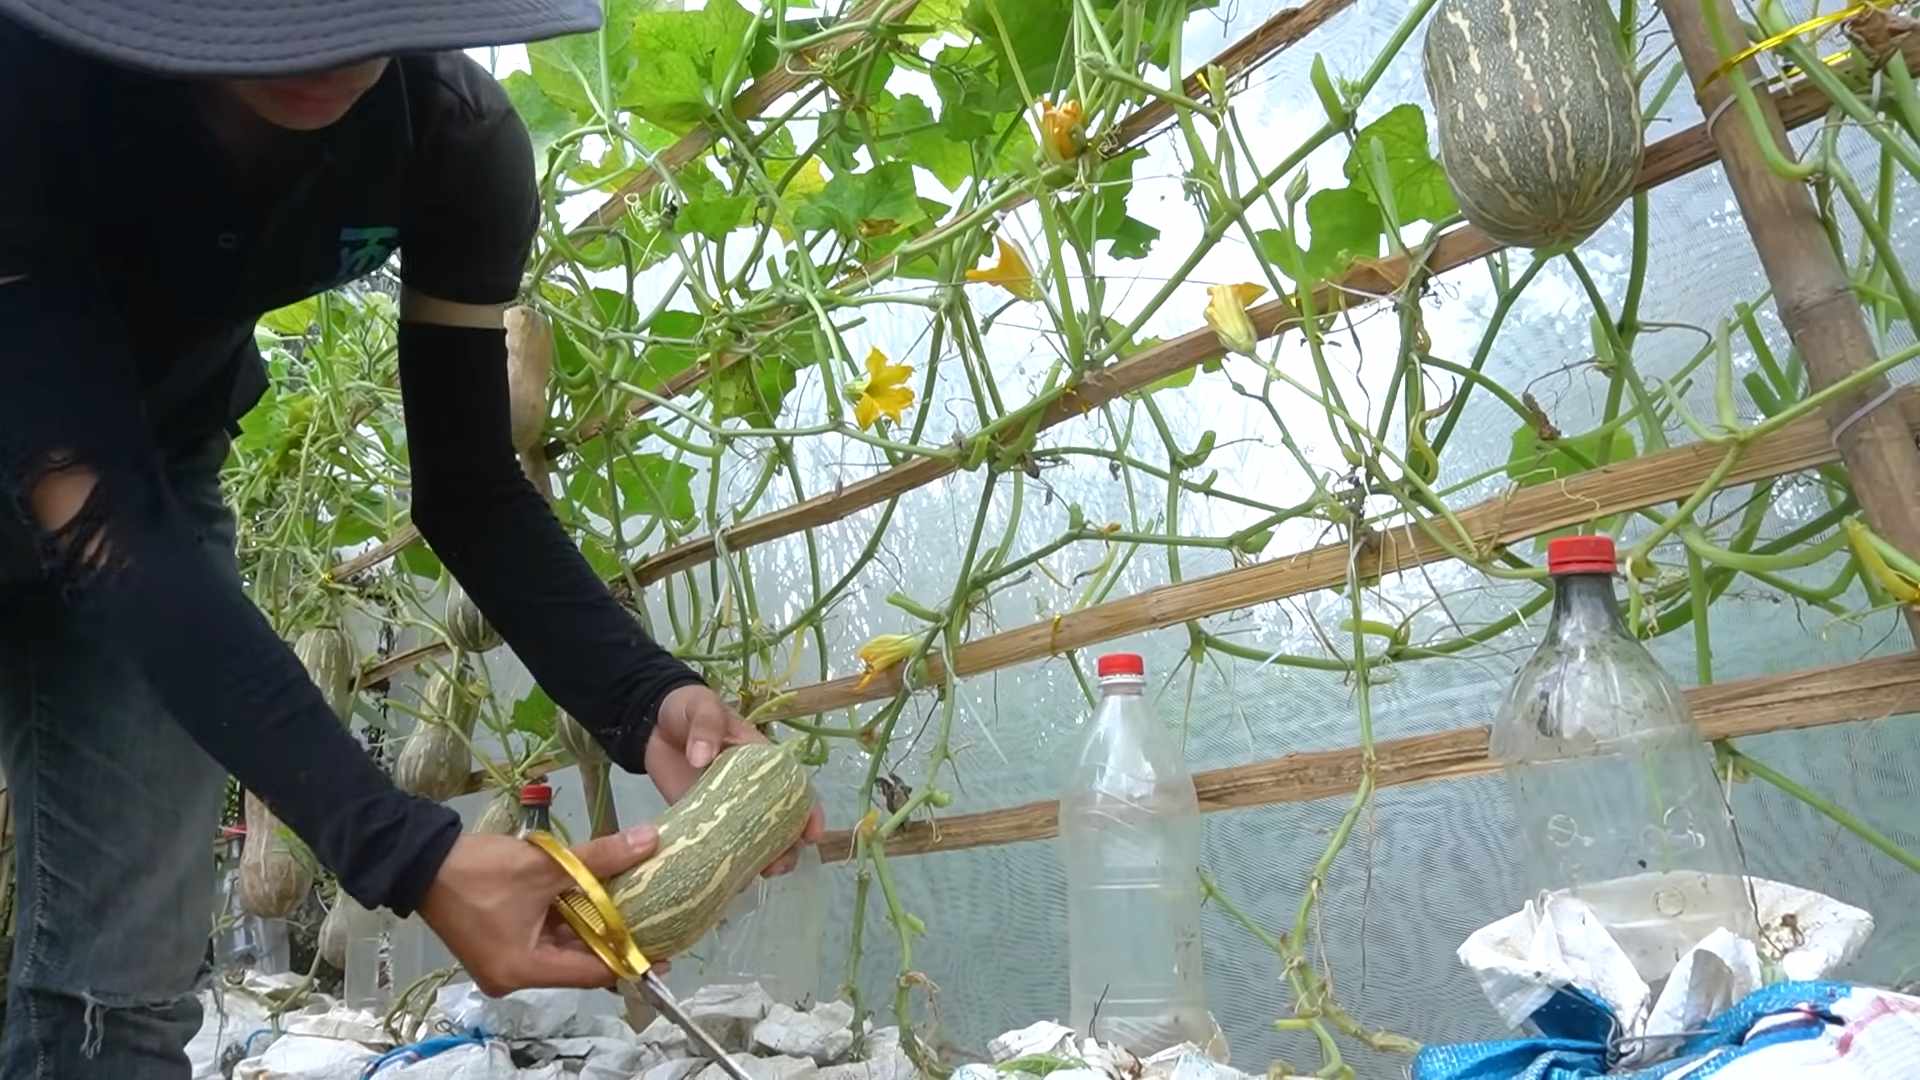
4. Harvesting: Use a sharp knife or pruning shears to cut the squash from the vine, leaving about 2-3 inches of stem attached.
5. Curing: Cure your butternut squash in a warm, dry place for about 1-2 weeks. This will help to harden the skin and improve its storage life.
Storing Your Butternut Squash
Proper storage is essential to keep your hard-earned butternut squash fresh and delicious for months.
1. Ideal Conditions: Store your cured butternut squash in a cool, dry, and well-ventilated place. The ideal temperature is around 50-60°F.
2. Avoid Bruising: Handle your butternut squash carefully to avoid bruising. Bruised squash will rot more quickly.
3. Don’t Wash: Don’t wash your butternut squash before storing it. The moisture can promote mold growth.
4. Check Regularly: Check your stored butternut squash regularly
Conclusion
So, there you have it! Growing butternut squash indoors might seem like a challenge reserved for seasoned gardeners, but with a little planning and these simple steps, you can absolutely cultivate these delicious, versatile vegetables right in your own home. We’ve walked you through everything from seed starting to pollination, ensuring you have the knowledge and confidence to succeed.
Why is this DIY trick a must-try? Because it opens up a world of possibilities! Imagine fresh, homegrown butternut squash gracing your table even when the weather outside is frightful. Think of the satisfaction of nurturing a plant from seed to harvest, knowing you played a direct role in providing healthy, delicious food for yourself and your family. Plus, growing your own food is a fantastic way to connect with nature, reduce your carbon footprint, and save money on groceries.
Butternut squash, with its sweet, nutty flavor, is incredibly versatile in the kitchen. Roast it for a simple side dish, puree it into a creamy soup, add it to pasta sauces, or even bake it into pies and muffins. The possibilities are endless! And when you grow your own, you have complete control over the quality and freshness of your produce.
Ready to take your indoor gardening to the next level? Consider these variations and suggestions:
* Vertical Gardening: If space is limited, explore vertical gardening techniques. Train your butternut squash vines to climb a trellis or support structure to maximize your growing area.
* Companion Planting: Experiment with companion plants like marigolds or basil to deter pests and attract pollinators.
* Different Varieties: While we focused on butternut squash, you can adapt these techniques to grow other types of squash indoors, such as acorn squash or delicata squash. Just be sure to research the specific needs of each variety.
* Hydroponics: For a more advanced approach, consider growing your butternut squash hydroponically. This method can provide even greater control over nutrient delivery and environmental conditions.
Don’t be afraid to experiment and adapt these techniques to suit your own unique growing environment. Every home is different, and what works for one person may not work for another. The key is to observe your plants closely, pay attention to their needs, and adjust your approach as necessary.
We are confident that you can successfully grow butternut squash indoors with a little patience and dedication. So, grab your seeds, gather your supplies, and get ready to embark on a rewarding gardening adventure!
We can’t wait to hear about your experiences! Share your photos, tips, and challenges in the comments below. Let’s create a community of indoor butternut squash growers and learn from each other. Happy gardening! Remember, mastering the art of growing butternut squash indoors is not just about the harvest; it’s about the journey, the connection to nature, and the satisfaction of creating something beautiful and delicious with your own two hands.
Frequently Asked Questions (FAQ)
What is the best time to start butternut squash seeds indoors?
The ideal time to start your butternut squash seeds indoors is typically 4-6 weeks before the last expected frost in your area. This allows the seedlings to develop a strong root system before being transplanted into larger containers or, if your climate allows, eventually outdoors. Check your local frost dates to determine the best timing for your specific region. Starting too early can result in leggy, weak seedlings, while starting too late may delay your harvest.
How much light do butternut squash seedlings need indoors?
Butternut squash seedlings require a significant amount of light to thrive. Aim for at least 6-8 hours of direct sunlight per day. If you don’t have access to a sunny window, consider using grow lights. Fluorescent or LED grow lights are excellent options. Position the lights a few inches above the seedlings and adjust as they grow. Insufficient light can lead to weak, spindly plants that are less likely to produce fruit.
What type of soil is best for growing butternut squash indoors?
Butternut squash prefers well-draining, nutrient-rich soil. A good potting mix specifically formulated for vegetables is an excellent choice. You can also create your own mix by combining equal parts of compost, peat moss (or coconut coir), and perlite or vermiculite. Avoid using garden soil, as it can be too heavy and may contain pests or diseases. Ensure the soil is loose and airy to allow for proper root development.
How often should I water my butternut squash plants indoors?
Water your butternut squash plants regularly, keeping the soil consistently moist but not waterlogged. Check the soil moisture level daily by sticking your finger about an inch into the soil. If it feels dry, it’s time to water. Water deeply, allowing the excess water to drain out of the bottom of the pot. Avoid overhead watering, as this can increase the risk of fungal diseases. Adjust your watering frequency based on the temperature and humidity of your indoor environment.
How do I pollinate butternut squash flowers indoors?
Since you won’t have bees or other pollinators indoors, you’ll need to hand-pollinate your butternut squash flowers. Butternut squash plants have separate male and female flowers. The male flowers have a long, thin stem, while the female flowers have a small, immature fruit at the base. To hand-pollinate, use a small paintbrush or cotton swab to collect pollen from the male flower and transfer it to the stigma of the female flower. The best time to pollinate is in the morning, when the flowers are fully open. Repeat the process for several days to increase your chances of success.
What are some common pests and diseases that affect butternut squash plants indoors?
Common pests that can affect butternut squash plants indoors include aphids, spider mites, and whiteflies. Regularly inspect your plants for signs of infestation, such as small insects, webbing, or sticky residue. Treat infestations with insecticidal soap or neem oil. Common diseases include powdery mildew and fungal leaf spots. Ensure good air circulation around your plants and avoid overhead watering to prevent these diseases. If necessary, treat with a fungicide.
How long does it take for butternut squash to mature indoors?
Butternut squash typically takes 90-100 days to mature from seed to harvest. However, the exact time can vary depending on the variety, growing conditions, and your climate. Keep an eye on your squash as it develops. It’s ready to harvest when the skin is hard and tough, and the stem is dry and brown.
Can I grow butternut squash in a small container indoors?
While butternut squash plants can get quite large, you can successfully grow them in containers indoors with proper care. Choose a large container, at least 15-20 gallons in size, to provide ample room for the roots to grow. Ensure the container has drainage holes to prevent waterlogging. You may need to prune the vines to keep them manageable and provide support as the squash develops.
How do I store butternut squash after harvesting it indoors?
After harvesting your butternut squash, cure it for 10-14 days in a warm, dry place with good air circulation. This helps to harden the skin and improve its storage life. Store cured butternut squash in a cool, dry, and dark place, such as a basement or pantry. Properly stored butternut squash can last for several months.
What if my butternut squash plant produces flowers but no fruit?
This is a common issue with indoor butternut squash growing and is usually due to incomplete pollination. Make sure you are diligently hand-pollinating your plants, transferring pollen from the male flowers to the female flowers each morning. Also, ensure your plants are receiving adequate light and nutrients, as these factors can also affect fruit production. Sometimes, the first few female flowers may not set fruit, but subsequent flowers are more likely to be successful.
Leave a Comment