
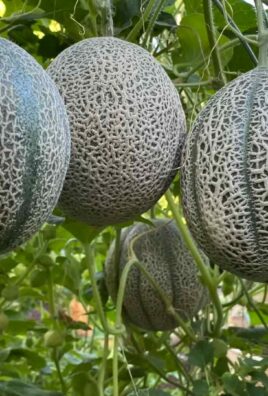
Grow Bitter Melon in Tubs and unlock a world of fresh, homegrown goodness right on your patio! Have you ever dreamed of harvesting your own vibrant, slightly bitter, yet incredibly healthy bitter melons without needing a sprawling garden? Well, dream no more! This DIY guide will walk you through the surprisingly simple process of cultivating these unique vegetables in the comfort of containers.
Bitter melon, also known as bitter gourd or karela, has a rich history deeply rooted in Asian and African cultures. For centuries, it’s been prized not only for its distinctive flavor but also for its impressive medicinal properties. From traditional remedies to culinary delights, bitter melon has earned its place as a staple in many households.
But why should you bother growing it yourself? In today’s world, where access to fresh, organic produce can be challenging and expensive, learning to grow bitter melon in tubs offers a fantastic solution. Imagine the satisfaction of plucking a perfectly ripe bitter melon, knowing exactly where it came from and how it was grown. Plus, it’s a fantastic way to add a touch of the exotic to your home garden, impress your friends, and enjoy a truly unique culinary experience. This DIY project is perfect for apartment dwellers, balcony gardeners, or anyone looking to maximize their growing space. Let’s get started!
Growing Bitter Melon in Tubs: A Comprehensive DIY Guide
Hey there, fellow gardening enthusiasts! I’m so excited to share my experience with growing bitter melon (also known as bitter gourd or *karela*) in tubs. It’s a rewarding experience, and trust me, even if you’re short on garden space, you can still enjoy this unique and healthy vegetable. I’ve learned a lot along the way, and I’m going to walk you through everything you need to know, step-by-step.
Choosing the Right Tub and Location
Before we even think about seeds, let’s talk about the foundation of our bitter melon garden: the tub and its location. This is crucial for success!
* Tub Size Matters: Bitter melon vines are vigorous growers, so you’ll need a decent-sized tub. I recommend a tub that’s at least 18 inches in diameter and 18 inches deep. A larger tub, like a half-barrel (around 24 inches), is even better, as it provides more room for the roots to spread.
* Drainage is Key: Make sure your tub has adequate drainage holes. Bitter melon hates soggy roots! If your tub doesn’t have enough holes, drill a few more. I usually aim for at least four holes, each about half an inch in diameter.
* Material Considerations: You can use plastic, terracotta, or even repurposed containers. Just ensure the material is food-safe if you’re using a recycled container. I personally prefer terracotta because it allows the soil to breathe a bit better, but plastic is a more budget-friendly option.
* Sunlight, Sunlight, Sunlight: Bitter melon thrives in full sun. That means at least 6-8 hours of direct sunlight per day. Choose a location that gets plenty of sun throughout the day. A south-facing balcony or patio is ideal.
* Protection from Wind: While bitter melon loves sun, it doesn’t appreciate strong winds. Find a spot that’s sheltered from harsh winds, as they can damage the delicate vines and flowers. A wall or fence can provide good protection.
Preparing the Soil
Now that we’ve got our tub and location sorted, let’s focus on the soil. Bitter melon needs well-draining, nutrient-rich soil to flourish.
* The Perfect Mix: I’ve found that a mix of equal parts potting soil, compost, and perlite works wonders. The potting soil provides a good base, the compost adds essential nutrients, and the perlite improves drainage and aeration.
* Compost is Your Friend: Don’t skimp on the compost! It’s the lifeblood of your bitter melon plant. I use a mix of homemade compost and store-bought compost. Worm castings are also a fantastic addition.
* pH Level: Bitter melon prefers a slightly acidic to neutral soil pH (around 6.0 to 7.0). You can test your soil pH using a soil testing kit, which you can find at most garden centers. If your soil is too alkaline, you can amend it with sulfur.
* Filling the Tub: When filling the tub, leave about 2-3 inches of space at the top. This will make watering easier and prevent soil from splashing out.
Starting Your Bitter Melon Seeds
You can either directly sow the seeds into the tub or start them indoors. I prefer starting them indoors because it gives them a head start and protects them from pests and diseases.
* Soaking the Seeds: Before planting, soak the bitter melon seeds in warm water for 24 hours. This helps to soften the hard seed coat and improve germination rates.
* Starting Indoors (My Preferred Method):
1. Fill small seedling trays or pots with seed-starting mix.
2. Plant the seeds about half an inch deep.
3. Water gently and keep the soil moist but not soggy.
4. Place the trays or pots in a warm location (around 75-85°F). A heat mat can be helpful.
5. Germination usually takes about 7-14 days.
6. Once the seedlings have developed a few true leaves, you can transplant them into the tub.
* Direct Sowing:
1. Sow the seeds directly into the tub about half an inch deep.
2. Water gently and keep the soil moist.
3. Germination may take a bit longer compared to starting indoors.
4. Thin out the seedlings if necessary, leaving only the strongest ones.
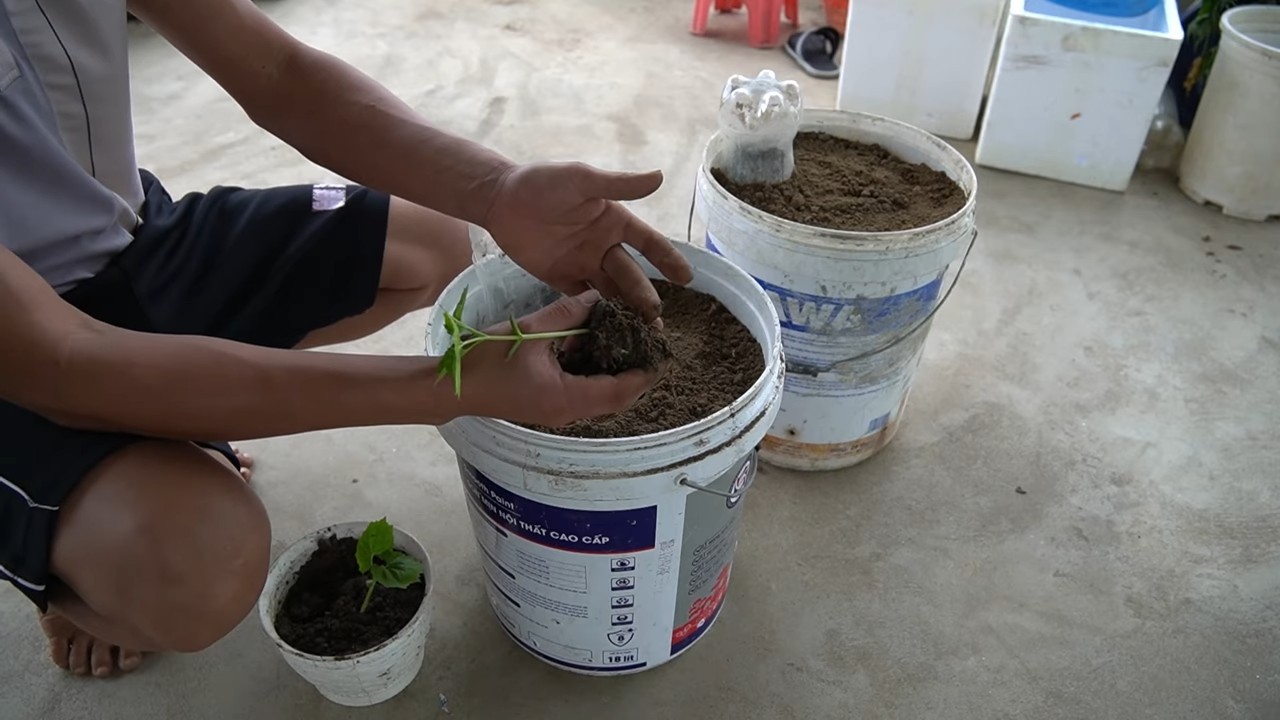
Transplanting and Initial Care
If you started your seeds indoors, it’s time to transplant them into the tub.
* Hardening Off: Before transplanting, you’ll need to harden off the seedlings. This means gradually exposing them to outdoor conditions over a period of about a week. Start by placing them outside for a few hours each day, gradually increasing the amount of time they spend outdoors.
* Transplanting Time: Choose a cloudy day for transplanting to minimize stress on the seedlings. Gently remove the seedlings from their trays or pots and plant them in the tub, spacing them about 12-18 inches apart.
* Watering After Transplanting: Water the seedlings thoroughly after transplanting.
* Providing Support: Bitter melon is a vine, so it needs support to climb. You can use a trellis, a fence, or even a sturdy stake. I prefer using a trellis because it provides ample support and allows the vines to grow vertically. Install the trellis at the time of transplanting to avoid disturbing the roots later.
Watering and Fertilizing
Proper watering and fertilizing are essential for healthy growth and abundant fruit production.
* Watering Schedule: Water deeply and regularly, especially during hot and dry weather. The soil should be consistently moist but not waterlogged. Check the soil moisture by sticking your finger into the soil. If the top inch feels dry, it’s time to water.
* Fertilizing: Bitter melon is a heavy feeder, so you’ll need to fertilize it regularly. I recommend using a balanced organic fertilizer, such as a 5-5-5 or 10-10-10 formula. Apply the fertilizer according to the package instructions. You can also supplement with liquid seaweed or fish emulsion every few weeks.
* Foliar Feeding: Consider foliar feeding with a diluted seaweed extract. This can help to boost growth and improve fruit production.
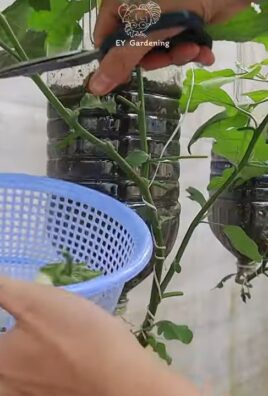
Pruning and Training
Pruning and training are important for maximizing fruit production and keeping the vines manageable.
* Pruning: Prune away any dead, damaged, or diseased leaves and stems. You can also prune the tips of the vines to encourage branching and more fruit production.
* Training: Train the vines to climb the trellis or support structure. Gently guide the vines and tie them to the trellis using soft twine or plant ties.
Pest and Disease Control
Bitter melon can be susceptible to certain pests and diseases. Here’s how to deal with them:
* Common Pests: Aphids, spider mites, and squash bugs are common pests that can attack bitter melon. You can control them with insecticidal soap, neem oil, or by handpicking them off the plants.
* Common Diseases: Powdery mildew and fungal leaf spots are common diseases that can affect bitter melon. You can prevent these diseases by providing good air circulation, avoiding overhead watering, and applying a fungicide if necessary.
* Prevention is Key: The best way to deal with pests and diseases is to prevent them in the first place. Keep your plants healthy by providing them with proper care, and inspect them regularly for any signs of trouble.
Harvesting Your Bitter Melon
The moment we’ve all been waiting for! Harvesting your own homegrown bitter melon is incredibly satisfying.
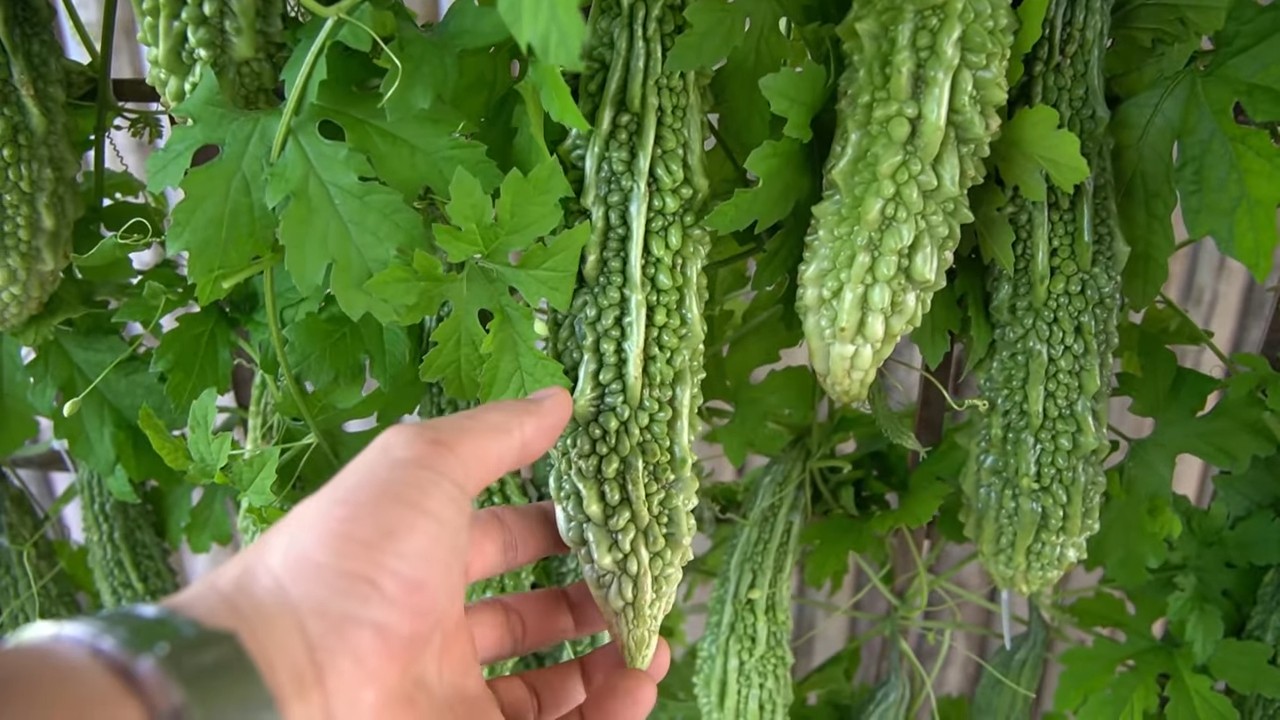
* When to Harvest: Bitter melon is typically ready to harvest about 2-3 months after planting. The fruits should be firm and green, and they should have a slightly waxy coating.
* Harvesting Technique: Use a sharp knife or pruning shears to cut the fruits from the vine. Leave a small stem attached to the fruit.
* Taste Test: The bitterness of the fruit increases as it ripens, so harvest it when it’s at the desired level of bitterness. I usually harvest mine when they’re about 6-8 inches long.
* Enjoy Your Harvest: Bitter melon can be used in a variety of dishes, from stir-fries to soups. It’s a healthy and delicious vegetable that’s packed with nutrients.
Troubleshooting
Even with the best care, you might encounter some challenges along the way. Here are a few common problems and how to fix them:
* Yellowing Leaves: This could be a sign of overwatering, underwatering, or nutrient deficiency. Check the soil moisture and adjust your watering schedule accordingly. Fertilize with a balanced fertilizer.
* Lack of Fruit: This could be due to a lack of pollination. Bitter melon has separate male and female flowers. You can hand-pollinate the
Conclusion
So, there you have it! Growing bitter melon in tubs is not only achievable but also a remarkably rewarding experience. We’ve walked you through the entire process, from selecting the right tub and soil to nurturing your plant and harvesting those uniquely flavored fruits. But why should you dedicate your time and effort to this particular gardening endeavor?
The answer lies in the unparalleled freshness and control you gain over your food source. Store-bought bitter melon, while readily available, often lacks the vibrant flavor and crisp texture of homegrown varieties. By cultivating your own, you’re guaranteed a supply of fresh, organic bitter melon, free from harmful pesticides and chemicals. Plus, there’s an undeniable satisfaction in nurturing a plant from seed to harvest, a connection to nature that’s often missing in our modern lives.
Beyond the practical benefits, growing bitter melon in tubs offers a unique opportunity to experiment and personalize your gardening experience. Consider these variations to tailor the process to your specific needs and preferences:
* Trellis Innovations: While we suggested a basic trellis, feel free to get creative with your support system. Use bamboo poles, repurposed branches, or even construct a decorative archway for your bitter melon vine to climb. This not only provides support but also adds an aesthetic touch to your garden or balcony.
* Companion Planting: Enhance your bitter melon’s growth and deter pests by incorporating companion plants. Marigolds, basil, and nasturtiums are excellent choices, offering natural pest control and attracting beneficial insects.
* Fertilizer Experiments: While we recommended a balanced fertilizer, explore organic alternatives like compost tea or fish emulsion. Observe how your plant responds to different nutrient combinations and adjust accordingly.
* Variety Selection: Don’t limit yourself to a single type of bitter melon. Experiment with different varieties, each offering unique shapes, sizes, and flavor profiles. Some popular options include the Chinese bitter melon, known for its elongated shape and milder bitterness, and the Indian bitter melon, characterized by its smaller size and more intense flavor.
* Vertical Gardening: If space is truly limited, consider a vertical gardening system. Attach multiple tubs to a wall or fence, creating a stunning green tapestry of bitter melon vines.
Ultimately, the success of your bitter melon growing venture hinges on your willingness to experiment, adapt, and learn from your experiences. Don’t be afraid to make mistakes – they’re valuable learning opportunities. Embrace the challenges, celebrate the successes, and most importantly, enjoy the process.
We wholeheartedly encourage you to embark on this exciting journey of growing bitter melon in tubs. It’s a rewarding experience that will not only provide you with fresh, delicious produce but also connect you with nature in a meaningful way. Once you’ve harvested your first batch of homegrown bitter melon, we’d love to hear about your experience! Share your tips, tricks, and photos with us in the comments section below. Let’s build a community of passionate bitter melon growers and learn from each other’s successes and challenges. Your insights could inspire others to take the plunge and discover the joys of homegrown goodness. So, grab your tubs, seeds, and gardening gloves, and let’s get growing!
Frequently Asked Questions (FAQ)
What size tub is best for growing bitter melon?
The ideal tub size for growing bitter melon is at least 15-20 gallons. This provides ample space for the root system to develop and ensures the plant has sufficient nutrients and water. Smaller tubs may restrict growth and lead to less productive plants. Consider the mature size of the bitter melon variety you’re growing when selecting your tub. Larger varieties may benefit from even larger containers. Remember to ensure the tub has adequate drainage holes to prevent waterlogging.
How often should I water my bitter melon plant in a tub?
Watering frequency depends on several factors, including the weather, the size of the tub, and the type of soil. Generally, you should water your bitter melon plant whenever the top inch of soil feels dry to the touch. During hot, dry periods, this may mean watering daily. In cooler, wetter weather, you may only need to water every few days. Avoid overwatering, as this can lead to root rot. A good rule of thumb is to water deeply and thoroughly, allowing excess water to drain out of the drainage holes. Monitor your plant closely and adjust your watering schedule accordingly.
What kind of soil should I use for growing bitter melon in a tub?
Bitter melon thrives in well-draining, nutrient-rich soil. A good potting mix specifically formulated for vegetables is an excellent choice. You can also create your own mix by combining equal parts of garden soil, compost, and perlite or vermiculite. The compost provides essential nutrients, while the perlite or vermiculite improves drainage and aeration. Avoid using heavy clay soil, as it can become waterlogged and suffocate the roots. Before planting, amend the soil with a slow-release fertilizer to provide a steady supply of nutrients throughout the growing season.
How much sunlight does bitter melon need?
Bitter melon requires at least 6-8 hours of direct sunlight per day to thrive. Choose a location for your tub that receives ample sunlight throughout the day. If you live in a particularly hot climate, some afternoon shade may be beneficial to prevent the leaves from scorching. If you’re growing bitter melon indoors, supplement with grow lights to ensure adequate light exposure. Insufficient sunlight can lead to stunted growth, reduced flowering, and smaller, less flavorful fruits.
How do I deal with pests and diseases on my bitter melon plant?
Regularly inspect your bitter melon plant for signs of pests and diseases. Common pests include aphids, spider mites, and whiteflies. These can be controlled with insecticidal soap or neem oil. Diseases such as powdery mildew and fungal leaf spots can be prevented by ensuring good air circulation and avoiding overhead watering. If you notice any signs of disease, remove affected leaves promptly and treat with a fungicide. Companion planting with marigolds, basil, or nasturtiums can also help deter pests naturally.
When is the best time to harvest bitter melon?
Bitter melon is typically ready to harvest 8-12 weeks after planting. The fruits should be firm, green, and slightly immature. The exact size and color will vary depending on the variety. Overripe bitter melon will turn yellow or orange and become more bitter. Use a sharp knife or pruning shears to cut the fruit from the vine, leaving a short stem attached. Harvest regularly to encourage continued fruit production.
Can I grow bitter melon indoors?
Yes, you can grow bitter melon indoors, but it requires careful attention to ensure adequate sunlight, humidity, and pollination. Provide at least 6-8 hours of direct sunlight per day, supplemented with grow lights if necessary. Maintain a humidity level of 50-60% by misting the plant regularly or using a humidifier. Hand-pollinate the flowers using a small brush to transfer pollen from the male flowers to the female flowers. Ensure the tub has adequate drainage and use a well-draining potting mix.
How do I pollinate my bitter melon plant?
Bitter melon plants have separate male and female flowers. The female flowers have a small, immature fruit at the base, while the male flowers do not. If you’re growing bitter melon indoors or in an area with limited pollinator activity, you may need to hand-pollinate the flowers. Use a small brush to collect pollen from the male flowers and gently transfer it to the stigma of the female flowers. Do this in the morning when the flowers are open. Successful pollination will result in the fruit developing and growing larger.
What are some common problems when growing bitter melon in tubs and how to solve them?
Some common problems include yellowing leaves (often due to nutrient deficiency or overwatering), lack of fruit production (often due to insufficient sunlight or poor pollination), and pest infestations. Address nutrient deficiencies with a balanced fertilizer. Adjust your watering schedule to avoid overwatering. Ensure the plant receives at least 6-8 hours of direct sunlight per day. Hand-pollinate the flowers if necessary. Control pests with insecticidal soap or neem oil. Regularly inspect your plant for signs of problems and address them promptly to prevent them from escalating.
Can I save seeds from my homegrown bitter melon for future planting?
Yes, you can save seeds from your homegrown bitter melon, but keep in mind that the resulting plants may not be identical to the parent plant, especially if the parent plant was a hybrid variety. To save seeds, allow a few fruits to fully ripen on the vine until they turn yellow or orange. Scoop out the seeds, rinse them thoroughly, and dry them completely before storing them in an airtight container in a cool, dark place. Use these seeds for planting in the next growing season.
Leave a Comment