
Grow baby carrots easily, right in your own backyard (or even on your balcony!). Imagine plucking those sweet, crunchy, miniature delights straight from the soil, knowing you nurtured them from tiny seeds. Forget the grocery store – we’re diving into the wonderful world of DIY baby carrot cultivation!
For centuries, home gardening has been a source of sustenance and joy. From ancient Roman kitchen gardens to the victory gardens of World War II, growing your own food connects us to a rich history of self-sufficiency and resourcefulness. While the modern supermarket offers convenience, there’s something deeply satisfying about nurturing life from seed to table. And let’s be honest, store-bought baby carrots just don’t compare to the vibrant flavor and satisfying crunch of homegrown ones.
But why grow baby carrots easily, specifically? Well, for starters, they’re incredibly versatile in the kitchen – perfect for snacking, salads, or roasting. More importantly, mastering this simple gardening trick empowers you to take control of your food source, reduce your reliance on processed options, and enjoy the freshest, most flavorful carrots imaginable. Plus, it’s a fantastic way to get your hands dirty, connect with nature, and maybe even impress your friends with your green thumb! So, let’s get started and unlock the secrets to a bountiful harvest of adorable, delicious baby carrots.
Grow Baby Carrots Like a Pro: A DIY Guide
Okay, so you want to grow baby carrots? Awesome! They’re delicious, adorable, and surprisingly easy to cultivate at home. Forget those pre-packaged bags from the store – homegrown baby carrots are sweeter, crisper, and bursting with flavor. I’m going to walk you through everything you need to know, from choosing the right seeds to harvesting your tiny treasures. Let’s get started!
Choosing the Right Carrot Variety
Not all carrots are created equal, especially when you’re aiming for the “baby” size. Some varieties are naturally smaller and mature quickly, making them perfect for this project.
* Nantes Varieties: These are my go-to! Nantes carrots are known for their cylindrical shape, smooth skin, and sweet flavor. They mature relatively quickly, making them ideal for baby carrots. Look for varieties like ‘Nantes Half Long’ or ‘Scarlet Nantes’.
* Thumbelina: As the name suggests, these are tiny, round carrots. They’re super cute and perfect for snacking.
* Paris Market: Another round variety, Paris Market carrots are known for their early maturity.
* Avoid Danvers and Imperator types: These varieties tend to grow long and thick, which isn’t what we’re after for baby carrots.
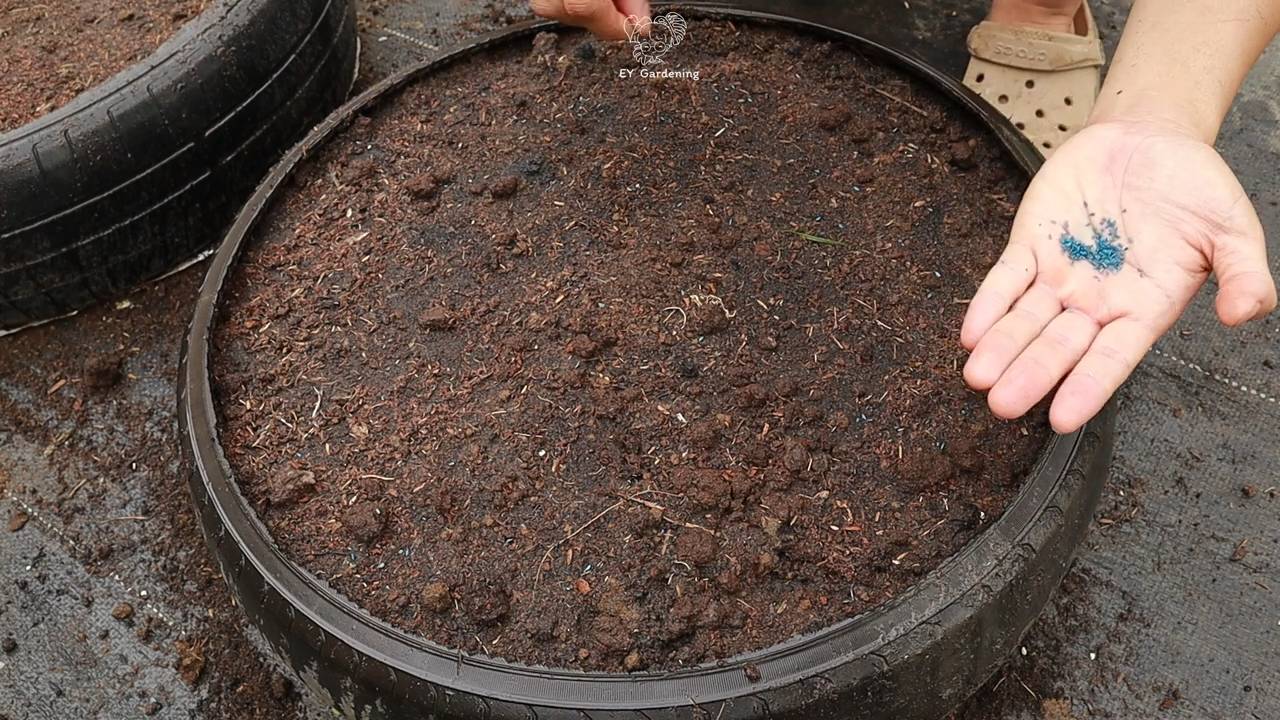
Preparing the Soil: The Key to Success
Carrots are notoriously picky about their soil. They need loose, well-drained soil to grow straight and smooth. Rocky or compacted soil will result in forked, stunted, and generally unhappy carrots. Trust me, I’ve been there!
* Choose the Right Location: Carrots need at least 6 hours of sunlight per day. Pick a spot in your garden that gets plenty of sunshine.
* Soil Testing (Optional but Recommended): A soil test can tell you the pH level and nutrient content of your soil. Carrots prefer a slightly acidic soil (pH 6.0-6.8). You can buy a soil testing kit at most garden centers or send a sample to your local agricultural extension office.
* Loosening the Soil: This is the most important step! Use a garden fork or tiller to loosen the soil to a depth of at least 12 inches. Remove any rocks, stones, or debris.
* Adding Amendments: Amend the soil with plenty of organic matter, such as compost, well-rotted manure, or peat moss. This will improve drainage, aeration, and fertility. I usually add a generous layer of compost and work it into the soil.
* Creating Raised Beds (Optional): If your soil is heavy clay or poorly drained, consider growing your carrots in raised beds. This will improve drainage and make it easier to control the soil quality.
* Avoid Fresh Manure: Fresh manure can cause forking and hairy roots. Make sure the manure is well-rotted before adding it to the soil.
Planting Your Baby Carrot Seeds
Now for the fun part! Planting carrot seeds can be a bit tricky because they’re so small. But with a little patience and these tips, you’ll be a pro in no time.
1. Check the Last Frost Date: Carrots are a cool-season crop, so you can plant them in early spring or late summer. Check your local last frost date to determine the best time to plant. You can usually find this information online or at your local garden center.
2. Direct Sow: Carrots don’t transplant well, so it’s best to sow the seeds directly into the garden.
3. Create Shallow Furrows: Use a hoe or your finger to create shallow furrows about 1/4 inch deep and 1-2 inches apart.
4. Sow Seeds Sparsely: This is crucial! Carrot seeds are tiny, and it’s easy to sow them too thickly. Try to space the seeds about 1/2 inch apart. I find it helpful to mix the seeds with sand to make them easier to handle.
5. Cover the Seeds Lightly: Gently cover the seeds with a thin layer of soil or vermiculite.
6. Water Gently: Water the soil gently with a watering can or hose with a gentle spray nozzle. Avoid washing away the seeds.
7. Keep the Soil Moist: Keep the soil consistently moist until the seeds germinate. This may require watering daily, especially in dry weather.
8. Mark the Rows: Label your rows so you know what you’ve planted.
Thinning: The Secret to Healthy Carrots
Thinning is essential for growing healthy carrots. If you don’t thin them, the carrots will be overcrowded and won’t have enough space to develop properly.
1. When to Thin: Thin the seedlings when they are about 1-2 inches tall.
2. How to Thin: Gently pull out the extra seedlings, leaving about 1-2 inches between each plant. Be careful not to disturb the roots of the remaining seedlings.
3. Successive Thinning: You may need to thin the carrots again a few weeks later, leaving about 2-3 inches between each plant.
4. Don’t Waste the Thinnings: You can eat the thinnings! They’re small but still flavorful. Add them to salads or use them as a garnish.
Watering and Fertilizing
Carrots need consistent moisture to grow well.
1. Watering: Water deeply and regularly, especially during dry weather. Aim for about 1 inch of water per week.
2. Avoid Overwatering: Overwatering can lead to root rot. Make sure the soil is well-drained.
3. Fertilizing: Carrots don’t need a lot of fertilizer. A light feeding of a balanced fertilizer (e.g., 10-10-10) a few weeks after germination is usually sufficient. Avoid fertilizers that are high in nitrogen, as this can promote leafy growth at the expense of root development. I prefer using a liquid seaweed fertilizer diluted according to the package instructions.
Weed Control
Weeds can compete with carrots for water, nutrients, and sunlight.
1. Hand Weeding: The best way to control weeds is to hand weed regularly. Be careful not to disturb the carrot roots.
2. Mulching: Mulching can help suppress weeds and retain moisture. Use organic mulches such as straw, hay, or wood chips.
3. Avoid Herbicides: I generally avoid using herbicides in my vegetable garden.
Pest and Disease Control
Carrots are relatively pest-free, but there are a few things to watch out for.
* Carrot Rust Fly: The larvae of the carrot rust fly can tunnel into the roots, causing damage. Cover your carrots with row covers to prevent the flies from laying eggs.
* Aphids: Aphids can suck the sap from the leaves. Spray them with a strong stream of water or use insecticidal soap.
* Leaf Blight: Leaf blight is a fungal disease that can cause spots on the leaves. Improve air circulation and avoid overhead watering to prevent leaf blight.
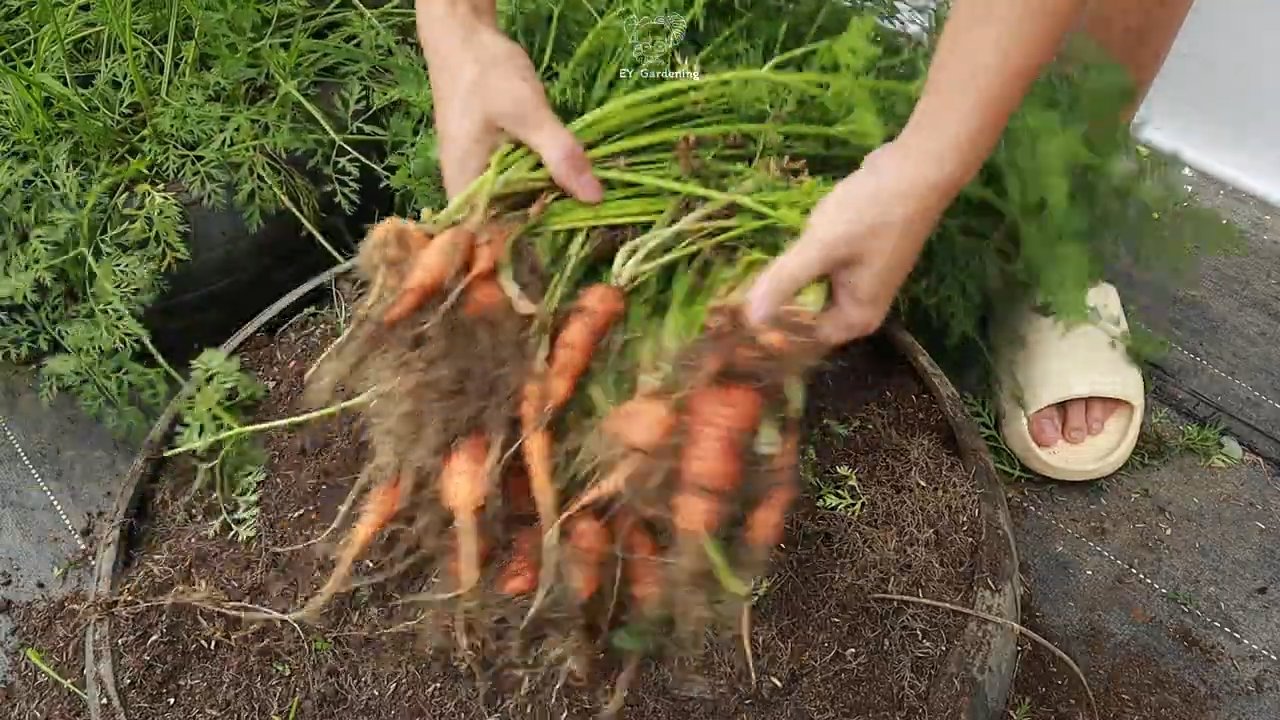
Harvesting Your Baby Carrots
The moment you’ve been waiting for! Harvesting baby carrots is easy and rewarding.
1. When to Harvest: Baby carrots are typically ready to harvest in 50-60 days, depending on the variety. Check the seed packet for specific maturity dates.
2. How to Harvest: Gently loosen the soil around the carrots with a garden fork or trowel. Pull the carrots out of the ground by the tops.
3. Check the Size: Harvest the carrots when they are about 3-4 inches long and 1/2 inch in diameter.
4. Wash and Enjoy: Wash the carrots thoroughly and enjoy them fresh from the garden!
Tips for Success
* Succession Planting: Plant carrots every 2-3 weeks for a continuous harvest.
* Companion Planting: Plant carrots with onions, garlic, or rosemary to deter pests.
* Record Keeping: Keep a record of what you planted, when you planted it, and how it grew. This will help you improve your gardening skills over time.
* Don’t Give Up: Gardening can be challenging, but it’s also incredibly rewarding. Don’t be discouraged if you don’t have success right away. Keep learning and experimenting, and you’ll eventually become a master gardener.
Storing Your Harvest
If you have more baby carrots than you can eat right away, here’s how to store them:
* Refrigerate: Store carrots in the refrigerator in a plastic bag or container. They will last for several weeks.
* Freeze: You can also freeze carrots. Blanch them in boiling water for 2-3 minutes, then cool them in ice water. Drain well and freeze in freezer bags or containers.
* Root Cellar: If you have a root cellar, you can store carrots in a box of moist sand
Conclusion
So, there you have it! Growing baby carrots at home is not only achievable but also surprisingly rewarding. Forget the pre-packaged, often bland, store-bought versions. Imagine biting into a sweet, crisp, and perfectly sized baby carrot that you nurtured from seed to harvest. The difference in flavor and texture is truly remarkable. This DIY trick is a must-try for anyone who appreciates fresh, homegrown produce and wants to add a touch of magic to their garden.
Why is this method so compelling? It’s about control. You control the soil, the watering, and the overall environment, ensuring your baby carrots receive the optimal conditions for growth. You avoid the potential chemicals and preservatives that can sometimes be found in commercially grown produce. And, perhaps most importantly, you experience the satisfaction of creating something delicious and healthy with your own two hands.
But the beauty of this DIY project lies in its adaptability. Feel free to experiment with different carrot varieties. Nantes carrots are a classic choice for baby carrots, known for their sweetness and uniform shape. However, you could also try Parisian carrots, which are round and adorable, or even rainbow carrots for a vibrant and colorful harvest.
Consider also the soil composition. While well-drained, loose soil is essential, you can amend it with compost or other organic matter to further enrich the nutrients available to your growing baby carrots. This will not only improve the flavor but also contribute to healthier, more robust plants.
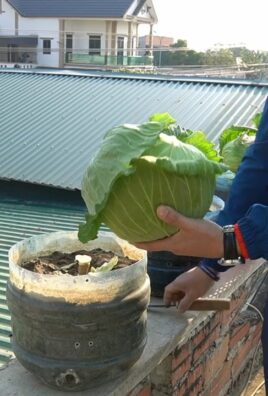
Another variation to explore is container gardening. If you have limited space, growing baby carrots in containers is a fantastic option. Just be sure to choose a container that is deep enough to accommodate the root growth and use a high-quality potting mix.
We strongly encourage you to give this DIY trick a try. It’s a simple, cost-effective, and incredibly satisfying way to enjoy fresh, delicious baby carrots. Don’t be intimidated if you’re a beginner gardener; the process is straightforward, and the rewards are well worth the effort.
Once you’ve harvested your first batch of homegrown baby carrots, we’d love to hear about your experience! Share your tips, tricks, and photos in the comments below. Let’s create a community of baby carrot enthusiasts and inspire others to embrace the joy of homegrown produce. What variety did you choose? What challenges did you face, and how did you overcome them? Your insights could be invaluable to other aspiring gardeners.
This DIY project is more than just growing vegetables; it’s about connecting with nature, learning new skills, and enjoying the simple pleasures of life. So, grab your seeds, prepare your soil, and get ready to experience the magic of growing your own baby carrots. You won’t be disappointed!
Frequently Asked Questions (FAQ)
What is the best time of year to plant baby carrots?
The best time to plant baby carrots is typically in the spring or fall. Carrots prefer cooler temperatures, so avoid planting them during the hottest months of summer. In most regions, you can plant them as soon as the soil can be worked in the spring, usually a few weeks before the last expected frost. For a fall harvest, plant them about 2-3 months before the first expected frost. This allows them enough time to mature before the weather turns too cold. Consider your local climate and growing season when determining the optimal planting time. Successive planting every 2-3 weeks will ensure a continuous harvest throughout the growing season.
How much sunlight do baby carrots need?
Baby carrots need at least 6 hours of sunlight per day to thrive. Choose a location in your garden that receives full sun for the majority of the day. If you’re growing them in containers, you can move them around to ensure they get enough sunlight. Insufficient sunlight can result in stunted growth and smaller, less flavorful carrots. If you live in a particularly hot climate, some afternoon shade may be beneficial to prevent the soil from drying out too quickly.
What kind of soil is best for growing baby carrots?
The ideal soil for growing baby carrots is loose, well-drained, and rich in organic matter. Carrots need loose soil to develop properly; compacted soil can lead to misshapen or stunted roots. Amend your soil with compost or other organic matter to improve drainage and fertility. Avoid using heavy clay soils, as they can be difficult for carrots to penetrate. A slightly acidic to neutral soil pH (around 6.0 to 7.0) is also optimal. Before planting, remove any rocks or debris from the soil to ensure smooth root growth.
How often should I water baby carrots?
Baby carrots need consistent moisture to grow well, but avoid overwatering, which can lead to root rot. Water deeply when the top inch of soil feels dry to the touch. Aim for about 1 inch of water per week, either through rainfall or irrigation. During hot, dry weather, you may need to water more frequently. Use a soaker hose or drip irrigation to water at the base of the plants, avoiding wetting the foliage, which can encourage fungal diseases.
How do I thin baby carrots?
Thinning is crucial for growing healthy baby carrots. When the seedlings are about 2 inches tall, thin them to about 1-2 inches apart. This gives the remaining carrots enough space to develop properly. Use small scissors to snip off the unwanted seedlings at the soil line, rather than pulling them out, which can disturb the roots of the remaining plants. Thinning may seem counterintuitive, but it’s essential for maximizing your harvest of well-formed baby carrots.
When are baby carrots ready to harvest?
Baby carrots are typically ready to harvest about 50-70 days after planting, depending on the variety. You can harvest them when they reach the desired size, usually around 3-4 inches long. Gently loosen the soil around the carrots and pull them out by the tops. If the soil is dry, water it beforehand to make harvesting easier. You can also harvest some carrots earlier as “thinnings” to create more space for the remaining plants to grow.
Can I grow baby carrots in containers?
Yes, you can absolutely grow baby carrots in containers! Choose a container that is at least 8-10 inches deep to accommodate the root growth. Use a high-quality potting mix that is well-draining and rich in organic matter. Ensure the container has drainage holes to prevent waterlogging. Place the container in a location that receives at least 6 hours of sunlight per day. Water regularly and fertilize with a balanced fertilizer every few weeks. Container gardening is a great option for those with limited space or poor soil conditions.
What are some common pests and diseases that affect baby carrots?
Some common pests that can affect baby carrots include carrot rust flies, aphids, and nematodes. Diseases include leaf blight and root rot. To prevent pests and diseases, practice good garden hygiene, such as removing weeds and debris. Use row covers to protect plants from pests. Ensure proper drainage to prevent root rot. If pests or diseases become a problem, use organic pest control methods or fungicides as needed. Crop rotation can also help prevent soilborne diseases.
Can I eat the carrot greens?
Yes, carrot greens are edible and nutritious! They have a slightly bitter taste, similar to parsley. You can use them in salads, soups, pesto, or as a garnish. Be sure to wash them thoroughly before eating. Some people may be sensitive to carrot greens, so start with a small amount to see how you react.
How do I store baby carrots after harvesting?
To store baby carrots after harvesting, remove the greens and wash the carrots thoroughly. Pat them dry and store them in a plastic bag or container in the refrigerator. They should last for several weeks. You can also store them in a container of water in the refrigerator, changing the water every few days to keep them fresh. Avoid storing them near apples or pears, as these fruits release ethylene gas, which can cause the carrots to become bitter.
Leave a Comment