
Easy tomato growing tips are what every gardener, from novice to seasoned pro, craves! Imagine biting into a sun-warmed, juicy tomato, bursting with flavor, that you nurtured from a tiny seed right in your own backyard. Sounds idyllic, right? But let’s be honest, growing tomatoes can sometimes feel like a battle against pests, diseases, and unpredictable weather.
For centuries, tomatoes have been a staple in cuisines around the world, originating in South America and making their way to Europe and beyond. They’ve become a symbol of summer abundance and fresh, homegrown goodness. But the journey from seed to table isn’t always smooth sailing. That’s where these DIY tricks and hacks come in!
I’ve compiled a collection of simple, yet effective, easy tomato growing tips that will help you overcome common challenges and maximize your harvest. Whether you’re struggling with blossom end rot, battling tomato hornworms, or simply want to boost your plant’s productivity, these DIY solutions are designed to make your tomato-growing experience easier and more rewarding. Let’s ditch the frustration and unlock the secrets to a bountiful tomato harvest together!
Tomato Growing Made Easy: Your DIY Guide for a Bountiful Harvest
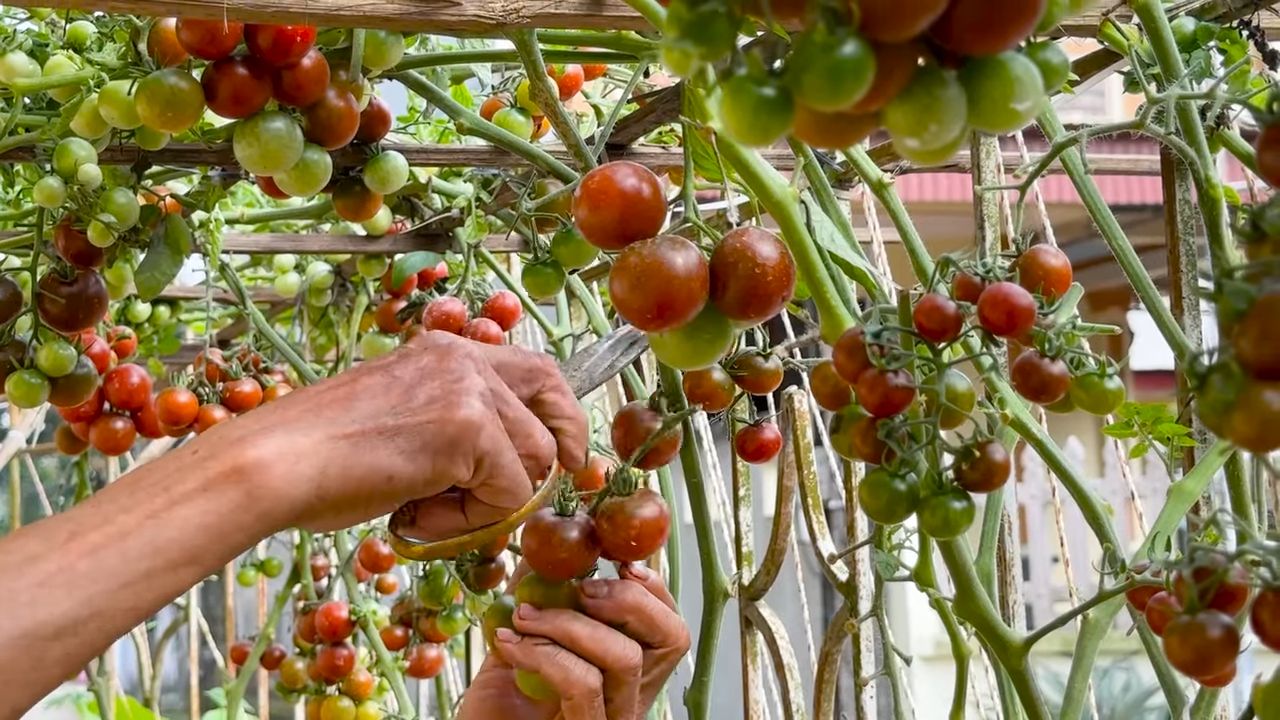
Hello dear garden friends! I love harvesting fresh tomatoes directly from the garden. Nothing tastes better than a sun-ripened tomato that you have grown yourself. And the best part? It’s not as difficult as you might think! In this article, I will show you how to achieve a bountiful tomato harvest using simple DIY methods. Don’t worry, even if you are a beginner, with these tips, it’s guaranteed to work!
The Basics: What Tomatoes Need to Grow
Before we get started, let’s briefly discuss the most important needs of our tomato plants. This is important so that you understand why we take certain steps.
- Sun: Tomatoes are sun worshippers! They need at least 6-8 hours of direct sunlight per day. The more sun, the better.
- Soil: Well-draining, nutrient-rich soil is crucial. Tomatoes don’t like it when their roots are standing in water.
- Water: Regular watering is important, especially during fruit formation. But be careful: don’t overdo it!
- Nutrients: Tomatoes are heavy feeders. They need sufficient nutrients to grow healthily and produce many fruits.
- Support: Tomato plants can get quite large and heavy. A trellis or a stake is essential to support them.
DIY Seed Starting: The Start of the Tomato Season
I prefer to start my tomato plants myself. This gives me the opportunity to choose from a wider variety of types and to ensure that the plants are healthy from the beginning.
What you need:
- Tomato seeds (preferably organic seeds)
- Seed starting mix
- Small seed pots or egg cartons
- Mini-greenhouse or plastic wrap
- Spray bottle
- Bright windowsill or plant lamp
Step-by-Step Guide:
- Prepare the seed pots: Fill the seed pots with seed starting mix. Lightly press the soil down.
- Sow the seeds: Place 1-2 tomato seeds in each pot. Cover the seeds with a thin layer of soil (approx. 0.5 cm / 0.2 inches).
- Watering: Gently moisten the soil with a spray bottle. The soil should be moist, but not wet.
- Mini-greenhouse: Place the seed pots in a mini-greenhouse or cover them with plastic wrap. This creates high humidity, which promotes germination.
- Location: Place the mini-greenhouse in a bright, warm place (approx. 20-25°C / 68-77°F). A windowsill is ideal.
- Regular checks: Check the soil regularly and moisten it with the spray bottle if necessary. Ventilate the mini-greenhouse daily to prevent mold.
- Germination: The first seedlings should appear after approx. 7-14 days.
- Remove the cover: Once the seedlings are there, you can remove the plastic wrap or the mini-greenhouse.
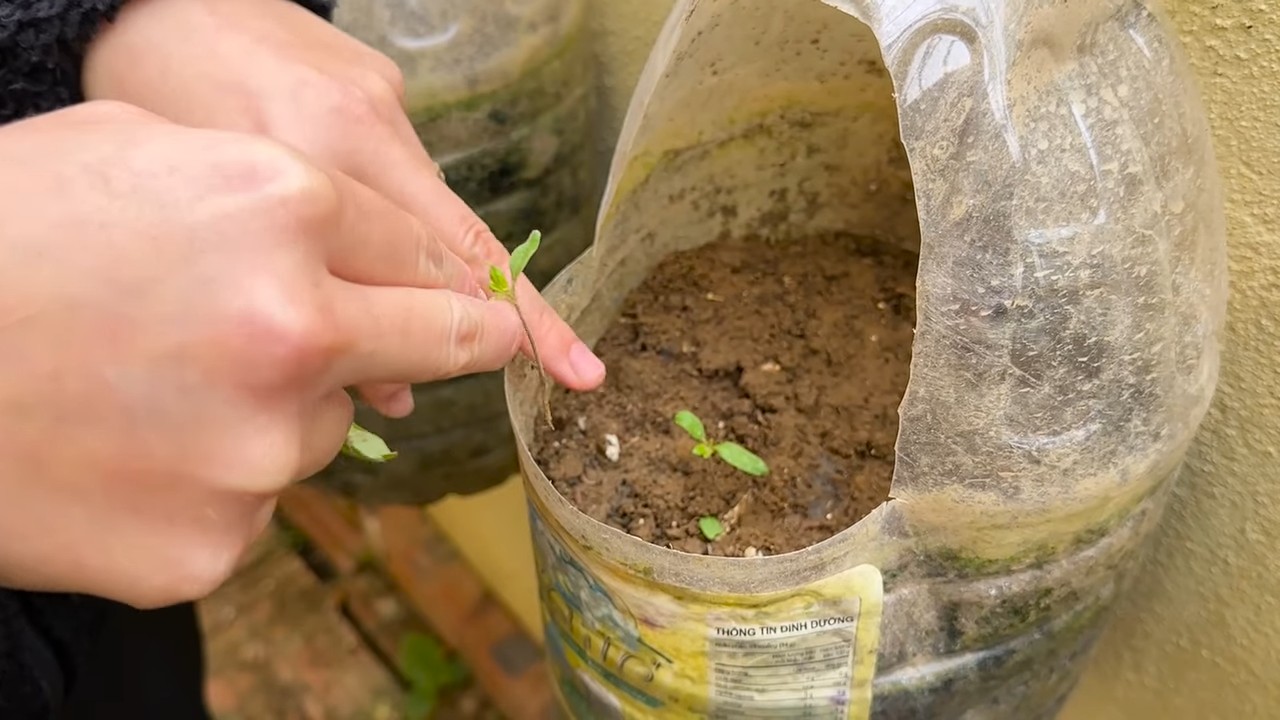
- Pricking out: When the seedlings have developed their first true leaves (after the cotyledons), it’s time to prick them out. This means transplanting the small plants into larger pots.
- Fill larger pots with potting soil.
- Carefully lift the small plants out of the seed pots with a dibber or a spoon. Be careful not to damage the roots.
- Place the seedlings in the larger pots and fill with soil. Lightly press the soil down.
- Gently water the seedlings.
- Further care: Place the pricked-out seedlings in a bright place and water them regularly. Fertilize them every 2-3 weeks with an organic liquid fertilizer.
DIY Soil Improvement: The Perfect Nutrient Base for Your Tomatoes
Good soil is the be-all and end-all for healthy tomato plants. I always prepare my soil myself to ensure it contains all the important nutrients.
What you need:
- Garden soil
- Compost
- Horn shavings
- Rock dust
- Wood ash (optional)
Step-by-Step Guide:
- Prepare the soil: Loosen the garden soil thoroughly. Remove weeds and stones.
- Incorporate compost: Work plenty of compost into the soil. Compost is a natural fertilizer and improves the soil structure.
- Add horn shavings: Horn shavings are a slow-release fertilizer that releases nitrogen. Add approx. 100g of horn shavings per square meter to the soil.
- Add rock dust: Rock dust provides important minerals and trace elements. Add approx. 50g of rock dust per square meter to the soil.
- Wood ash (optional): Wood ash contains potassium, which is important for fruit formation. Add only a little wood ash (approx. 20g per square meter), as it can raise the pH of the soil.
- Mix everything well: Mix all ingredients thoroughly with the garden soil.
- Let the soil rest: Let the soil rest for a few days before planting the tomato plants.
DIY Trellis: Stability for Your Tomato Plants
Tomato plants need support so they don’t break when they are heavy with fruit. I prefer to build my own trellises because then they meet my exact needs.
Option 1: Tomato Stakes
What you need:
- Bamboo stakes or wooden stakes (approx. 1.5-2 m / 5-6.5 feet long)
- Garden twine
Step-by-Step Guide:
- Insert stakes into the ground: Stick the stakes into the ground, right next to the tomato plants. Make sure the stakes are deep enough in the ground to be stable.
- Tie up the plants: Tie the tomato plants to the stakes with garden twine. Be careful not to tie the plants too tightly so they can still grow.
- Check regularly: Check the ties regularly and loosen them if necessary.
Option 2: Tomato Cage
What you need:
- Wire mesh (approx. 1 m / 3 feet high)
- Wire cutters
- Gloves
Step-by-Step Guide:
- Cut the wire mesh: Cut the wire mesh to the desired length. The length should be such that you can form a cage around the tomato plant.
- Form the cage: Bend the wire mesh into a cage.
- Connect the ends: Connect the ends of the wire mesh with wire.
- Place the cage over the plant: Place the cage over the tomato plant.
- Anchor the cage in the ground: Anchor the cage in the ground so that it stands stable.
DIY Fertilizer: Natural Nutrients for Your Tomatoes
Tomatoes are heavy feeders and need regular fertilizer. I prefer to use homemade fertilizer because it is natural and environmentally friendly.
Conclusion
So, there you have it! Mastering the art of easy tomato growing doesn’t require a green thumb blessed by the gardening gods. It’s about understanding the plant’s needs and implementing a few clever, DIY tricks to give them a helping hand. We’ve explored how simple adjustments to your watering schedule, strategic pruning, and even homemade supports can dramatically impact your tomato yield and the overall health of your plants.
Why is this a must-try? Because it empowers you to take control of your garden and enjoy the unparalleled satisfaction of harvesting your own, perfectly ripe tomatoes. Forget those bland, store-bought varieties. Imagine sinking your teeth into a juicy, sun-warmed tomato bursting with flavor – a flavor you cultivated yourself! This isn’t just about growing tomatoes; it’s about connecting with nature, reducing your carbon footprint, and enjoying the freshest possible produce.
But the beauty of gardening lies in experimentation. Don’t be afraid to adapt these techniques to your specific environment and tomato varieties. For example, if you live in a particularly humid climate, consider increasing airflow around your plants by spacing them further apart and being extra diligent with pruning. If you’re growing heirloom varieties, you might find they require slightly different watering schedules or support systems.
Consider experimenting with different types of homemade fertilizer. Coffee grounds, eggshells, and banana peels are all excellent sources of nutrients that your tomato plants will love. You can also try companion planting with herbs like basil and marigolds, which are known to deter pests and attract beneficial insects.
And speaking of pests, keep a close eye on your plants for any signs of trouble. Early detection is key to preventing infestations from spiraling out of control. A simple solution of soapy water can often be effective against aphids and other common tomato pests.
Ultimately, the best way to learn is by doing. So, grab your gardening gloves, gather your supplies, and get ready to embark on your tomato-growing adventure. We’re confident that with these easy tomato growing tips, you’ll be amazed at the results.
We encourage you to try these DIY tricks and share your experiences with us! What worked best for you? What challenges did you encounter? What delicious tomato recipes did you create with your homegrown bounty? Share your photos, tips, and stories in the comments below. Let’s build a community of tomato-loving gardeners and learn from each other’s successes and failures. Happy gardening!
Frequently Asked Questions (FAQ)
Q: How often should I water my tomato plants?
A: Watering frequency depends on several factors, including the weather, soil type, and the size of your plants. As a general rule, aim to water deeply and less frequently, rather than shallowly and often. This encourages deep root growth, which makes your plants more resilient to drought. Check the soil moisture by sticking your finger about an inch or two into the soil. If it feels dry, it’s time to water. During hot, dry weather, you may need to water daily, while during cooler, wetter periods, you may only need to water every few days. Avoid overhead watering, as this can promote fungal diseases. Instead, water at the base of the plant, directing the water towards the roots.
Q: What’s the best way to prune my tomato plants?
A: Pruning is essential for maximizing tomato production and preventing disease. The main goal of pruning is to remove suckers, which are the small shoots that grow between the main stem and the branches. These suckers steal energy from the plant and can lead to overcrowding, which increases the risk of fungal diseases. To prune, simply pinch off the suckers when they are small, ideally less than a few inches long. You can also remove any yellowing or diseased leaves to improve airflow and prevent the spread of disease. Determinate tomato varieties (those that grow to a certain size and then stop) require less pruning than indeterminate varieties (those that continue to grow throughout the season).
Q: What kind of support system should I use for my tomato plants?
A: Tomato plants, especially indeterminate varieties, need a strong support system to prevent them from collapsing under the weight of their fruit. There are several options to choose from, including cages, stakes, and trellises. Cages are a popular choice because they provide all-around support and are relatively easy to install. Stakes are a good option for smaller plants or for those who prefer a more natural look. Trellises are a great choice for larger gardens and can provide excellent support for multiple plants. When choosing a support system, make sure it is sturdy enough to withstand the weight of the mature plants and their fruit.
Q: What are some common tomato pests and diseases, and how can I prevent them?
A: Tomato plants are susceptible to a variety of pests and diseases, including aphids, whiteflies, tomato hornworms, early blight, and blossom end rot. To prevent these problems, start by choosing disease-resistant varieties. Practice good garden hygiene by removing any fallen leaves or debris that could harbor pests or diseases. Water at the base of the plants to avoid wetting the foliage, which can promote fungal growth. Use organic pest control methods, such as insecticidal soap or neem oil, to control pests. Ensure your plants have adequate calcium to prevent blossom end rot.
Q: Can I grow tomatoes in containers?
A: Yes, you can definitely grow tomatoes in containers! Choose a large container, at least 20 gallons in size, with good drainage. Use a high-quality potting mix and fertilize regularly. Container-grown tomatoes may require more frequent watering than those grown in the ground, especially during hot weather. Choose determinate or dwarf varieties for container growing, as they tend to be more compact and manageable. Provide a support system, such as a stake or cage, to prevent the plants from toppling over.
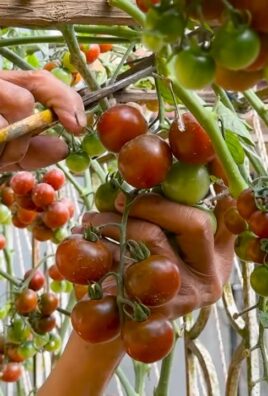
Q: How do I know when my tomatoes are ripe?
A: The best way to tell if a tomato is ripe is to look at its color and feel its texture. Ripe tomatoes will be uniformly colored, depending on the variety, and will feel slightly soft to the touch. They should also have a pleasant aroma. Gently twist the tomato from the vine; if it comes off easily, it’s ripe. Avoid picking tomatoes that are still green or hard, as they will not ripen properly off the vine.
Q: What can I do with green tomatoes?
A: Don’t despair if you have a glut of green tomatoes at the end of the season! There are many delicious ways to use them. You can make fried green tomatoes, green tomato chutney, or even pickled green tomatoes. Green tomatoes have a tart, tangy flavor that adds a unique twist to many dishes.
Q: How can I improve the flavor of my homegrown tomatoes?
A: Several factors can influence the flavor of your homegrown tomatoes. Choose varieties known for their flavor, such as heirloom varieties. Provide your plants with plenty of sunlight and water. Avoid over-fertilizing, as this can dilute the flavor. Allow the tomatoes to ripen fully on the vine before picking them. And finally, enjoy them fresh from the garden for the best possible flavor!

Leave a Comment