
Easy Melon Growing Tips are what every gardener craves when summer rolls around! Imagine biting into a juicy, homegrown melon, bursting with flavor that no store-bought fruit can match. Sounds idyllic, right? But the path to melon mastery can sometimes feel like navigating a thorny vine. That’s where I come in!
For centuries, melons have been cherished across cultures, from ancient Egypt where they were found in tombs, to the vibrant markets of Asia where countless varieties thrive. Their sweet taste and refreshing qualities have made them a symbol of summer abundance and a delightful treat enjoyed worldwide. But let’s be honest, successfully cultivating these sun-loving fruits can be tricky, especially if you’re new to gardening or facing space constraints.
That’s why I’ve compiled this guide packed with easy melon growing tips and DIY hacks to help you achieve a bountiful harvest, no matter your experience level or garden size. Whether you’re dealing with limited space, pest problems, or simply struggling to get those melons to ripen, I’ve got you covered. I’ll share my tried-and-true methods, from selecting the right varieties to creating the perfect growing environment, so you can finally enjoy the sweet taste of success. Get ready to transform your garden into a melon paradise!
Grow Your Own Delicious Melons: A Beginner’s Guide
Hey there, fellow gardening enthusiasts! I’m so excited to share my tried-and-true methods for growing juicy, flavorful melons right in your own backyard. Forget those bland, store-bought melons – with a little know-how, you can be enjoying homegrown sweetness all summer long. This guide will walk you through everything, from choosing the right variety to harvesting your prize-winning fruit. Let’s get started!
Choosing the Right Melon Variety
Before you even think about planting, you need to decide what kind of melon you want to grow. There are so many delicious options, each with its own unique characteristics. Here’s a quick rundown of some popular choices:
* Watermelons: The quintessential summer fruit! Watermelons come in various sizes, colors (red, pink, yellow), and even seedless varieties. Consider the space you have available, as some watermelons can get quite large.
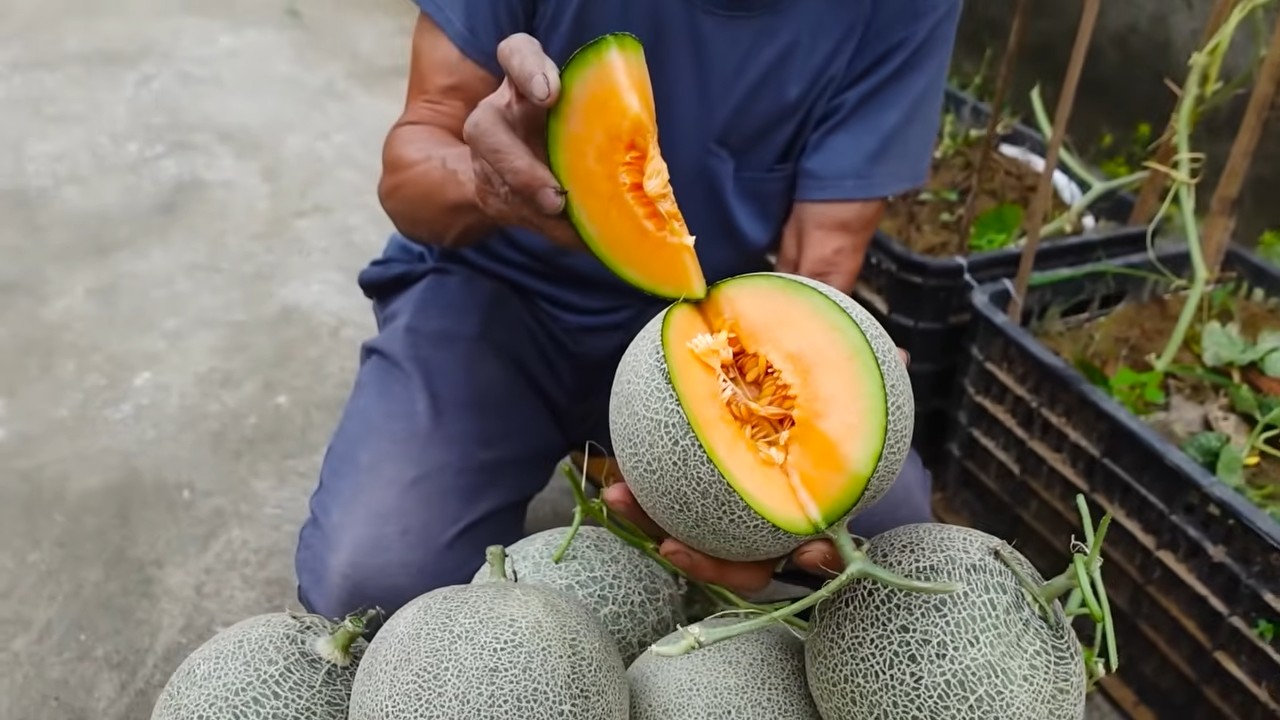
* Cantaloupes: Known for their orange flesh and netted rind, cantaloupes are a classic choice. They’re relatively easy to grow and offer a sweet, musky flavor.
* Honeydew Melons: With their smooth, pale green rind and sweet, juicy flesh, honeydew melons are a refreshing treat. They tend to be a bit more challenging to grow than cantaloupes, but the reward is well worth the effort.
* Galia Melons: A hybrid of cantaloupe and honeydew, Galia melons have a distinctive spicy-sweet flavor and a netted rind. They’re a great option for gardeners looking for something a little different.
* Personal-Sized Melons: If you’re short on space, look for personal-sized melon varieties. These smaller melons are perfect for single servings and can even be grown in containers.
Tip: Check your local climate and growing season before selecting a variety. Some melons require a longer growing season than others. Your local nursery or extension office can provide valuable information on the best varieties for your area.
Preparing Your Garden Bed
Melons are sun-loving, heavy feeders, so proper soil preparation is crucial for success. Here’s what you need to do:
* Sunlight: Choose a location that receives at least 6-8 hours of direct sunlight per day. More is always better!
* Soil: Melons thrive in well-drained, fertile soil with a pH between 6.0 and 6.8. If your soil is heavy clay or sandy, amend it with plenty of organic matter, such as compost, well-rotted manure, or peat moss.
* Drainage: Good drainage is essential to prevent root rot. If your soil tends to stay wet, consider planting your melons on raised beds or mounds.
* Nutrients: Melons need plenty of nutrients to produce large, sweet fruit. Before planting, incorporate a balanced fertilizer into the soil according to the package directions. I like to use a slow-release fertilizer that will provide nutrients throughout the growing season.
Planting Your Melon Seeds or Transplants
You can start melon seeds indoors 4-6 weeks before the last expected frost, or you can direct sow them in the garden after the soil has warmed up to at least 70°F (21°C).
Starting Seeds Indoors (Optional)
1. Choose your containers: Use seed starting trays or small pots filled with a seed starting mix.
2. Sow the seeds: Plant 2-3 seeds per cell or pot, about ½ inch deep.
3. Water gently: Keep the soil consistently moist, but not soggy.
4. Provide warmth and light: Place the trays or pots in a warm location (75-85°F/24-29°C) and provide plenty of light, either from a sunny window or a grow light.
5. Thin the seedlings: Once the seedlings emerge, thin them to one plant per cell or pot.
6. Harden off the seedlings: Before transplanting the seedlings outdoors, gradually acclimate them to outdoor conditions by exposing them to increasing amounts of sunlight and wind over a period of 7-10 days.
Direct Sowing Seeds Outdoors
1. Prepare the soil: Make sure the soil is warm and well-drained.
2. Plant the seeds: Sow the seeds about 1 inch deep, spacing them according to the variety’s recommendations (usually 2-3 feet apart for smaller varieties and 4-6 feet apart for larger varieties).
3. Water gently: Keep the soil consistently moist until the seedlings emerge.
4. Thin the seedlings: Once the seedlings emerge, thin them to the strongest plant in each location.
Transplanting Seedlings
1. Choose a cloudy day: Transplanting on a cloudy day will help reduce stress on the seedlings.
2. Dig a hole: Dig a hole that is slightly larger than the root ball of the seedling.
3. Gently remove the seedling: Carefully remove the seedling from its container, being careful not to damage the roots.
4. Place the seedling in the hole: Place the seedling in the hole and backfill with soil, gently firming the soil around the base of the plant.
5. Water thoroughly: Water the seedling thoroughly after planting.
Caring for Your Melon Plants
Once your melon plants are established, it’s important to provide them with the care they need to thrive.
* Watering: Melons need consistent moisture, especially during fruit development. Water deeply and regularly, especially during dry spells. Avoid overhead watering, as this can promote fungal diseases. Drip irrigation is an excellent option for melons.
* Fertilizing: Side-dress your melon plants with a balanced fertilizer every 2-3 weeks throughout the growing season. You can also use a liquid fertilizer, such as fish emulsion or seaweed extract.
* Weeding: Keep the area around your melon plants free of weeds, as weeds can compete for nutrients and water. Mulching with straw or black plastic can help suppress weeds and retain moisture.
* Pruning (Optional): Some gardeners prune their melon plants to encourage larger fruit and better air circulation. If you choose to prune, remove any suckers (small shoots that grow from the base of the plant) and any leaves that are touching the ground.
* Pest and Disease Control: Keep an eye out for common melon pests, such as aphids, squash bugs, and cucumber beetles. You can control these pests with insecticidal soap or neem oil. Melons are also susceptible to fungal diseases, such as powdery mildew and downy mildew. Prevent these diseases by providing good air circulation and avoiding overhead watering. If you notice any signs of disease, treat your plants with a fungicide.
Supporting Your Melon Plants
As your melons grow, they may need some support to prevent them from rotting on the ground or breaking the vines.
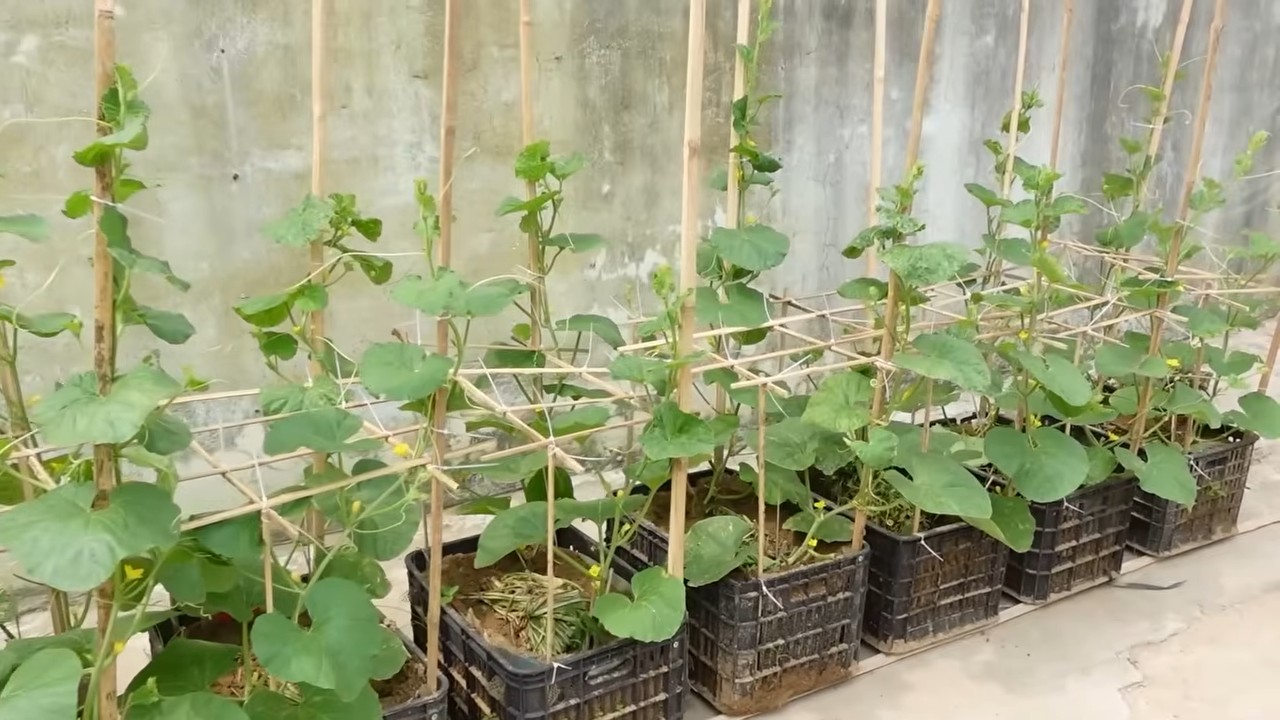
* Trellising: Trellising is a great option for smaller melon varieties, such as personal-sized watermelons or cantaloupes. Use a sturdy trellis and tie the vines to the trellis as they grow. You may also need to support the fruit with slings made from netting or fabric.
* Mulching: Mulching with straw or wood chips can help keep the fruit off the ground and prevent rotting.
* Elevating: For larger melons, you can place them on pieces of wood or cardboard to keep them off the ground.
Harvesting Your Melons
Knowing when to harvest your melons is key to enjoying their full flavor and sweetness. Here are some general guidelines:
* Watermelons: Look for a dry tendril closest to the melon, a dull sound when you thump the melon, and a yellowish spot on the underside where the melon rested on the ground.
* Cantaloupes: Cantaloupes are ripe when they slip easily from the vine with a gentle tug. They should also have a fragrant aroma.
* Honeydew Melons: Honeydew melons are ripe when the rind turns a creamy yellow color and the blossom end is slightly soft.
* Galia Melons: Galia melons are ripe when the rind turns a golden yellow color and the melon has a fragrant aroma.
Tip: Don’t be afraid to taste-test your melons! If they’re not quite ripe, leave them on the vine for a few more days.
Enjoying Your Homegrown Melons
Congratulations! You’ve successfully grown your own delicious melons. Now it’s time to enjoy the fruits (or melons!) of your labor.
* Storage: Store ripe melons in the refrigerator for up to a week.
* Serving: Melons are delicious on their own, but they can also be used in salads, smoothies, and desserts.
* Seed Saving: If you want to grow the same variety of melon next year, you can save the seeds from your ripe melons. Simply scoop out
Conclusion
So, there you have it! Mastering these easy melon growing tips isn’t just about saving money or having bragging rights; it’s about connecting with nature, understanding the food you eat, and enjoying the unparalleled flavor of a homegrown melon ripened to perfection under the sun. Forget those bland, mass-produced melons from the grocery store. Imagine sinking your teeth into a juicy, sweet cantaloupe or watermelon that you nurtured from a tiny seed. The difference is truly remarkable.
This isn’t some complicated, time-consuming project either. With a little planning and these simple techniques, you can transform your garden, balcony, or even a sunny windowsill into a melon-producing paradise. Think about the possibilities! You could try different varieties of melons – honeydew, Crenshaw, Galia – each offering a unique taste and texture. Experiment with vertical gardening techniques to maximize space, or try companion planting to deter pests naturally.
Don’t be afraid to get your hands dirty and experiment! Maybe you’ll discover a new favorite melon variety or a clever trick that boosts your yield. The beauty of gardening is that there’s always something new to learn and explore.
We’ve covered everything from seed starting and soil preparation to watering and pest control. We’ve emphasized the importance of sunlight, proper drainage, and consistent care. Now, it’s your turn to put these easy melon growing tips into action.
We are confident that you will be successful.
We encourage you to take the plunge and start your own melon-growing adventure. Share your experiences with us! Post photos of your thriving melon plants, tell us about your favorite varieties, and let us know if you discover any helpful tips along the way. Your insights could inspire other gardeners and help us all learn and grow together.
Growing your own melons is a rewarding experience that offers a delicious payoff. So, grab your seeds, prepare your soil, and get ready to enjoy the sweet taste of success! Happy gardening!
Frequently Asked Questions (FAQ)
Q: What are the easiest types of melons to grow for beginners?
A: For beginners, cantaloupe and watermelon are generally considered the easiest melons to grow. They are relatively forgiving and can thrive with basic care. Look for “bush” or “compact” varieties if you have limited space. These varieties are bred to produce smaller vines, making them ideal for smaller gardens or containers. Honeydew melons can be a bit more challenging as they require a longer growing season and are more susceptible to certain diseases. However, with proper care and attention, they are certainly achievable for beginner gardeners.
Q: How much sunlight do melons need?
A: Melons are sun-loving plants and require at least 6-8 hours of direct sunlight per day to thrive. Insufficient sunlight can lead to stunted growth, poor fruit development, and bland-tasting melons. Choose a planting location that receives ample sunlight throughout the day. If you are growing melons in containers, make sure to position them in a sunny spot and rotate them regularly to ensure even sun exposure.
Q: What kind of soil is best for growing melons?
A: Melons prefer well-drained, fertile soil that is rich in organic matter. The ideal soil pH is between 6.0 and 6.8. Before planting, amend your soil with compost, aged manure, or other organic materials to improve its fertility and drainage. Avoid heavy clay soils, as they can retain too much moisture and lead to root rot. If you have clay soil, consider growing melons in raised beds or containers filled with a well-draining potting mix.
Q: How often should I water my melon plants?
A: Melons need consistent moisture, especially during fruit development. Water deeply and regularly, aiming to keep the soil consistently moist but not waterlogged. The frequency of watering will depend on the weather conditions and soil type. In hot, dry weather, you may need to water daily. Check the soil moisture regularly by sticking your finger into the soil. If the top inch feels dry, it’s time to water. Avoid overhead watering, as it can promote fungal diseases. Instead, water at the base of the plants using a soaker hose or drip irrigation system.
Q: How do I know when my melons are ripe?
A: Determining when a melon is ripe can be tricky, but there are a few telltale signs to look for. For cantaloupes, the stem should slip easily from the vine with a gentle tug. The skin should also turn from green to a tan or yellowish color, and the melon should have a sweet, fragrant aroma. For watermelons, look for a dull, rather than shiny, rind. The spot where the melon rests on the ground (the “ground spot”) should turn from white to yellow. You can also thump the melon; a ripe watermelon will sound hollow. Honeydew melons are ripe when the blossom end is slightly soft and yields to gentle pressure.
Q: What are some common pests and diseases that affect melons, and how can I control them?
A: Common pests that affect melons include aphids, squash bugs, cucumber beetles, and vine borers. Diseases include powdery mildew, fusarium wilt, and anthracnose. To control pests, you can use insecticidal soap, neem oil, or row covers. For diseases, ensure good air circulation, avoid overhead watering, and use disease-resistant varieties. Crop rotation can also help prevent soilborne diseases. Regularly inspect your plants for signs of pests or diseases and take action promptly to prevent them from spreading.
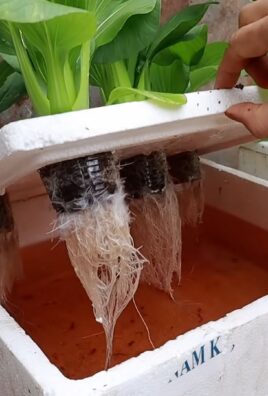
Q: Can I grow melons in containers?
A: Yes, you can grow melons in containers, but you’ll need to choose a large container (at least 20 gallons) and select bush or compact varieties. Make sure the container has drainage holes and use a well-draining potting mix. Provide adequate sunlight and water regularly. You may also need to fertilize your melon plants more frequently when growing them in containers, as nutrients can leach out more quickly.
Q: How can I improve the sweetness of my melons?
A: Several factors can influence the sweetness of melons. Ensure your plants receive adequate sunlight, as sunlight is essential for sugar production. Water consistently, but avoid overwatering, especially as the melons approach maturity. Reduce watering slightly in the week or two before harvest to concentrate the sugars. Also, make sure your soil is rich in potassium, as potassium plays a role in sugar transport and storage. You can add potassium-rich fertilizers or amendments, such as wood ash, to your soil.

Leave a Comment