
Drain Starfish Kitchen Tool: Ever find yourself battling a sink clogged with food scraps, wishing you had a tiny superhero to save the day? I know I have! We’ve all been there, staring down a drain that’s more of a culinary graveyard than a water passage. But fear not, fellow home chefs and kitchen enthusiasts, because today, we’re diving into a simple yet incredibly effective DIY project: crafting your very own drain starfish kitchen tool!
While the concept of a drain protector might seem modern, the need to keep our drains clear is as old as plumbing itself. Ancient civilizations, from the Romans with their elaborate aqueducts to the Minoans with their sophisticated drainage systems, understood the importance of preventing blockages. Though they didn’t have starfish-shaped tools, they certainly employed ingenious methods to keep things flowing smoothly.
Why is this DIY drain starfish kitchen tool so essential? Because nobody wants to spend their precious time wrestling with a clogged sink! Not only is it frustrating, but it can also lead to unpleasant odors and even damage your plumbing. Plus, constantly buying disposable drain screens is both wasteful and expensive. This simple DIY solution is a cost-effective, eco-friendly way to keep your kitchen sink sparkling clean and your plumbing happy. I’m excited to show you how to create your own drain starfish kitchen tool, saving you time, money, and a whole lot of frustration!
DIY Drain Starfish: Keep Your Kitchen Sink Sparkling!
Okay, friends, let’s talk about a kitchen sink nemesis: clogged drains! I’ve battled my fair share of food scraps and greasy buildup, and I’m tired of resorting to harsh chemicals or calling a plumber. That’s why I’m so excited to share this super simple, surprisingly effective DIY drain starfish. It’s a cheap, eco-friendly way to catch debris before it even thinks about venturing down your drain. Trust me, your pipes (and your wallet) will thank you!
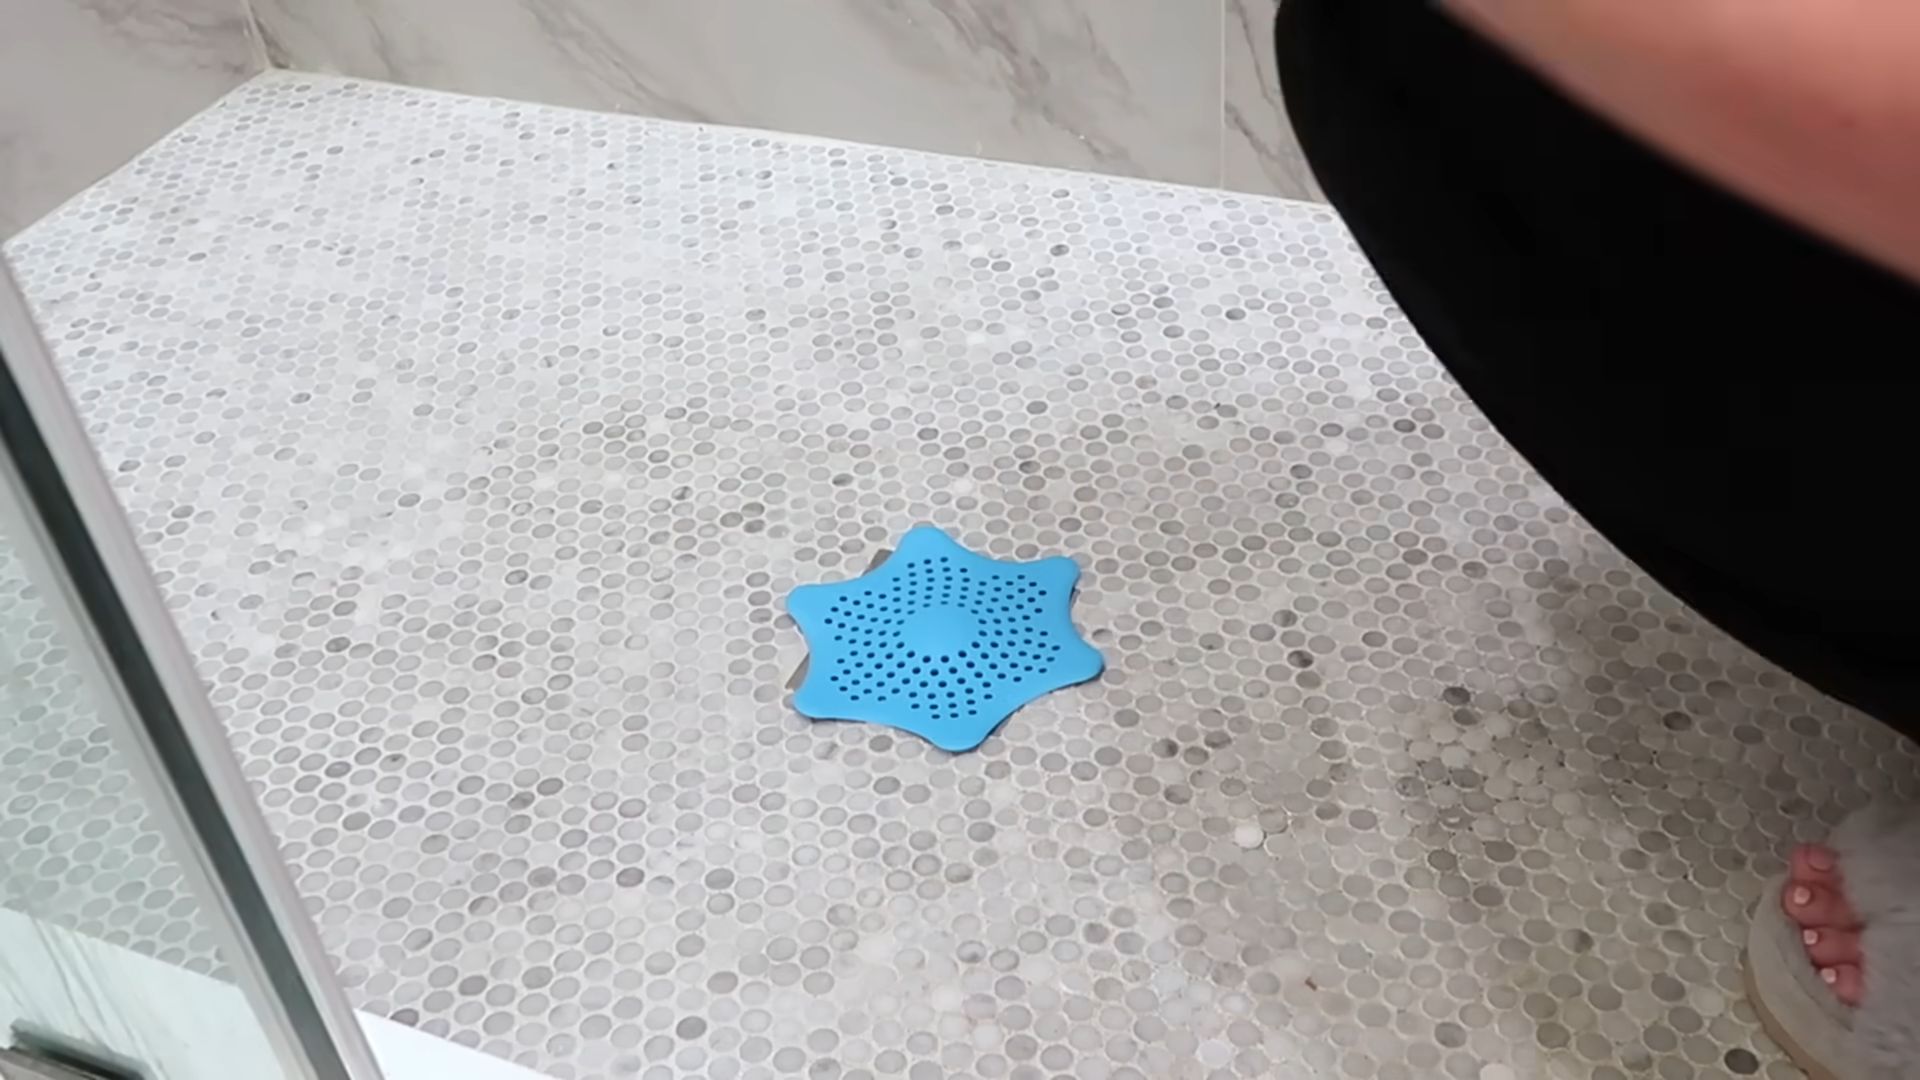
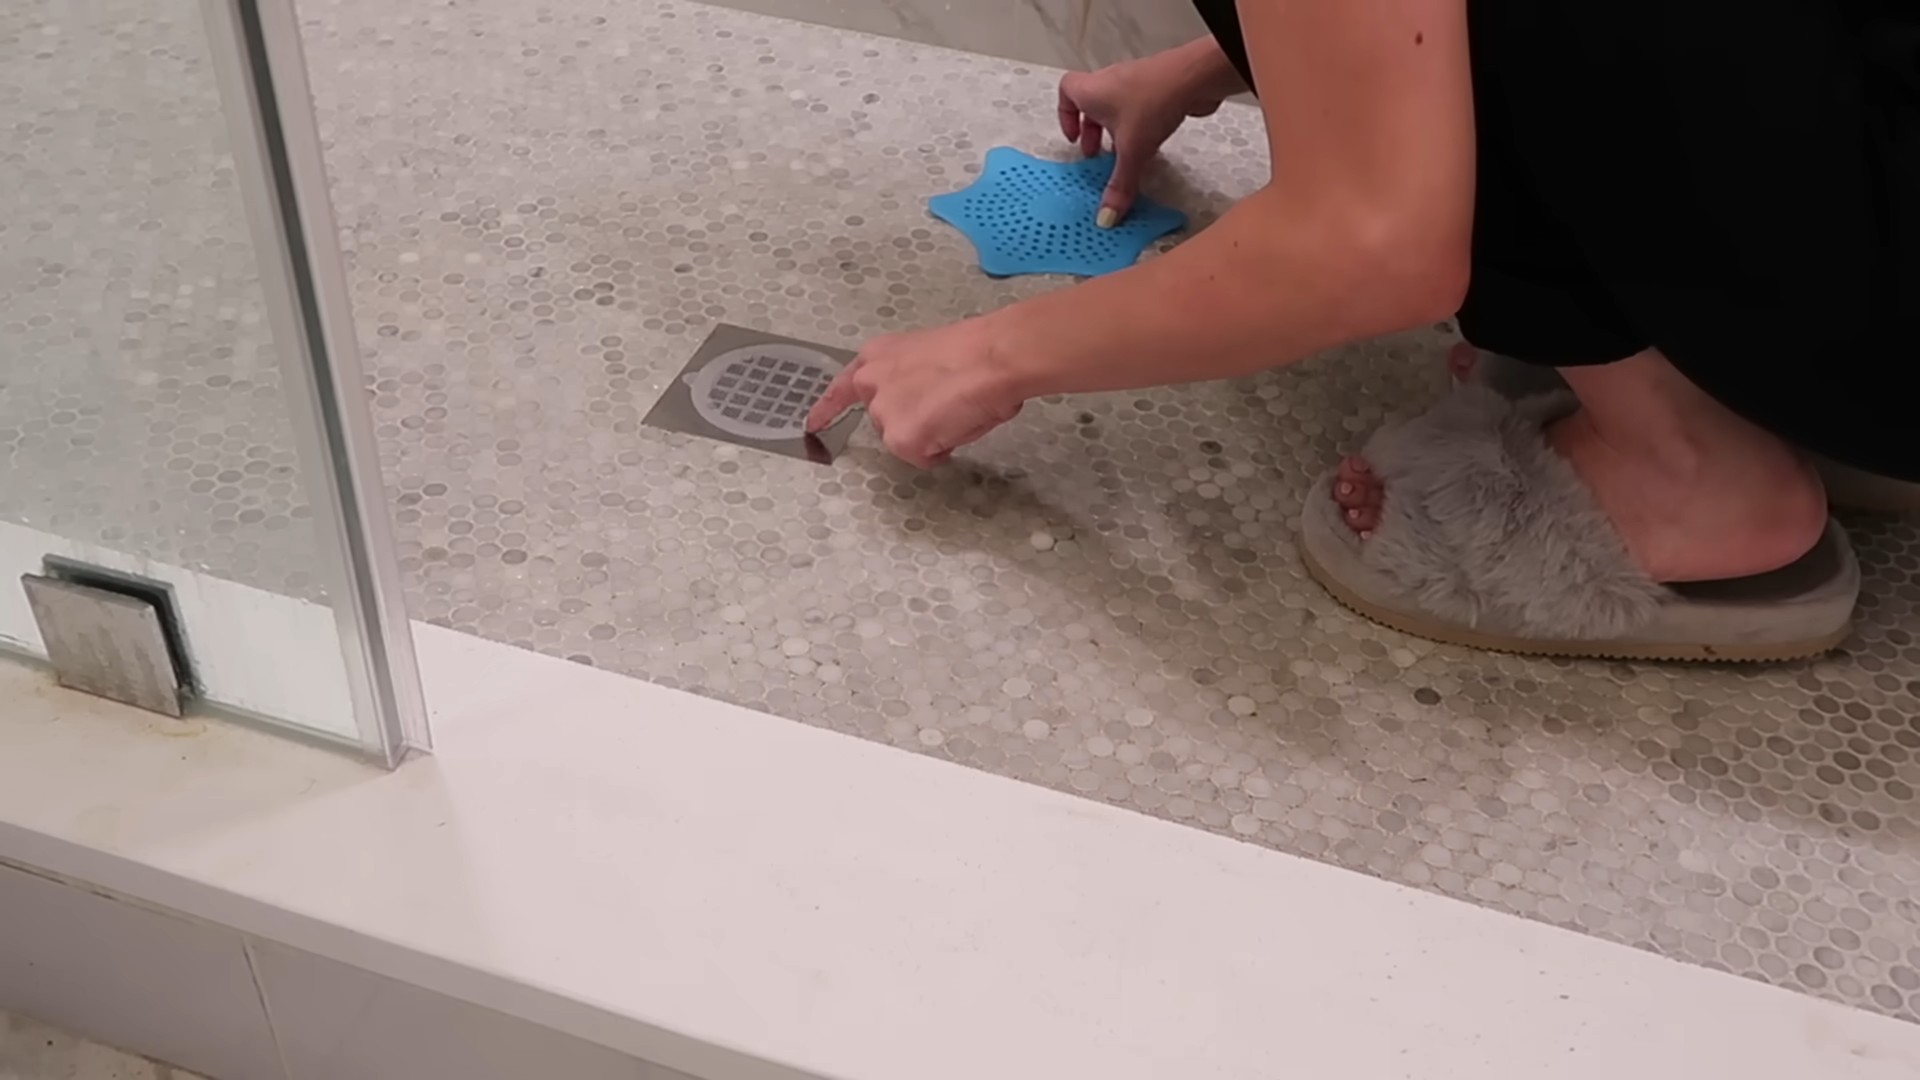
What is a Drain Starfish?
Basically, it’s a little star-shaped contraption that sits in your sink drain and acts as a filter. The “arms” of the star catch food particles, hair, and other gunk, preventing them from clogging your pipes. You just lift it out, clean it off, and pop it back in. Easy peasy!
Why Make Your Own?
You can buy drain strainers, sure, but they can be flimsy, expensive, or just plain ugly. This DIY version is customizable, durable (depending on the materials you choose), and you can make it with things you probably already have lying around. Plus, it’s a fun little project!
Materials You’ll Need
* Heavy-duty plastic canvas: This is the base of our starfish. You can find it at most craft stores. Choose a thicker gauge for better durability. I prefer the clear or white, but feel free to get creative with colors!
* Scissors or a craft knife: For cutting the plastic canvas. A sharp pair of scissors works just fine, but a craft knife will give you cleaner edges.
* Needle-nose pliers (optional but recommended): These are helpful for bending and shaping the plastic canvas.
* Sandpaper (optional): To smooth out any rough edges after cutting.
* Measuring tape or ruler: To ensure your starfish is the right size for your drain.
* Pencil or marker: For marking the plastic canvas.
* Zip ties (small): These will hold the starfish arms together. Choose a color that complements your plastic canvas.
* Heat source (optional): A lighter or heat gun can be used to slightly melt the ends of the zip ties for a smoother finish. Be extremely careful if using this method!
* Gloves (optional): To protect your hands while working with the plastic canvas and zip ties.
Step-by-Step Instructions: Creating Your Drain Starfish
Okay, let’s get started! Here’s how to make your very own drain starfish:
1. Measure Your Drain Opening: The first and most crucial step is to measure the diameter of your sink drain opening. This will determine the overall size of your starfish. You want it to be slightly larger than the opening so it sits securely on top. Add about 1/2 inch to 1 inch to the diameter for the total starfish size. Write down this measurement – we’ll call it “Total Diameter.”
2. Cut the Plastic Canvas Circle:
* Using your “Total Diameter” measurement, draw a circle on the plastic canvas. You can use a compass if you have one, or trace around a circular object like a plate or bowl.
* Carefully cut out the circle using your scissors or craft knife. Take your time and try to follow the line as closely as possible.
* If the edges are rough, lightly sand them down with sandpaper.
3. Mark the Starfish Points:
* Divide the circle into five equal sections. Imagine a clock face – you’ll be marking points at approximately 12, 2, 4, 6, 8, and 10 o’clock.
* Use your pencil or marker to make a small dot at each of these points on the edge of the circle. These will be the tips of your starfish arms.
4. Cut the Starfish Arms:
* Now, we’ll cut out the “arms” of the starfish. Starting at one of your marked points, carefully cut a wedge shape towards the center of the circle. Don’t cut all the way to the center! Leave about 1/2 inch to 1 inch of the circle intact in the middle. This will be the central hub of your starfish.
* Repeat this process for each of the five marked points, creating five distinct arms.
* Important Tip: Make sure all the arms are roughly the same size and shape for a balanced and effective starfish.
5. Shape the Starfish Arms (Optional):
* This step is optional, but it can help your starfish catch debris more effectively. Use your needle-nose pliers to gently bend the arms upwards slightly. This will create a small “cup” shape that will trap food particles.
* You can also experiment with bending the tips of the arms inwards slightly to create a more secure fit in your drain.
6. Reinforce the Starfish Arms:
* This is where the zip ties come in! We’ll use them to reinforce the arms and prevent them from bending or breaking.
* Take a small zip tie and thread it through the plastic canvas at the base of one of the arms, close to the central hub.
* Tighten the zip tie securely, but not so tight that it cuts into the plastic canvas.
* Trim off the excess zip tie with scissors or wire cutters.
* Repeat this process for each of the five arms.
7. Smooth the Zip Tie Ends (Optional):
* If you want a smoother finish, you can use a lighter or heat gun to slightly melt the cut ends of the zip ties. This will prevent them from scratching your hands or the sink.
* Safety First! Be extremely careful when using a heat source. Work in a well-ventilated area and keep a bowl of water nearby in case of accidents. Only melt the very tip of the zip tie – don’t overheat it!
8. Test and Adjust:
* Place your finished drain starfish in your sink drain. Does it fit snugly? Does it sit flat?
* If it’s too big, trim the arms slightly. If it’s too small, you might need to start over with a larger circle of plastic canvas.
* If the arms are too flimsy, add more zip ties for reinforcement.
Alternative Materials and Designs
Don’t have plastic canvas? No problem! Here are a few alternative materials you can use:
* Thick plastic placemats: These are often made of durable plastic and come in a variety of colors and patterns.
* Recycled plastic lids: Large, flat plastic lids from containers like yogurt tubs or ice cream buckets can be repurposed into drain starfish. Just make sure the plastic is thick enough to be sturdy.
* Metal mesh: You can use metal mesh (like hardware cloth) to create a more durable and rust-resistant drain starfish. Be careful when cutting metal mesh, as the edges can be sharp.
You can also experiment with different designs. Instead of a starfish shape, you could try a simple cross shape or a circular strainer with holes punched in it. The possibilities are endless!
Maintenance and Cleaning
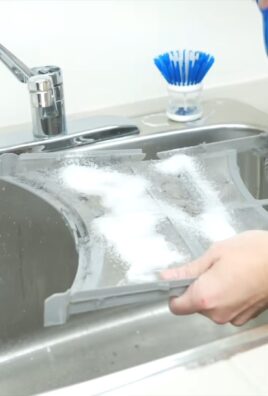
To keep your drain starfish working its best, it’s important to clean it regularly. Here’s how:
* Daily: After each use, simply lift the starfish out of the drain and rinse it under running water to remove any food particles or debris.
* Weekly: Once a week, give your starfish a more thorough cleaning. You can wash it with soap and water, or soak it in a solution of vinegar and water to remove any stubborn buildup.
* Inspect: Regularly inspect your starfish for any signs of damage, such as cracks or broken zip ties. Replace it if necessary.
Troubleshooting
* Starfish keeps floating: If your starfish keeps floating, it’s probably too light. Try adding some weight to it by attaching small metal washers or pebbles to the underside with glue or zip ties.
* Starfish doesn’t catch debris: If your starfish isn’t catching debris effectively, the arms might be too flat. Try bending them upwards slightly to create a more pronounced “cup” shape.
* Starfish gets clogged easily: If your starfish gets clogged easily, you might need to clean it more frequently. You can also try making the holes in the arms larger to allow water to flow through more easily.
Final Thoughts
And there you have it! Your very own DIY drain starfish. It’s a simple, effective, and eco-friendly way to keep your kitchen sink drain clear and clog-free. I hope you found this tutorial helpful. Happy crafting, and happy unclogged drains! I’ve found this to be a lifesaver in my kitchen, and I hope it will be in yours too! Remember to always be careful when using sharp tools and heat sources. Now go forth and conquer those kitchen sink clogs!
Conclusion
So, there you have it! Ditching those harsh chemicals and embracing a simple, effective, and eco-friendly solution for a clogged drain is easier than you think. This DIY drain cleaning trick, centered around the ingenious use of a “Drain Starfish Kitchen Tool,” is not just a temporary fix; it’s a proactive approach to maintaining a healthy and free-flowing plumbing system.
Why is this a must-try? Because it’s safe for your pipes, safe for your family, and safe for the environment. Unlike corrosive chemical drain cleaners that can damage your plumbing over time and release harmful fumes, this method relies on the power of physical removal. The Drain Starfish Kitchen Tool acts as your trusty underwater explorer, reaching down into the depths of your drain to snag hair, food particles, and other debris that contribute to clogs.
But the benefits don’t stop there. This method is incredibly cost-effective. Think about how much you spend on those single-use drain cleaners each year. With a Drain Starfish Kitchen Tool, you’re making a one-time investment that will save you money in the long run. Plus, you’ll be reducing your reliance on plastic packaging, contributing to a more sustainable lifestyle.
Looking for variations? Absolutely! While the Drain Starfish Kitchen Tool is incredibly effective on its own, you can enhance its performance with a few simple additions.
* Boiling Water Boost: After using the Drain Starfish Kitchen Tool to remove the initial blockage, pour a kettle of boiling water down the drain. The hot water will help to dissolve any remaining grease or soap scum clinging to the pipe walls.
* Baking Soda and Vinegar Power Duo: For a more stubborn clog, try this classic combination. Pour one cup of baking soda down the drain, followed by one cup of white vinegar. Let it fizz for about 30 minutes, then flush with hot water. The baking soda and vinegar will create a chemical reaction that helps to break down organic matter. Use the Drain Starfish Kitchen Tool after this process to remove any loosened debris.
* Enzyme Drain Cleaner: If you prefer a more hands-off approach, consider using an enzyme drain cleaner. These cleaners contain natural enzymes that break down organic waste without harming your pipes. Follow the instructions on the product label and use the Drain Starfish Kitchen Tool periodically to remove any remaining debris.
We wholeheartedly encourage you to give this DIY drain cleaning trick a try. It’s a simple, effective, and environmentally friendly way to keep your drains flowing smoothly. Once you’ve experienced the satisfaction of unclogging your drain with the help of a Drain Starfish Kitchen Tool, we’re confident you’ll be hooked.
Don’t just take our word for it! We want to hear about your experiences. Share your before-and-after photos, tips, and tricks in the comments section below. Let’s build a community of DIY drain cleaning enthusiasts and help each other keep our homes running smoothly. Your insights could be invaluable to someone else struggling with a clogged drain. So, grab your Drain Starfish Kitchen Tool, get ready to tackle that clog, and let us know how it goes!
Frequently Asked Questions (FAQs)
What exactly is a Drain Starfish Kitchen Tool, and where can I get one?
A Drain Starfish Kitchen Tool is a small, flexible tool designed to reach down into drains and remove hair, food particles, and other debris that cause clogs. It typically has a long, slender body with barbs or hooks along its length to grab onto the blockage. You can find Drain Starfish Kitchen Tools at most hardware stores, home improvement stores, and online retailers like Amazon. They are generally inexpensive and come in various sizes and designs. Look for one that is durable and has good reviews.
How do I use a Drain Starfish Kitchen Tool effectively?
Using a Drain Starfish Kitchen Tool is quite simple. First, carefully insert the tool into the drain opening. Gently push it down as far as it will go, rotating it slightly as you go. This will help the barbs or hooks to catch onto any debris. Once you’ve reached the end of the clog, slowly pull the tool back up, continuing to rotate it. As you pull it out, the tool should bring with it the hair, food particles, and other debris that were causing the blockage. Dispose of the debris properly and repeat the process until the drain is clear. Remember to wear gloves to protect your hands.
Is a Drain Starfish Kitchen Tool safe for all types of pipes?
Yes, Drain Starfish Kitchen Tools are generally safe for all types of pipes, including PVC, copper, and cast iron. Unlike chemical drain cleaners, they don’t contain corrosive ingredients that can damage your plumbing. However, it’s important to use the tool gently and avoid forcing it into the drain, as this could potentially damage older or more fragile pipes. If you encounter resistance, try rotating the tool more or using a different size.
How often should I use a Drain Starfish Kitchen Tool to prevent clogs?
The frequency of use depends on how often your drains tend to clog. If you have long hair or frequently dispose of food scraps down the drain, you may need to use the tool more often, perhaps once a week or every other week. If your drains are generally well-maintained, you may only need to use it once a month or even less frequently. The key is to be proactive and use the tool before a major clog develops.
Can I use a Drain Starfish Kitchen Tool in my toilet?
While you can technically use a Drain Starfish Kitchen Tool in your toilet, it’s generally not recommended. Toilets have a different plumbing design than sinks and showers, and the tool may not be as effective at removing clogs in a toilet. Additionally, there’s a risk of damaging the toilet’s internal components if you’re not careful. For toilet clogs, it’s best to use a plunger or a toilet auger (also known as a closet auger).
What if the Drain Starfish Kitchen Tool doesn’t completely clear the clog?
If the Drain Starfish Kitchen Tool doesn’t completely clear the clog, there are a few things you can try. First, repeat the process several times, making sure to rotate the tool and reach all areas of the drain. You can also try using a combination of the Drain Starfish Kitchen Tool and other methods, such as pouring boiling water down the drain or using a baking soda and vinegar solution. If the clog persists, it may be necessary to call a professional plumber.
How do I clean the Drain Starfish Kitchen Tool after use?
Cleaning the Drain Starfish Kitchen Tool after use is essential to prevent the buildup of bacteria and odors. Simply rinse the tool thoroughly with hot water and soap. You can also use a disinfectant spray to kill any remaining germs. Make sure to remove any debris that is stuck to the tool. Allow the tool to air dry completely before storing it.
Are there any alternatives to the Drain Starfish Kitchen Tool?
Yes, there are several alternatives to the Drain Starfish Kitchen Tool, including:
* Plunger: A plunger is a classic tool for clearing clogs in sinks, showers, and toilets.
* Drain Snake (Auger): A drain snake is a flexible tool that can be used to reach deeper into drains and break up stubborn clogs.
* Chemical Drain Cleaners: Chemical drain cleaners are a quick and easy way to clear clogs, but they can be harmful to your pipes and the environment.
* Enzyme Drain Cleaners: Enzyme drain cleaners are a more natural alternative to chemical drain cleaners.
* Wet/Dry Vacuum: A wet/dry vacuum can be used to suck out clogs from drains.
However, the Drain Starfish Kitchen Tool offers a good balance of effectiveness, safety, and affordability, making it a popular choice for many homeowners.

Leave a Comment