
Dragon fruit cutting propagation might sound intimidating, but trust me, it’s an incredibly rewarding and surprisingly simple way to expand your exotic fruit garden! Have you ever looked at a vibrant dragon fruit at the grocery store and thought, “I wish I could grow that!”? Well, now you can, and you don’t need to be a seasoned horticulturalist to do it. This DIY guide will walk you through every step, from selecting the perfect cutting to nurturing it into a thriving, fruit-bearing plant.
The dragon fruit, also known as pitaya, has a rich history rooted in Central and South America, where it was a staple food for centuries. Its cultivation has since spread globally, becoming a symbol of exotic beauty and delicious flavor. But beyond its visual appeal and taste, growing your own dragon fruit offers a unique connection to nature and a sense of accomplishment.
Why bother with dragon fruit cutting propagation? Because it’s a cost-effective and efficient way to get new plants! Buying mature dragon fruit plants can be expensive. Propagating from cuttings allows you to multiply your collection from a single plant or even a generous friend’s cutting. Plus, it’s incredibly satisfying to watch a small cutting transform into a flourishing vine, knowing you played a vital role in its growth. So, let’s dive in and unlock the secrets to successful dragon fruit propagation!
Dragon Fruit Propagation: Your DIY Guide to Home Cultivation
Hey plant friends! Have you ever wondered how you can grow that exotic and delicious dragon fruit yourself? I’ll show you how to do it easily with cuttings! It’s easier than you think and a lot of fun. Let’s go!
What You Need: The Checklist for Your Success
Before we get started, make sure you have everything on hand. This saves time and nerves!
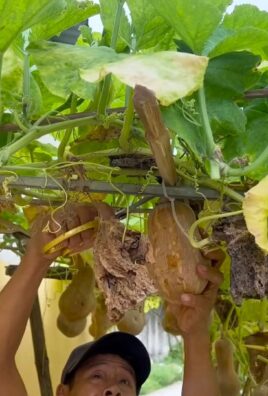
- Dragon fruit cutting: Preferably from a healthy, fruit-bearing plant. Make sure the cutting is at least 20-30 cm long.
- Sharp knife or garden shears: Be sure to disinfect them to avoid diseases!
- Rooting hormone (optional): Speeds up the process, but it works without it too.
- Pot: A pot with good drainage is important.
- Cactus soil or well-draining potting soil: Dragon fruits don’t like their roots standing in water.
- Water: To moisten the soil.
- Spray bottle: To increase humidity.
- Patience: Rooting can take a few weeks.
The Perfect Cutting: How to Choose It
Choosing the right cutting is crucial for success. Here are a few tips:
- Health: The cutting should be free of spots, damage, or signs of disease.
- Maturity: Choose a cutting that is not too young and not too old. A medium-mature cutting is ideal.
- Size: As mentioned, 20-30 cm is a good length. This gives the cutting enough reserves to form roots.
- Cut surface: Make sure the cut surface is clean and smooth.
Step-by-Step Guide: How to Propagate Your Dragon Fruit
Now let’s get down to it! Follow these steps and soon you’ll have your own dragon fruit plant.
- Cut the cutting: With the disinfected knife or garden shears, make a clean cut on the cutting. Make sure the cut is slanted so that water can drain better.
- Prepare the cutting: Let the cutting dry in a shady place for 2-3 days. This will form a callus (a type of scar tissue) at the cut site, which prevents pathogens from entering.
- Rooting hormone (optional): If you are using rooting hormone, dip the cut end of the cutting in it briefly. Shake off any excess powder.
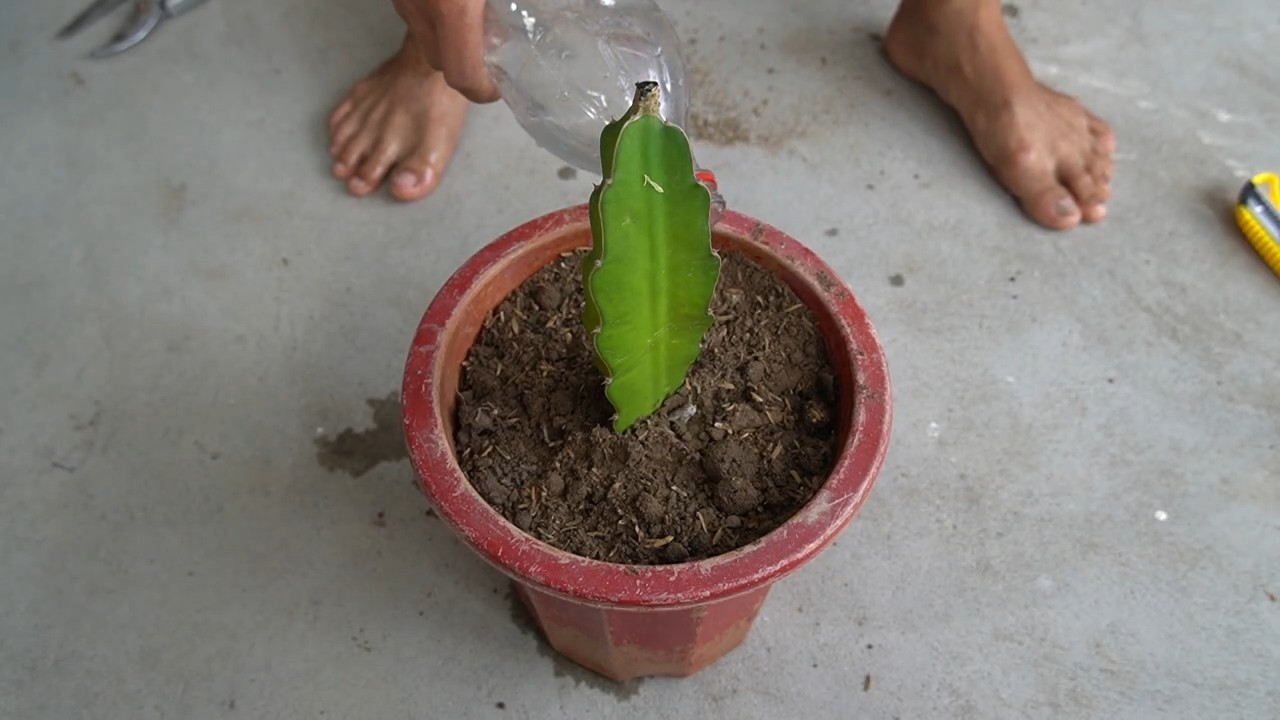
- Planting: Fill the pot with cactus soil or well-draining potting soil. Make a hole in the soil and insert the cutting. Make sure that about 5-7 cm of the cutting is in the soil.
- Watering: Water the soil gently so that it is moist but not wet.
- Location: Place the pot in a bright, but not direct sun, location. Direct sun can burn the cutting.
- Humidity: Spray the cutting regularly with water to increase humidity. You can also put a plastic bag over the pot to create a mini-greenhouse. But make sure the bag does not directly touch the cutting and ventilate regularly to prevent mold.
- Be patient: Rooting can take 4-8 weeks. Be patient and don’t overwater the cutting. The soil should always be slightly moist.
- Check for roots: After about 4 weeks, you can gently pull on the cutting. If it resists, it has formed roots.
- Repotting (optional): Once the cutting is well-rooted, you can repot it into a larger pot.
The Right Care: How to Keep Your Dragon Fruit Happy
After your cutting has taken root, proper care is important for it to grow into a healthy and fruit-bearing plant.
- Watering: Dragon fruits do not like their roots standing in water. Only water them when the soil is dry. In winter, they need even less water.
- Fertilizing: Fertilize your dragon fruit every 2-4 weeks during the growing season (spring and summer) with a cactus fertilizer.
- Light: Dragon fruits need a lot of light, but not direct midday sun. A bright location is ideal.
- Temperature: Dragon fruits are sensitive to frost. The ideal temperature is between 18 and 28 degrees Celsius.
- Trellis: Dragon fruits are climbing plants and need a trellis. You can use a stake, a trellis, or another sturdy structure.
- Pruning: Prune your dragon fruit regularly to keep it in shape and promote fruit production. Remove dead or damaged shoots.
- Overwintering: If you live in a region with cold winters, you need to bring your dragon fruit indoors. Place it in a bright and cool place (approx. 10-15 degrees Celsius) and water it very little.
Common Problems and Solutions: What to Do When Things Go Wrong?
Sometimes things don’t go smoothly. Here are a few common problems and how you can solve them:
- Cutting is rotting: This usually happens when the soil is too wet. Reduce watering and ensure good drainage.
- Cutting is not forming roots: This can have various causes. Make sure the cutting gets enough light, the humidity is high, and the temperature is right. You can also use rooting hormone.
- Plant is not growing: This can be due to too little light, nutrient deficiency, or pests. Move the plant to a brighter location, fertilize it regularly, and check it for pests.
- Pests: Dragon fruits can be infested by pests such as mealybugs or spider mites. Combat the pests with a suitable insecticide or with natural remedies like neem oil.
Extra Tips for the Dragon Fruit Pro
- Different varieties: There are different dragon fruit varieties with different fruit colors and flavors. Try different varieties to find your favorite.
- Pollination: Some dragon fruit varieties are self-sterile and need cross-pollination to produce fruit. If you only have one plant, you can hand-pollinate it.
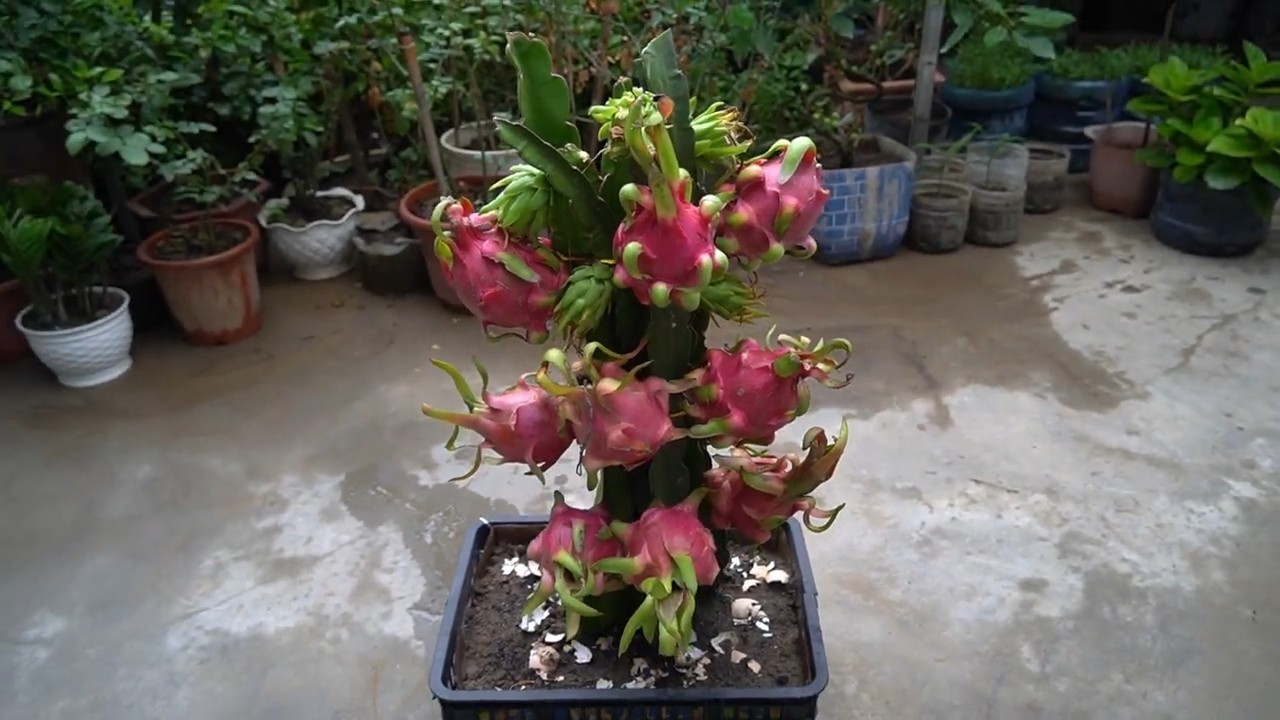
- Harvest: Dragon fruits are ripe when they can be easily detached from the stem and the skin has a bright color.
Summary: Your Path to Your Own Dragon Fruit
Propagating dragon fruit with cuttings is an exciting and rewarding project. With the right materials, a little patience, and the right care, you can soon be harvesting your own exotic fruits. I hope this guide has helped and inspired you. Good luck with growing your own dragon fruit! And remember: Have fun with it!
Conclusion
So, there you have it! Mastering dragon fruit cutting propagation is not only achievable but also incredibly rewarding. Forget shelling out money for established plants when you can easily multiply your dragon fruit collection with this simple, cost-effective method. We’ve walked you through each step, from selecting the perfect cutting to nurturing its growth, ensuring you have all the knowledge you need to succeed.
But why is this DIY trick a must-try? Beyond the obvious financial benefits, propagating your own dragon fruit cuttings allows you to cultivate specific varieties you adore. Perhaps you’re after the intensely sweet magenta flesh of a particular cultivar, or maybe you’re drawn to the unique flavor profile of a rare hybrid. With cutting propagation, you have complete control over the genetic lineage of your dragon fruit plants.
Furthermore, this method fosters a deeper connection with your garden and the natural world. Witnessing the transformation of a simple cutting into a thriving plant is an incredibly satisfying experience. It’s a testament to your green thumb and a tangible representation of your gardening skills.
Looking for variations to spice things up? Consider experimenting with different rooting mediums. While we recommended a well-draining potting mix, you could also try perlite, vermiculite, or even a combination of these. Some gardeners have even had success with water propagation, although this method requires more frequent water changes and careful monitoring to prevent rot.
Another exciting variation is grafting. Once your dragon fruit cuttings have established a strong root system, you can graft them onto different rootstocks to potentially improve disease resistance or vigor. This technique requires a bit more skill and precision, but the results can be truly remarkable.
Don’t be afraid to get creative with your support structures as well. While a simple trellis or stake will suffice, you can also build elaborate structures that not only support your dragon fruit plants but also add visual appeal to your garden. Think arches, pergolas, or even living walls adorned with cascading dragon fruit vines.
We wholeheartedly encourage you to embark on this dragon fruit cutting propagation adventure. It’s a fun, educational, and ultimately rewarding experience that will transform your garden and your appreciation for these exotic fruits.
And now, the most important part: share your experience! We want to hear about your successes, your challenges, and your unique approaches to dragon fruit cutting propagation. Post photos of your cuttings on social media using #DragonFruitDIY and tag us so we can celebrate your achievements. Your insights and experiences will not only inspire other gardeners but also contribute to a growing community of dragon fruit enthusiasts. Let’s learn and grow together!
Frequently Asked Questions (FAQ)
What is the best time of year to propagate dragon fruit cuttings?
The ideal time for dragon fruit cutting propagation is during the warmer months, typically spring and summer. This is when the plants are actively growing, and the cuttings will root more quickly and easily. Avoid propagating during the colder months when growth is slow or dormant. The warmer temperatures and increased sunlight provide the optimal conditions for root development. However, if you live in a climate with consistently warm temperatures year-round, you can propagate dragon fruit cuttings at any time.
How long does it take for dragon fruit cuttings to root?
Rooting time can vary depending on several factors, including the variety of dragon fruit, the temperature, and the humidity. Generally, you can expect to see roots developing within 2 to 4 weeks. Be patient and avoid disturbing the cuttings too frequently, as this can hinder root growth. Look for signs of new growth, such as small roots emerging from the cut end or new leaves sprouting from the nodes.
What type of soil is best for rooting dragon fruit cuttings?
Dragon fruit cuttings thrive in well-draining soil. A mix of potting soil, perlite, and vermiculite is ideal. This combination provides good aeration and drainage, preventing the cuttings from becoming waterlogged and rotting. Avoid using heavy clay soils, as they retain too much moisture. You can also use a cactus or succulent potting mix, as these are specifically formulated for plants that prefer well-draining conditions.
How often should I water dragon fruit cuttings?
Water dragon fruit cuttings sparingly, allowing the soil to dry out slightly between waterings. Overwatering is a common mistake that can lead to root rot. Check the moisture level of the soil by inserting your finger into the top inch. If it feels dry, it’s time to water. When watering, saturate the soil thoroughly, but make sure the excess water drains away freely.
What kind of light do dragon fruit cuttings need?
Dragon fruit cuttings need bright, indirect light. Avoid placing them in direct sunlight, as this can scorch the leaves. A location near a window that receives morning sun or filtered sunlight is ideal. If you don’t have access to natural light, you can use a grow light to supplement their needs.
How do I know if my dragon fruit cutting has rooted successfully?
The most obvious sign that your dragon fruit cutting has rooted successfully is the emergence of new growth. Look for new leaves sprouting from the nodes or small roots emerging from the drainage holes of the pot. You can also gently tug on the cutting to see if it resists. If it feels firmly anchored in the soil, it has likely rooted.
Can I propagate dragon fruit cuttings in water?
Yes, you can propagate dragon fruit cuttings in water, although it’s not the most common method. To do this, place the cut end of the cutting in a jar of water, ensuring that the nodes are submerged. Change the water every few days to prevent bacterial growth. Once roots have developed, you can transplant the cutting into a pot filled with well-draining soil.
What are some common problems when propagating dragon fruit cuttings?
Some common problems when propagating dragon fruit cuttings include root rot, fungal infections, and pest infestations. Root rot is usually caused by overwatering, so be sure to allow the soil to dry out slightly between waterings. Fungal infections can be prevented by using a sterile potting mix and avoiding overcrowding. Pest infestations can be controlled with insecticidal soap or neem oil.
How big should the dragon fruit cutting be?
A good size for a dragon fruit cutting is typically between 6 and 12 inches long. This provides enough stem for root development and enough nodes for new growth to emerge. Avoid using very small cuttings, as they may not have enough energy reserves to root successfully.
Can I use rooting hormone on dragon fruit cuttings?
While not strictly necessary, using rooting hormone can help to speed up the rooting process and increase the success rate. Dip the cut end of the cutting in rooting hormone powder or liquid before planting it in the soil. Follow the instructions on the rooting hormone package for best results.
What do I do after the dragon fruit cutting has rooted?
Once your dragon fruit cutting has rooted successfully, you can gradually acclimate it to more sunlight. Start by placing it in a location that receives morning sun or filtered sunlight, and then gradually move it to a sunnier spot over a period of several weeks. Water it regularly, allowing the soil to dry out slightly between waterings. Fertilize it with a balanced fertilizer every few weeks during the growing season.
How long does it take for a dragon fruit plant grown from a cutting to produce fruit?
Dragon fruit plants grown from cuttings typically start producing fruit within 1 to 3 years, which is faster than plants grown from seed. The exact time will depend on the variety of dragon fruit, the growing conditions, and the overall health of the plant. Be patient and provide your plant with the care it needs, and you’ll be rewarded with delicious dragon fruit in due time.
Leave a Comment